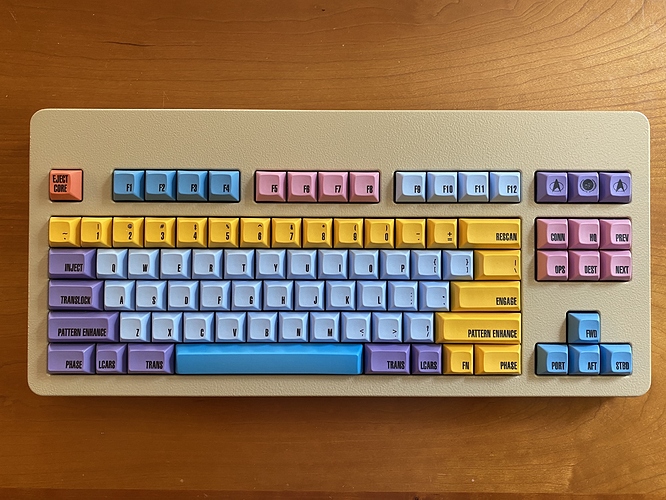
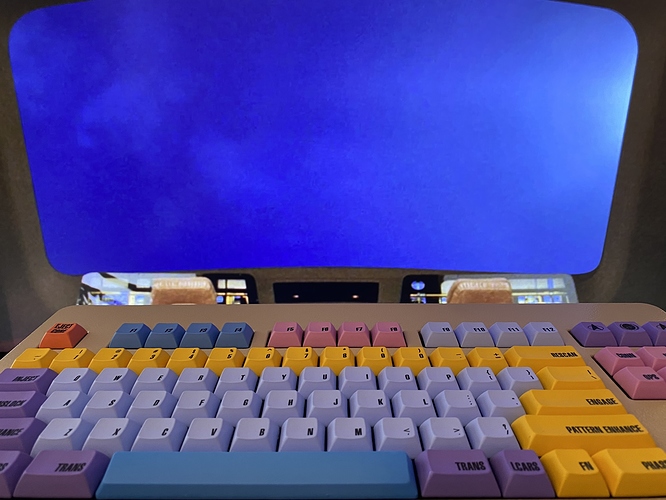
Build #41: Norbaforce Galaxy Class (Part II)
And now, the conclusion to “Build #41: Norbaforce Galaxy Class”…
Self-administered therapy
Realizing that my insistence on keeping those Novatouch domes and springs safe and sound has cost me a significant amount of build time at this point, and further realizing that my neglect in learning the LCTRL lessons from prior generations of builders is about to come back to haunt me, I realize that I’m about to get quite frustrated. And if there is any state of mind that isn’t conducive to a satisfying build, it’s frustration.
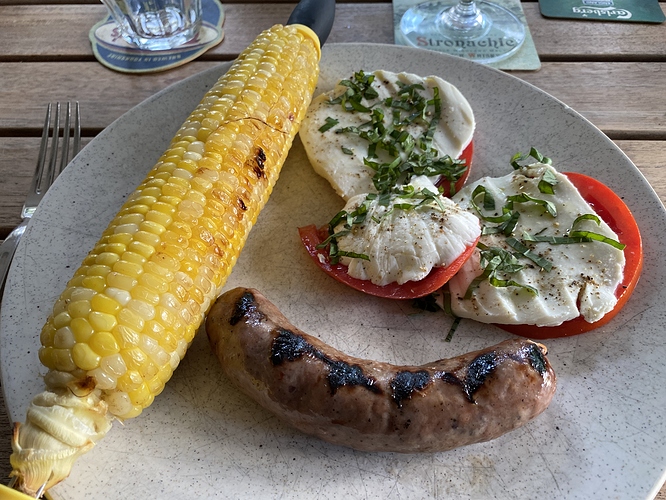
Fortunately, I’ve learned over the years to administer my own therapy for these kinds of situations. It’s summer. The weather forecast is good. We have fresh corn, tomatoes, basil, and mozzarella on hand. We have some sausages in the fridge. Open a nice bottle of white wine, and let’s just chill for a bit. This looks tasty.
I think LCTRL can wait until tomorrow. Pour me another glass, would you? Thanks.
Tackling LCTRL
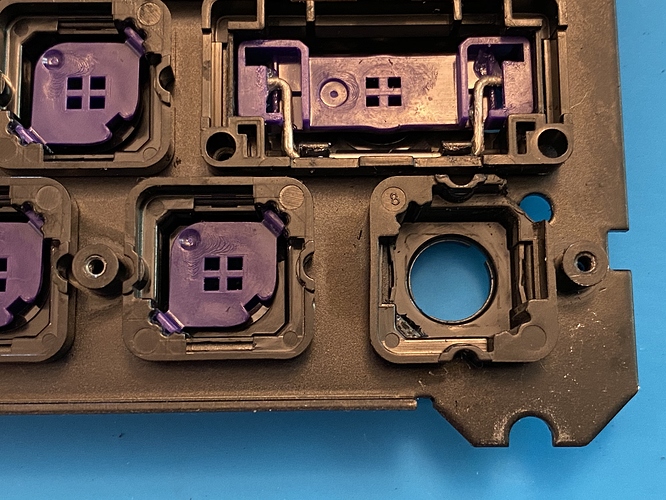
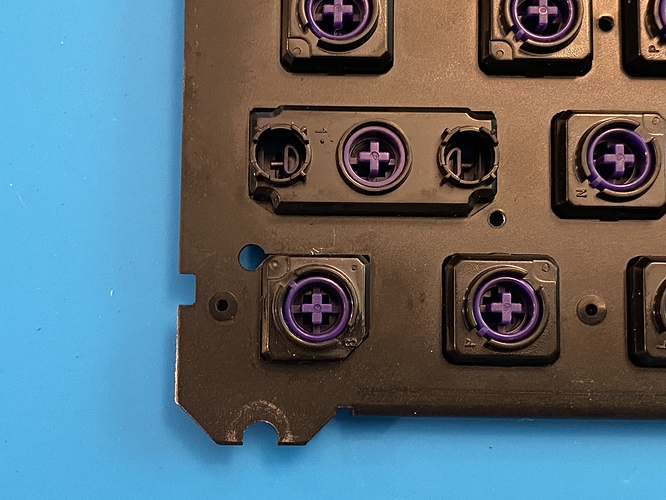
It’s a brand new day, and we’re refreshed and ready to take the full measure of this LCTRL situation. As we noted in the first bit of foreshadowing, the left control slider on a Realforce is thinner than all of the other 1u sliders, and has a special housing to contain it, while avoiding interfering with a nearby LED on the PCB. Because of that size difference, a Novatouch 1u slider will not fit in that specific housing.
So, at a high level, we have two options:
- Sand down a Novatouch slider until it fits in that housing. This could probably work up to a point, but I didn’t like the idea of introducing roughness to the slider, even if LCTRL is a comparatively infrequently used key. There is also some risk of overdoing the sanding, resulting in slider wobble.
- Harvest a 1u housing from a Novatouch, which will by definition accommodate a Novatouch 1u slider, leaving us with the problem of installing the Novatouch housing in the Realforce plate’s LCTRL cutout.
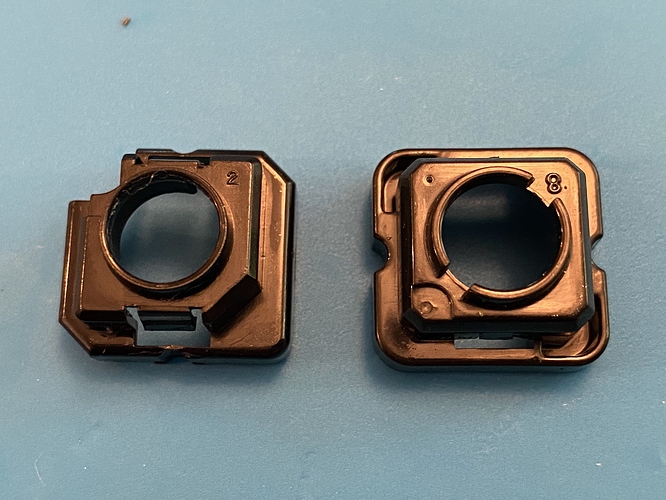
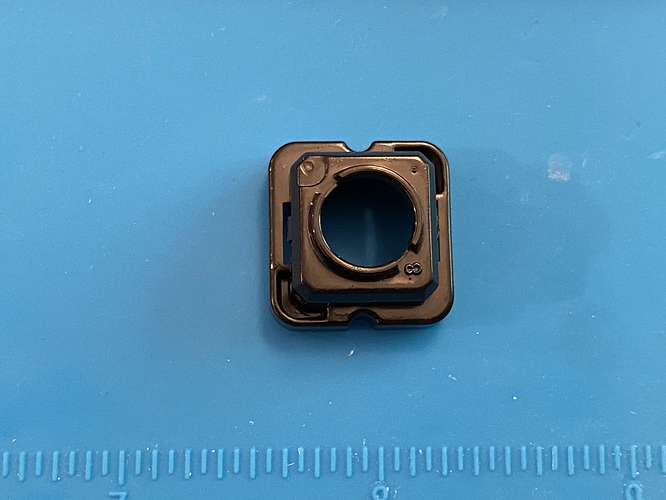
All right, I’m calm. One more Novatouch opening/closing cycle to obtain a 1u housing, and here we are - Realforce LCTRL housing on the left, Novatouch LCTRL housing on the right.
Both housings have two “layers” - a bottom layer, which lies below and makes contact with the plate, and a top layer, which protrudes through the plate cutout and has a hole for the slider stem. There are three significant differences between the two housings:
- The lower right corner of the top layer on the Realforce housing has a diagonal cutaway, to match the cutout shape of the plate.
- The upper left corner of both layers on the Realforce housing is cutaway as well, to allow clearance for the LED.
- Although it’s not visible in this photo, from above the housing the slider rails are in the upper right and lower left corners, unlike every other housing, where they would be in the upper left and lower right corners. This is necessary since the standard rail orientation conflicts with the LED placement.
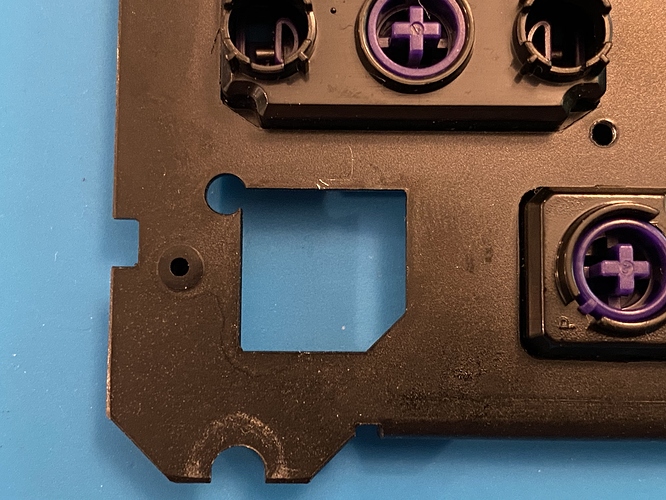
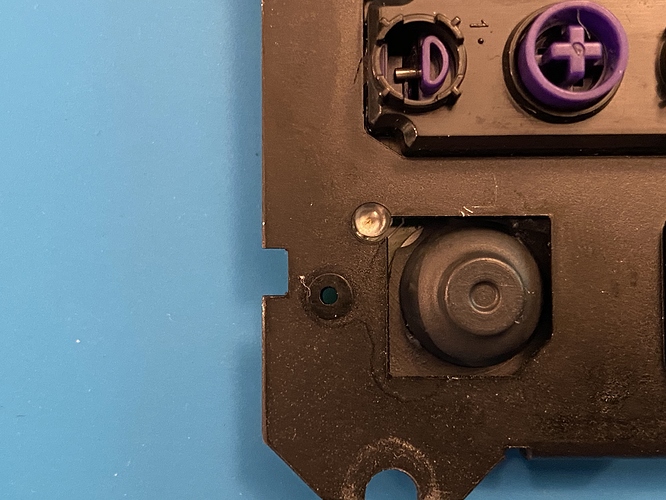
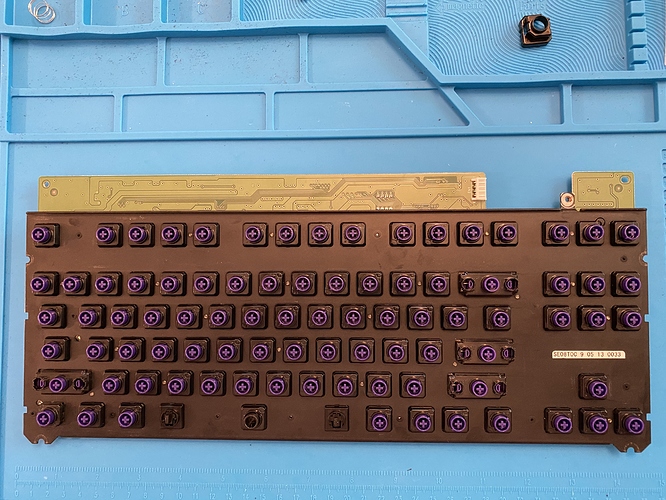
For reference, let’s also take a look at the Realforce LCTRL plate cutout again, with and without the dome and PCB underneath it.
There’s a lot to think about here, but let’s work through it:
- The Realforce cutout is not square - the lower right cutaway is diagonal, so the Novatouch housing will not fit without either cutting the plate to make room for it, or filing down the Novatouch housing so that it will fit. Given that we only have one Realforce plate and hence one chance to cut the plate correctly, but 83 Novatouch 1u housings and hence 83 chances to file correctly, filing seems to be a preferable option, and if for some reason that doesn’t pan out, we can always revert to plate cutting.
- We’ll have to file down the opposite corner of the housing as well, since the LED will be in the way. Both the top and bottom layers will have to be filed, since both layers encroach on the LED cutaway space. Alternatively, we could desolder the LED, but since we already have to file the housing anyway to address the lower right corner of the plate cutout, it seems preferable to restrict our mods to just the Novatouch housing, leaving the Realforce plate and PCB intact.
- Since we’re going to have to file through a corner of the housing, we need to be sure to file the two opposing corners that do not contain the slider rails. However, this means that we need to rotate the Novatouch housing 90 degrees from its usual orientation to install it, and the housing is not perfectly square, so we may also have to do a bit of filing on the sides of the housing.
So, to sum up: we start by rotating the Novatouch housing 90 degrees.
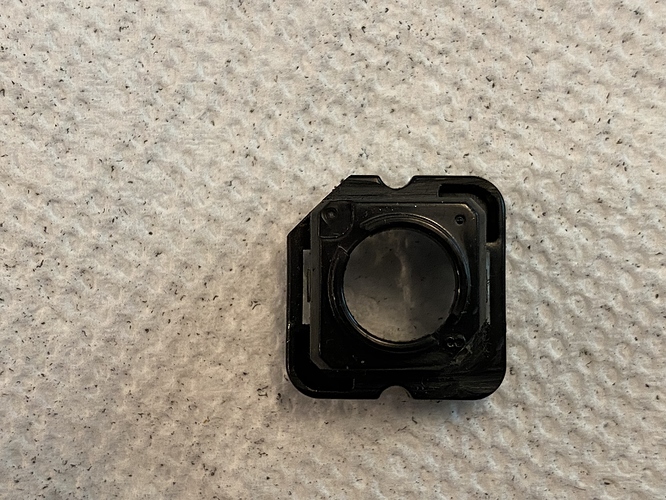
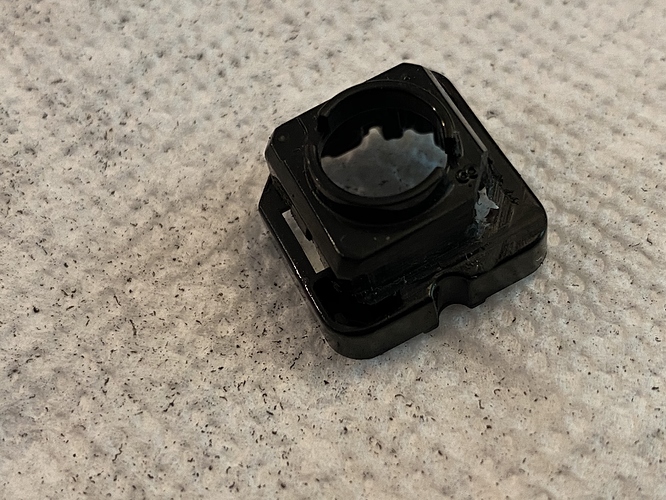
In that position, we file away the top layer’s lower right corner, and the upper left corner of both layers, using a flat needle file for better control. You can see a lot of the plastic particles on the paper towel I’m using for a work surface.
The plastic is thin on the lower right corner, so you’ll likely file through the housing at that point, but it doesn’t matter, as long as there is enough plastic to maintain contact with the plate.
On the upper left corner, you’ll also completely file through the lower layer of the housing, but you’ll only need to take away a small diagonal piece of the upper layer. If you look very closely, you can also see file marks running parallel to the top and bottom edges of the upper layer - I needed to sand down the “north” and “south” sides of the top layer to obtain enough clearance for the housing to fit in the plate, due to the slightly rectangular shape of the housing and the fact that we’ve rotated it.
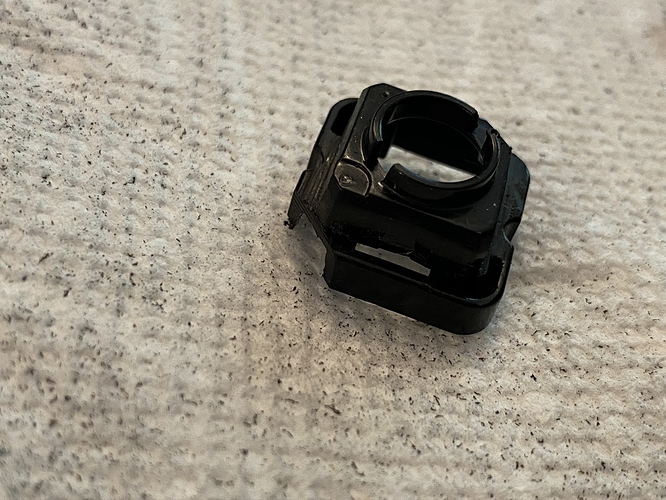
Fitting our filed housing into the Realforce plate, we see that we have the cutaway for the LED, and that the rails are oriented in the opposite corners from all of the other 1u housings.
And, from the top side, the slider appears to fit cleanly.
But, the real moment of truth arrives when we screw back together the PCB/dome assembly with the plate. Do we have free slider movement? Success!
Don’t forget to lube the rails on this last housing.
Norbaforce (Mark I)
The Norbaforce housing has been waiting patiently all this time for its chance to shine.
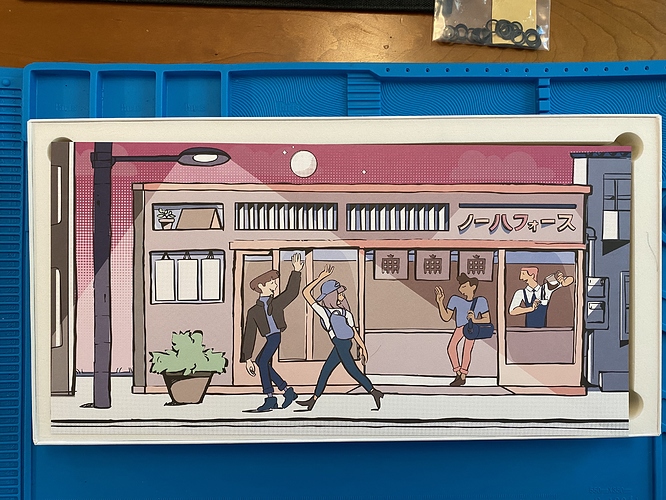
These fine individuals are enjoying their day of unboxing - clearly none of them are suffering from LCTRL trauma. Must be that coffee.
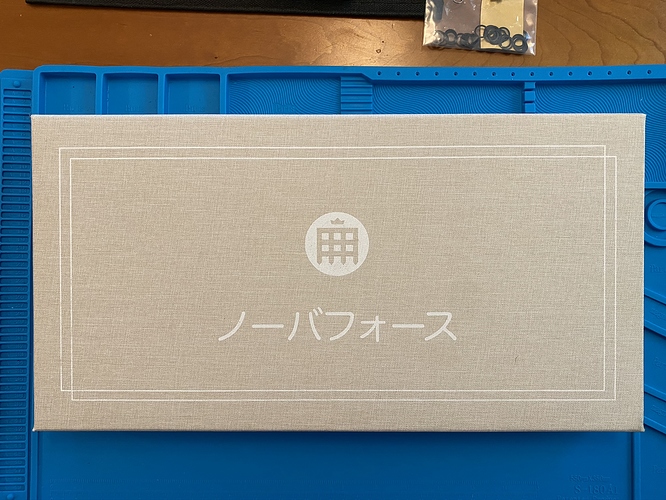
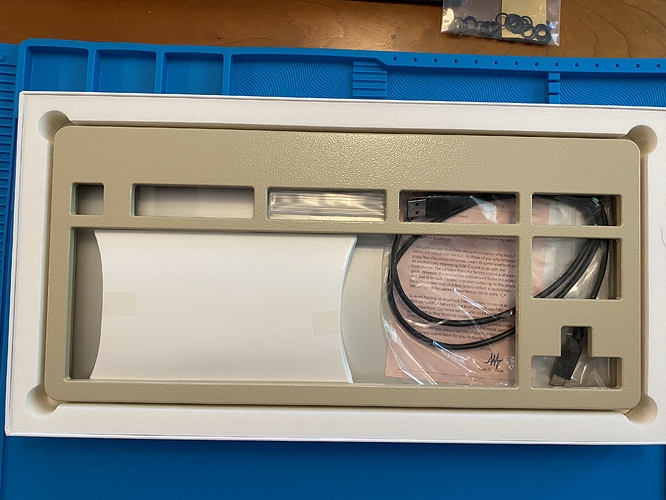
All joking aside, you have to love the Norbaforce unboxing experience. Cartoons!
Our first look at the Norbaforce with the Galaxy Console powdercoat. Potato pics aside, that’s gorgeous.
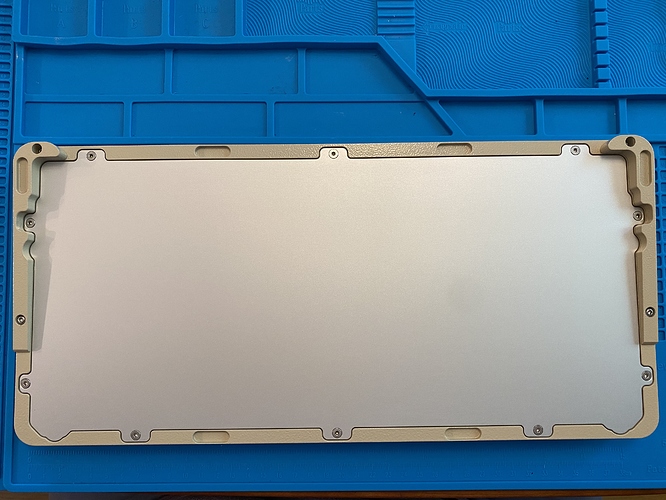
Removing the housing from its packaging and flipping it over, we see two risers attached to the housing with screws, as well as a metal baseplate also attached by screws.
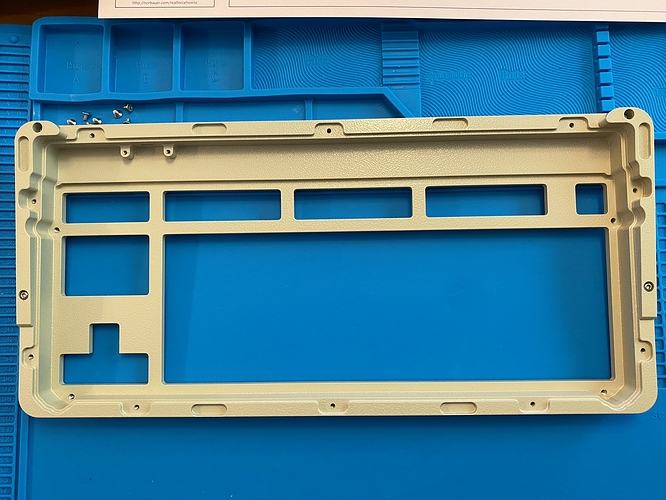
Removing the baseplate, we obtain access to the interior of the housing.
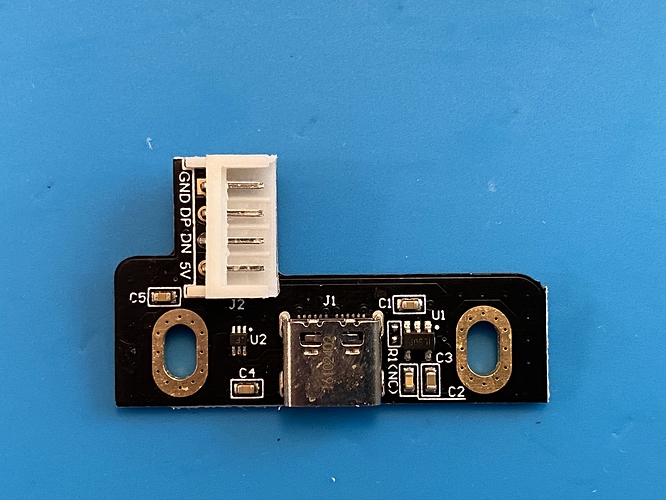
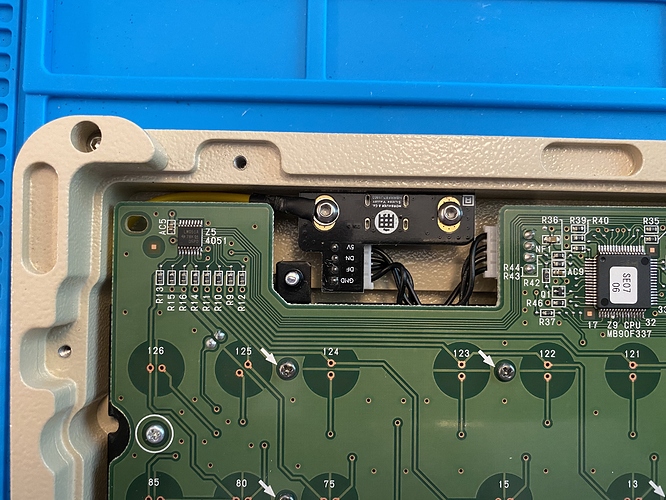
The Norbaforce housing upgrades the stock Realforce to support USB-C and removable cables, which it accomplishes via a replacement breakout board.
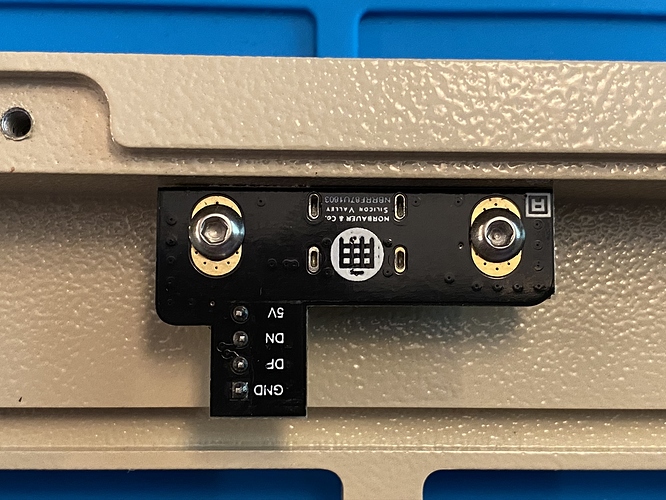
The other side of the breakout boards sports the Norbauer portcullis logo, and this is the side that will be face up when it’s installed in the housing, like so:
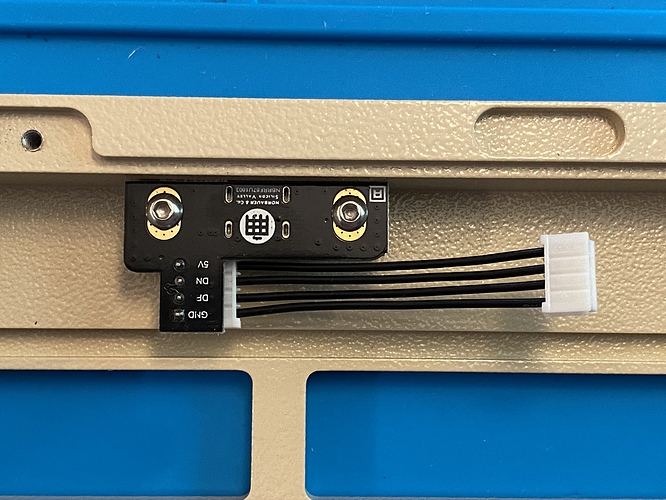
The Norbaforce includes a breakout cable for attaching the breakout board to the Realforce PCB.
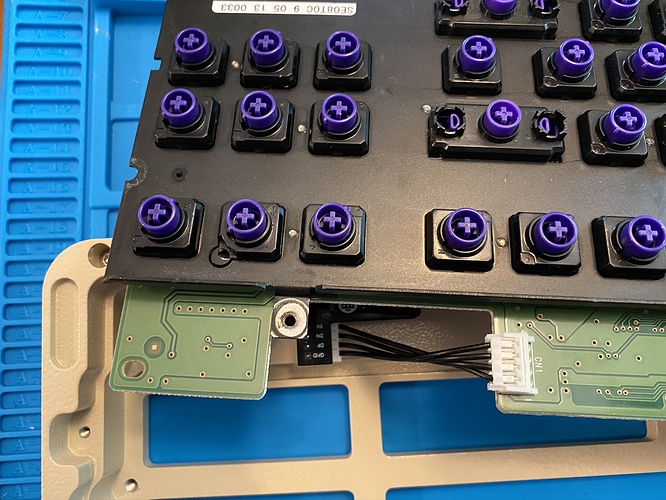
The easiest way to install this is to flip the PCB/plate assembly over and attach the breakout cable with a twist in it, so that when it is flipped back into place, the cable will straighten out.
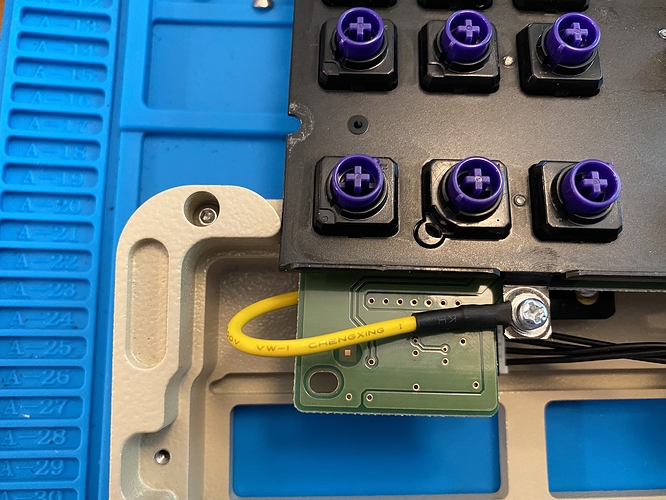
Don’t forget the ground wire included with the Norbaforce and the screw you reserved for it. One end is reattached to the plate with that screw…
…and the other end is attached to the breakout board. Yes, I had to unscrew the breakout PCB to attach this, but at this point, what’s one more screw.
An old Norbaforce learns new tricks
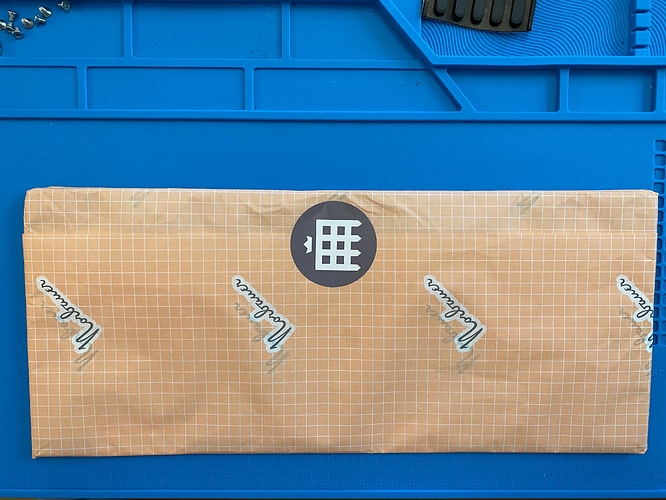
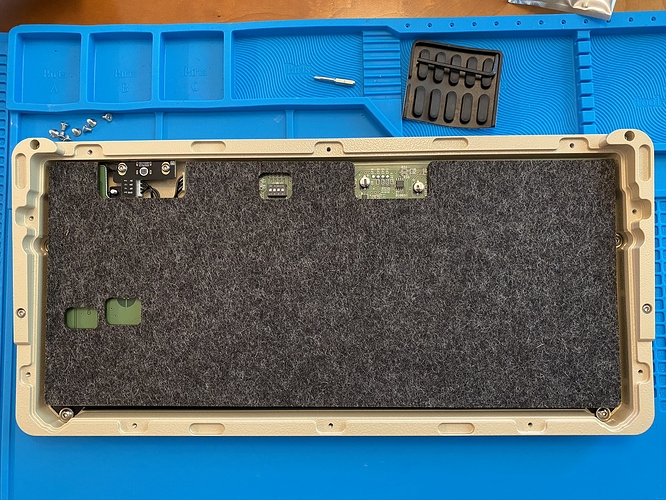
Since the original release of the Norbaforce, we’ve seen the release of the Norbaforce Mark II for the current Realforce R2 lineup, and alongside that release, we’ve seen some new upgrades compatible with both Mark I and Mark II Norbaforce housings. First, we have a new sound dampening treatment, the Norbaforce Acoustic Dampener, which arrives wrapped in custom tissue paper:
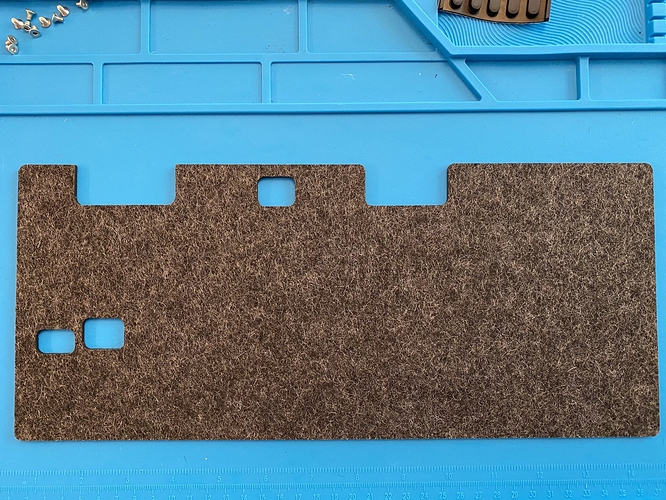
Opening that up, we find a custom-cut pad of felt Merino wool. If your order arrives during the hot summer months, as mine did, you’ll probably smell that wool before you see it…
The pad is meant to rest freely on the bottom of the keyboard, which it will do once the base is installed and flipped over, so it’s easiest to simply place it on the PCB at this stage.
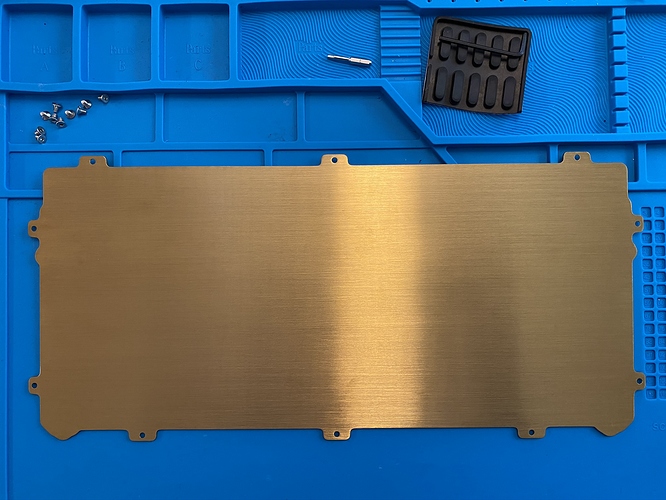
We could just screw the baseplate back into place, but there’s one more quick upgrade to do. The stock Norbaforce Mark I baseplate is made of aluminum, which we can replace with new option: a much heavier brushed gold PVD-coated stainless steel baseplate, further assisting with noise dampening, and adding heft.
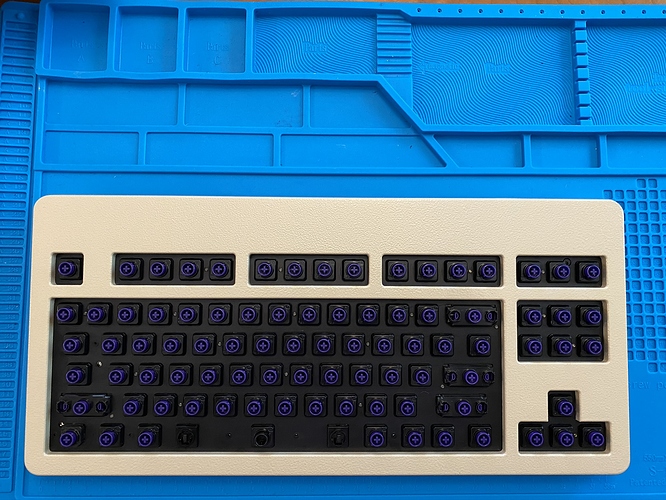
Installing that into place, we finally have our first look at the completed board, sans keycaps.
Spacebars: the final frontier
Up to this point, I’ve been glossing over the decision to leave the Topre spacebar
stabs and sliders in place. My original intent was to remove that slider and
those stabs and replace them with their Novatouch counterparts, at which point
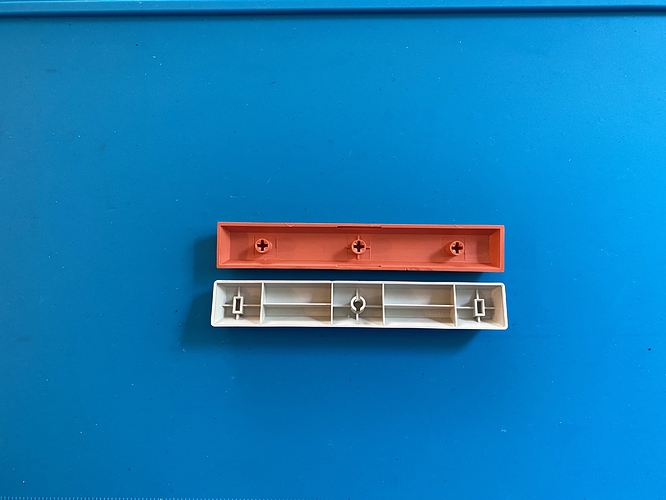
I could use the salmon-colored 6u DSA spacebar to match the DSA Galaxy Class
color scheme.
But at some point along the way, I thought to line up the DSA spacebar with
its stock Realforce counterpart, and re-learned an old lesson: the spacebar
stems don’t line up. Sigh.
We have a few options:
- Cut holes in the plate and mount the Novatouch stab assembly in those holes, in the correct locations for the DSA spacebar.
- Add stems to the DSA spacebar in the Realforce-supported locations with epoxy, as outlined here by @AdrianMan.
- Find a Topre-compatible spacebar in an acceptable color.
What to do? I ruled out the first option - I’ve made it this far without destructive mods to the Realforce parts. A quick troll through KBDfans yielded several Topre spacebars in a variety of colors, and one of them was both reasonably close in color to the Galaxy Class color scheme and less jarring than a bright salmon spacebar. We have a winner! (For the time being, at least - I admit to being intrigued
by the epoxy retrofit approach…)
Lessons learned
- I’ve said it before, but I’m always struck by how much better a silenced and lubed Topre board sounds. The difference is dramatic and positive.
- When harvesting a Novatouch for sliders, take a few extra minutes to harvest the mod housings and some 1u housings too while you’ve got the board apart.
- Spacebars can be loud on Topre boards, but take a few seconds to be absolutely certain the keycap is fully seated on all three contact points. For a while, I thought I was going to need to put foam in the spacebar, until I pressed one with a bit of extra force to see if it was fully seated - and it wasn’t, and it subsequently sounded much better. Still the loudest key, but much more tolerably so.
- Since the wool dampener is not compressed against the housing or the PCB, its acoustic dampening properties derive from sound absorption through the air, rather than dampening by direct contact with vibrating surfaces, a la Sorbothane. As such, I think Sorbothane would still yield a more consistent and effective result, but this pad will get you, subjectively, 80% of the way there. And how many keyboards do you have with wool in them?
- With that said, I hope this particular application of wool isn’t as susceptible to static as its clothing counterparts, or we may have a problem, with that PCB in such close proximity.
- The difficulties in using MX-style keycaps on Topre boards is maddening. While compatibility has become better with the availability of the Realforce R2 RGB, those boards suffer from tolerance and rattle issues more than their predecessors. Let’s hope a solution is forthcoming…
- We’ve come to expect it, but it bears repeating: the powder coat finishes on Norbauer’s housings are pristine, and this is no exception. Aside from its pleasant texture, the finish captures light in a lovely way.
Shall we go see what’s out there?
Make it so.
Specifications
donor boards:
- Realforce 87U
- Novatouch TKL
case: Norbaforce (Mark I)
- Galaxy Console finish
- Stainless steel brushed gold PVD backplate
case dampening: Norbaforce Acoustic Dampener
- felt Merino wool
PCB: Realforce donor + Norbaforce USB-C breakout board
plate: Realforce donor
domes/springs: Realforce donor, 55g
slider housings: Realforce donor, except
- modifier key housings: Novatouch donor
- LCTRL housing: Novatouch donor, rotated and filed to size
sliders: Novatouch donor, except
- spacebar: Realforce donor
slider mods:
- Installed Deskeys #4 silencing rings
- Lubed rails with Tribosys 3204
stabilizer sliders: Realforce wires and Novatouch donor sliders, except
- spacebar: Realforce donor sliders
stabilizer mods:
- Installed Deskeys #4 silencing rings
- Lubed housing interiors with Tribosys 3204
- Lubed wire ends and wire clips with SuperLube
keycaps:
- DSA Galaxy Class
- kbdfans Topre PBT 6u spacebar, kit 7 (light blue)
HxWxD (without feet or caps): 1.25" x 15.0" x 7.0"
HxWxD (without caps): 1.31" x 15.0" x 7.0"
HxWxD: 1.5" x 15.0" x 7.0"
assembled weight: 2.67 kg (5.88 lb)
