I need to implement some guidance pins for the final release of the case, but overall I’m finally done with the project. At least from the hardware side, QMK is still todo. Just KMK for now.
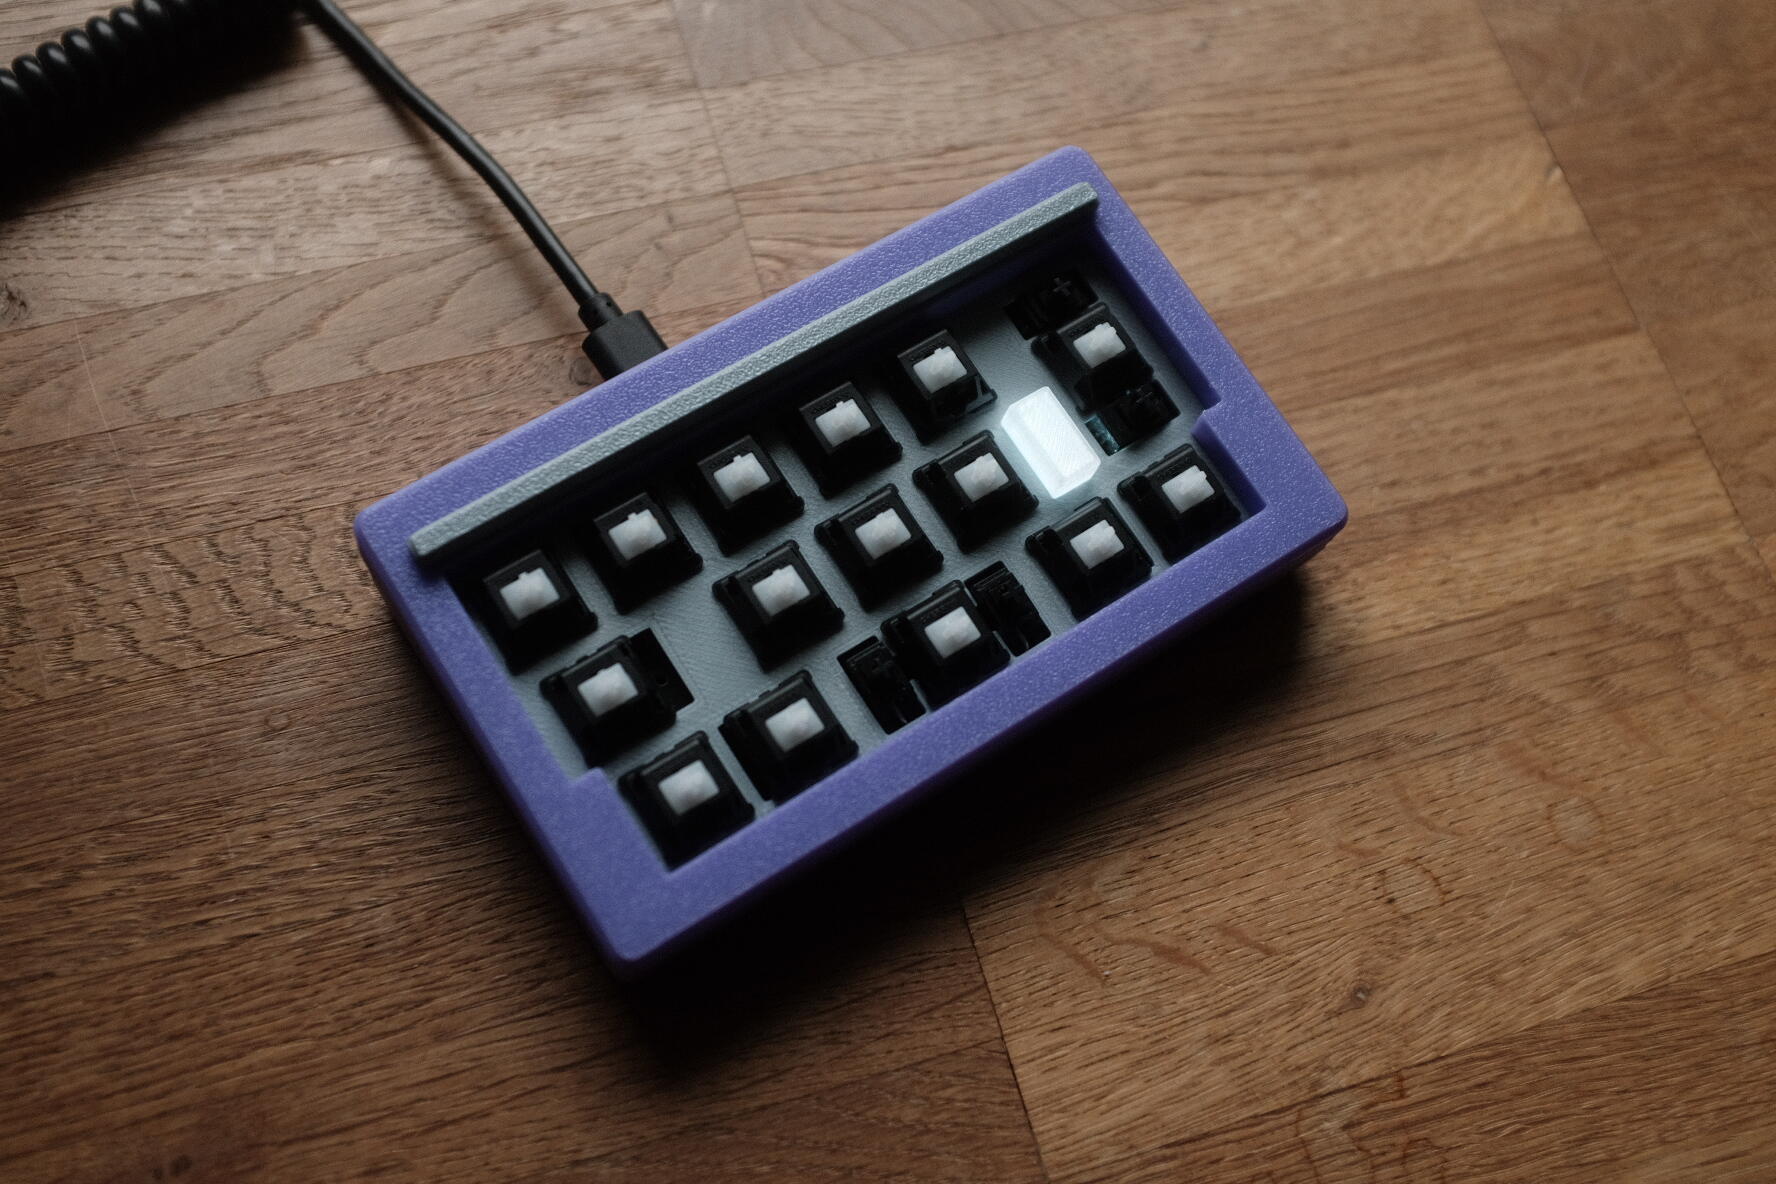
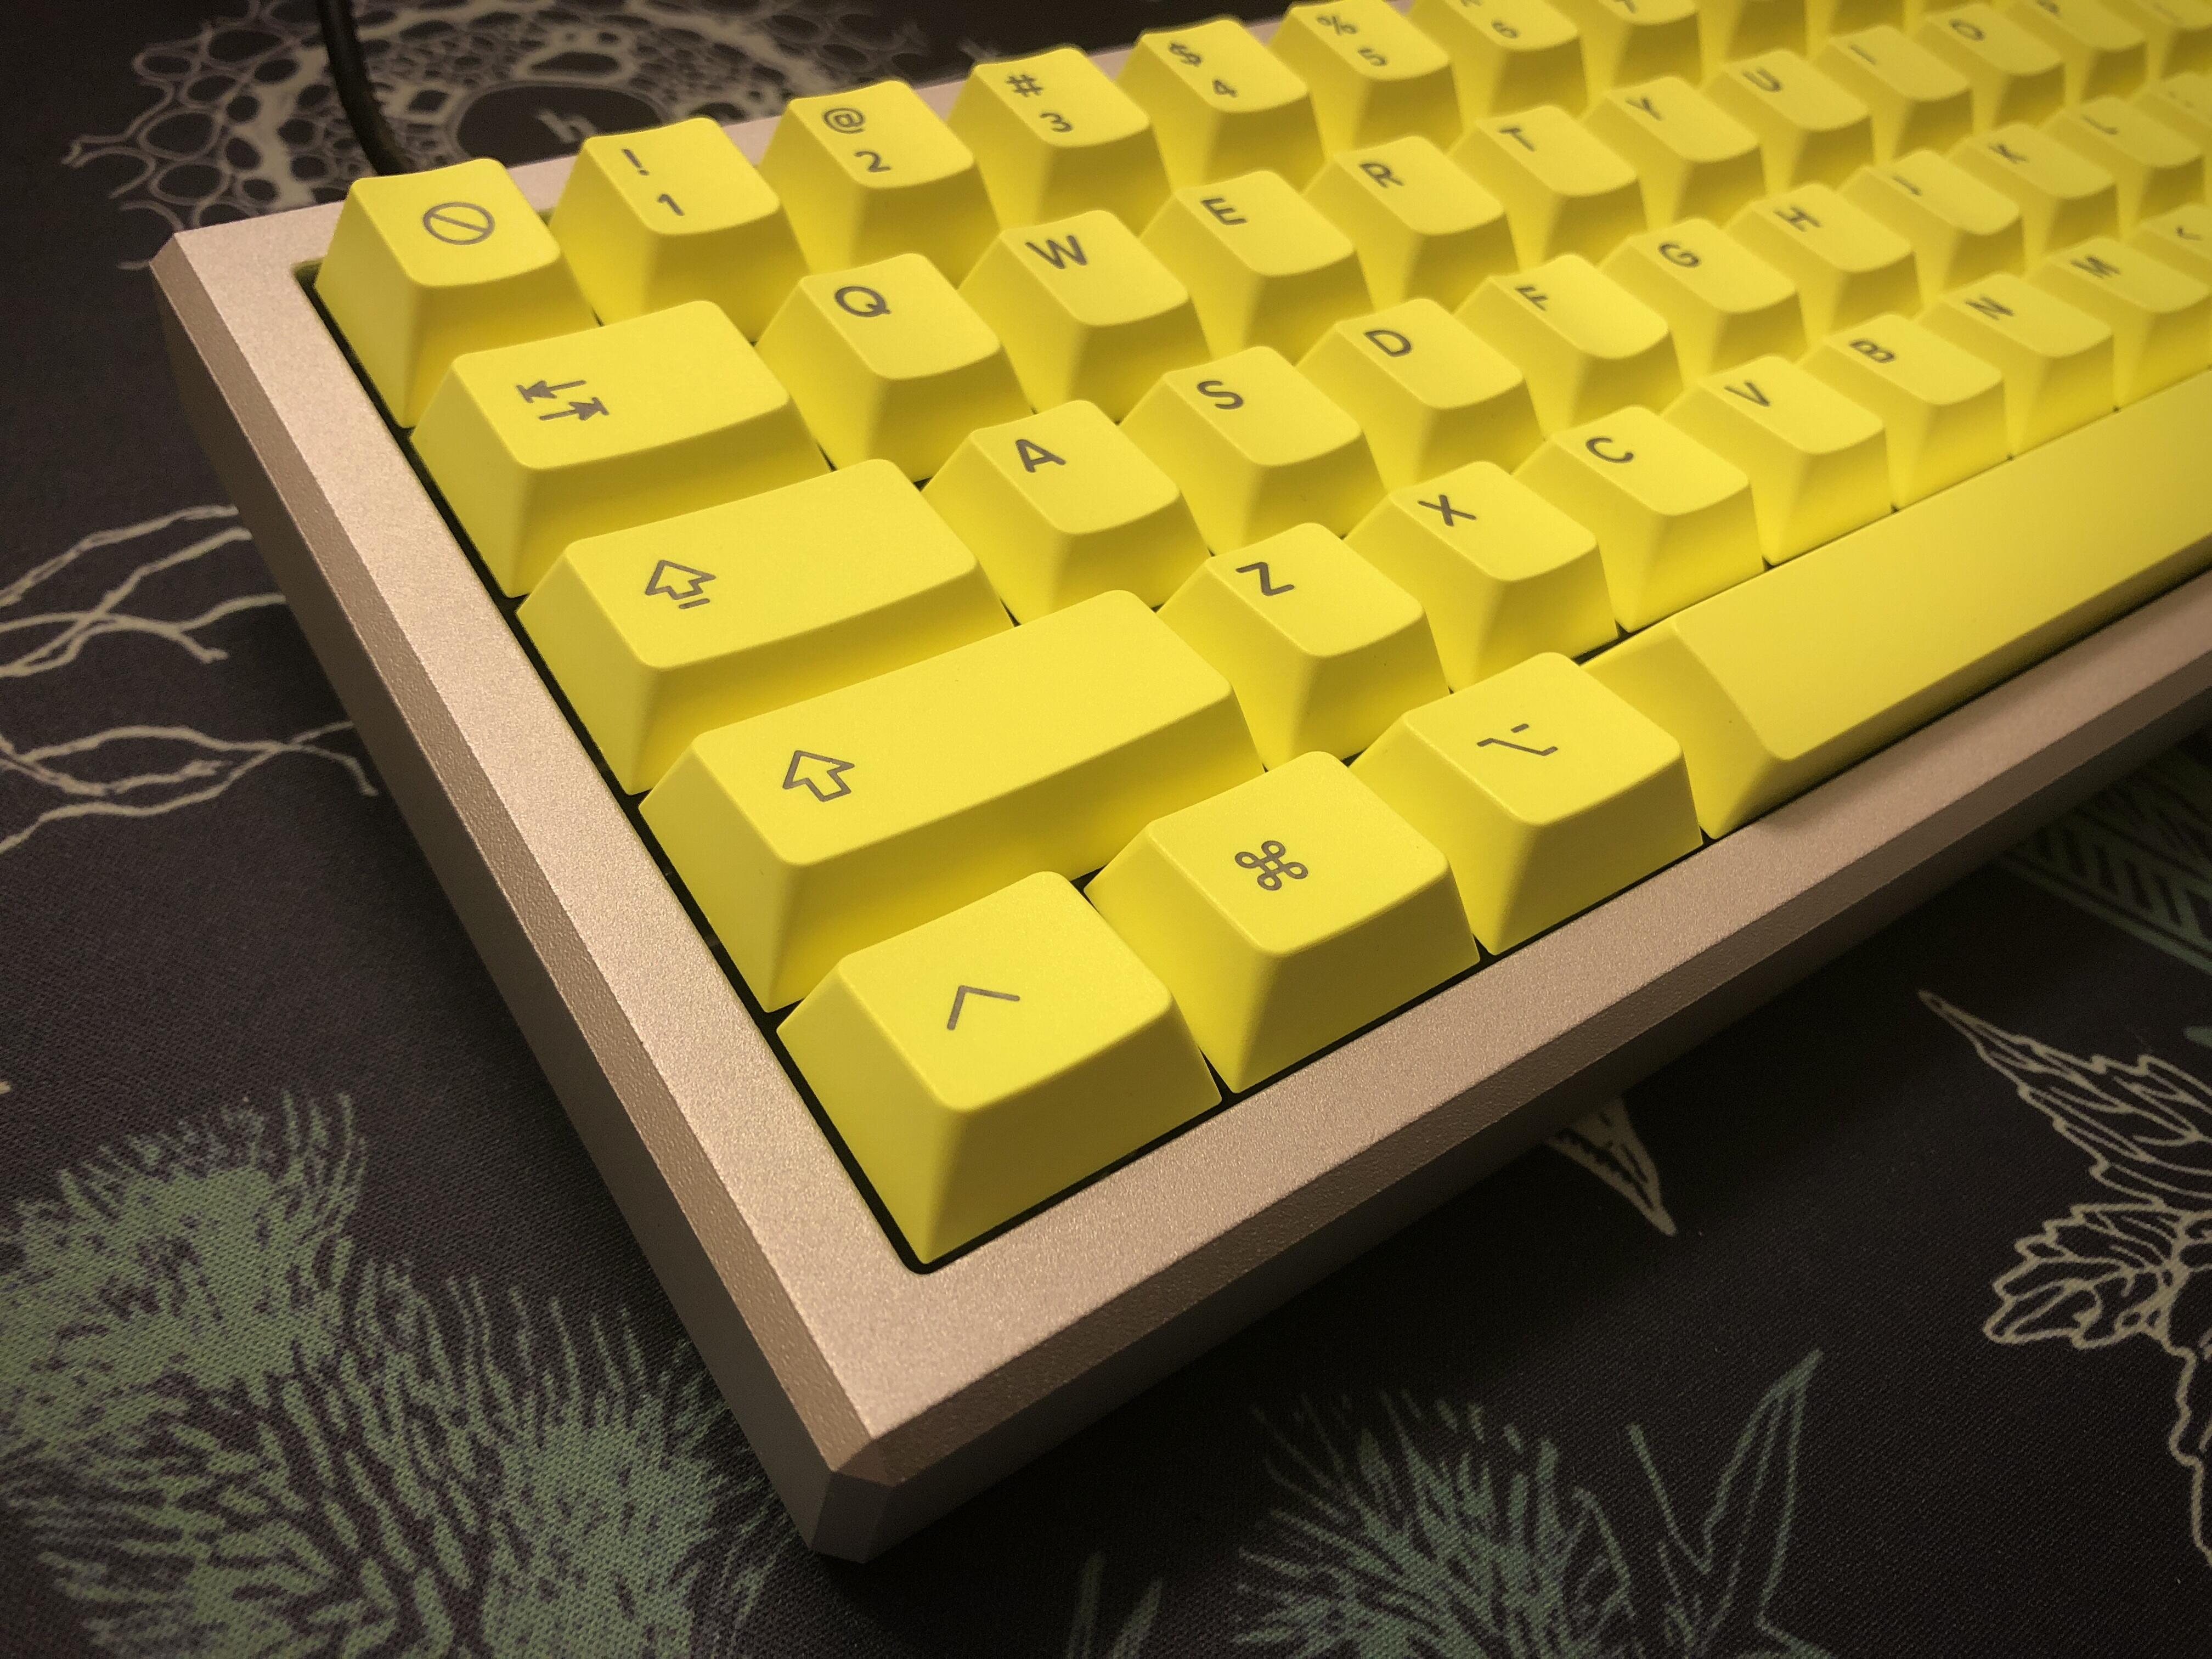
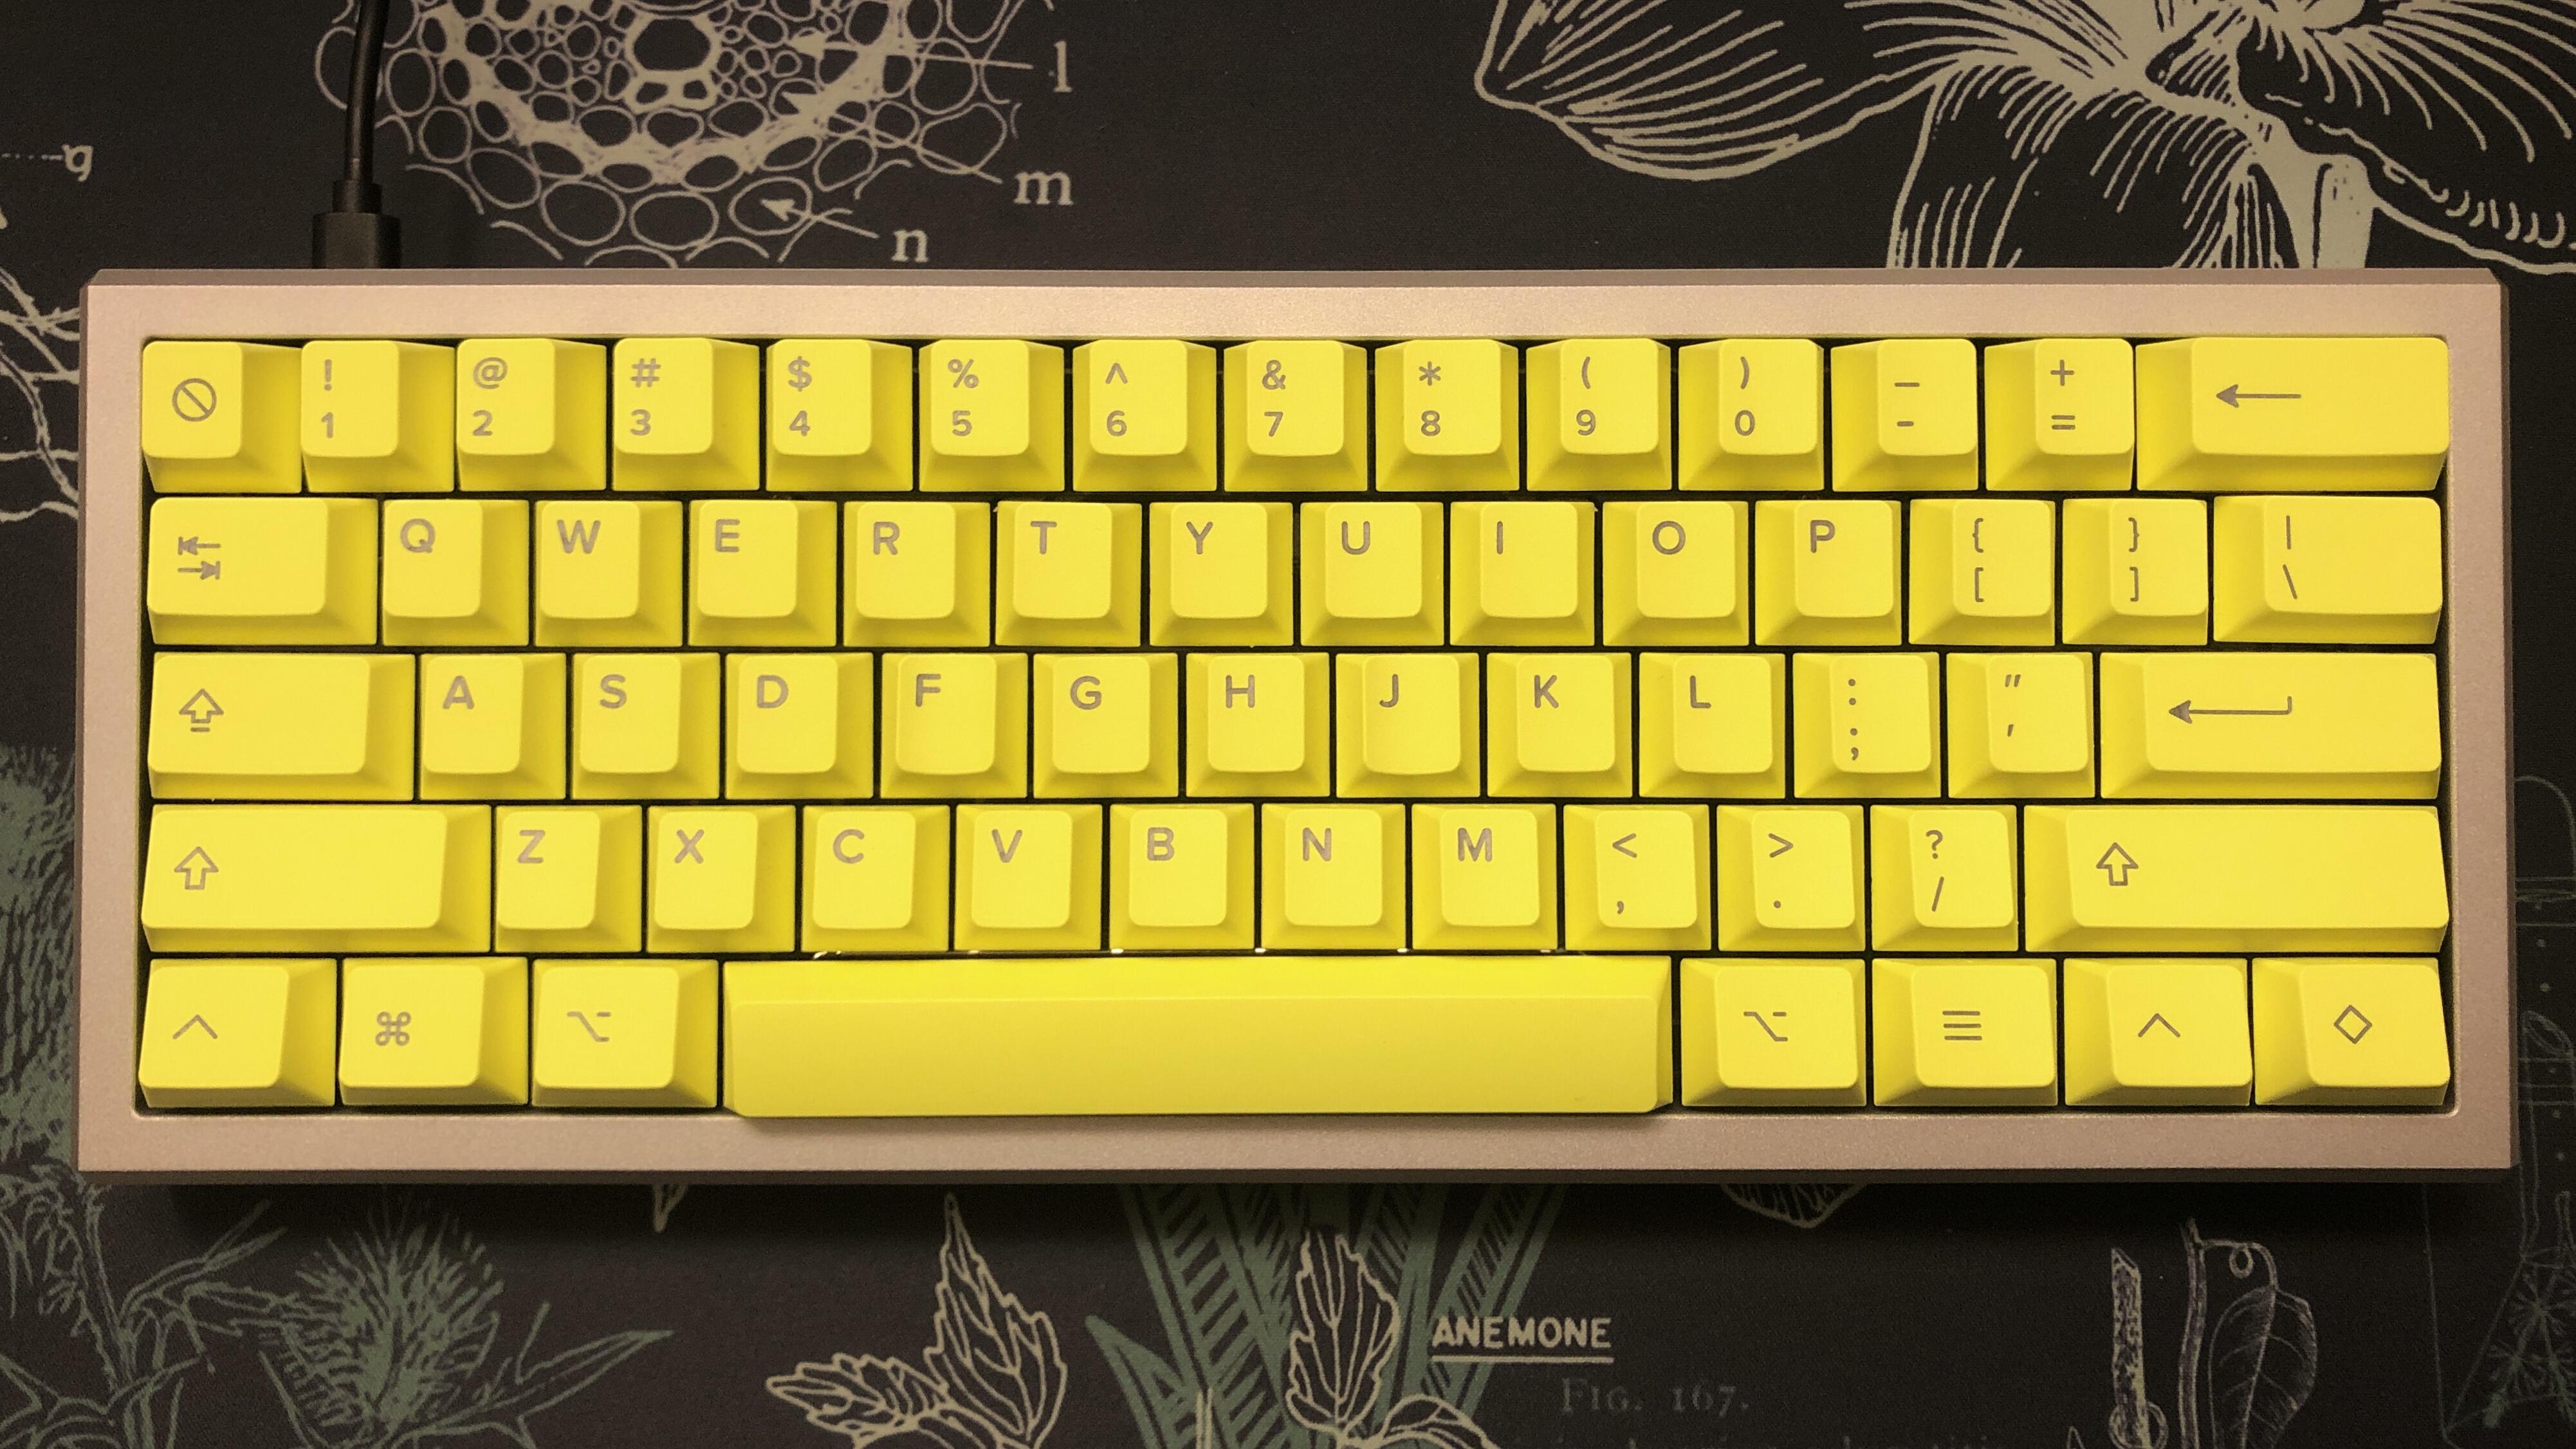
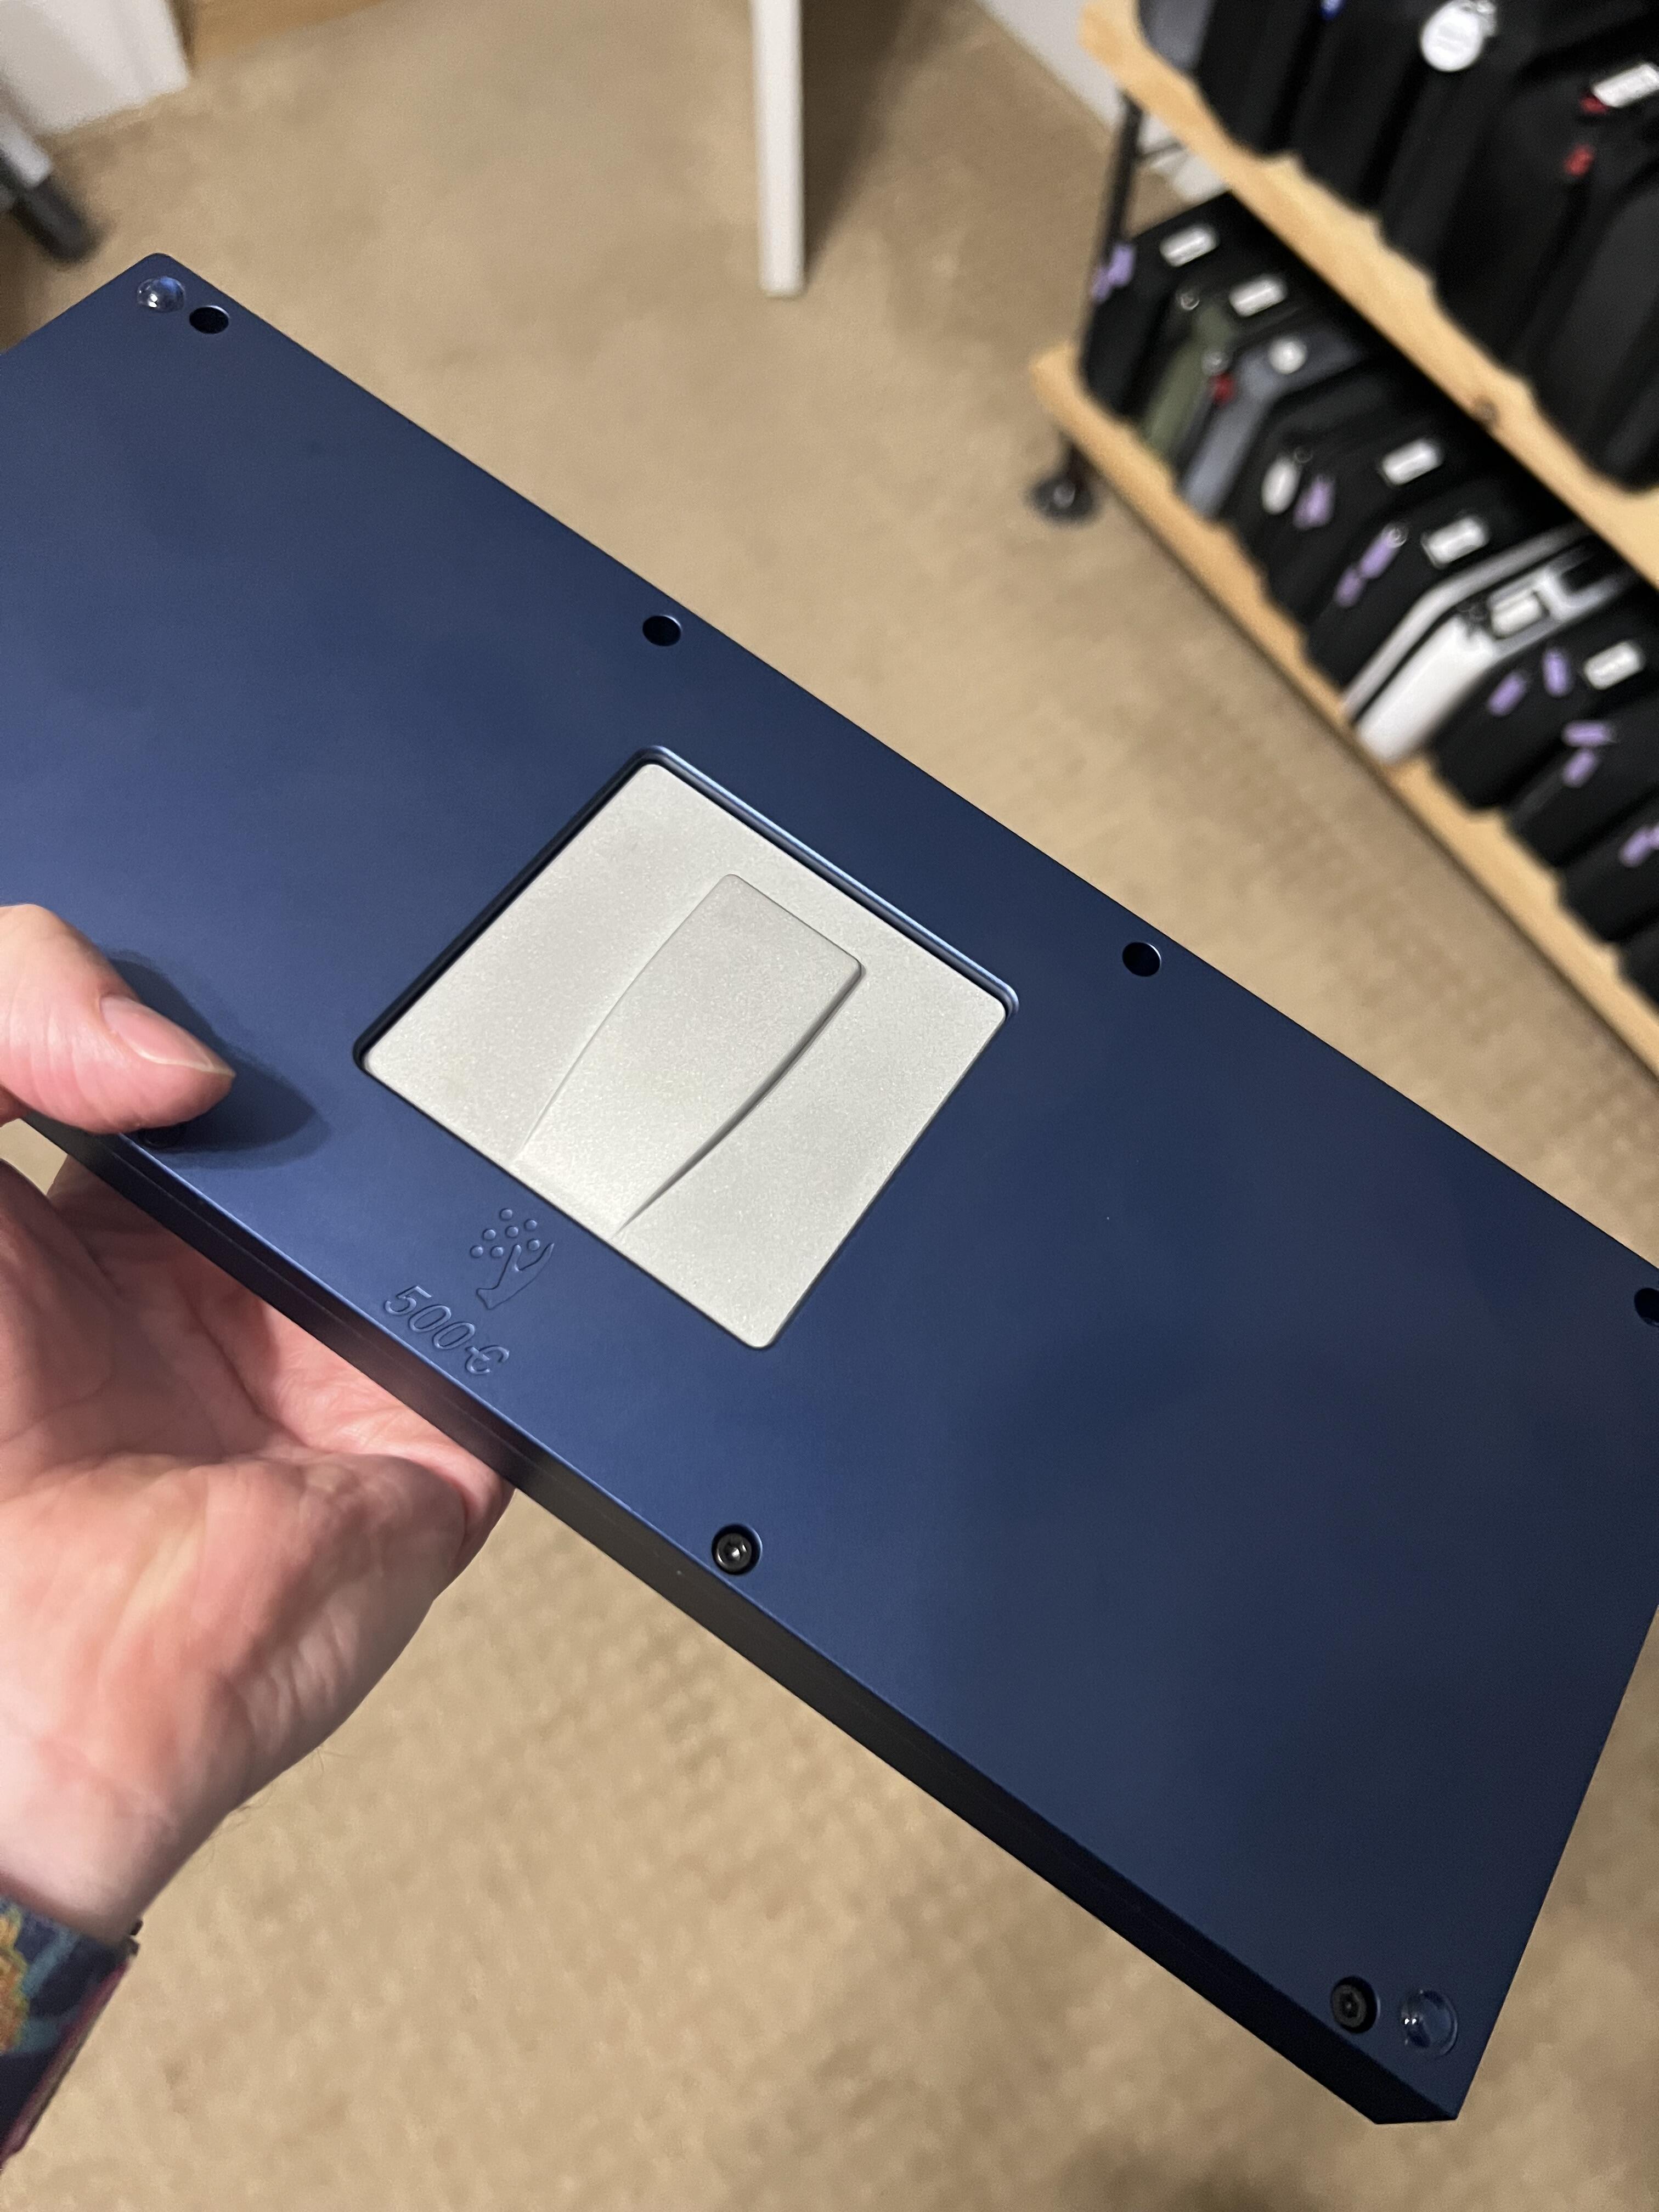
After some searching for a name I concluded on ISO13715, which is a real ISO Norm and the numbers just fit the board perfectly. 13/15 keys depending on your bottom row and 7 “Alphas”.
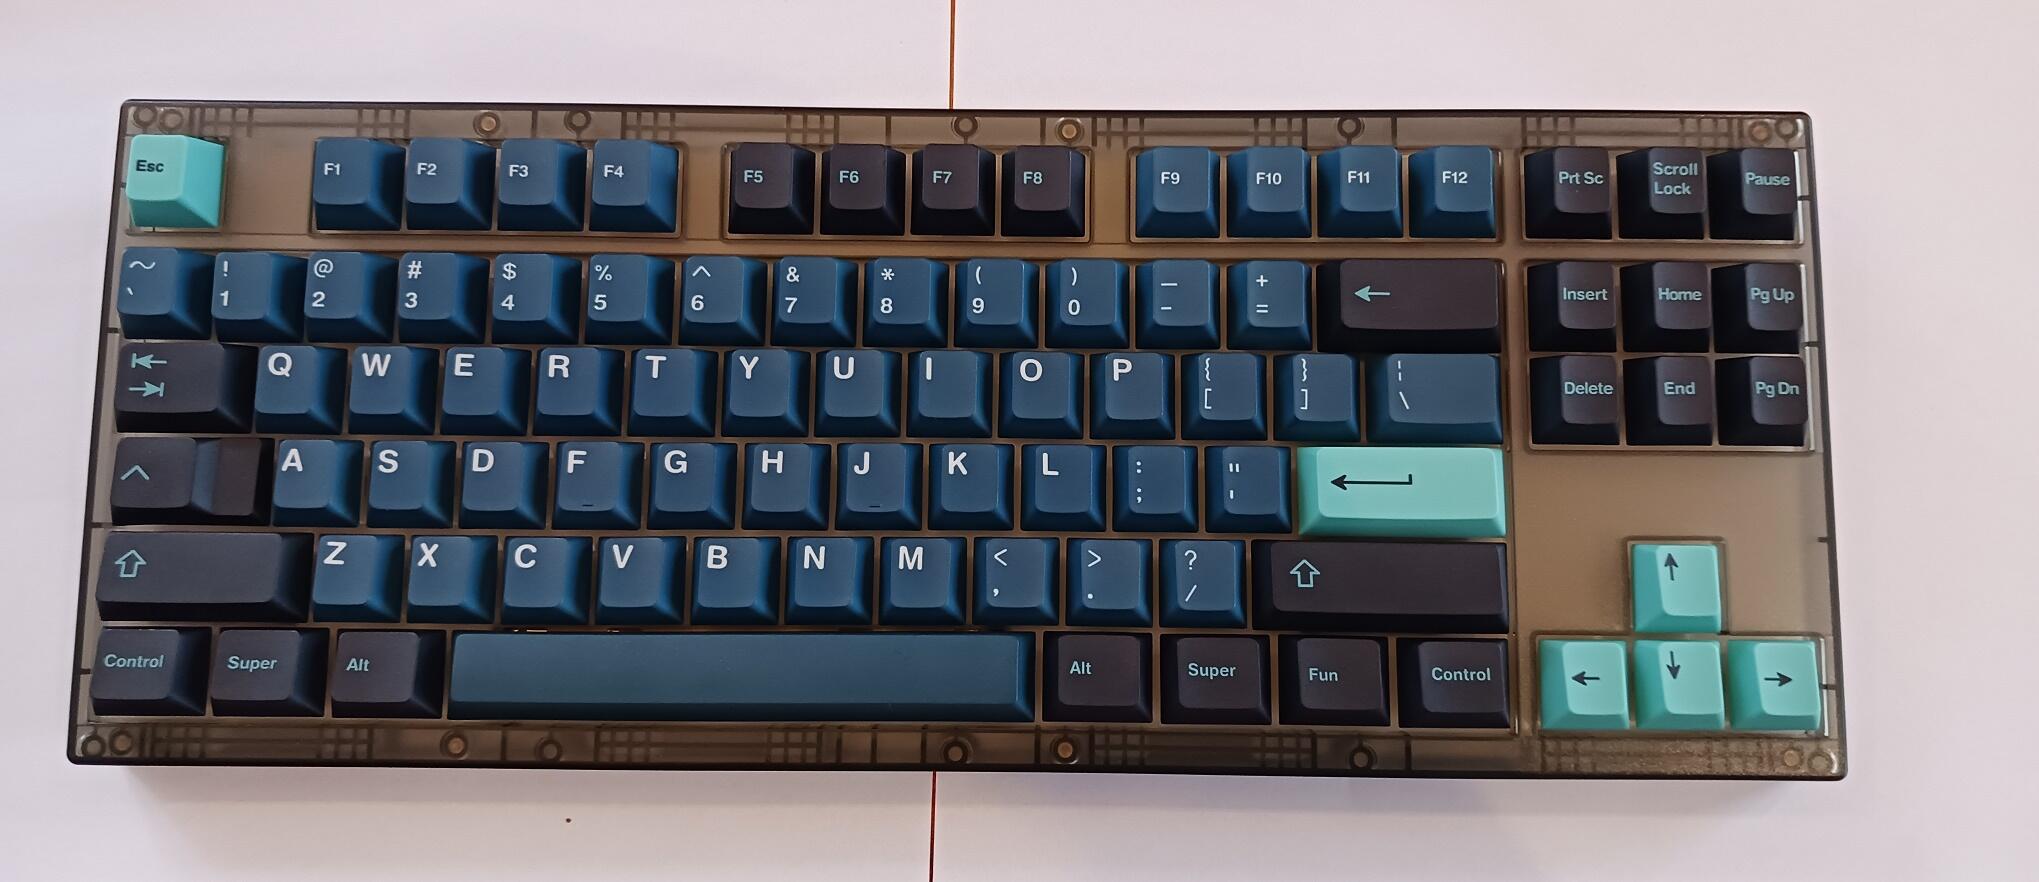
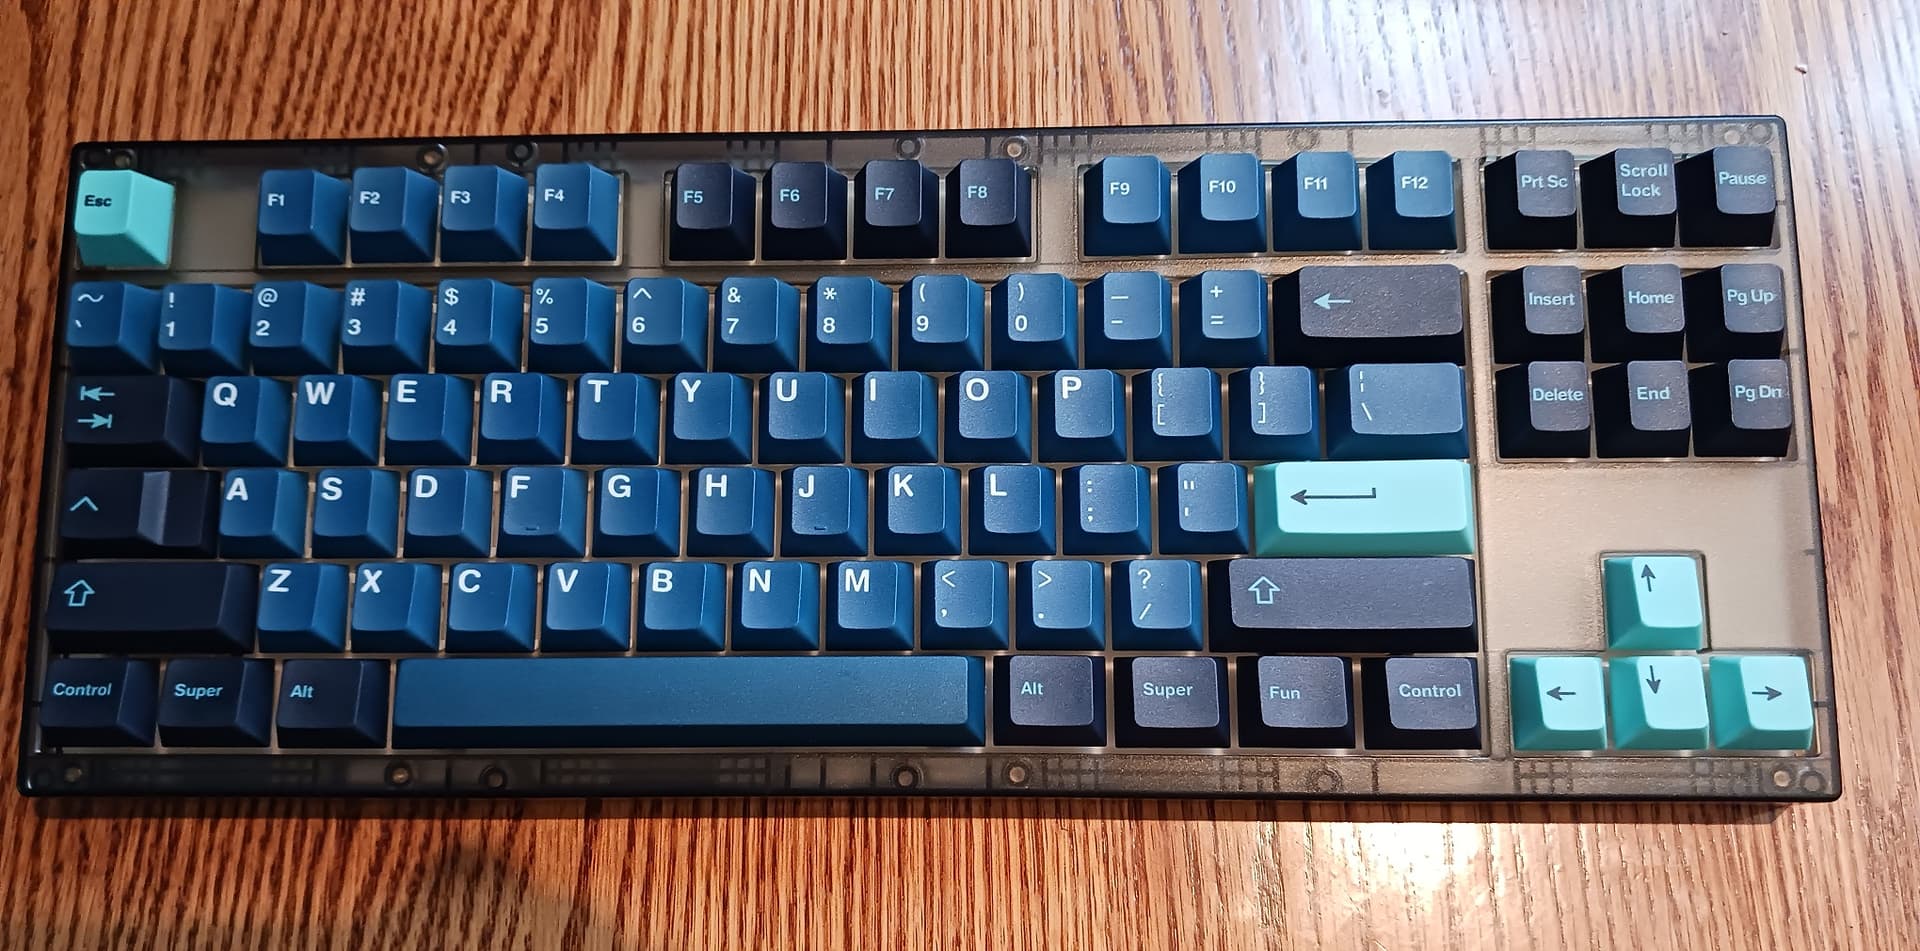
Here you can see the pipe key isn’t quite aligned; not sure if that’s the switch or my soldering job on this plateless build, but I’m just going to assume the latter. You can also see the updated layout I went with, having the FN layer key at the bottom-right corner.
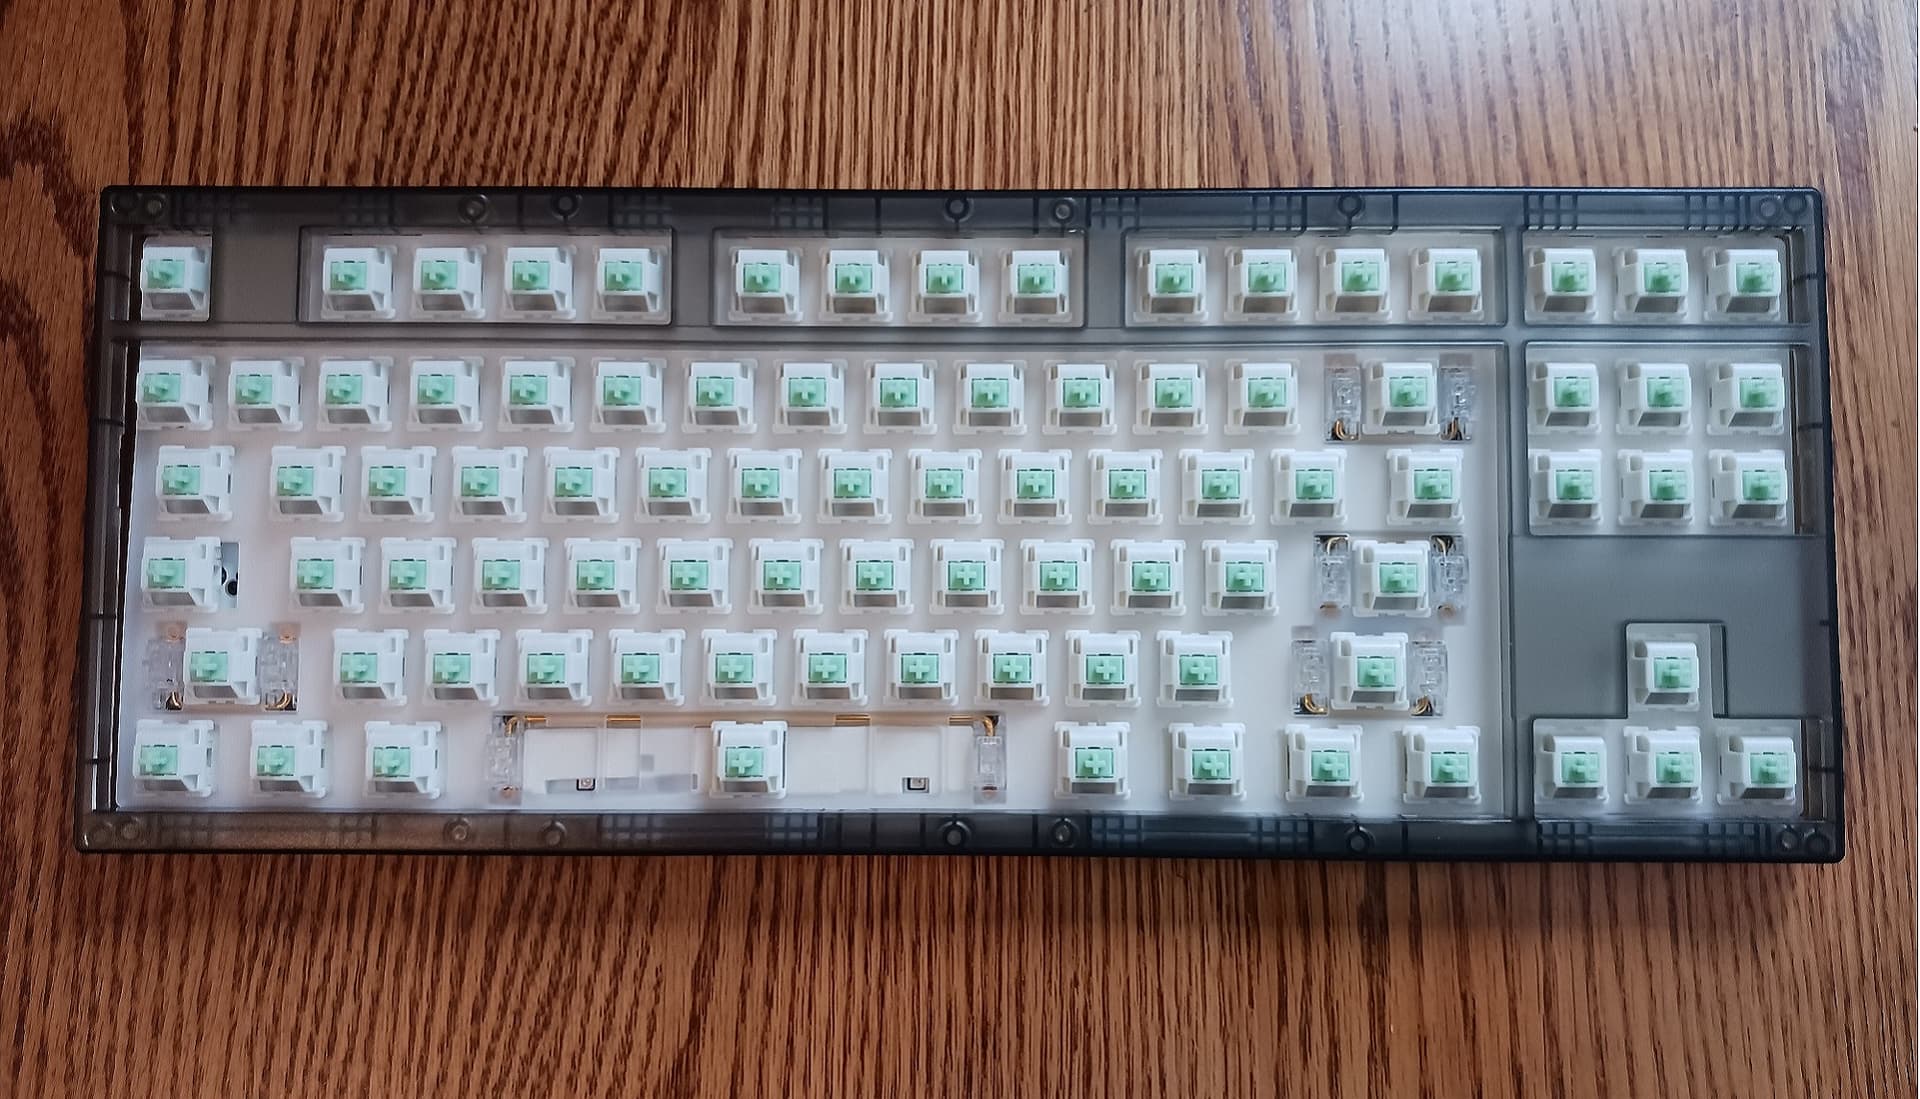
This might be the most flexy build I own, even including the 1.2mm flex-cut Ikki68 Aurora R2, thanks to a combination of the leaves and going plateless with this Weirdflex PCB. Definitely one of the more unique typing experiences in my collection.
Mill maxed pcb with TX stabilizers. The switches are the new mocha chocolate linears from Durock. These have an all POK housing with a POM long pole stem and supposedly new molds.
The switches are very smooth but pretty similar to other Durock offerings in terms of typing feel. The sound is medium to medium-deep and pronounced from the long pole. I’m using them stock since it is now a hotswap build. You do get some extra noises here and there as is typical from Durock switches. The spring is a bit light for my taste. Supposed to be 62g bottom out long spring but it feels lighter to me.
Super nice build! Also thanks for the heads up on those mocha chocolate linears. I seen them listed somewhere & was curious about them cause all POK, but haven’t messed with any Durock/JWK switches in awhile now as I feel like their quality was dipping pretty hard.
Speaking of switch info I spring swapped that batch of Gateron Snow Rabbits today & can happily say the springs were the issue I had with them before. They were making so much extra noise I had thought it was a combo of spring & leaf noise, but with oiled springs put into them they quieted down to just plastic on plastic noise. Now I am really digging them as they are basically a rail bottom out smoothie (not made from the same molds but all POM parts).
I went with Gat Clear springs in them & am actually really enjoying how they came out! Kinda funny I am now liking such light weightings as I remember the first time I tried Gat clears I wondered how anyone could use such a light switch LOL! Also going with such a lightweight spring really highlights how nice the Type Plus stabs work. They have such freedom of movement even on the spacebar you can’t feel any extra resistance! With conventionally designed Cherry stabs you can definitely feel the difference in resistance between the stabilized & non stabilized keys when using springs as light as these IME.
That’s super cool and looks great. I’m a little OOTL on this project, I assume this is a custom build by you? Custom PCB, everything else 3D printed?
Something about the layout makes me uncomfortable, but it looks so cool lol
Oooo plateless! How’s it feel/sound with the side springs installed? IIRC many people have issues with the side springs, me included so and I ditched 'em on mine. I millmax everything but I am tempted to try plateless on a build somewhere sometime.
lol Man that is a bright board
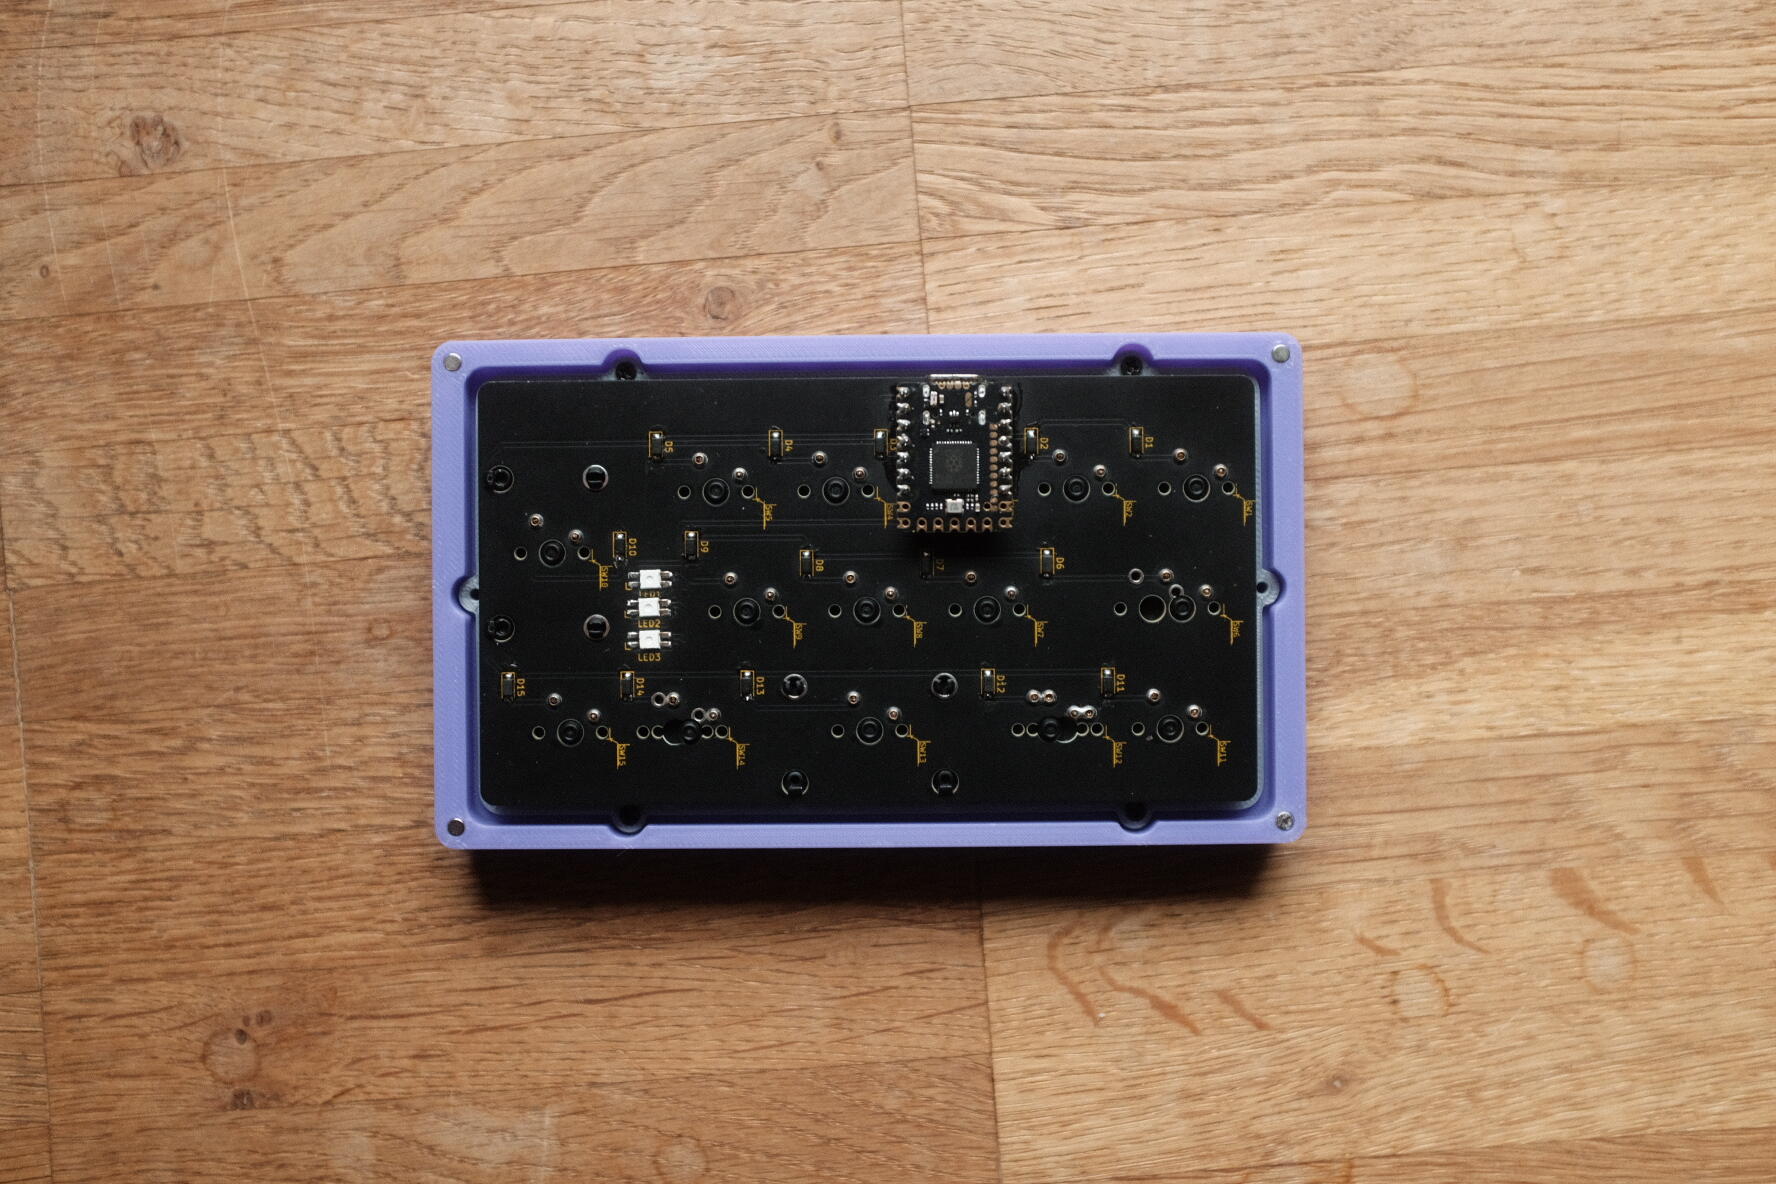
Exactly wanted to try PCB design myself and not build the „classic“ 3x3 macropad. Played around with KLE and I really wanted to integrate a ISO enter. Everything else fell kind of into place,the first design featured a 2U spacebar but I didn’t want to be stuck on that size. I also wanted uniform sides, that’s where the LEDs came in then.
Case design was my pain point on the project, I still didn’t really figure out the best way to use a export of the PCB for that. KiCad is finished since a few month, case took much longer now to complete. But that’s also with a lot of frustration breaks in between. The meetup last week finally gave me the deadline to finish this, at least for the hardware side.
There’s a little bit of aluminum resonance, but otherwise satisfying clacks.
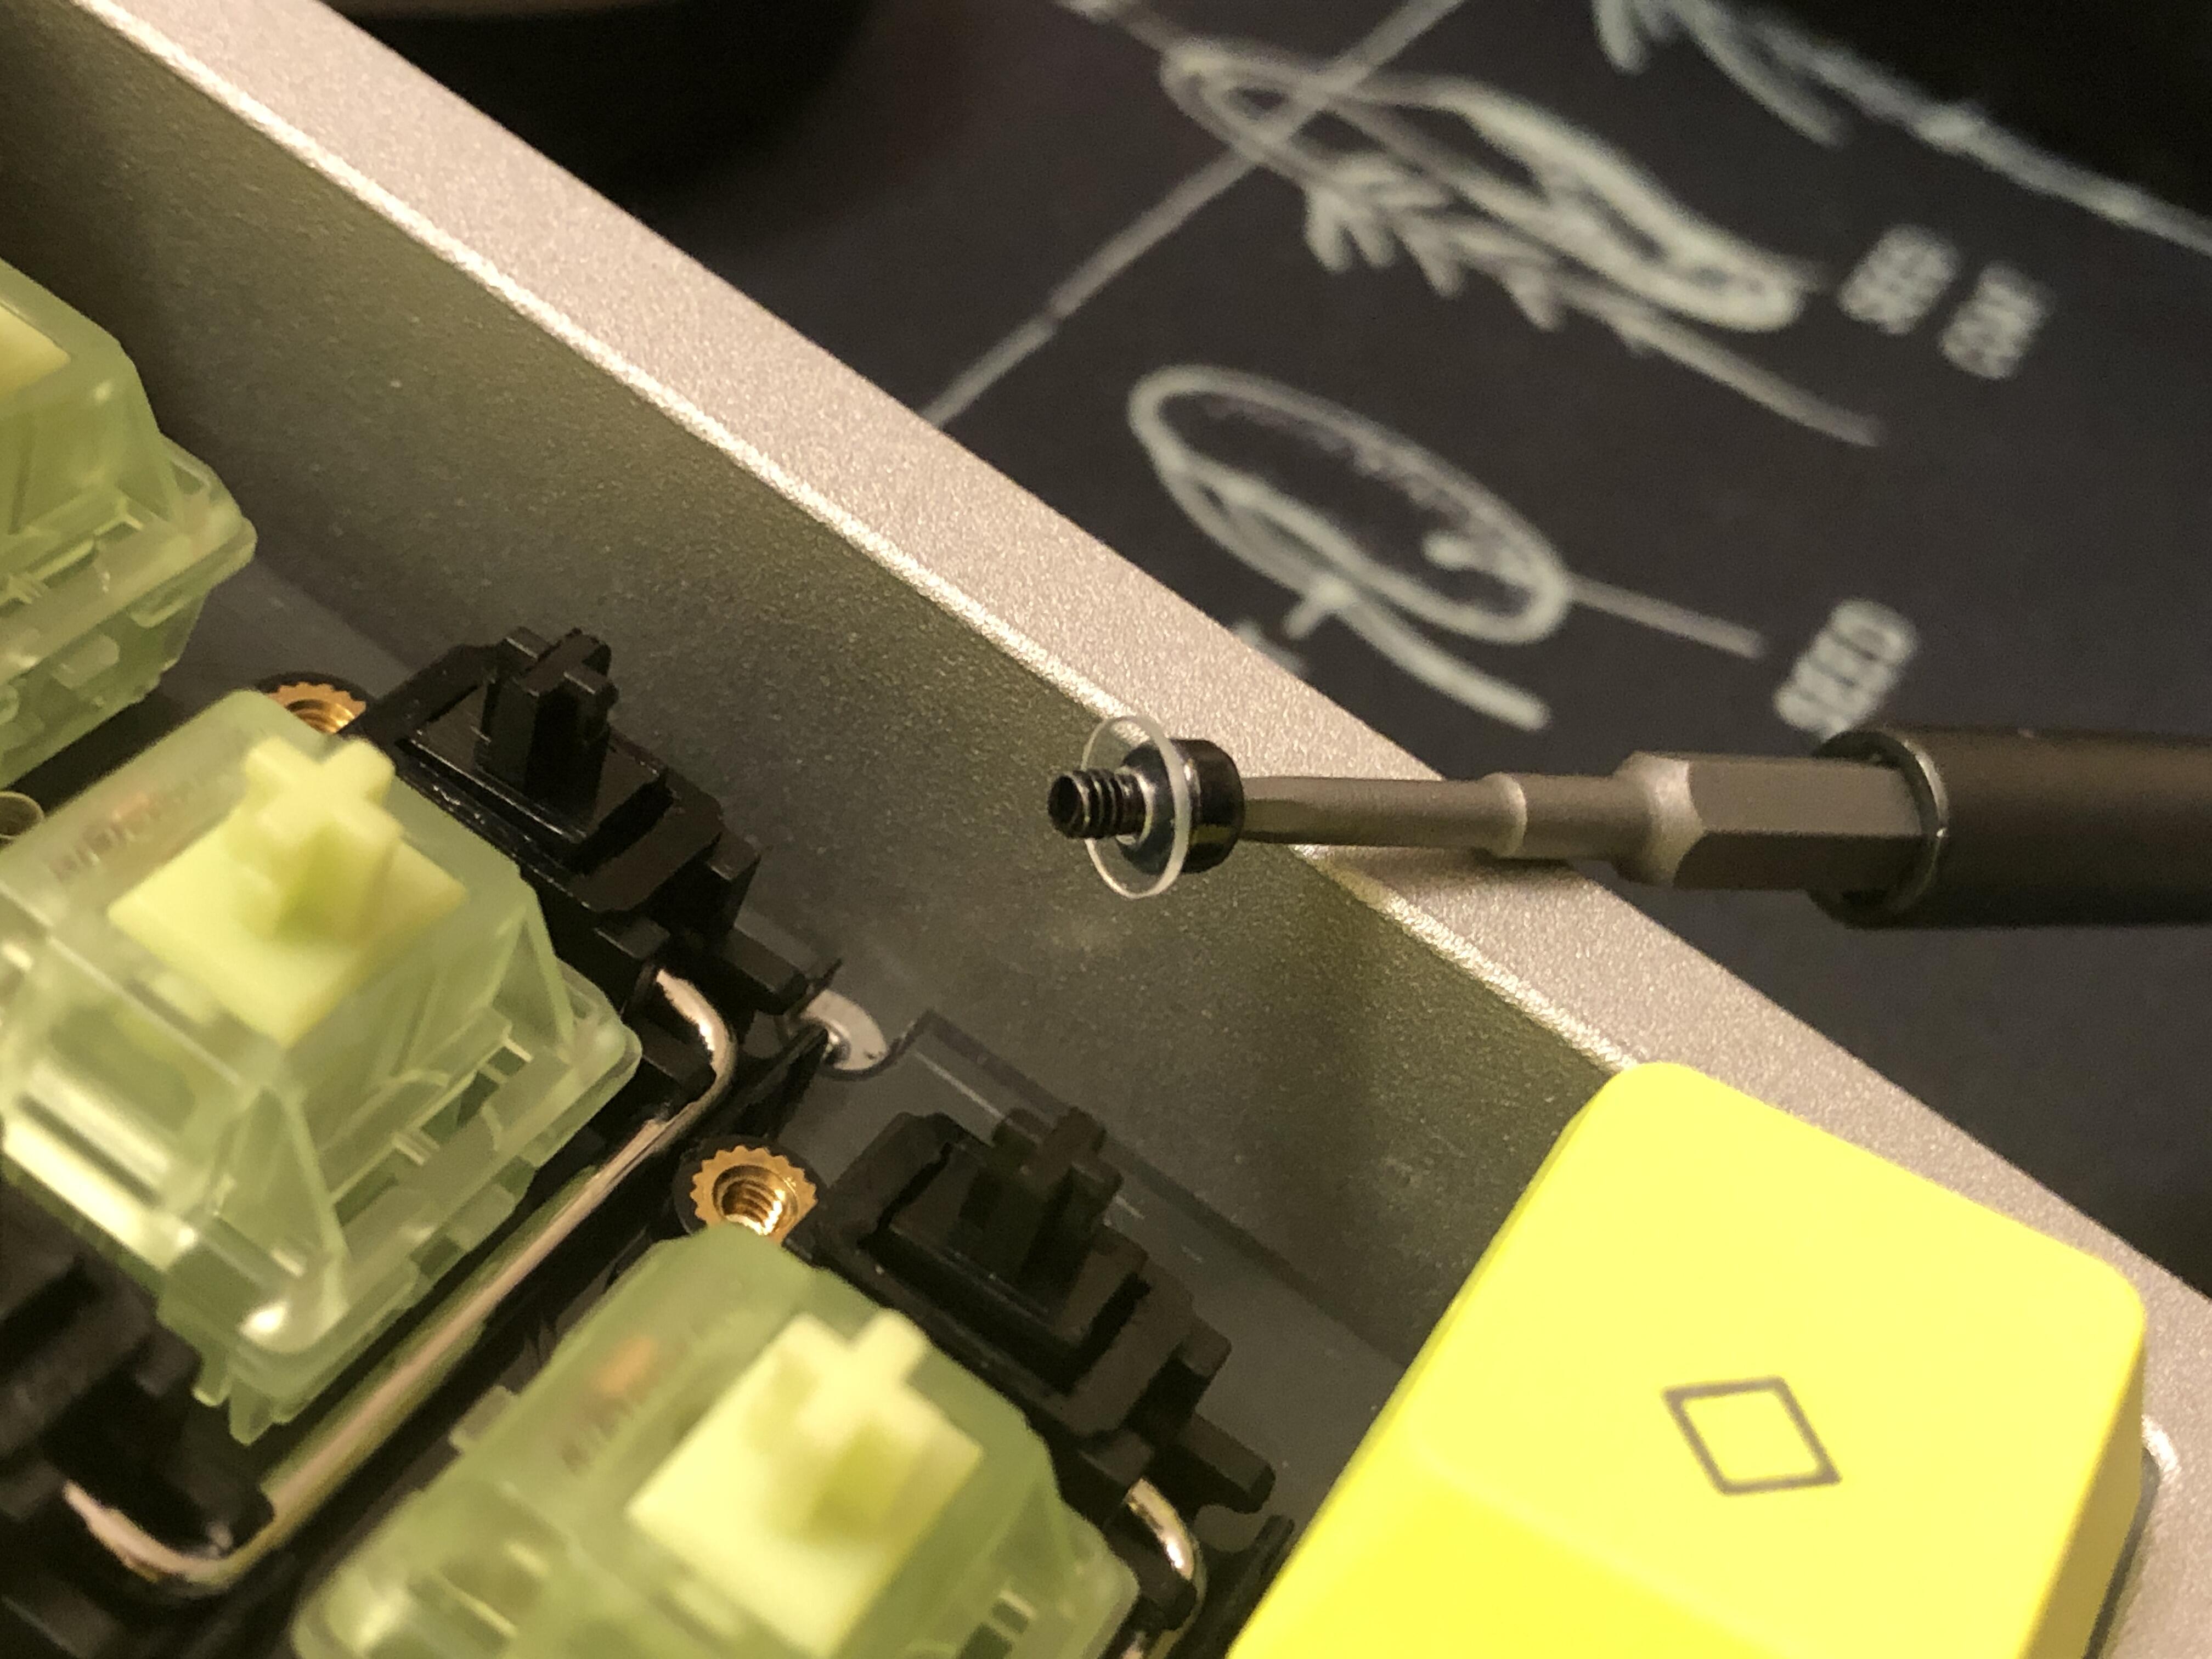
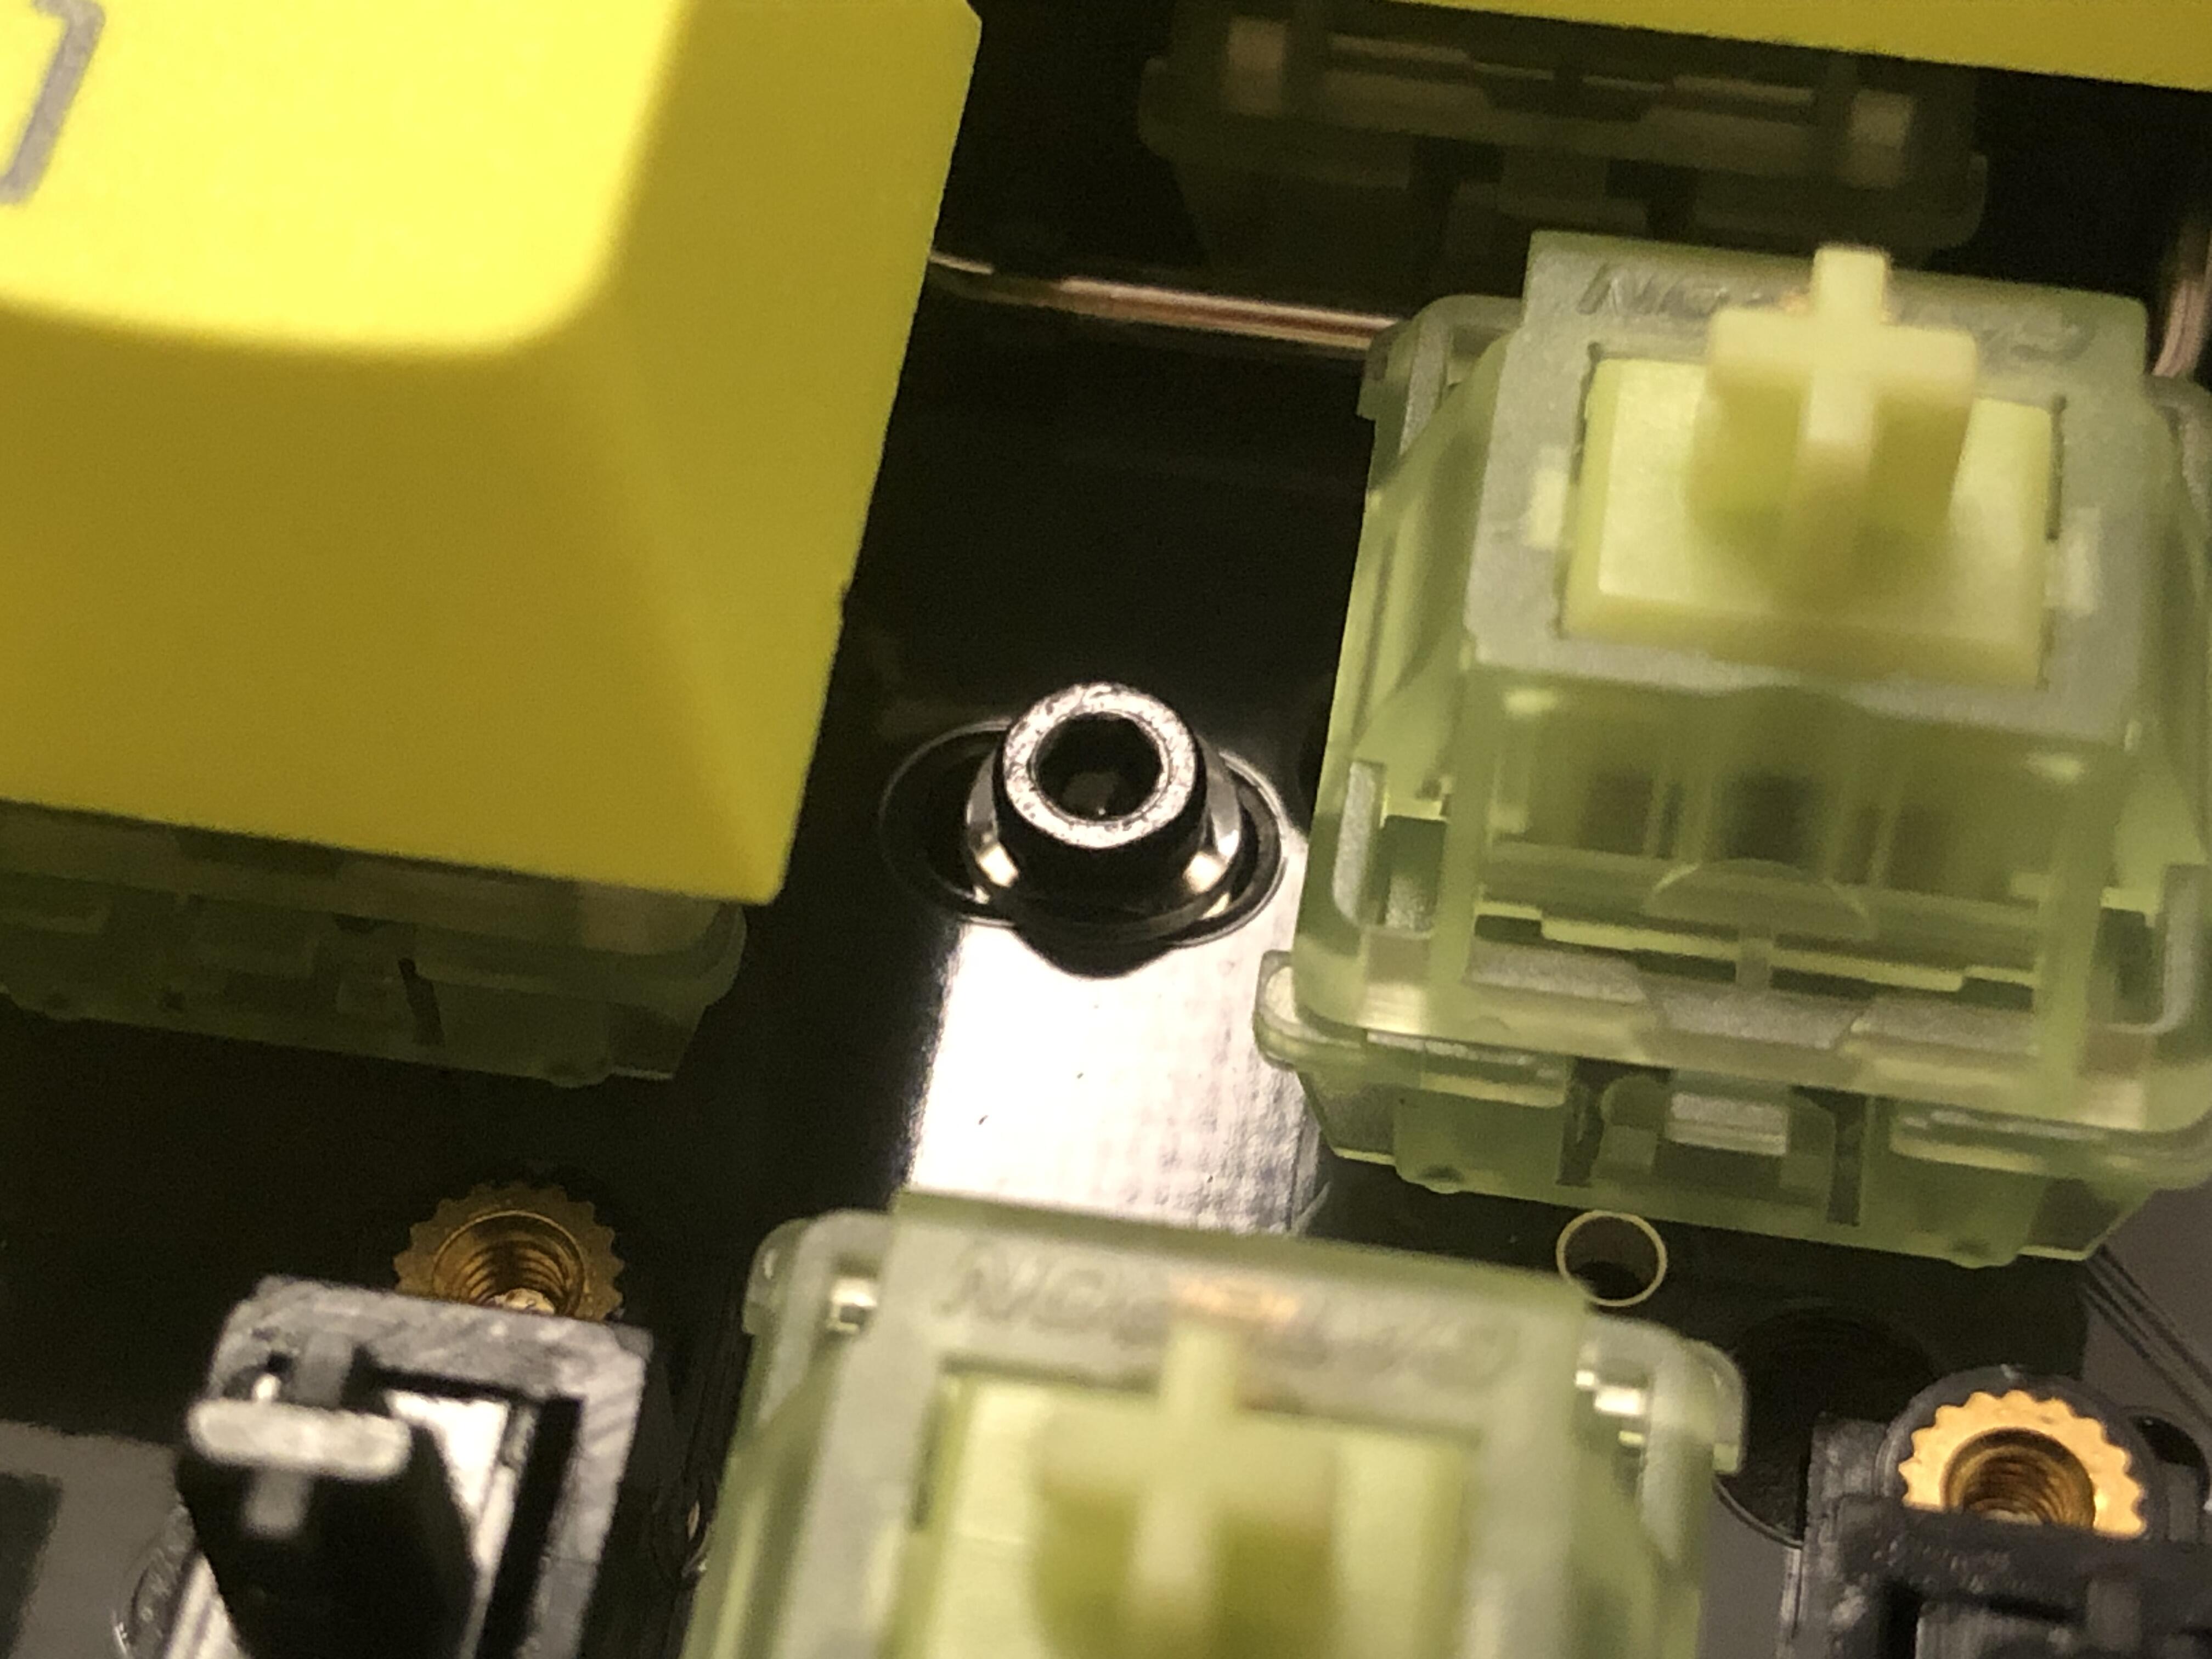
I haven’t had any issues so far aside from the screw-heads being a bit small for the PCB holes (hence adding the washers); but I also haven’t tried it without them yet.
Feel is very bouncy and flexy in general. Enter key has a tiny bit of travel scrape I haven’t pinned down yet, but the space bar is extra satisfying.
Finished putting the Gateron Longjing Tea switches in the new Transition Lite TKL.
The switches have had their springs replaced with 60 G 14mm TX. Spacebar is a 58 G 2-stage spring. Very good for spacebars.
Gateron Longjing Tea had the best results in this TKL. They sound smooth, quiet, and inoffensive. No ‘thock’ or ‘clack’ though. Just a ‘tapping’ noise.
Have been using KDS Solarized Dark for the testing, and it was good enough that I am using it on the board.
Now it works fine, although I can’t figure out how to adjust the RGB. I had managed to set up some keys through VIA or VIAL before, but it seems to have reset the layers to factory settings. Which involves almost no RGB control keys.
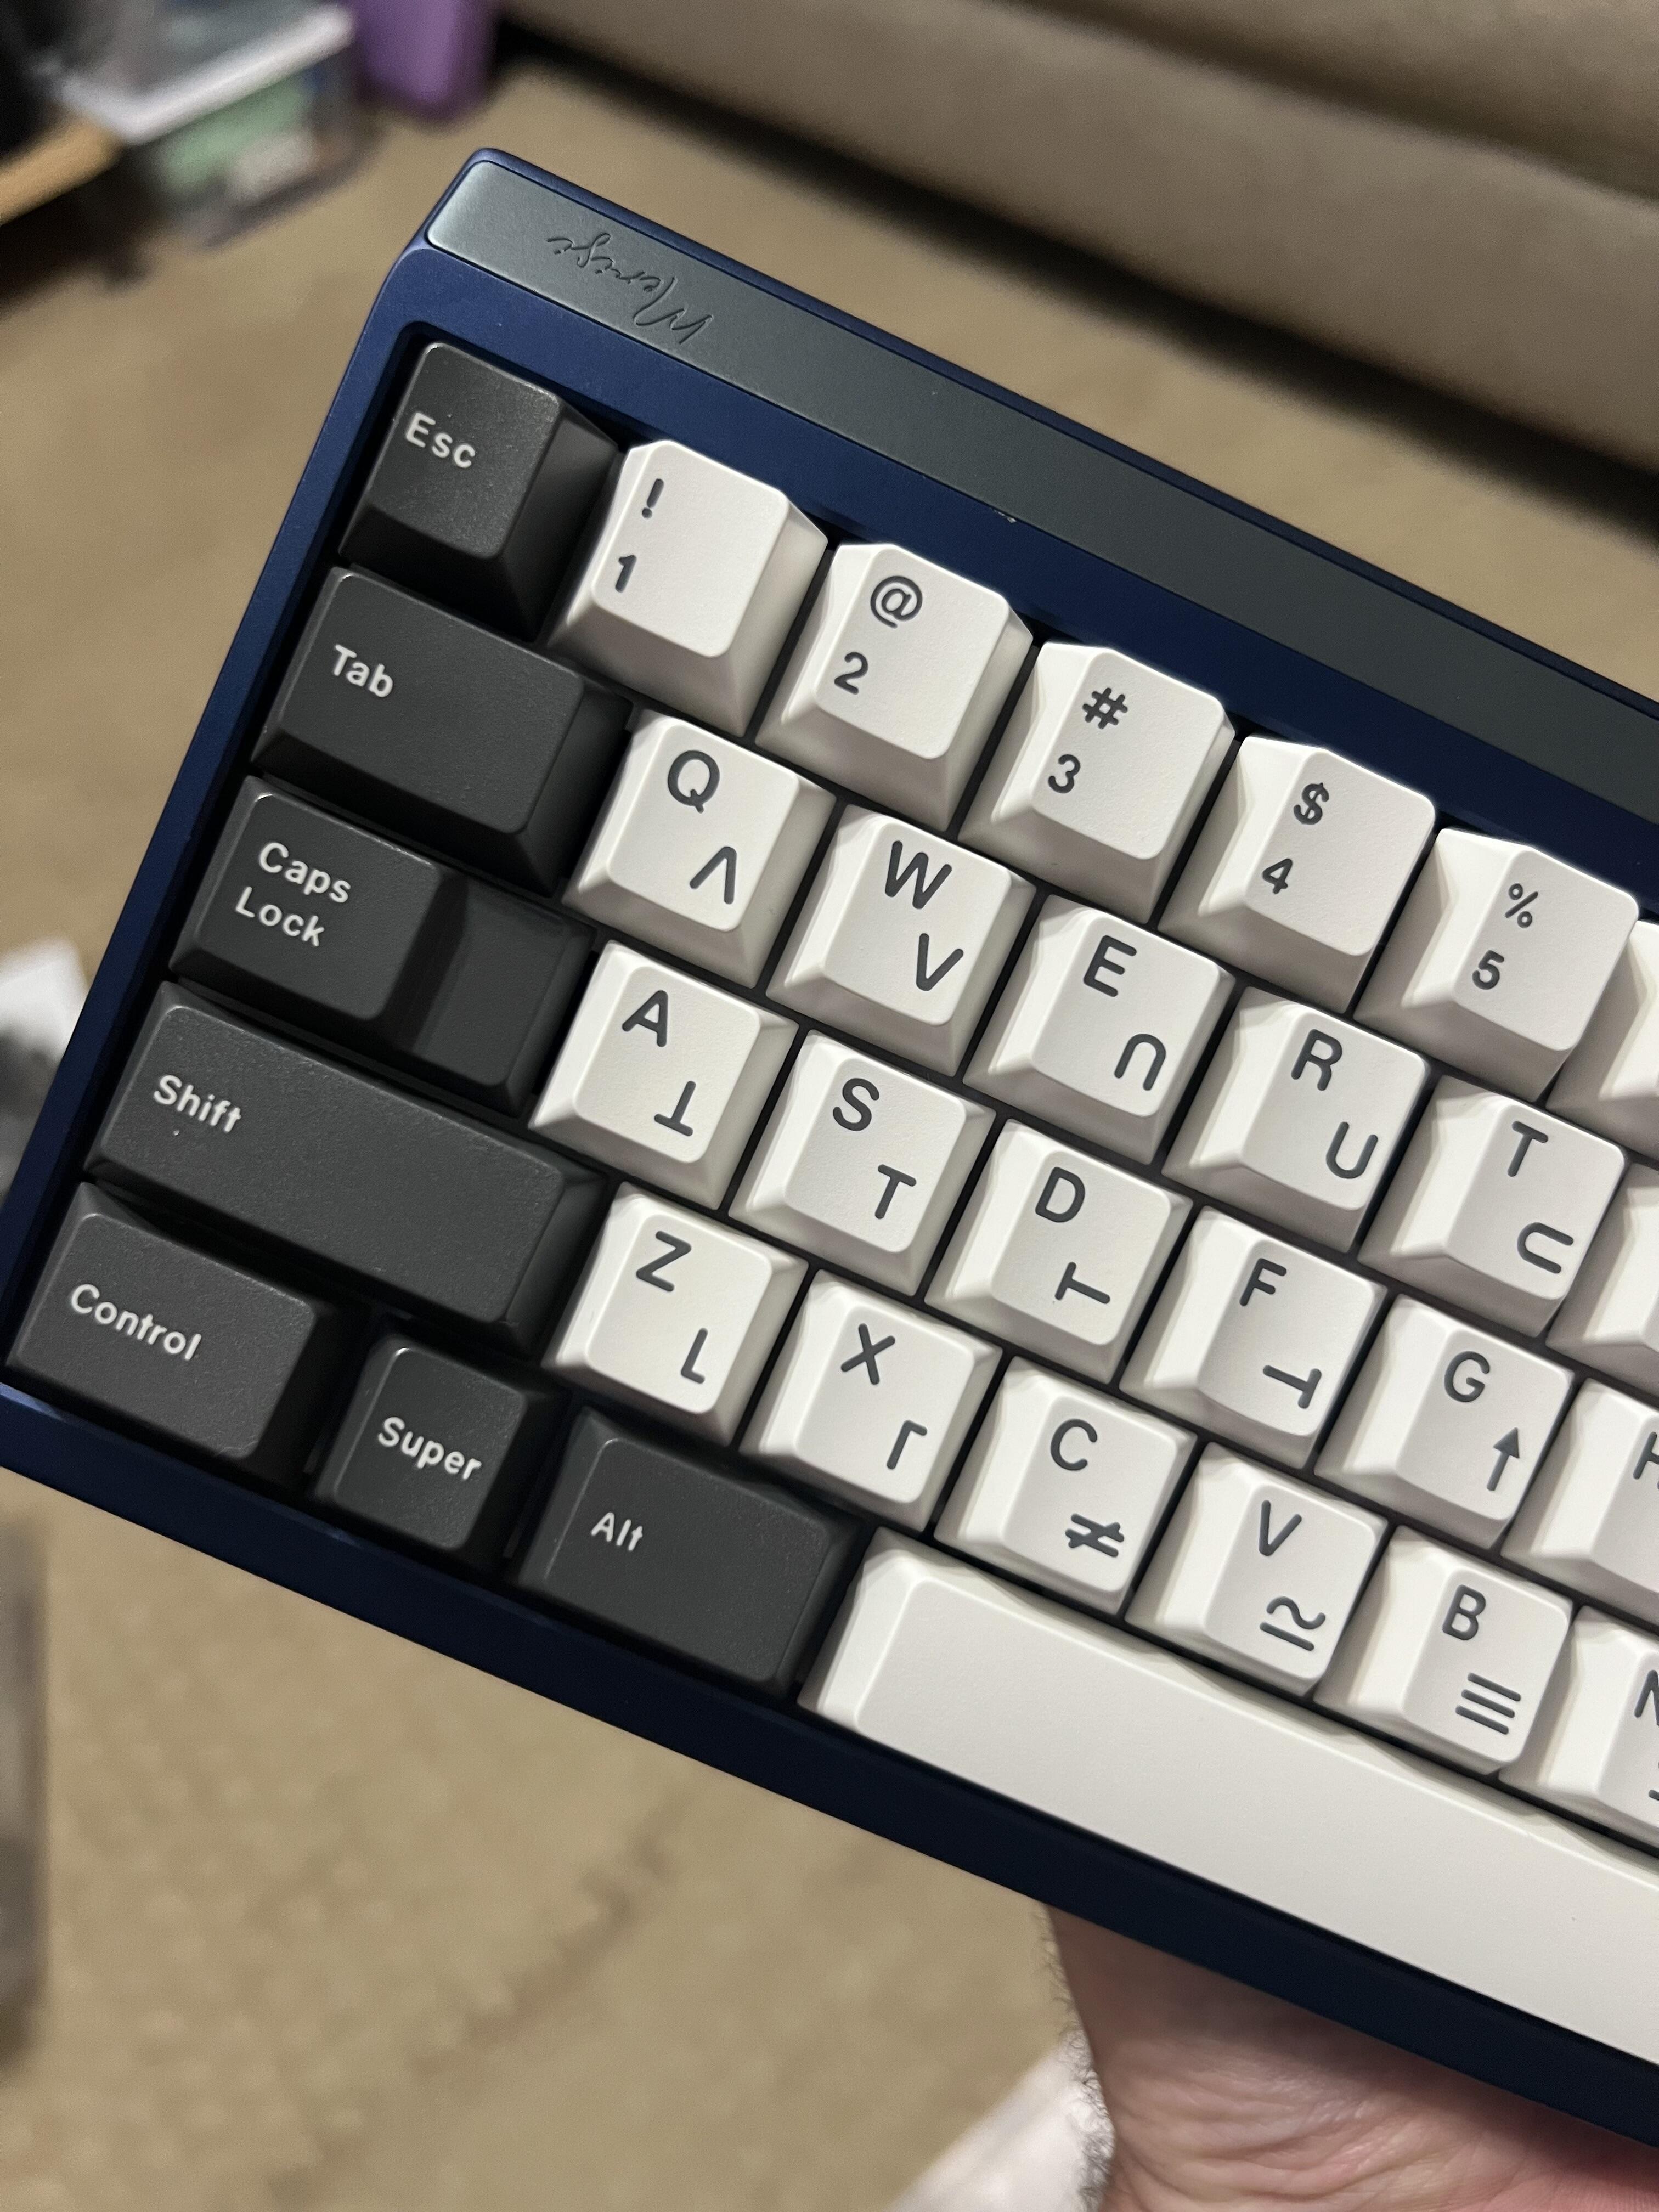
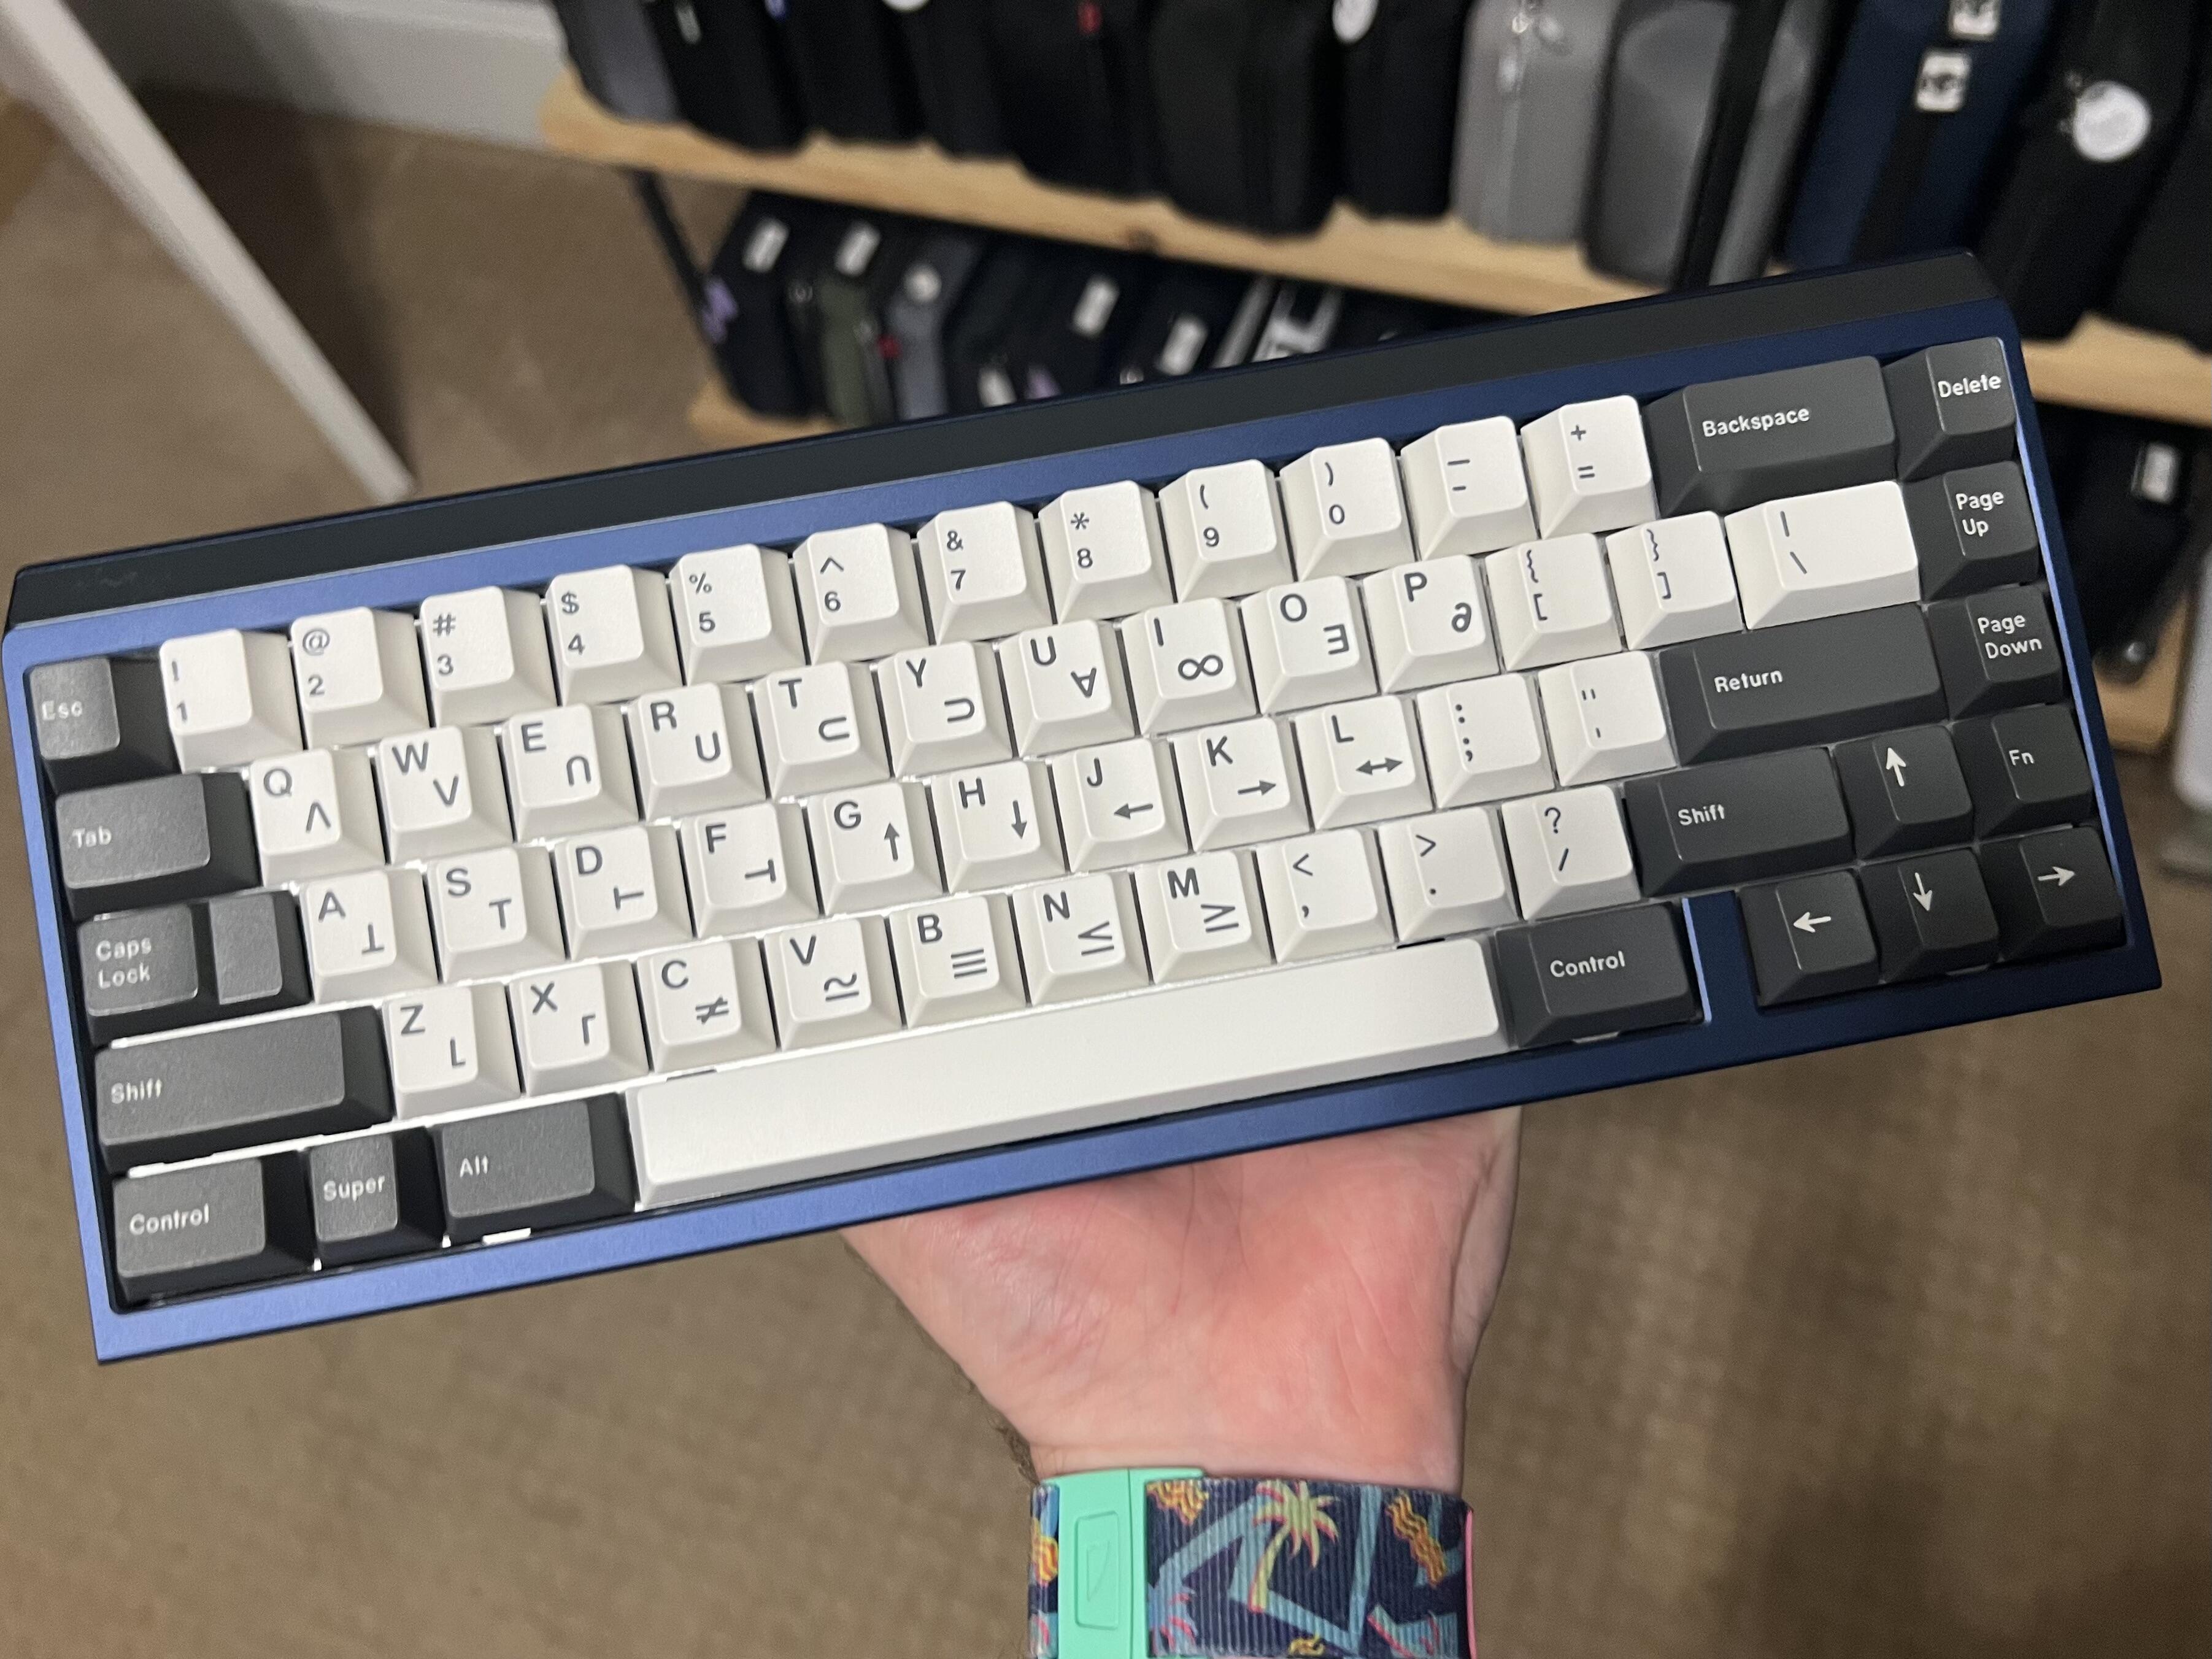
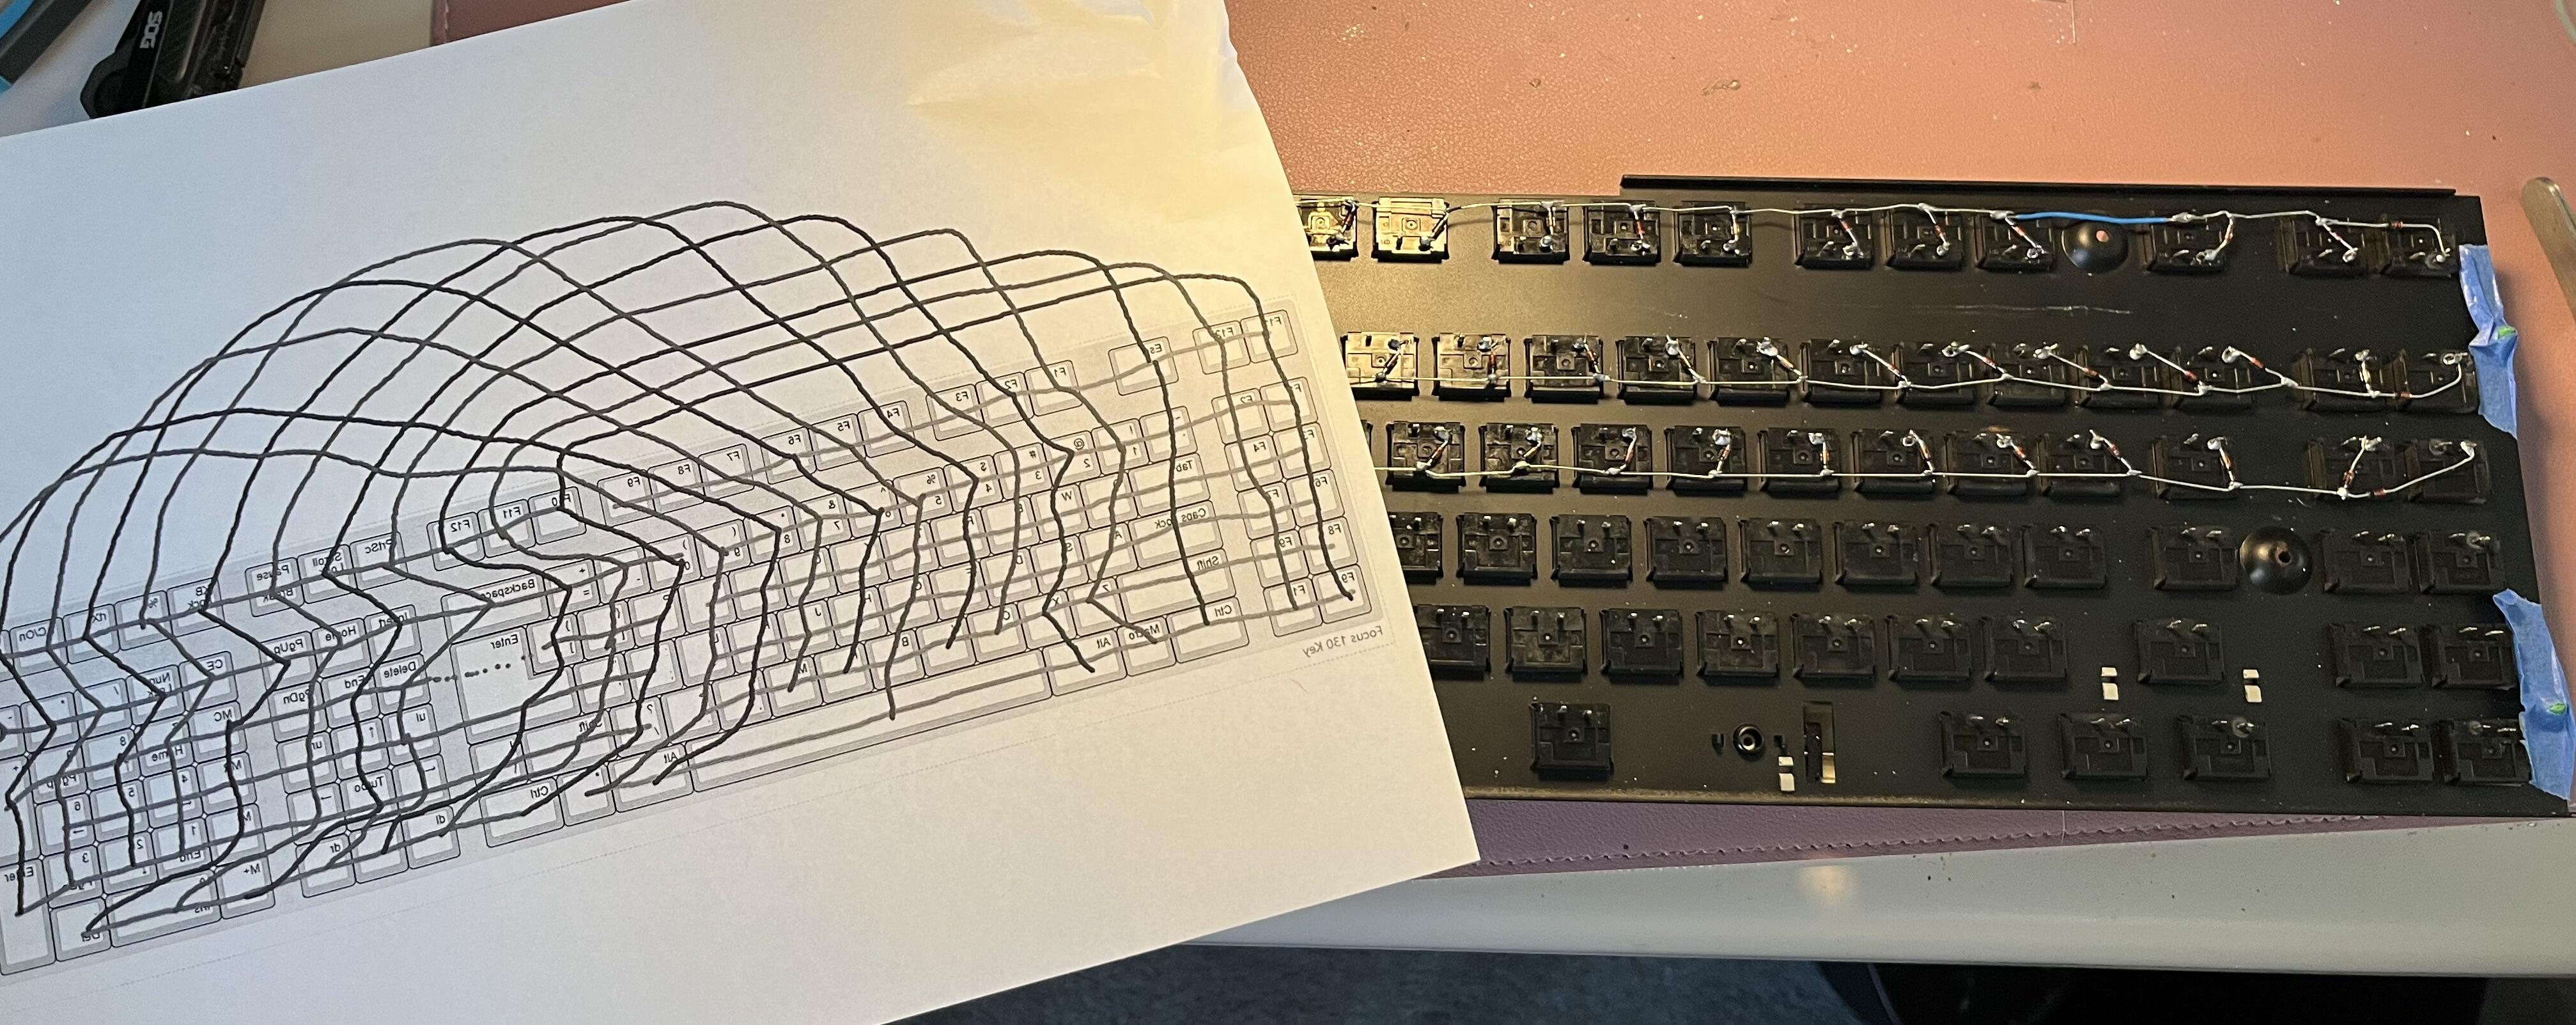
I finally decided that, like Popeye, I yam what I yam what I yam, and what “I yam” is a weirdo who is very happy to hand-wire 130 switches to an MCU and stuff them into a case.
I will indeed lose the FK-5001’s calculator, but I’ll get a fully programmable white Alps battleship with NKRO. I’m still weighing my options for the Calc LCD opening: leave the disconnected calculator PCB to preserve the look, 3D print a blocker with something silly on it, or 3D print a mount for a rotary encoder or a few micro-switch buttons.
If I use an encoder, I may have to give up lock indicators beyond capslock. I have 28 pins. My current matrix uses 24, and the optimal is 23. An Encoder needs 3, or at least 2 if you omit the button or wire it into the matrix (which I’d need to look up how to do since it has a shared ground with the knob directions), and each LED will need one.
Board looks great! I always love your case and keycap combinations!!
You can adjust the bounce a little by moving the foam “fulcrum” farther away from where the arms screw into the case.
I found the stock PCB to be too soft for me and went with the WT60-C PCB from Wilba instead.
Also, remember to make sure your Wilba PCB doesn’t have a slight bend. Almost every Wiba PCB I have ever used has had a slight curve, but you can gently persuade it with a heatgun (or hairdryer) and a hefty book.
I have also heard folks having luck using the tape mod on their PCB is the Salvation’s case ping isn’t quite to your liking.
As for plateless alignment, you might want to pick up this combo from KineticLabs.
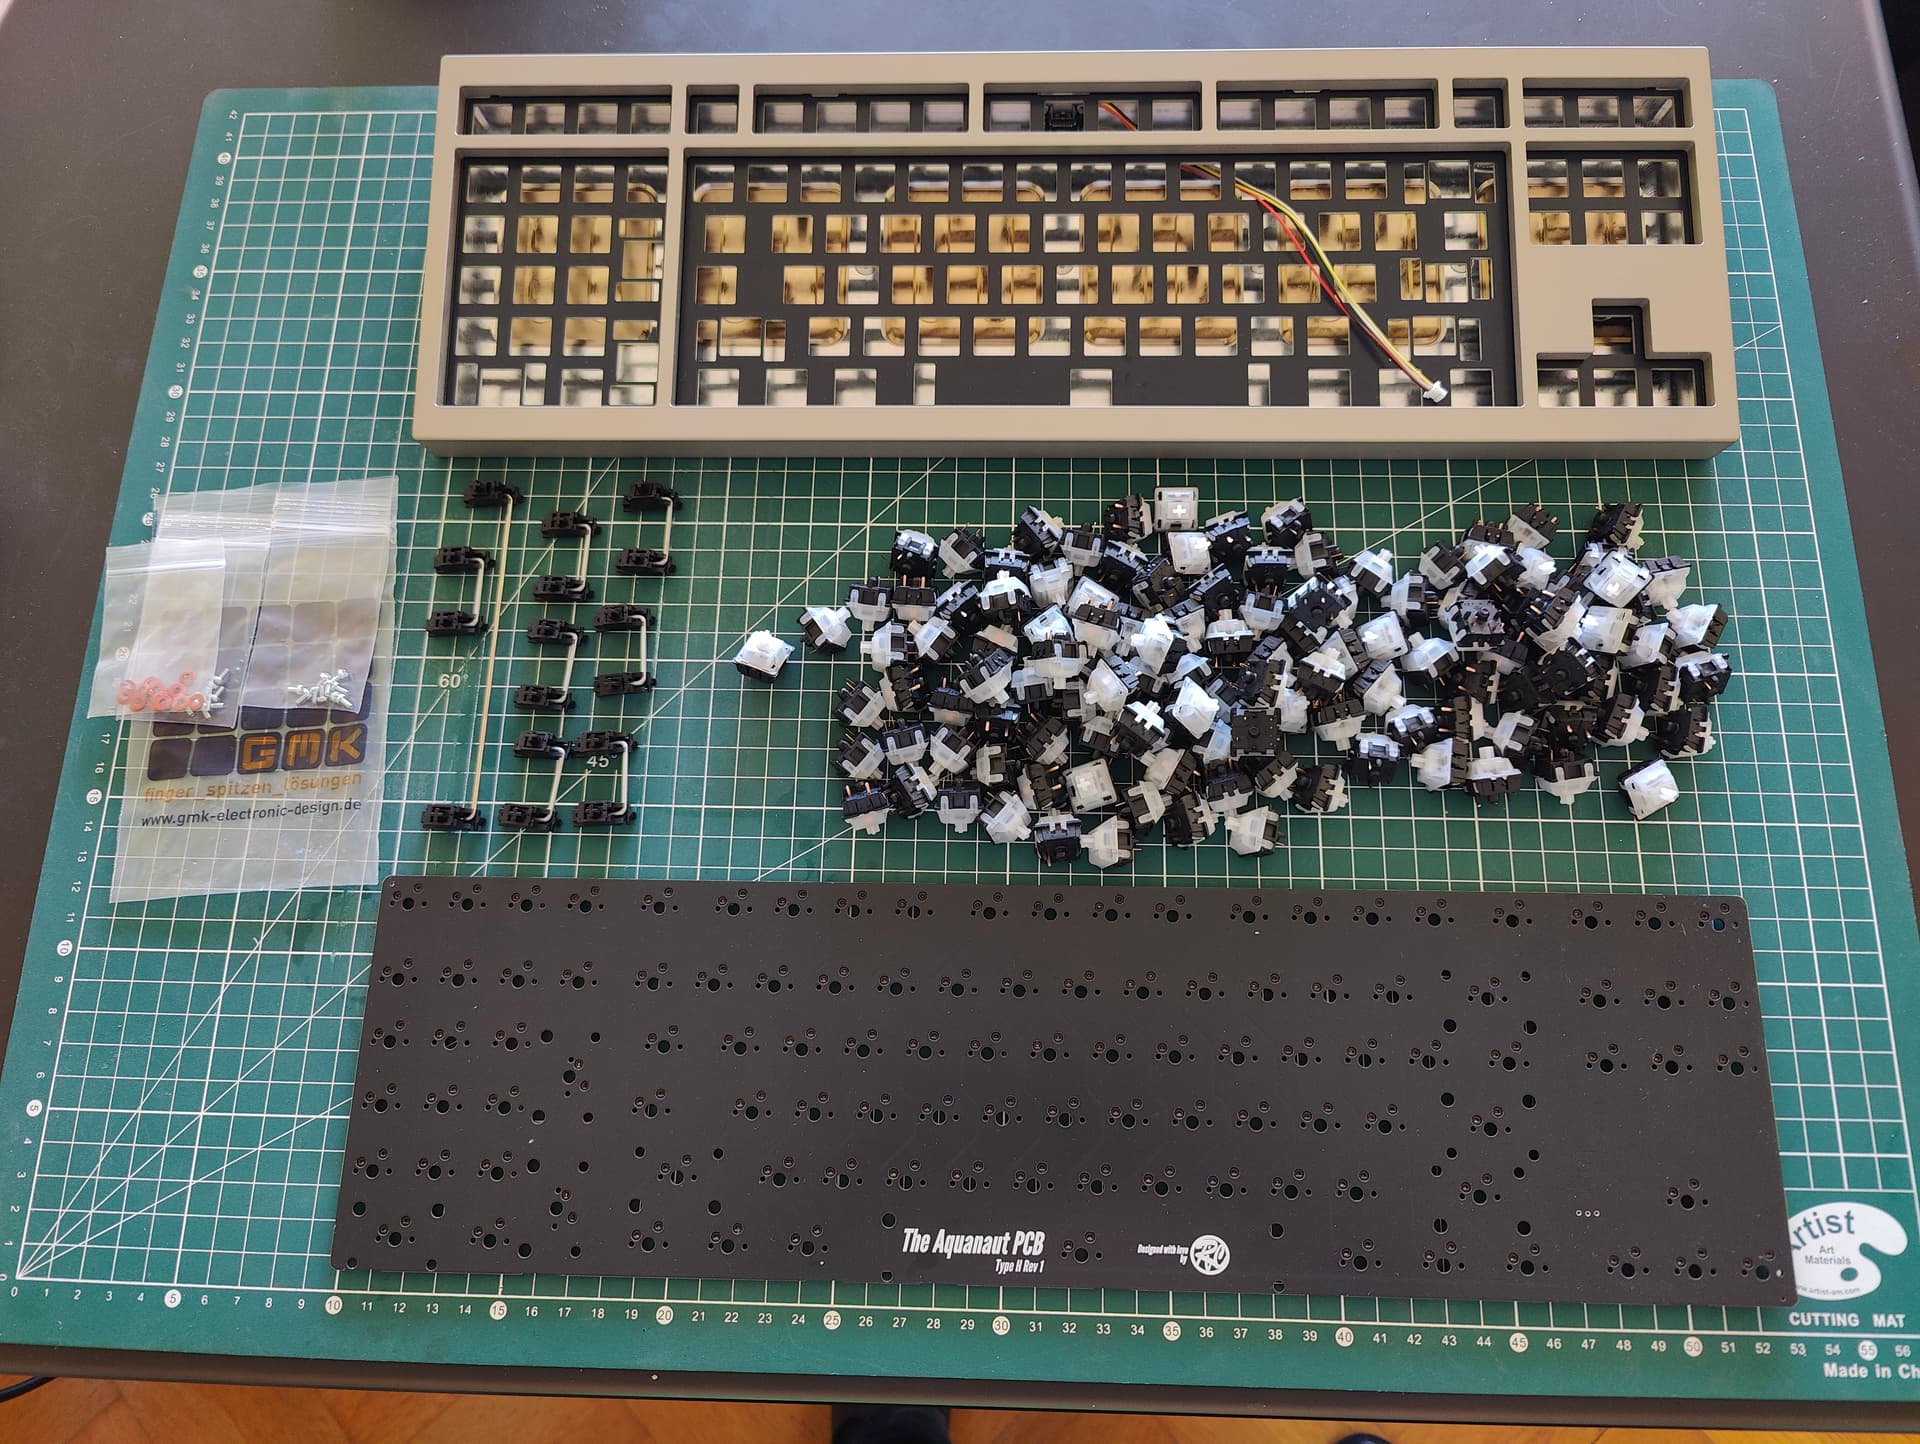
Ready to assemble my second Aquanaut, this time for my work.
This is a temporary build: the final one will use an EC PCB that I designed with the help of past Cipulot work but I am waiting for @Andreas URSA keycaps for this.
As such I selected old basic but still proven parts that I had lying around:
OG Gateron milky top switches that I had a long time ago at a great discount (13 cents a switch !!!), stem only lubed with 205g0, spring swapped to long TX 55g springs and lubed with 105.
OG GMK screw-in stabs, will use dielectric grease for wires and 205g0 for housing.
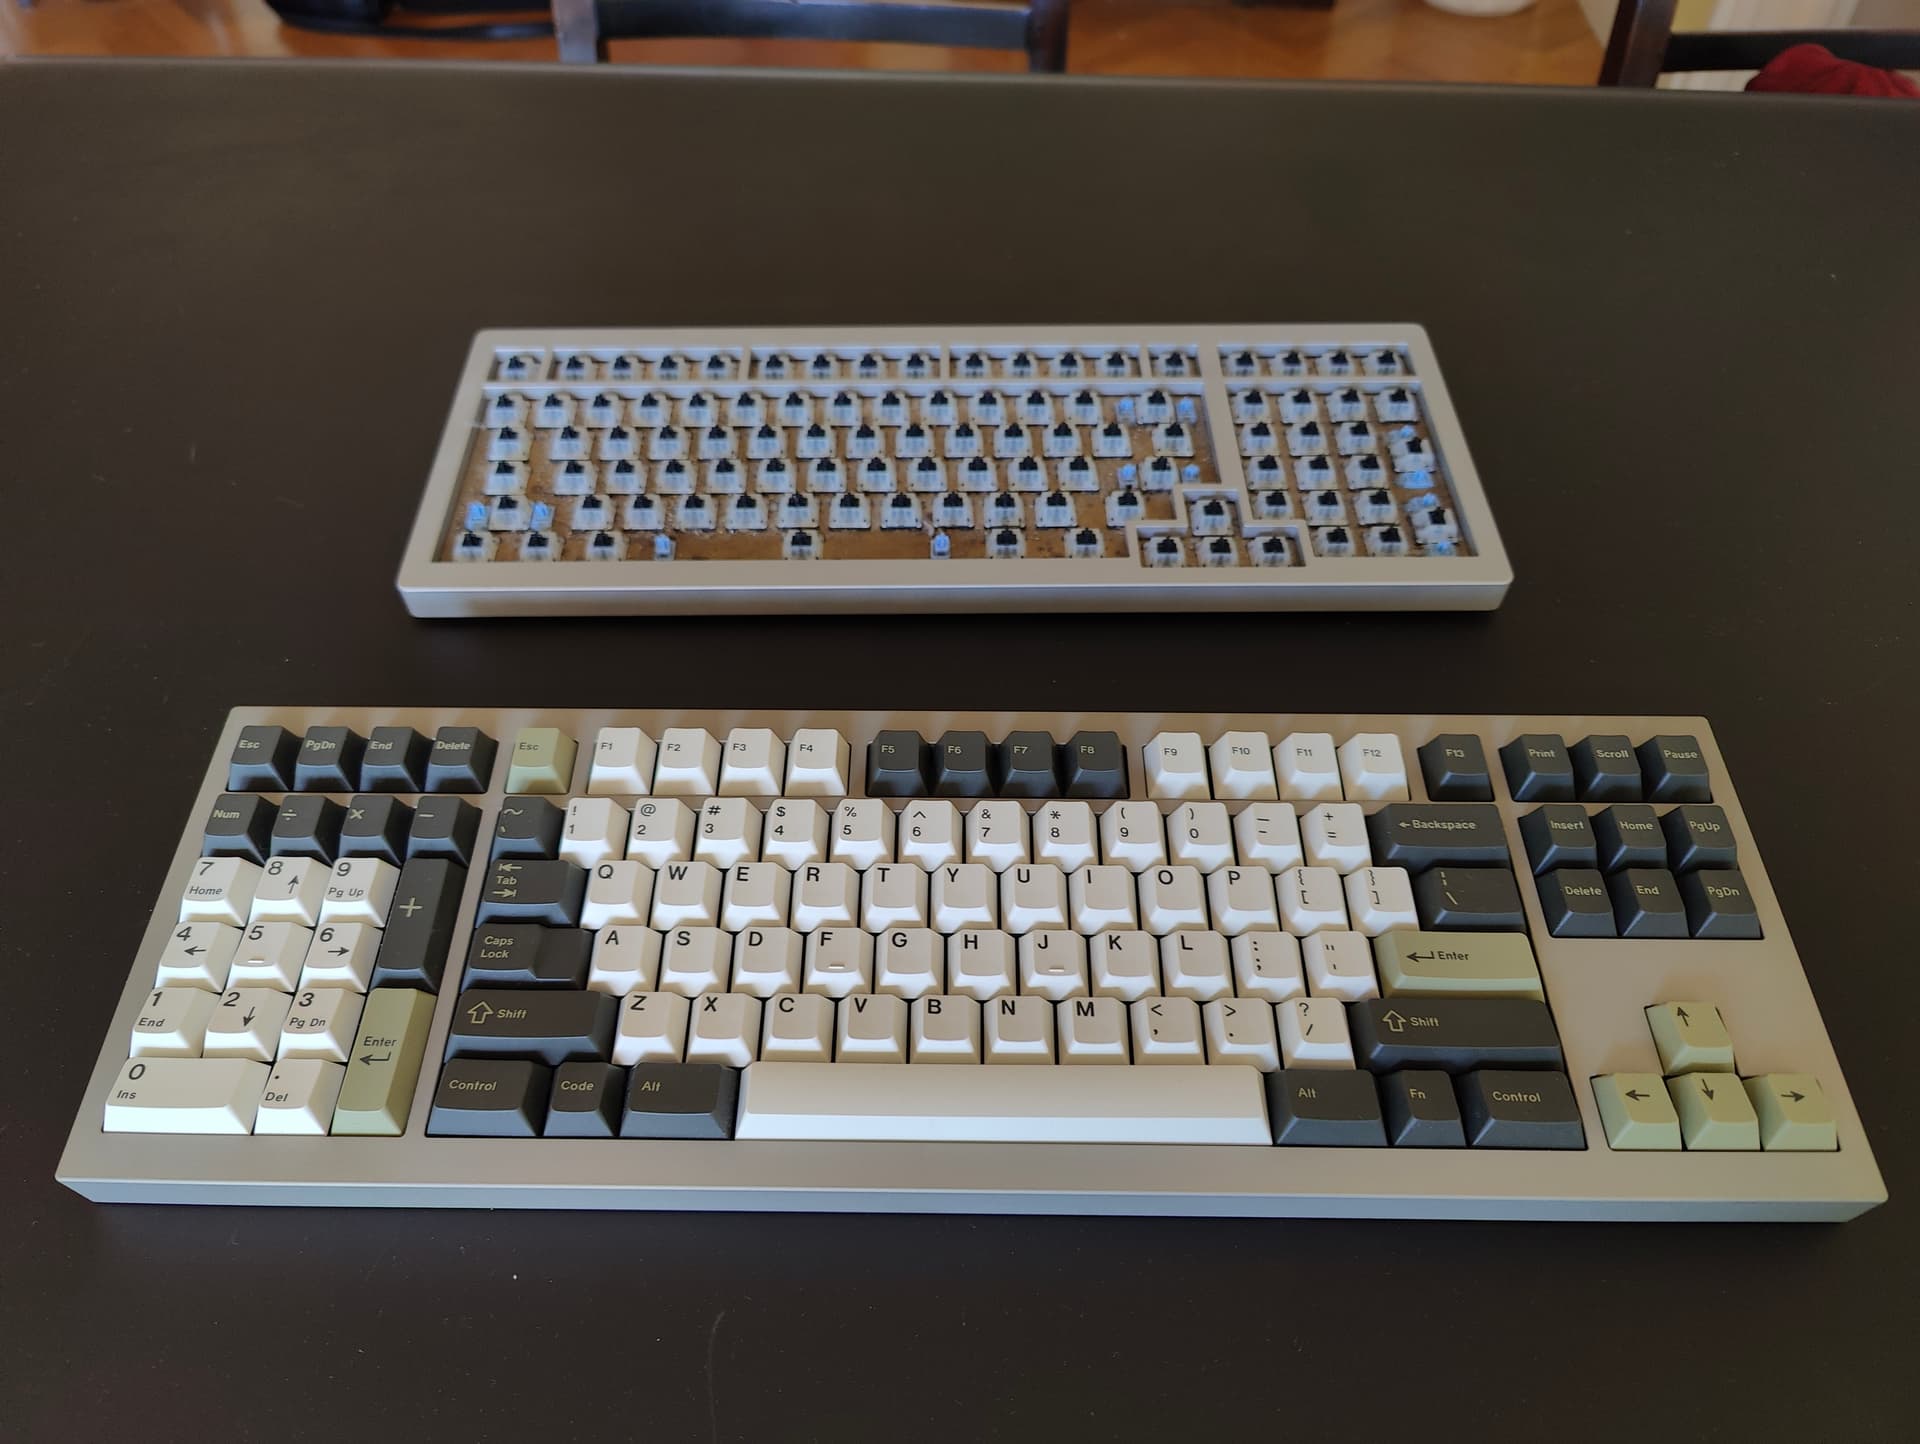
I removed the Olive keycaps from my good old Winghead (has been in daily use for 6 years now, time for him to retire) to populate the Aquanaut.
Olive goes well with the anodization color of the board
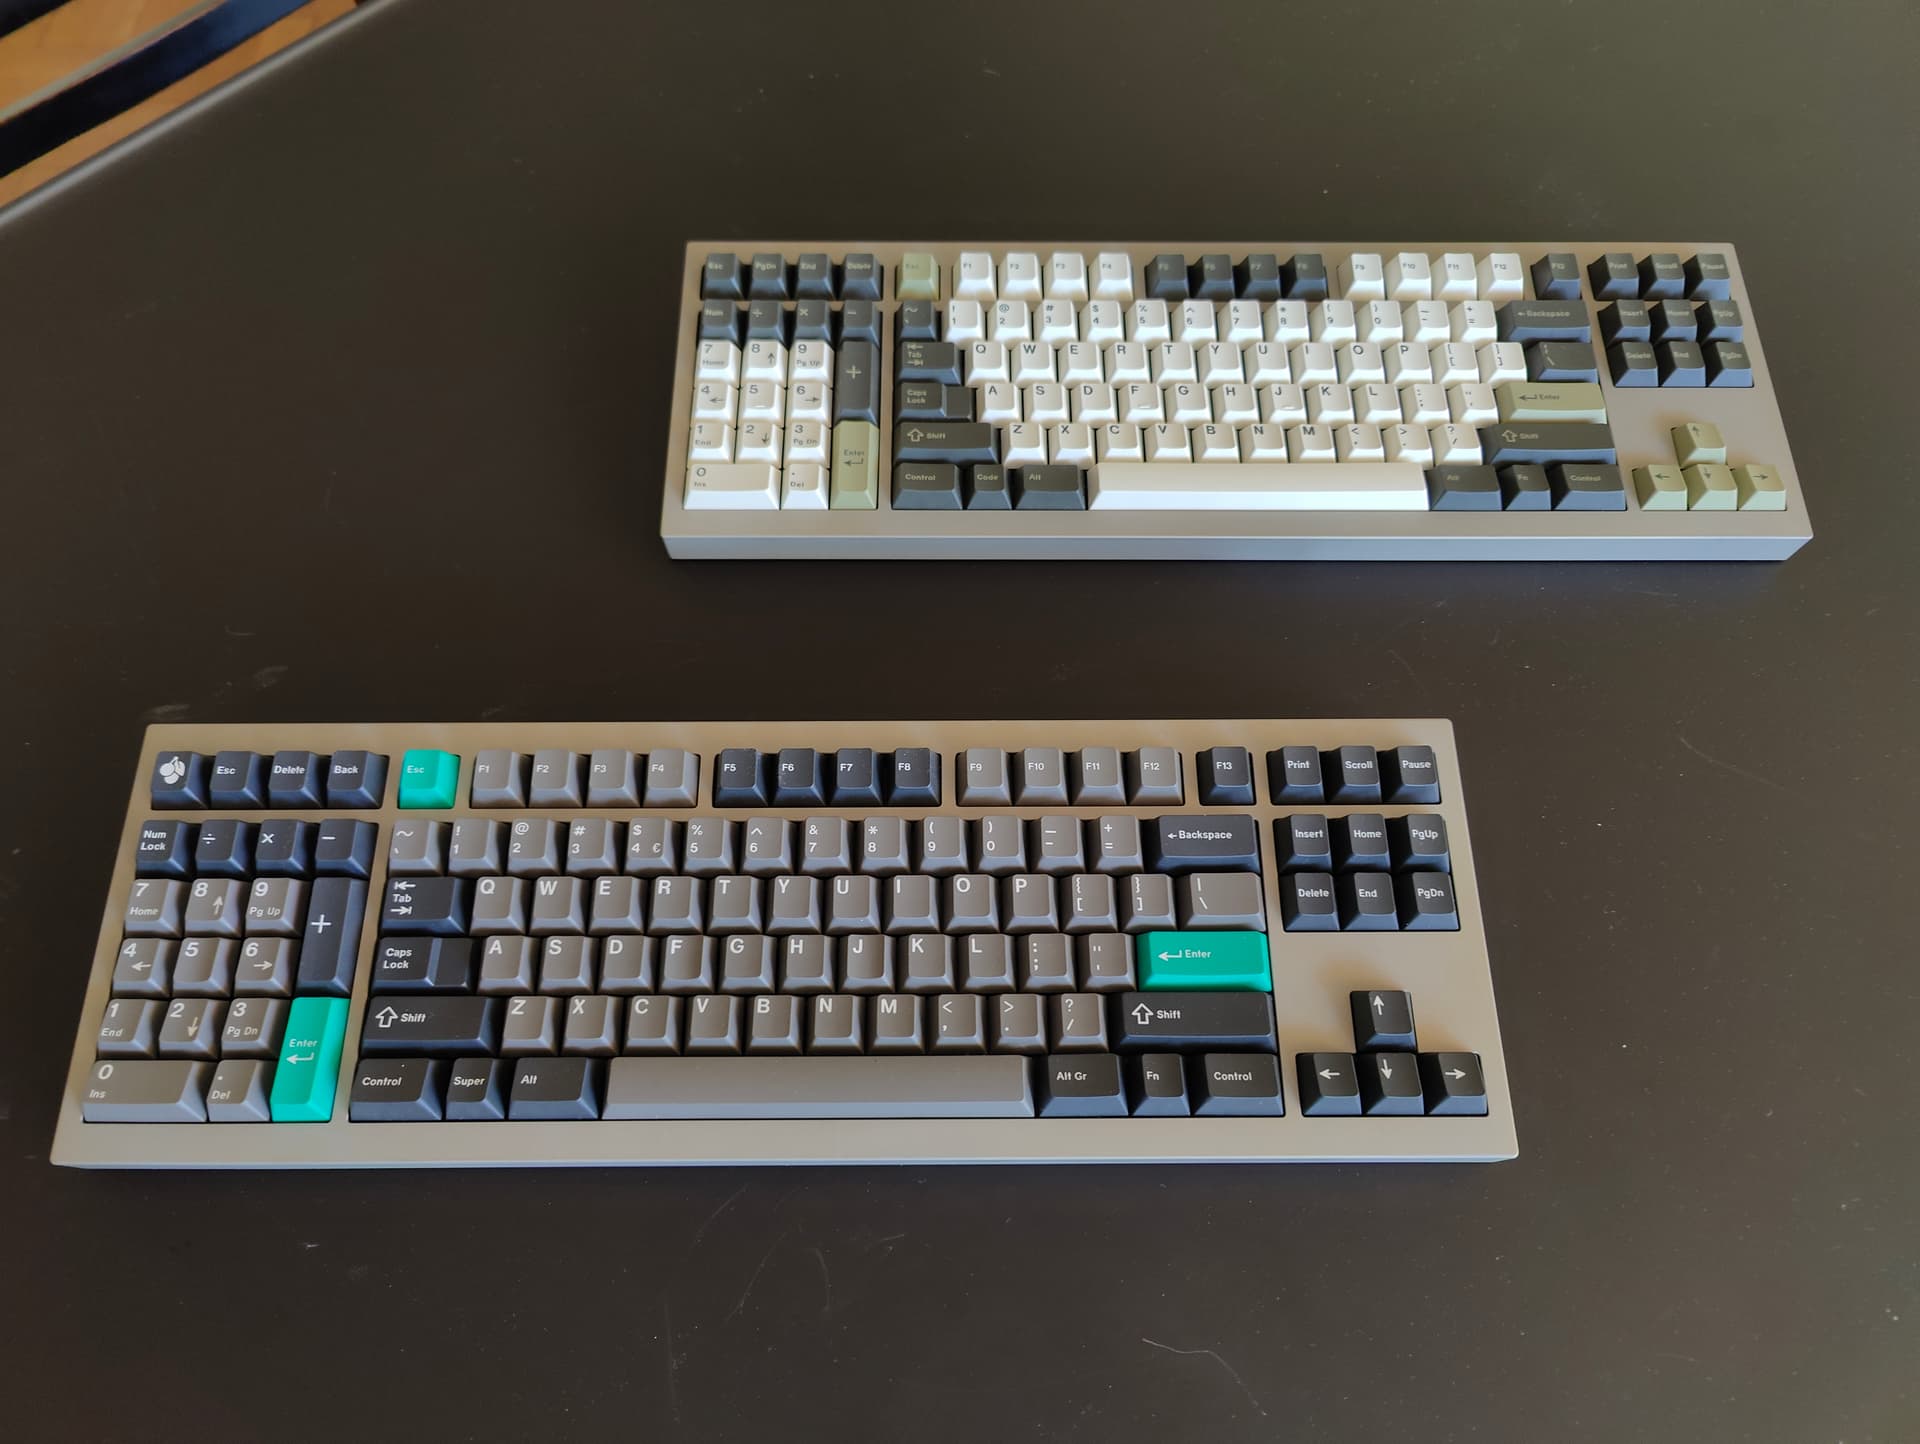
Last pictures of the two Aquanauts together before the Olive one goes to my workspace
As promised above. Finally got around to making fresh public repos for these from my draft repos. Feel like the README took as long as making the actual schematic .
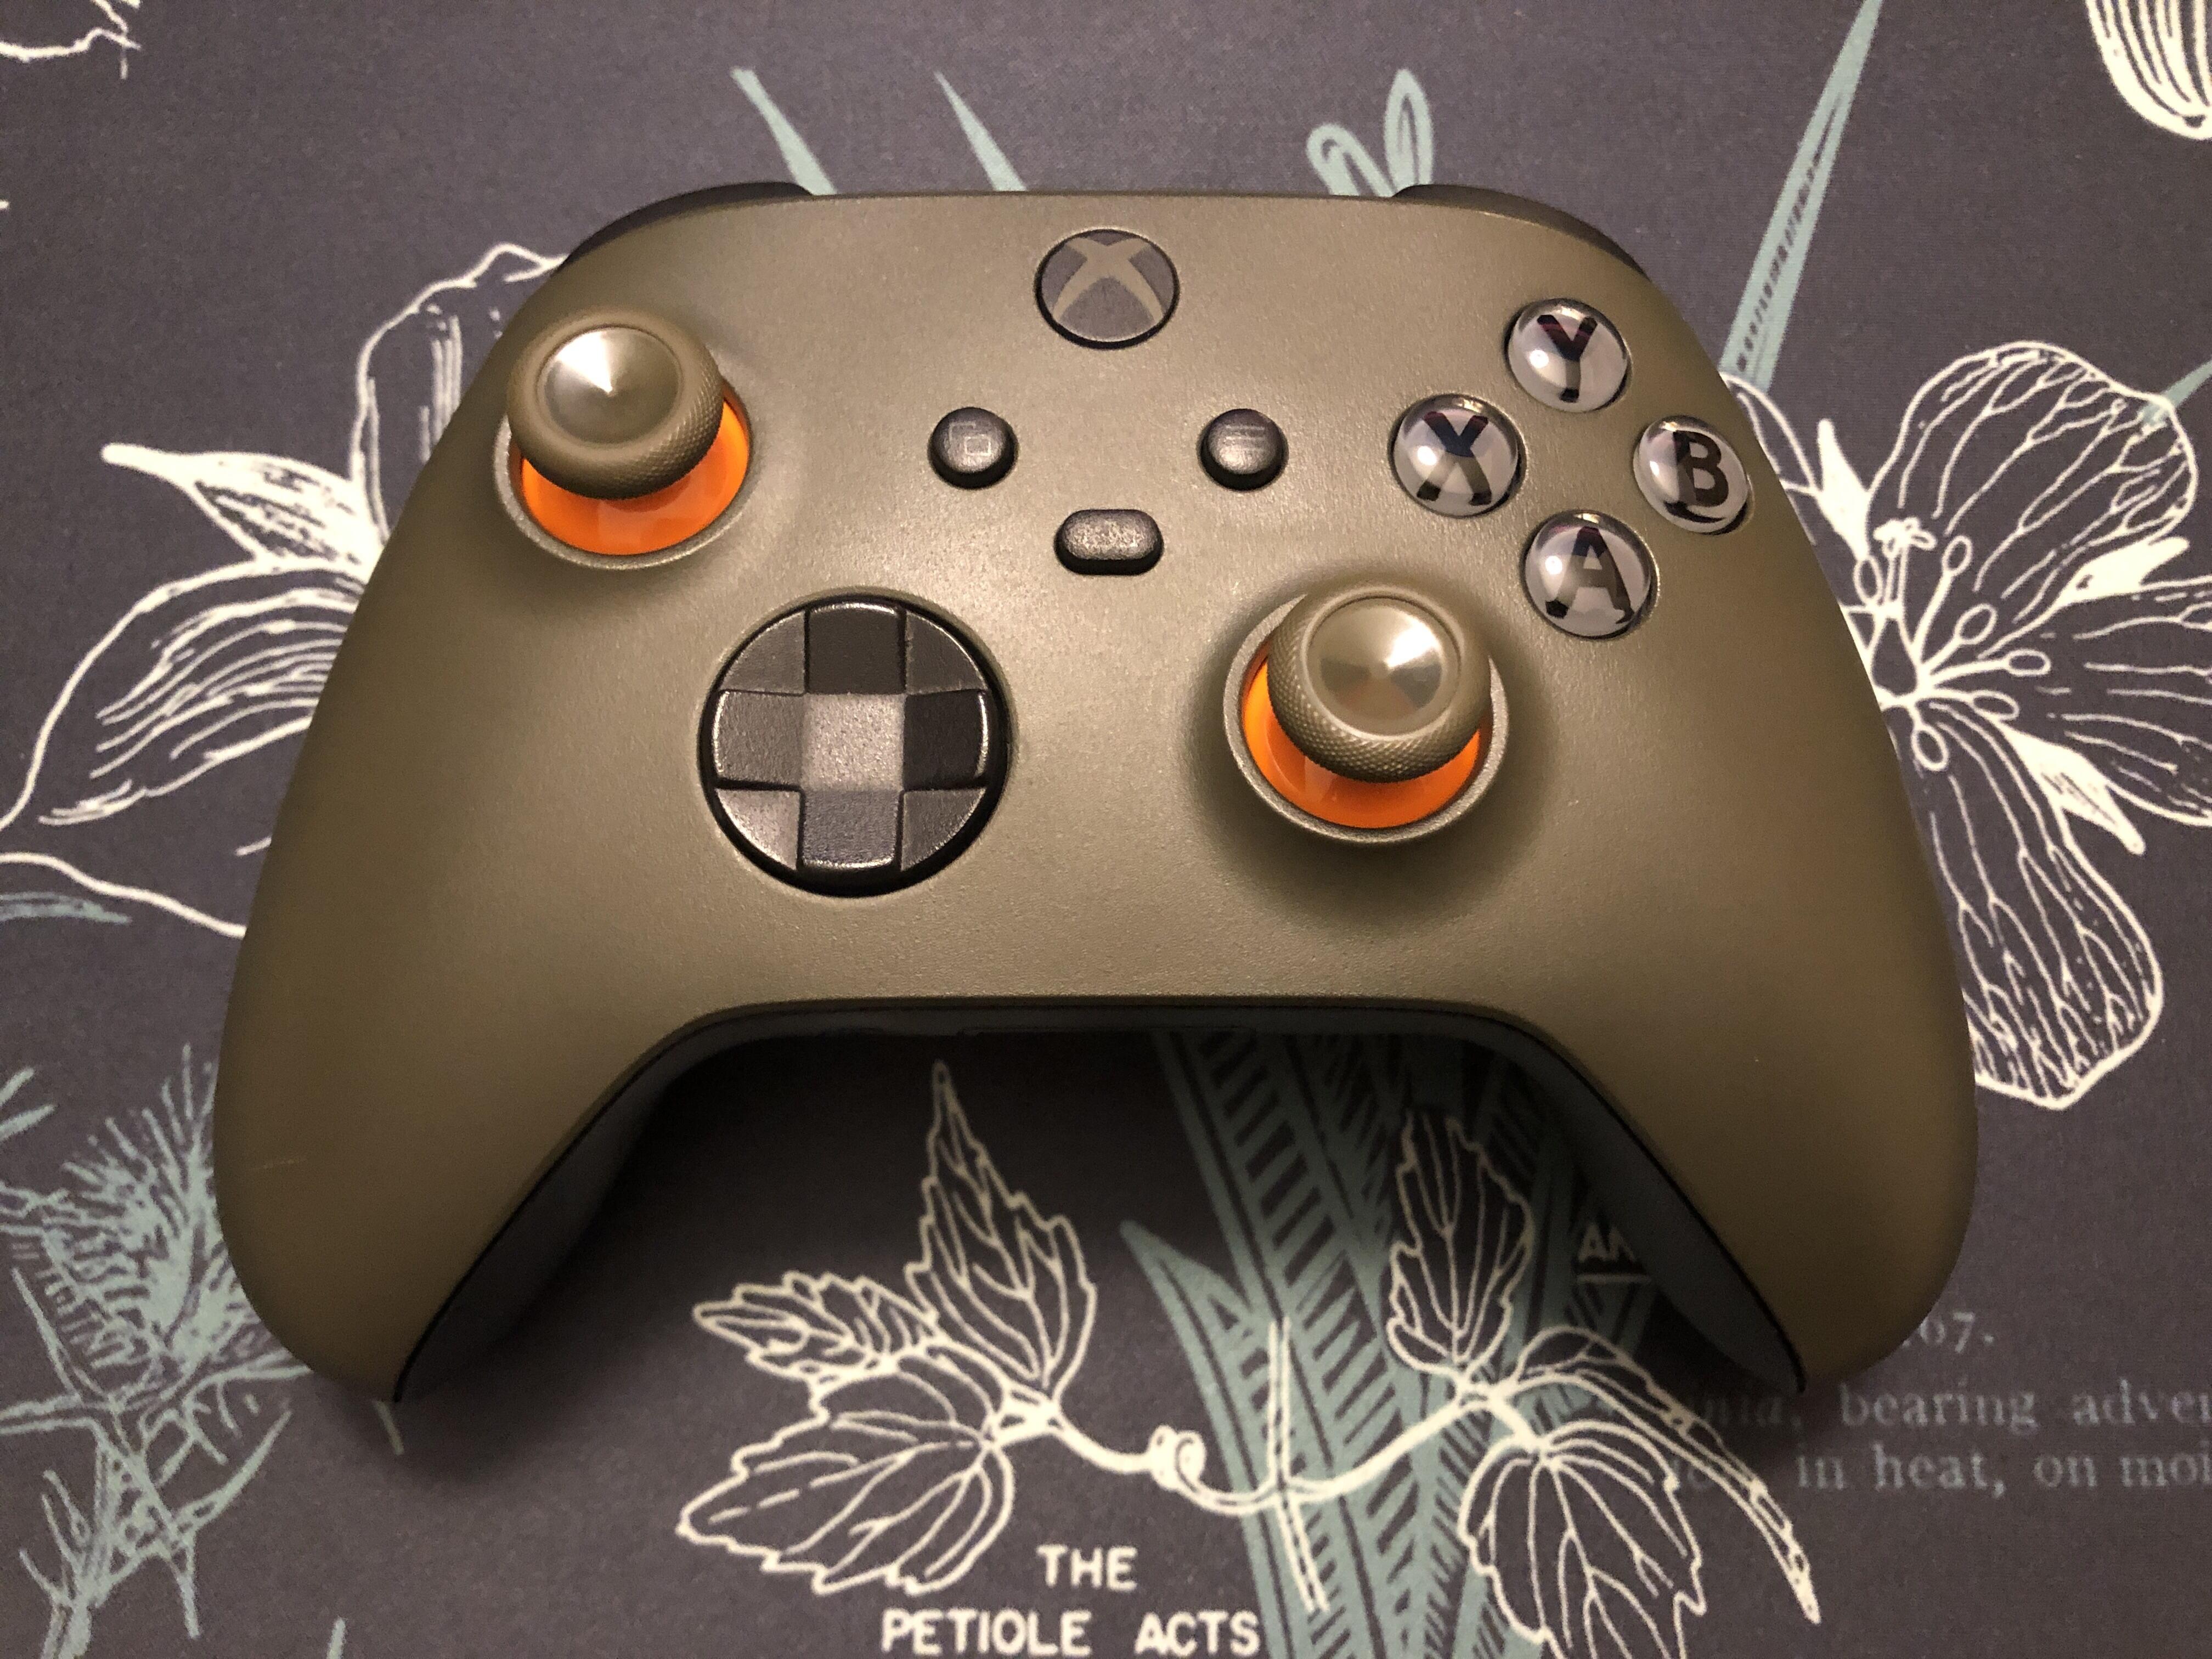
I finally fixed this Xbox Series controller, which hasn’t worked right since the day I got it.
More details and another photo or two
I’ve actually opened this thing up quite a few times trying to find out why the face buttons had weak, chattery input. I replaced the dome pads underneath the buttons, but that didn’t really work. I tried adding some material between the domes and buttons to help them make contact - that helped, but didn’t really work either.
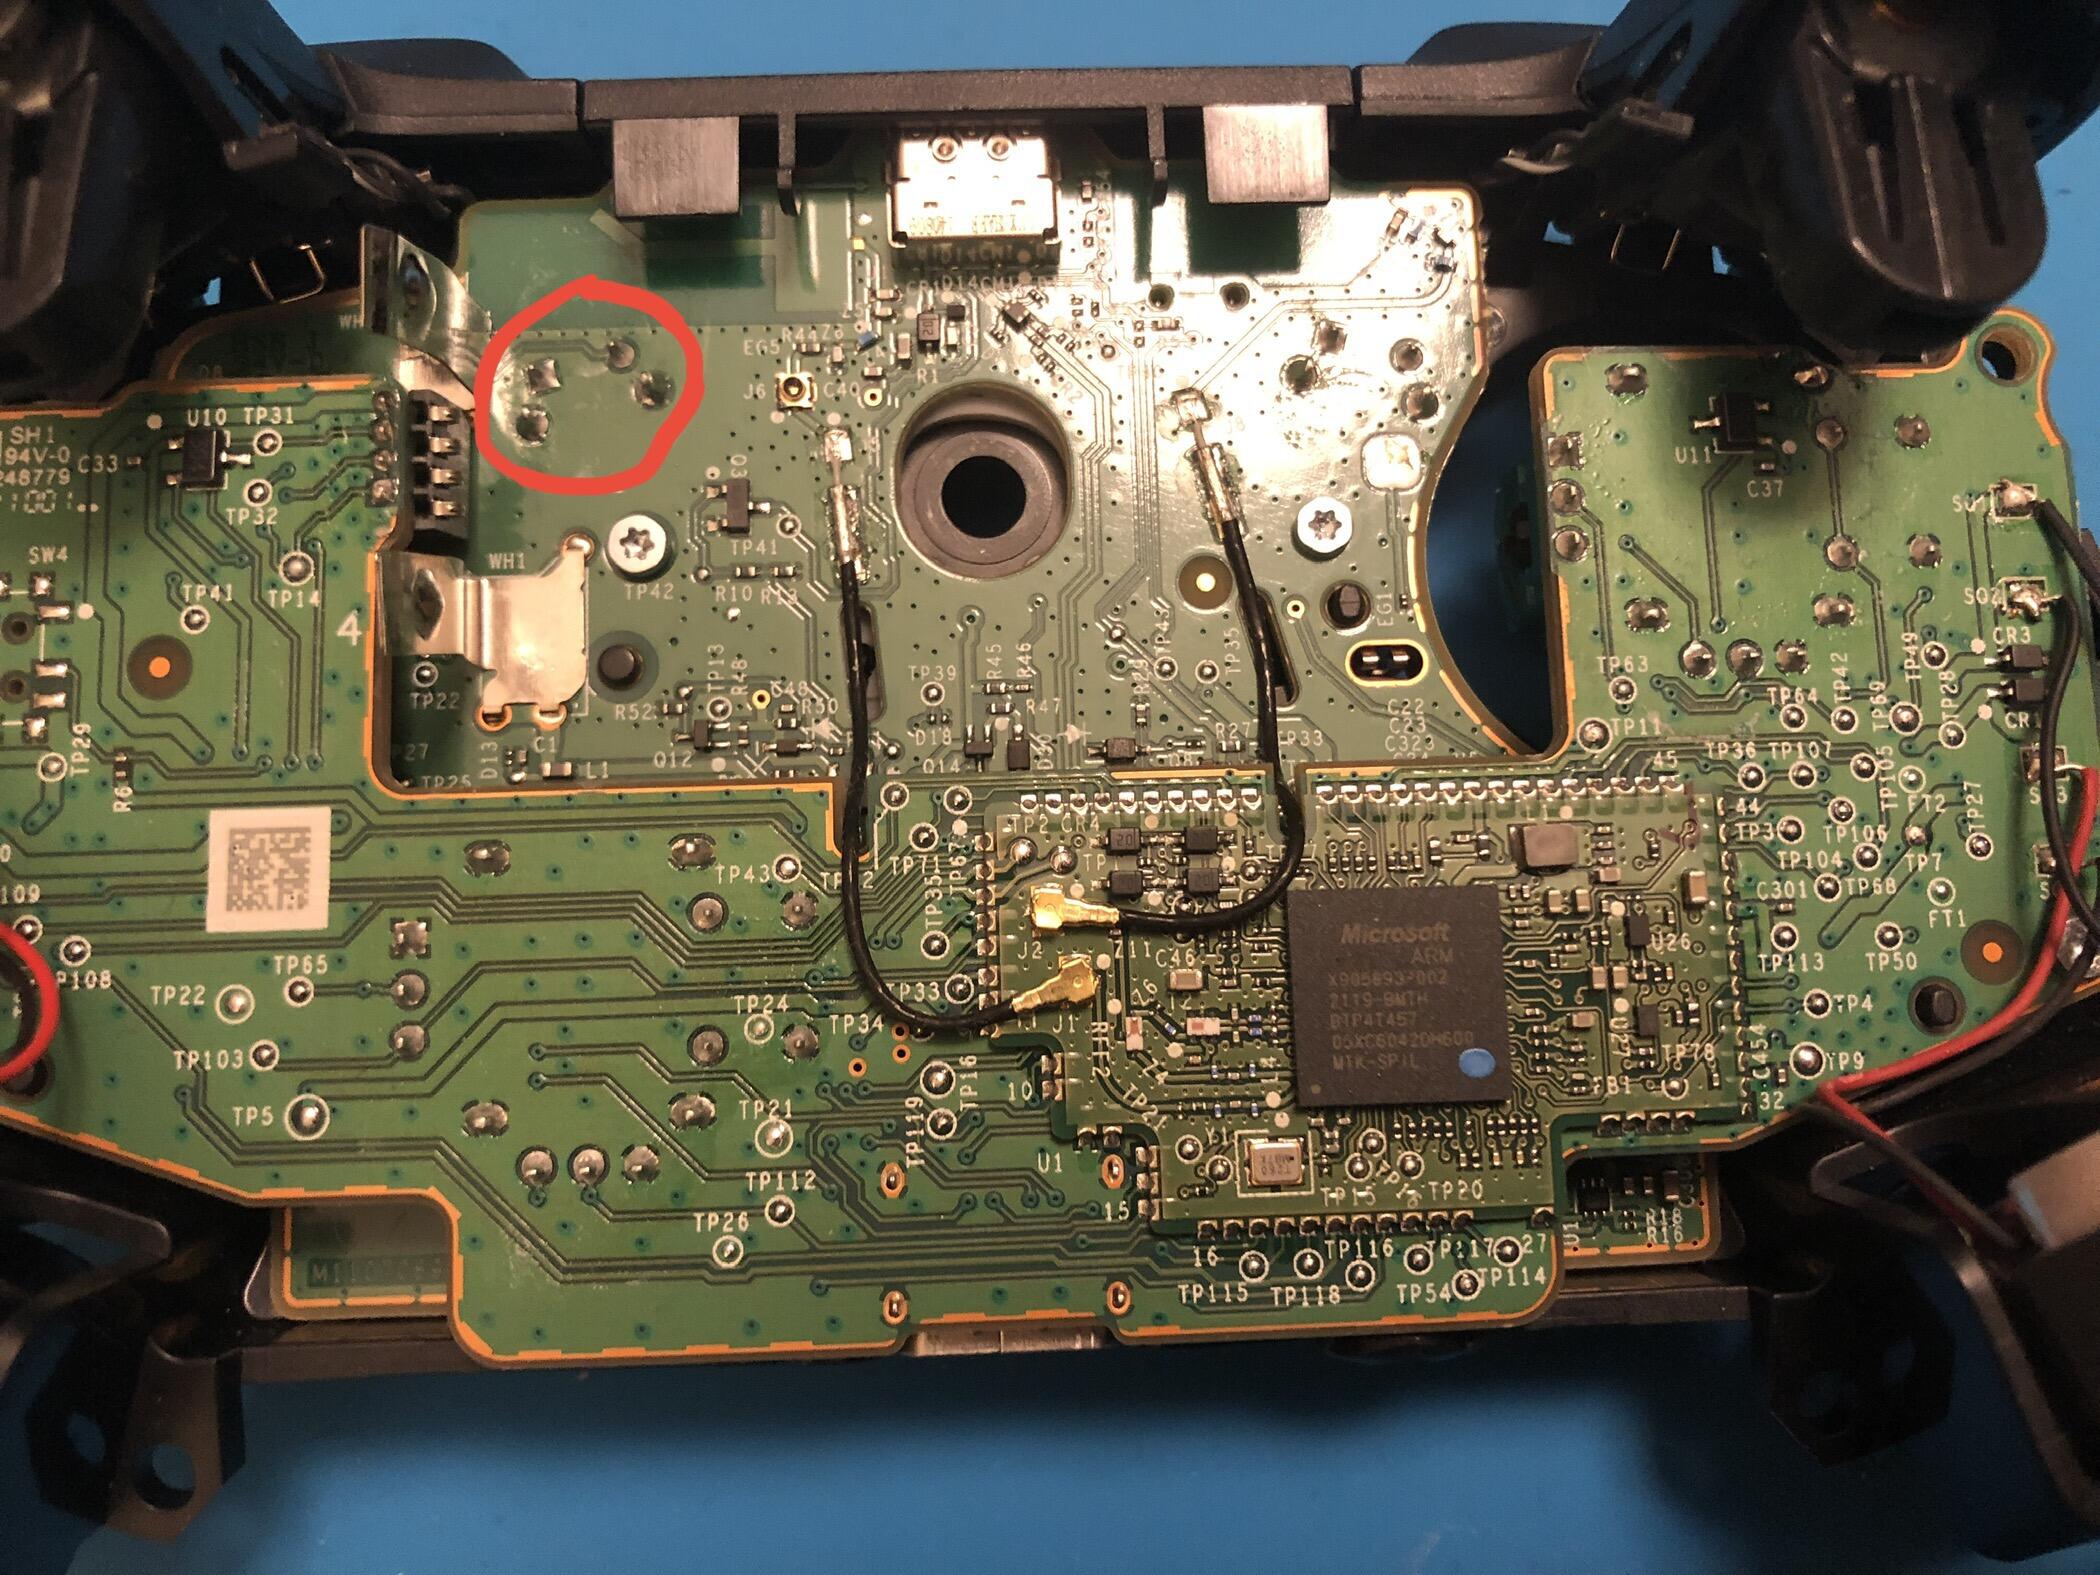
The culprit? Excessive soldering flux from the factory covering the contacts on the PCB.
I’d have never even recognized what it was if not for my experience soldering keyboards - and in fact I didn’t when I first opened this thing like 5 years ago. (Jeez, time flies… I still think of this thing as “new”) - but this time after the buttons were still chattering I took a closer look and saw the flux. A little wiping with an alcohol pad and bam, working like it always should have. Ha, I am so pleased.
During a previous repair attempt, I’d damaged one of the microswitches for the shoulder buttons - so I soldered-in a more fresh one from a donor controller. The 4 pins circled above. A little more challenging than an MX-pattern switch having smaller pins, but same process.
Also earlier on, I removed the LED under the home button, because those things drive me nuts.
These things are pretty difficult to take apart and re-assemble; maybe a notch or two below the complexity of a modern phone, mostly because one of the two PCBs is tethered by a bunch of soldered-on cables which leave very little room to maneuver the other PCB in and out of place. I’m pretty familiar with the process now, though, ha.
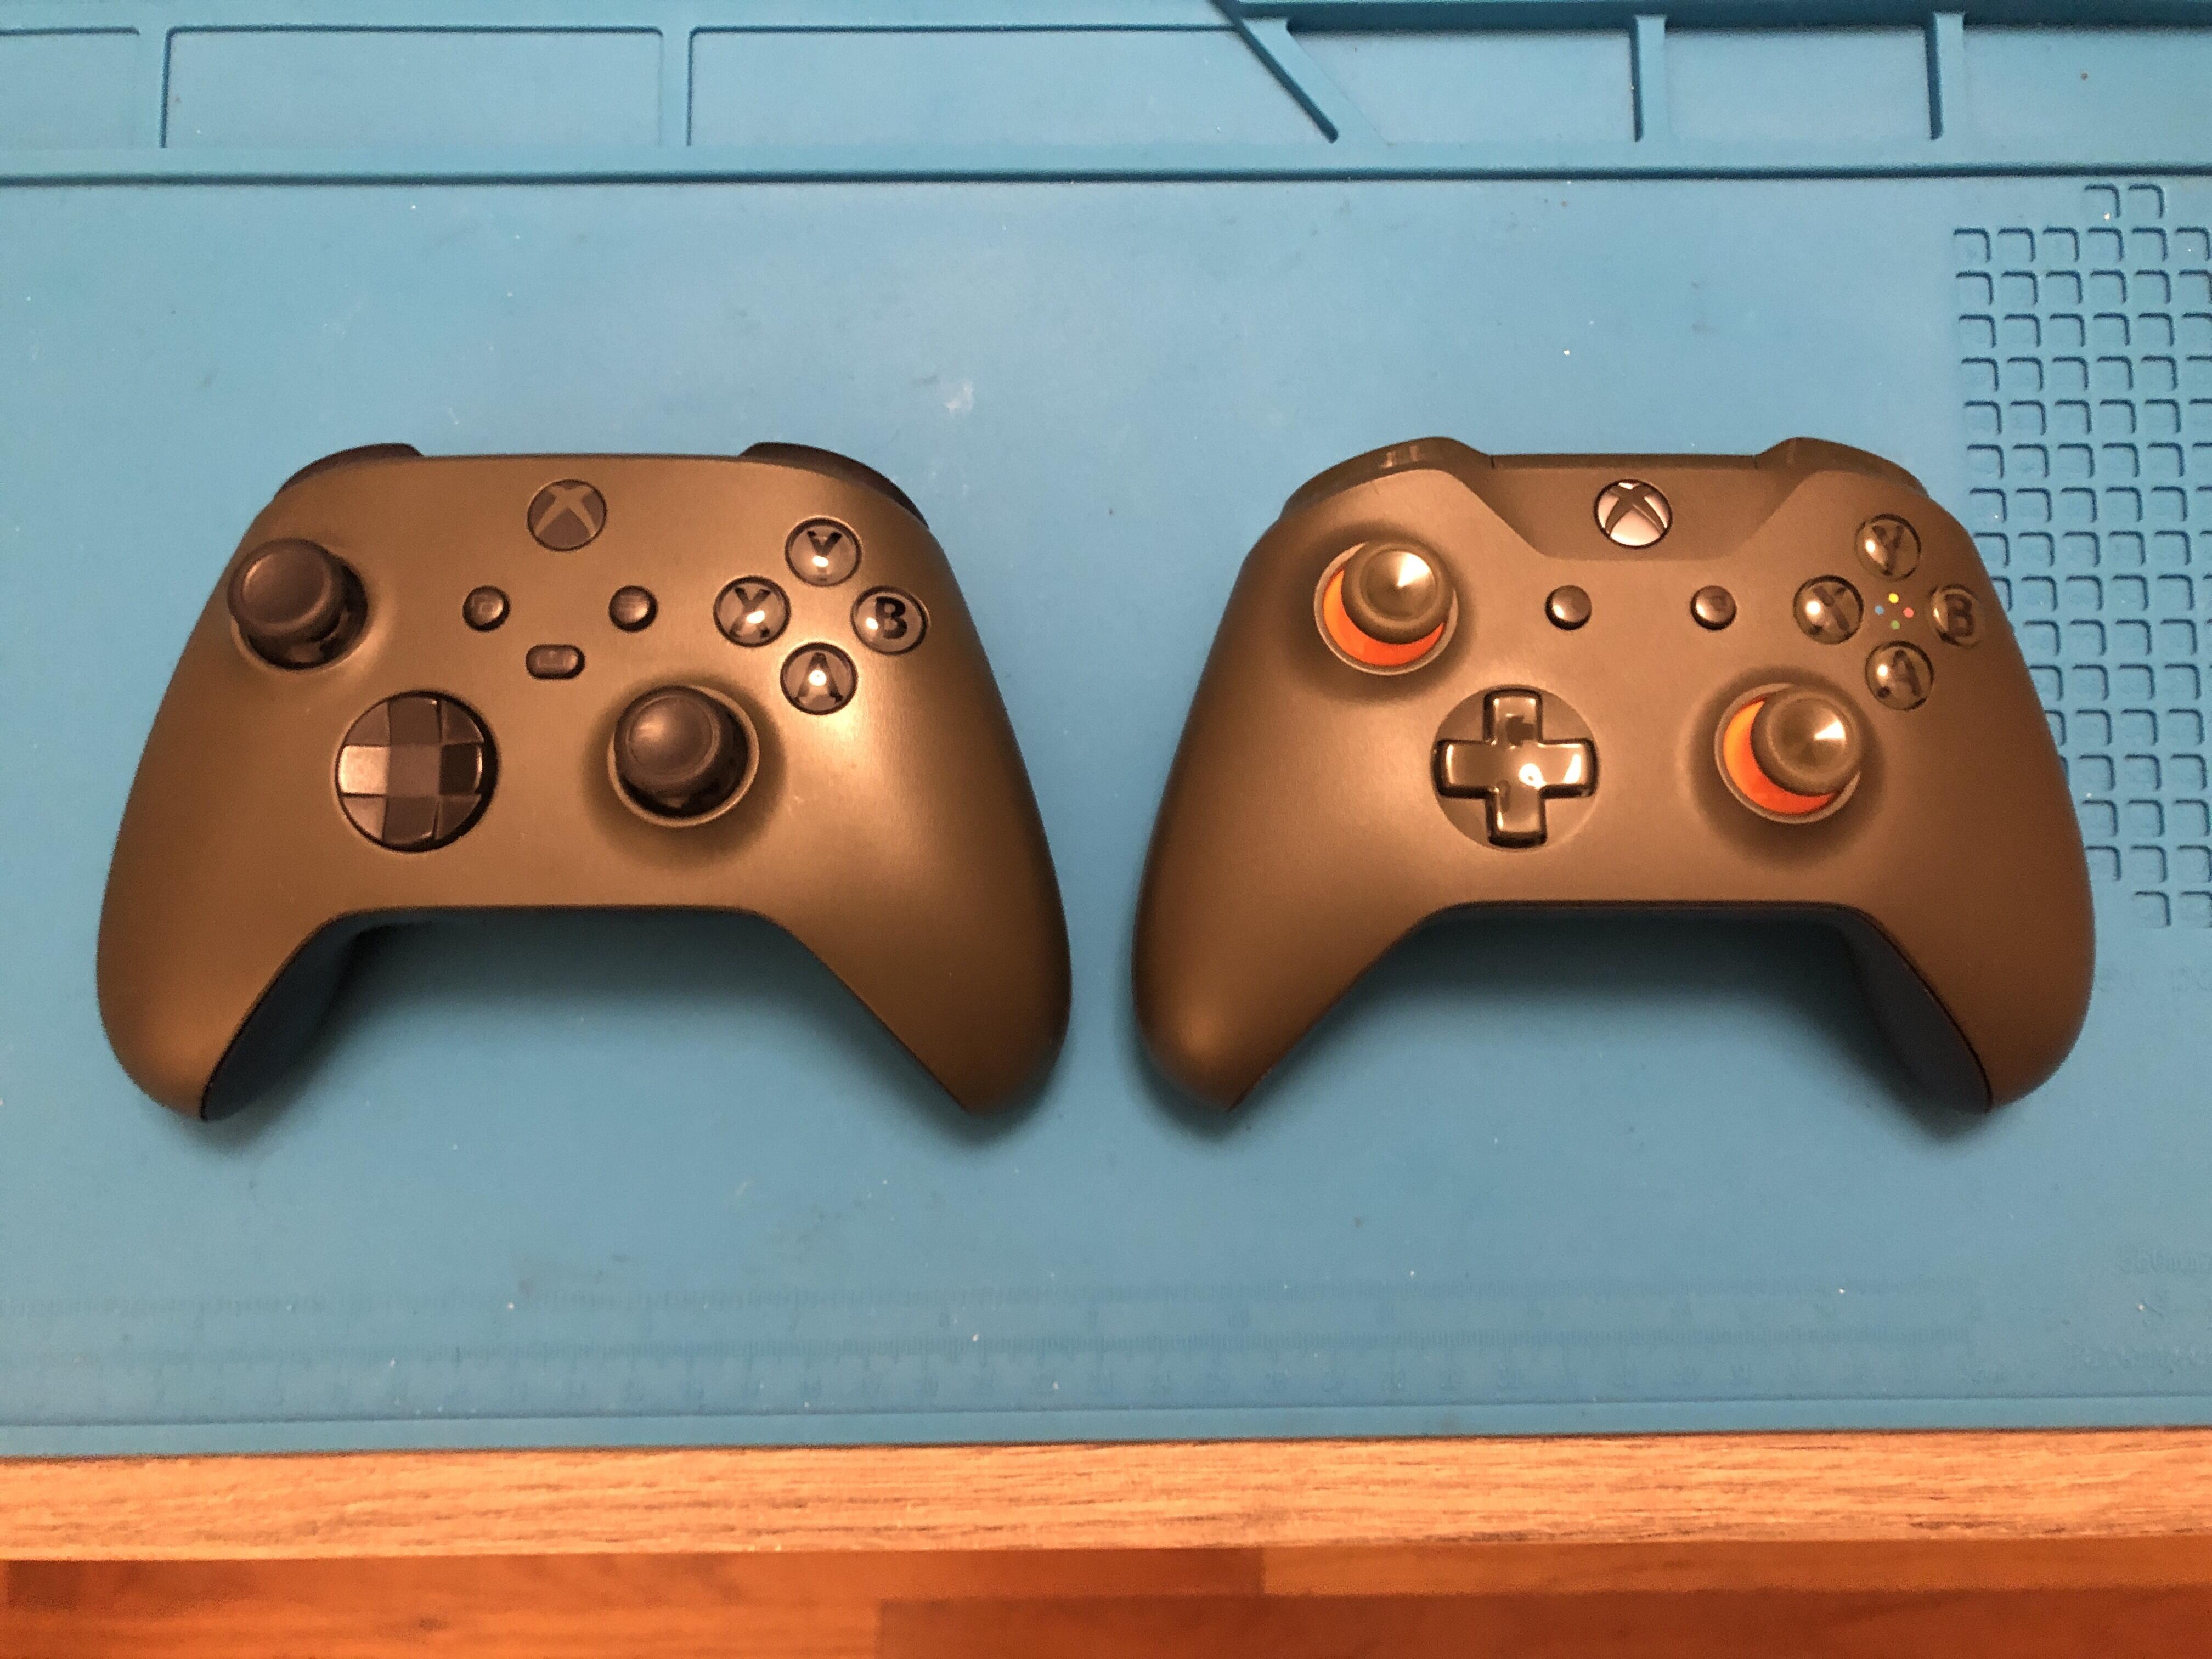
While I was at it, I swapped-over the orange-and-green sticks (and face button dome cluster) from my old favorite Xbox One controller (shown above on the right) with an absolutely wrecked USB-micro port. (The whole reason I got a custom Series one in the first place was to replace it with one that has a more sturdy USB-C port, while still retaining similar aesthetics to the limited edition one I had.) I’d planned to swap over the green face buttons, too - but it turns out that while they technically fit, they are a little shorter and not as easy to press that way - so I swapped-back the grey ones.
The donor dome pad cluster doesn’t have the share button on it, so I put some foam rubber from my keyboard supplies under it to keep it in-position - I’ve never used it, so I can’t say I mind that it doesn’t function now. I could have retained its old dome with some creative cutting of the old cluster, but it didn’t seem worth it for a button I don’t use - this is exclusively for PC gaming.
After opening the newer one maybe five times over as many years, it’s finally in proper, snappy working order - and looks almost just like my old favorite - now with a nice, reliable port. I also now have the perfectcable to use with it - such a seemingly subtle change from a stiff USB-micro cable and otherwise similar controller has my setup feeling so much better it’s nuts.
If this is about the xbox controller, there are actually two self-contained micro-switches on the board that can be removed, used for the shoulder buttons.
Limited use-case for tiny, right-angle, 4-pin switches of course - but in my case I harvested one from an otherwise worn-out controller to replace a damaged one on the newer controller.
Most of the rest are rubber domes, with the d-pad being sort of an open-face micro-switch array of metallic domes.