Huh, interesting. What brand is it? I don’t think I’ve noticed that kind of behavior with the Hakko desoldering gun, but it’s also super expensive. I want to say it has a one-way valve (and filter) to deal with this problem.
1 Like
Well, you wouldn’t, because…
LOL. This is a no-name device, identical to this one. Here’s a video on Youtube:

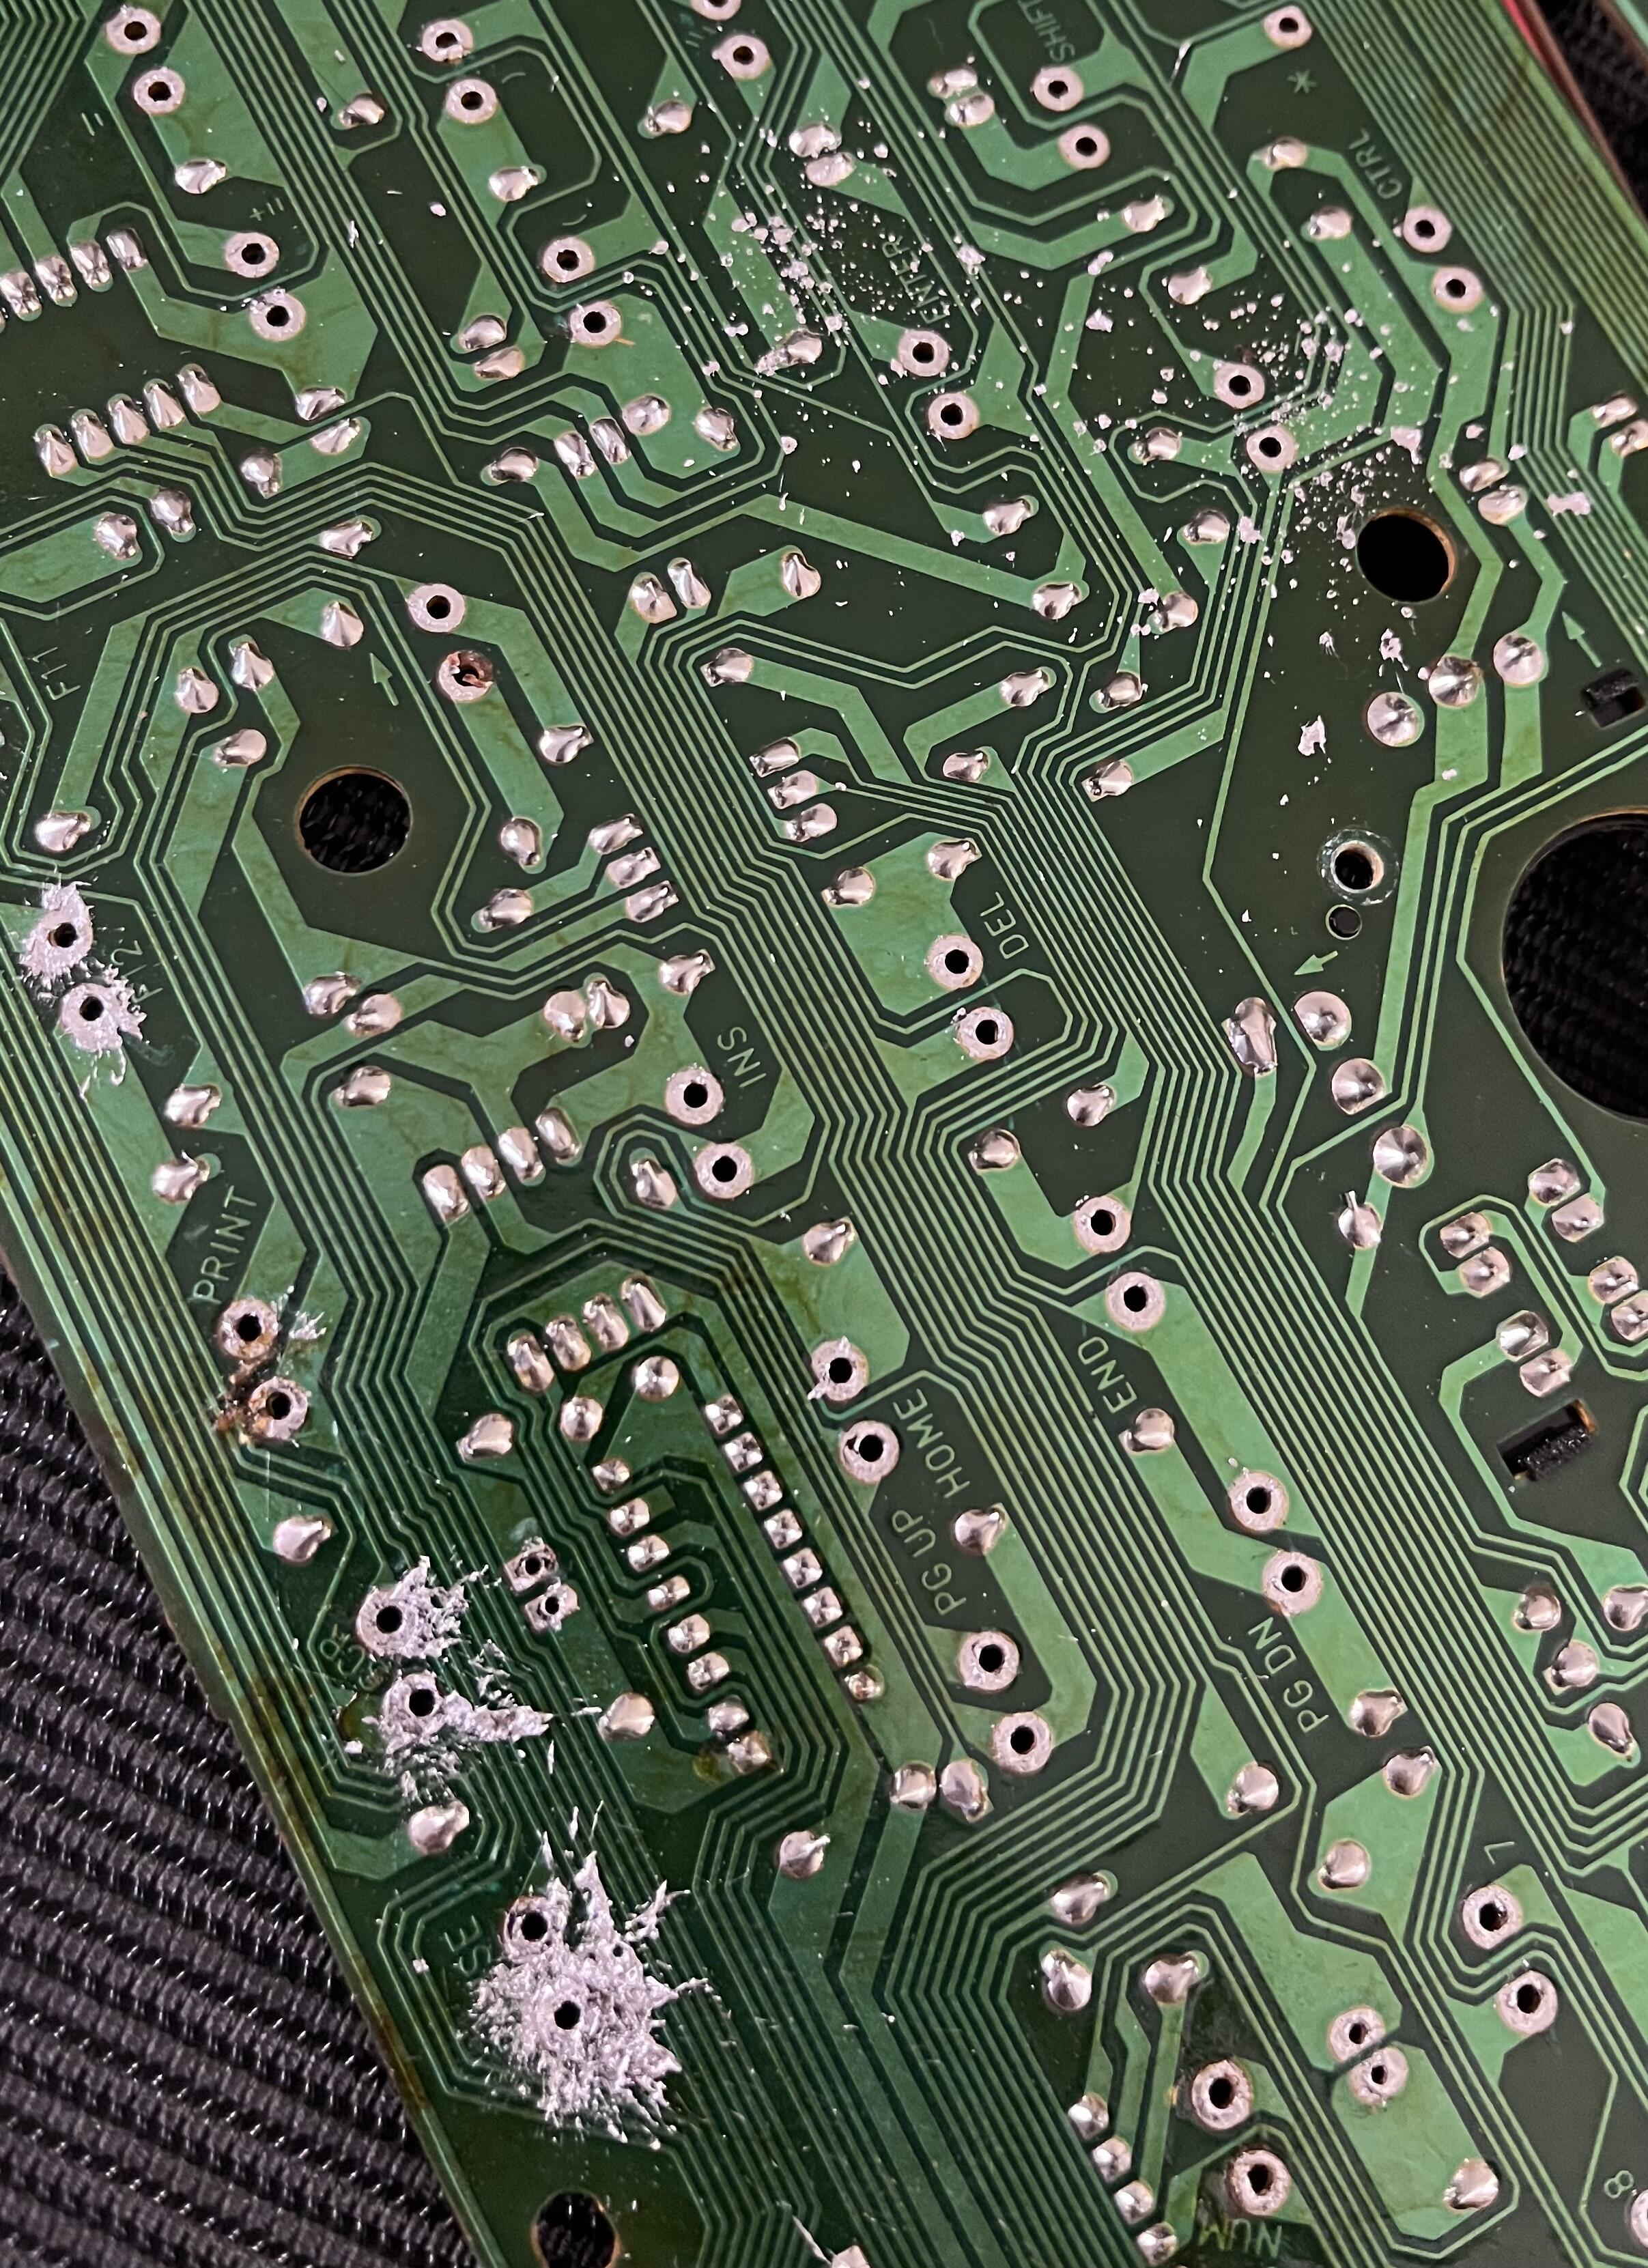
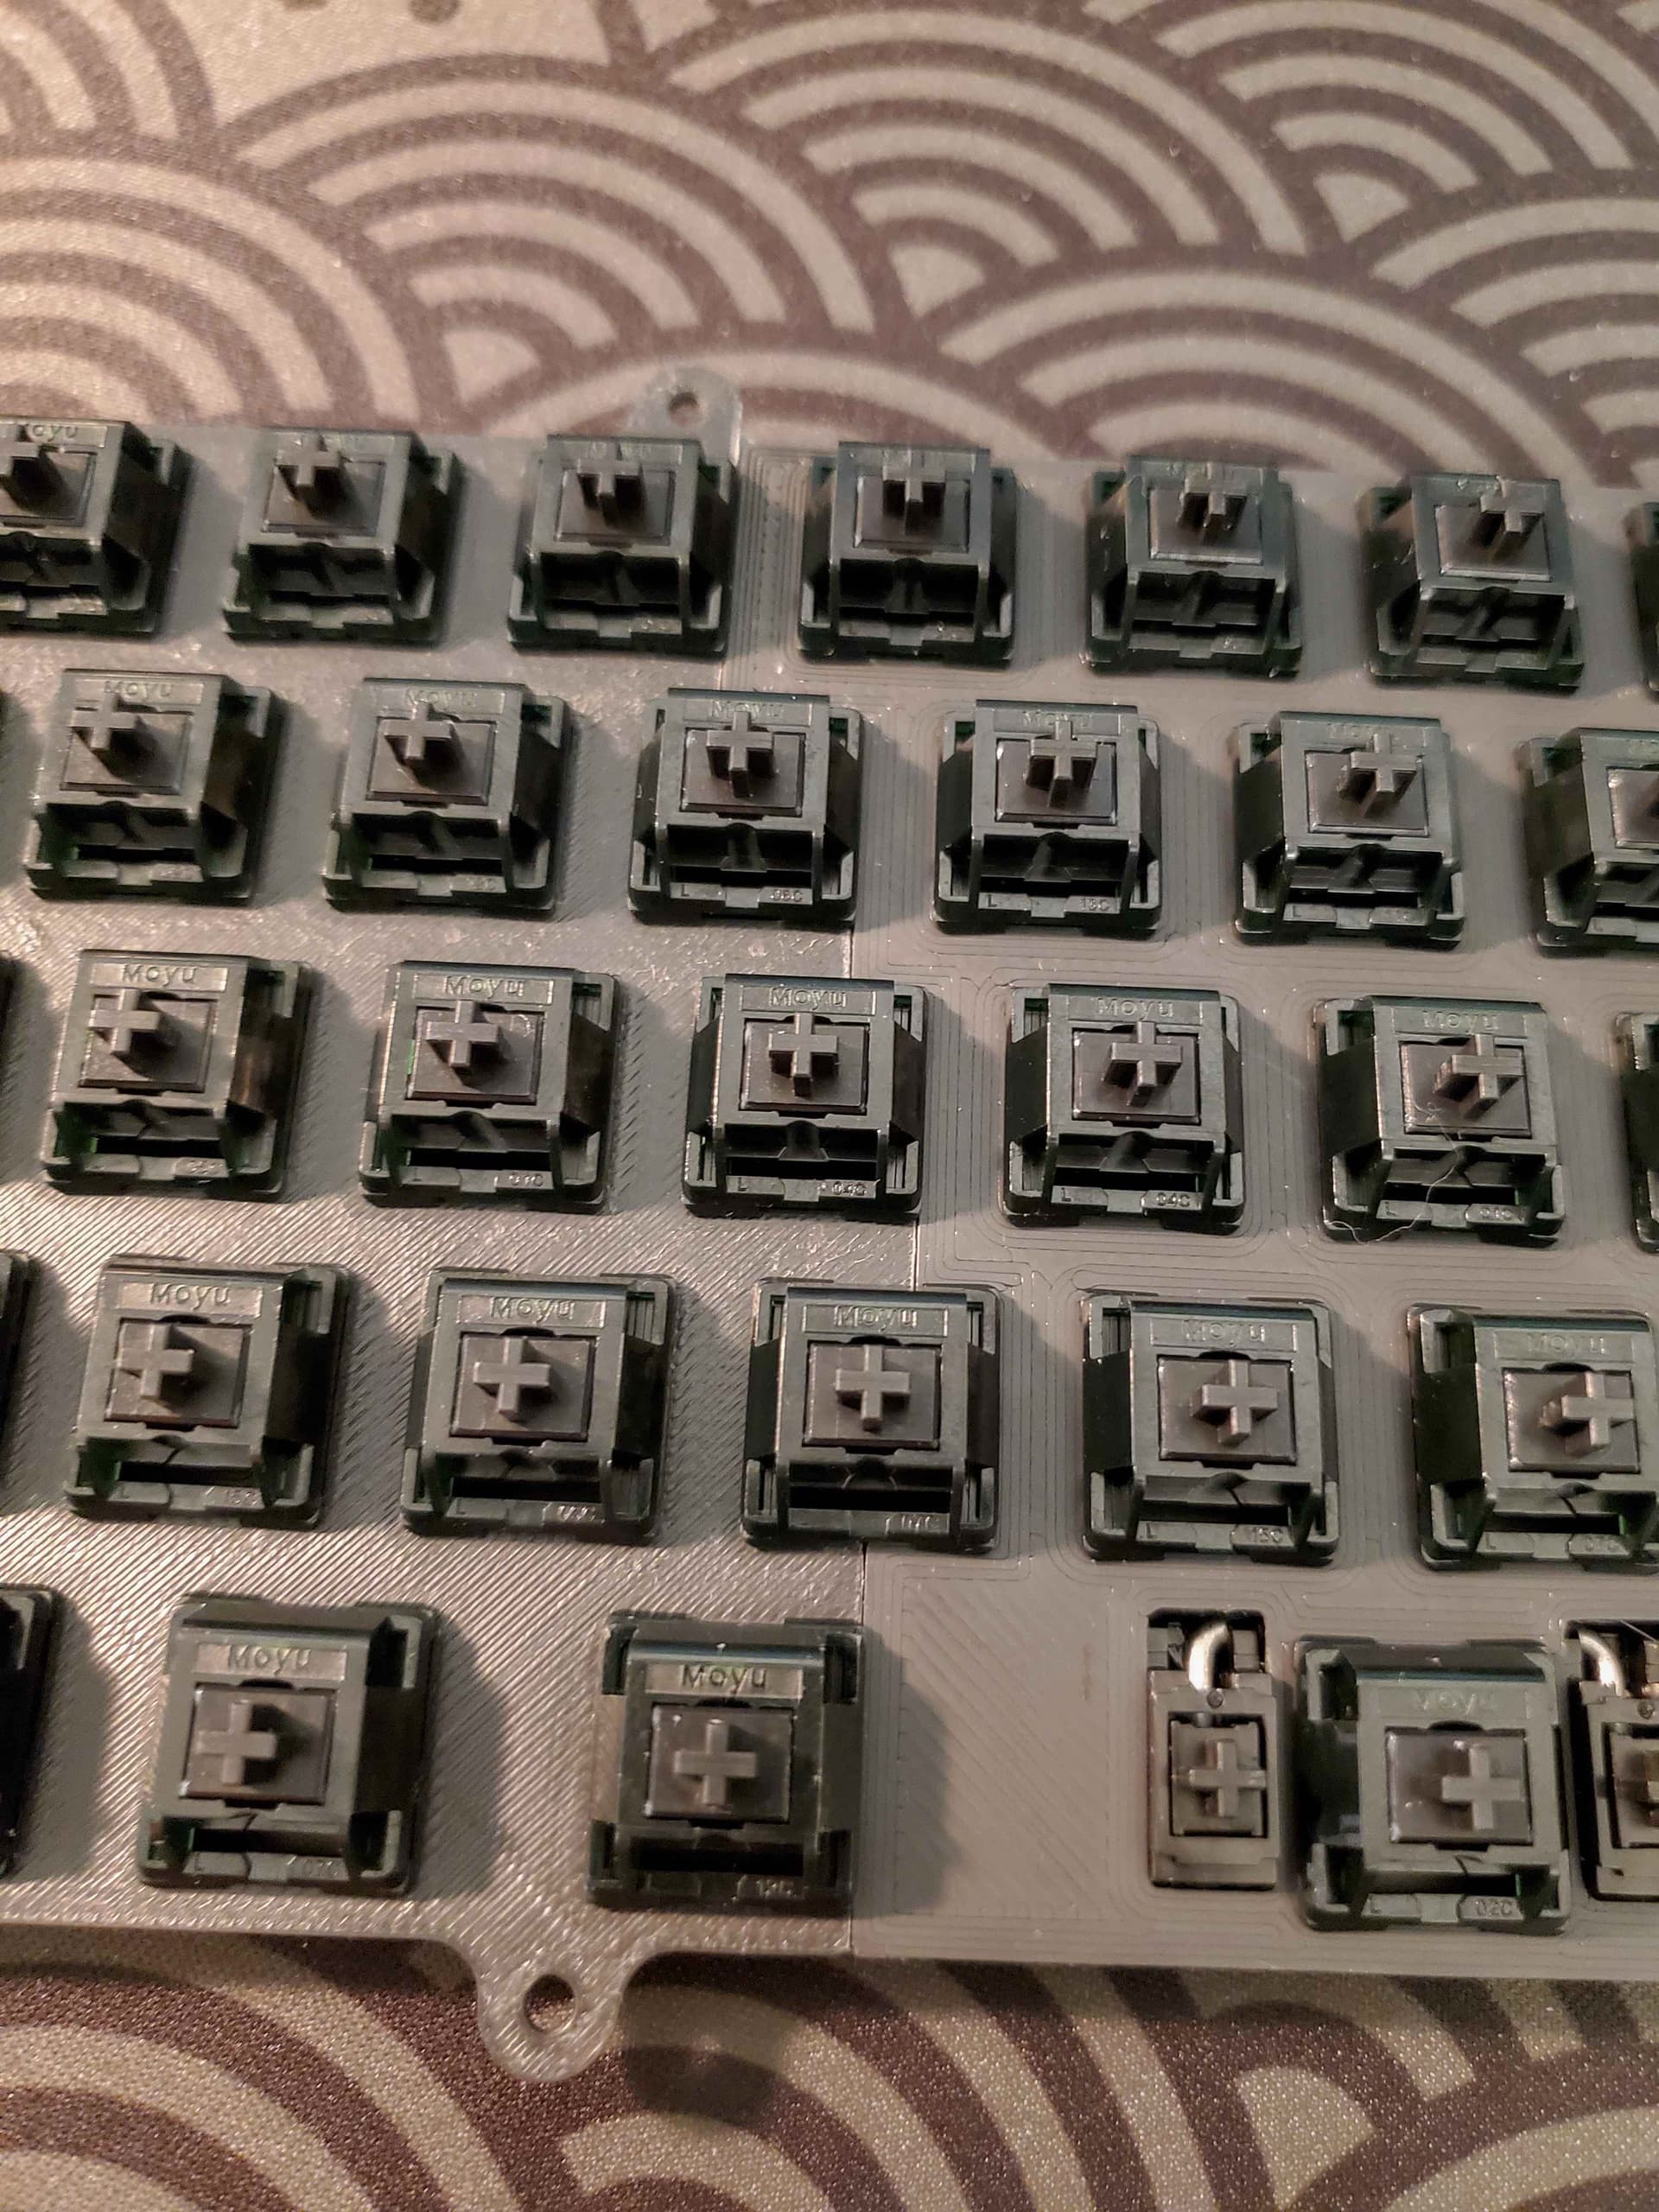
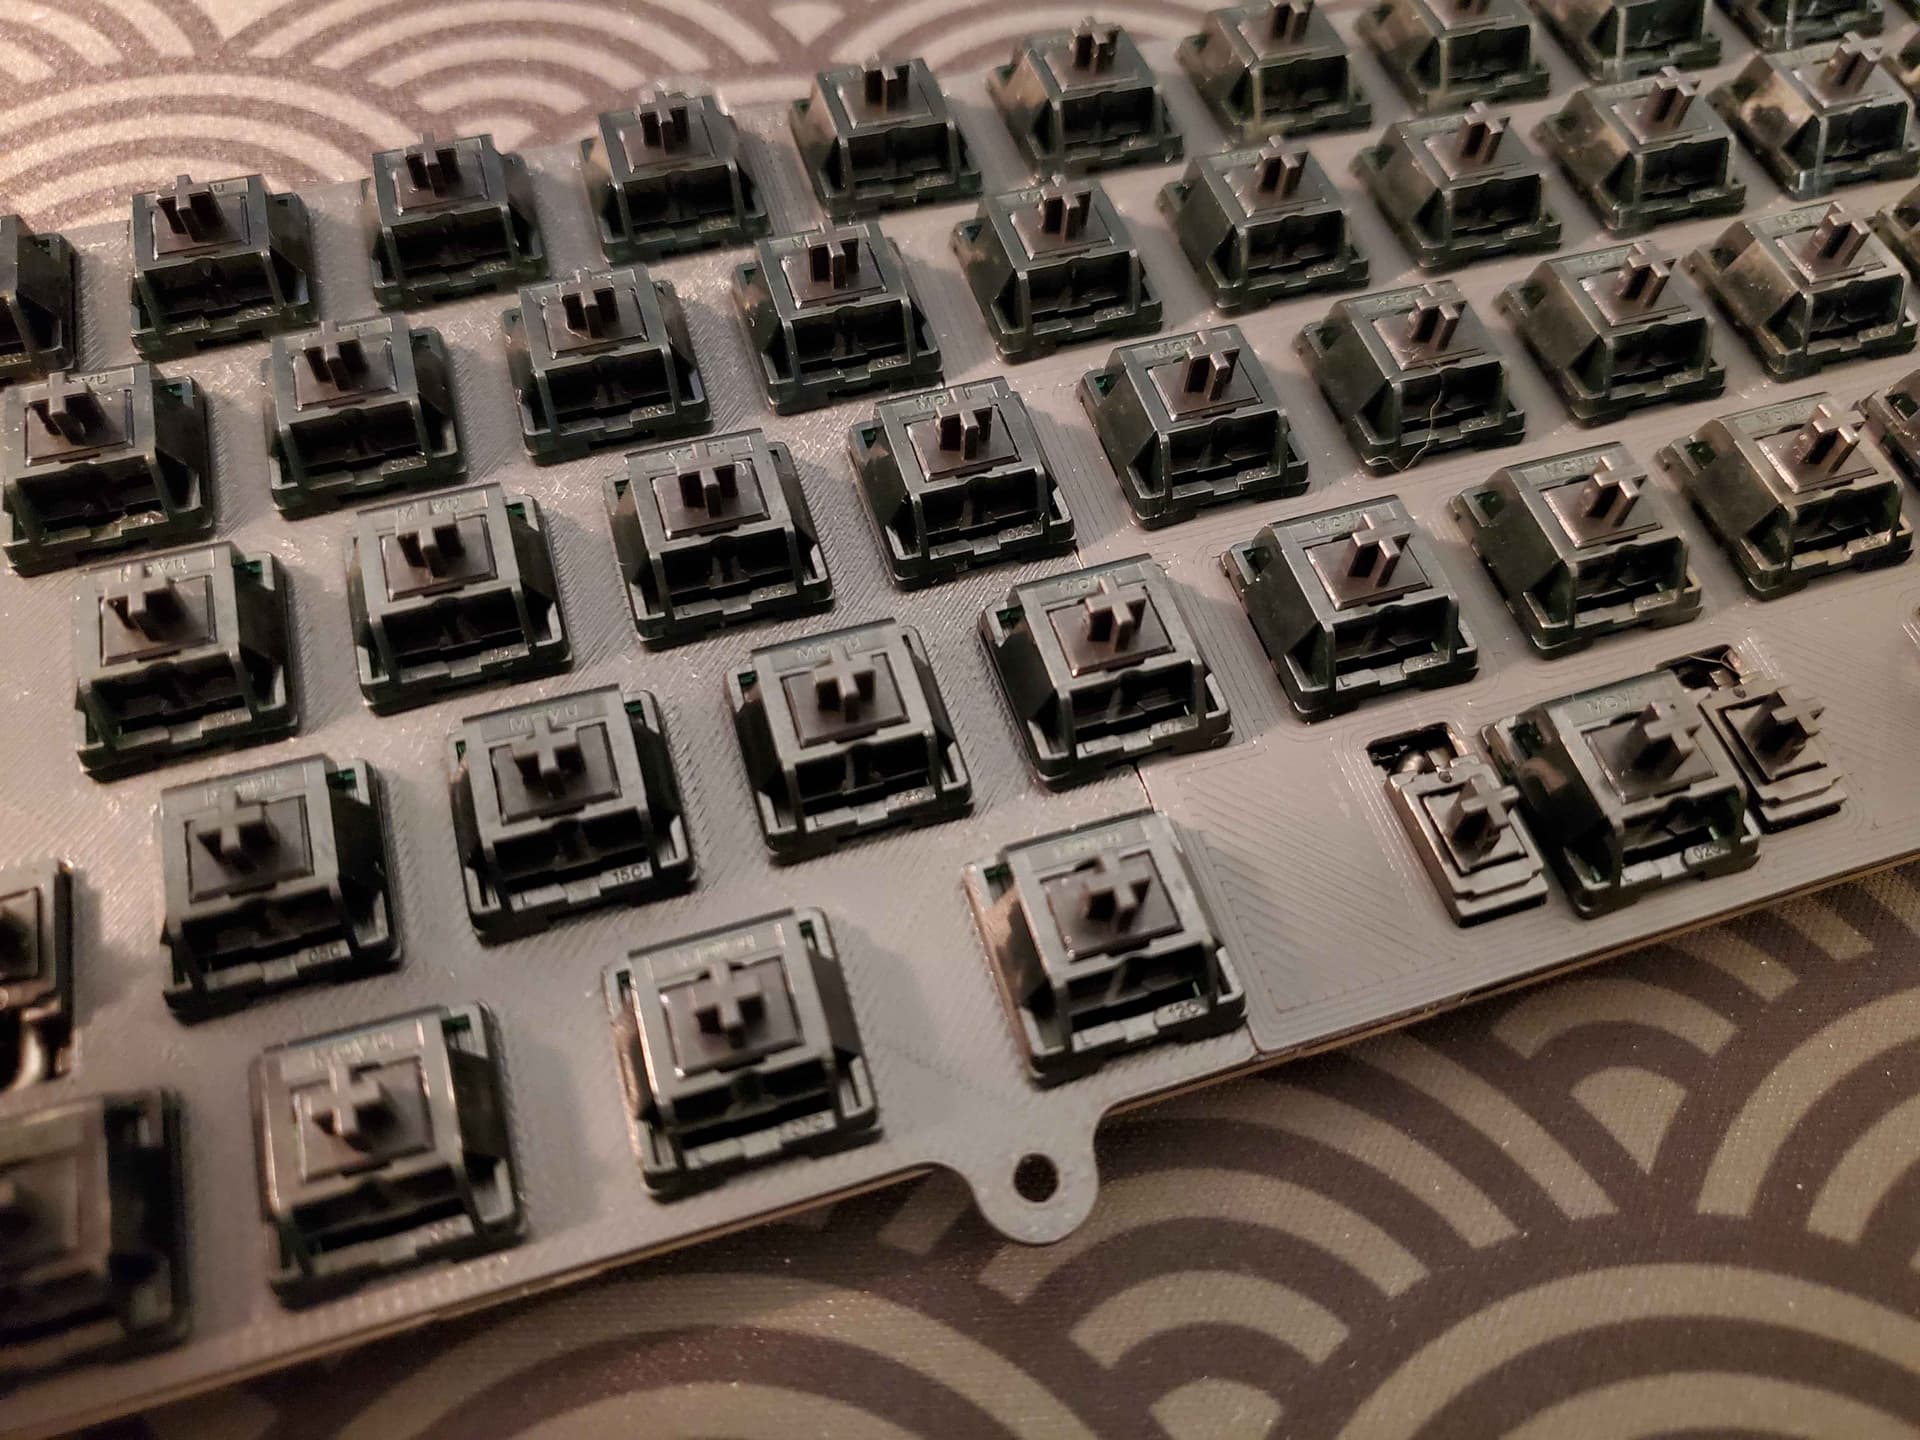
Now, as I said, while crude, it is effective, and I desoldered almost 100 switches in maybe 30 minutes. But between a few at the beginning where I didn’t know any better, and a couple of others where my finger slipped or I had a brain-fart, my PCB (full of burnt caps anyway) ended up looking like this:
3 Likes
Hakko will do similar if it starts to clog. Do you have a tool to clear it with after a few switches? I’m well in tune with the sound of my Desoldering pump. When it starts to sound wrong I clear out the chamber with the provided tool. It’s a simple thin wire with a coil at the end to keep it from getting hot too fast while you use it to ream out the inside of the gun
4 Likes
I did get one, and I’ll make a point of trying it the next time I use the thing. I will also make sure I’m using the smallest nozzle that will fit over the switch pins. I wasn’t too bothered with damaging this FK-7000P PCB, as the trackball just complicates everything, requiring a serial mouse and relegating the arrow keys to microswitches with little mouse flaps molded from the top-case in stead of proper keycaps (and one of them was already broken). I may end up discarding the FK-5001’s PCB too, but I’d like to have the option of putting it back if I find something fixable underneath, and looking at the 7000P, there are likely to be a lot of jumpers and diodes in there.
Plans
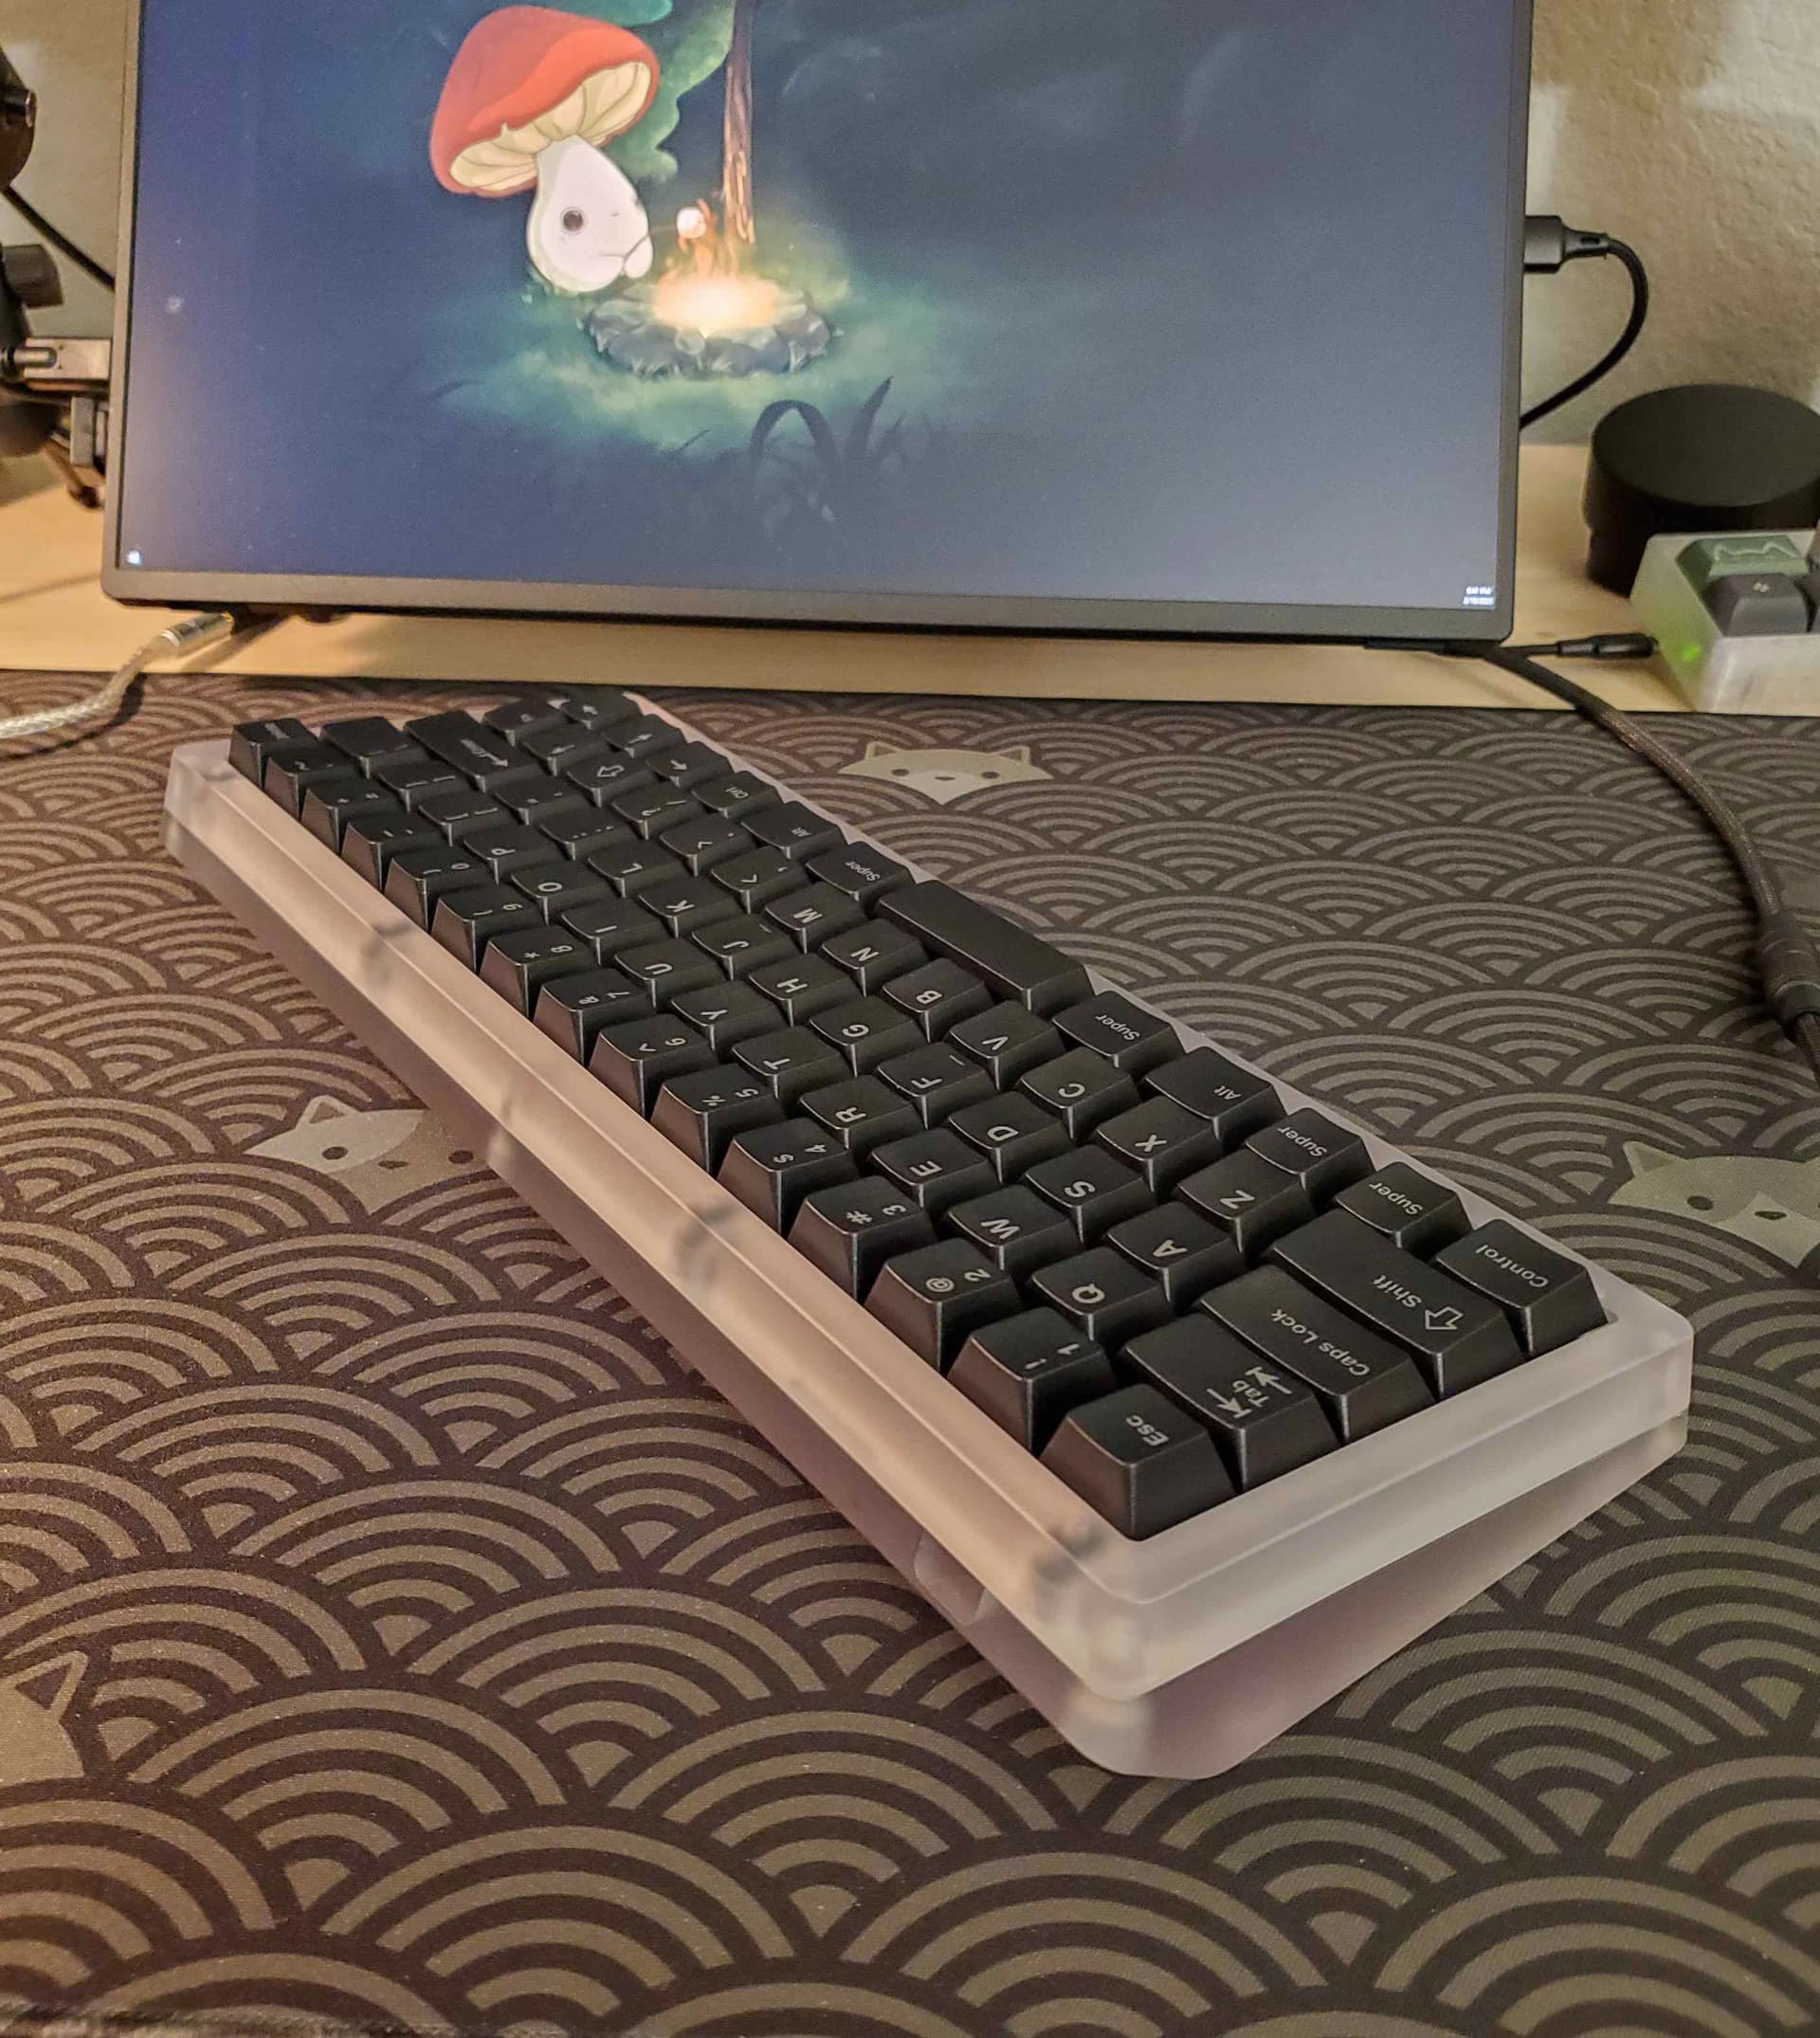
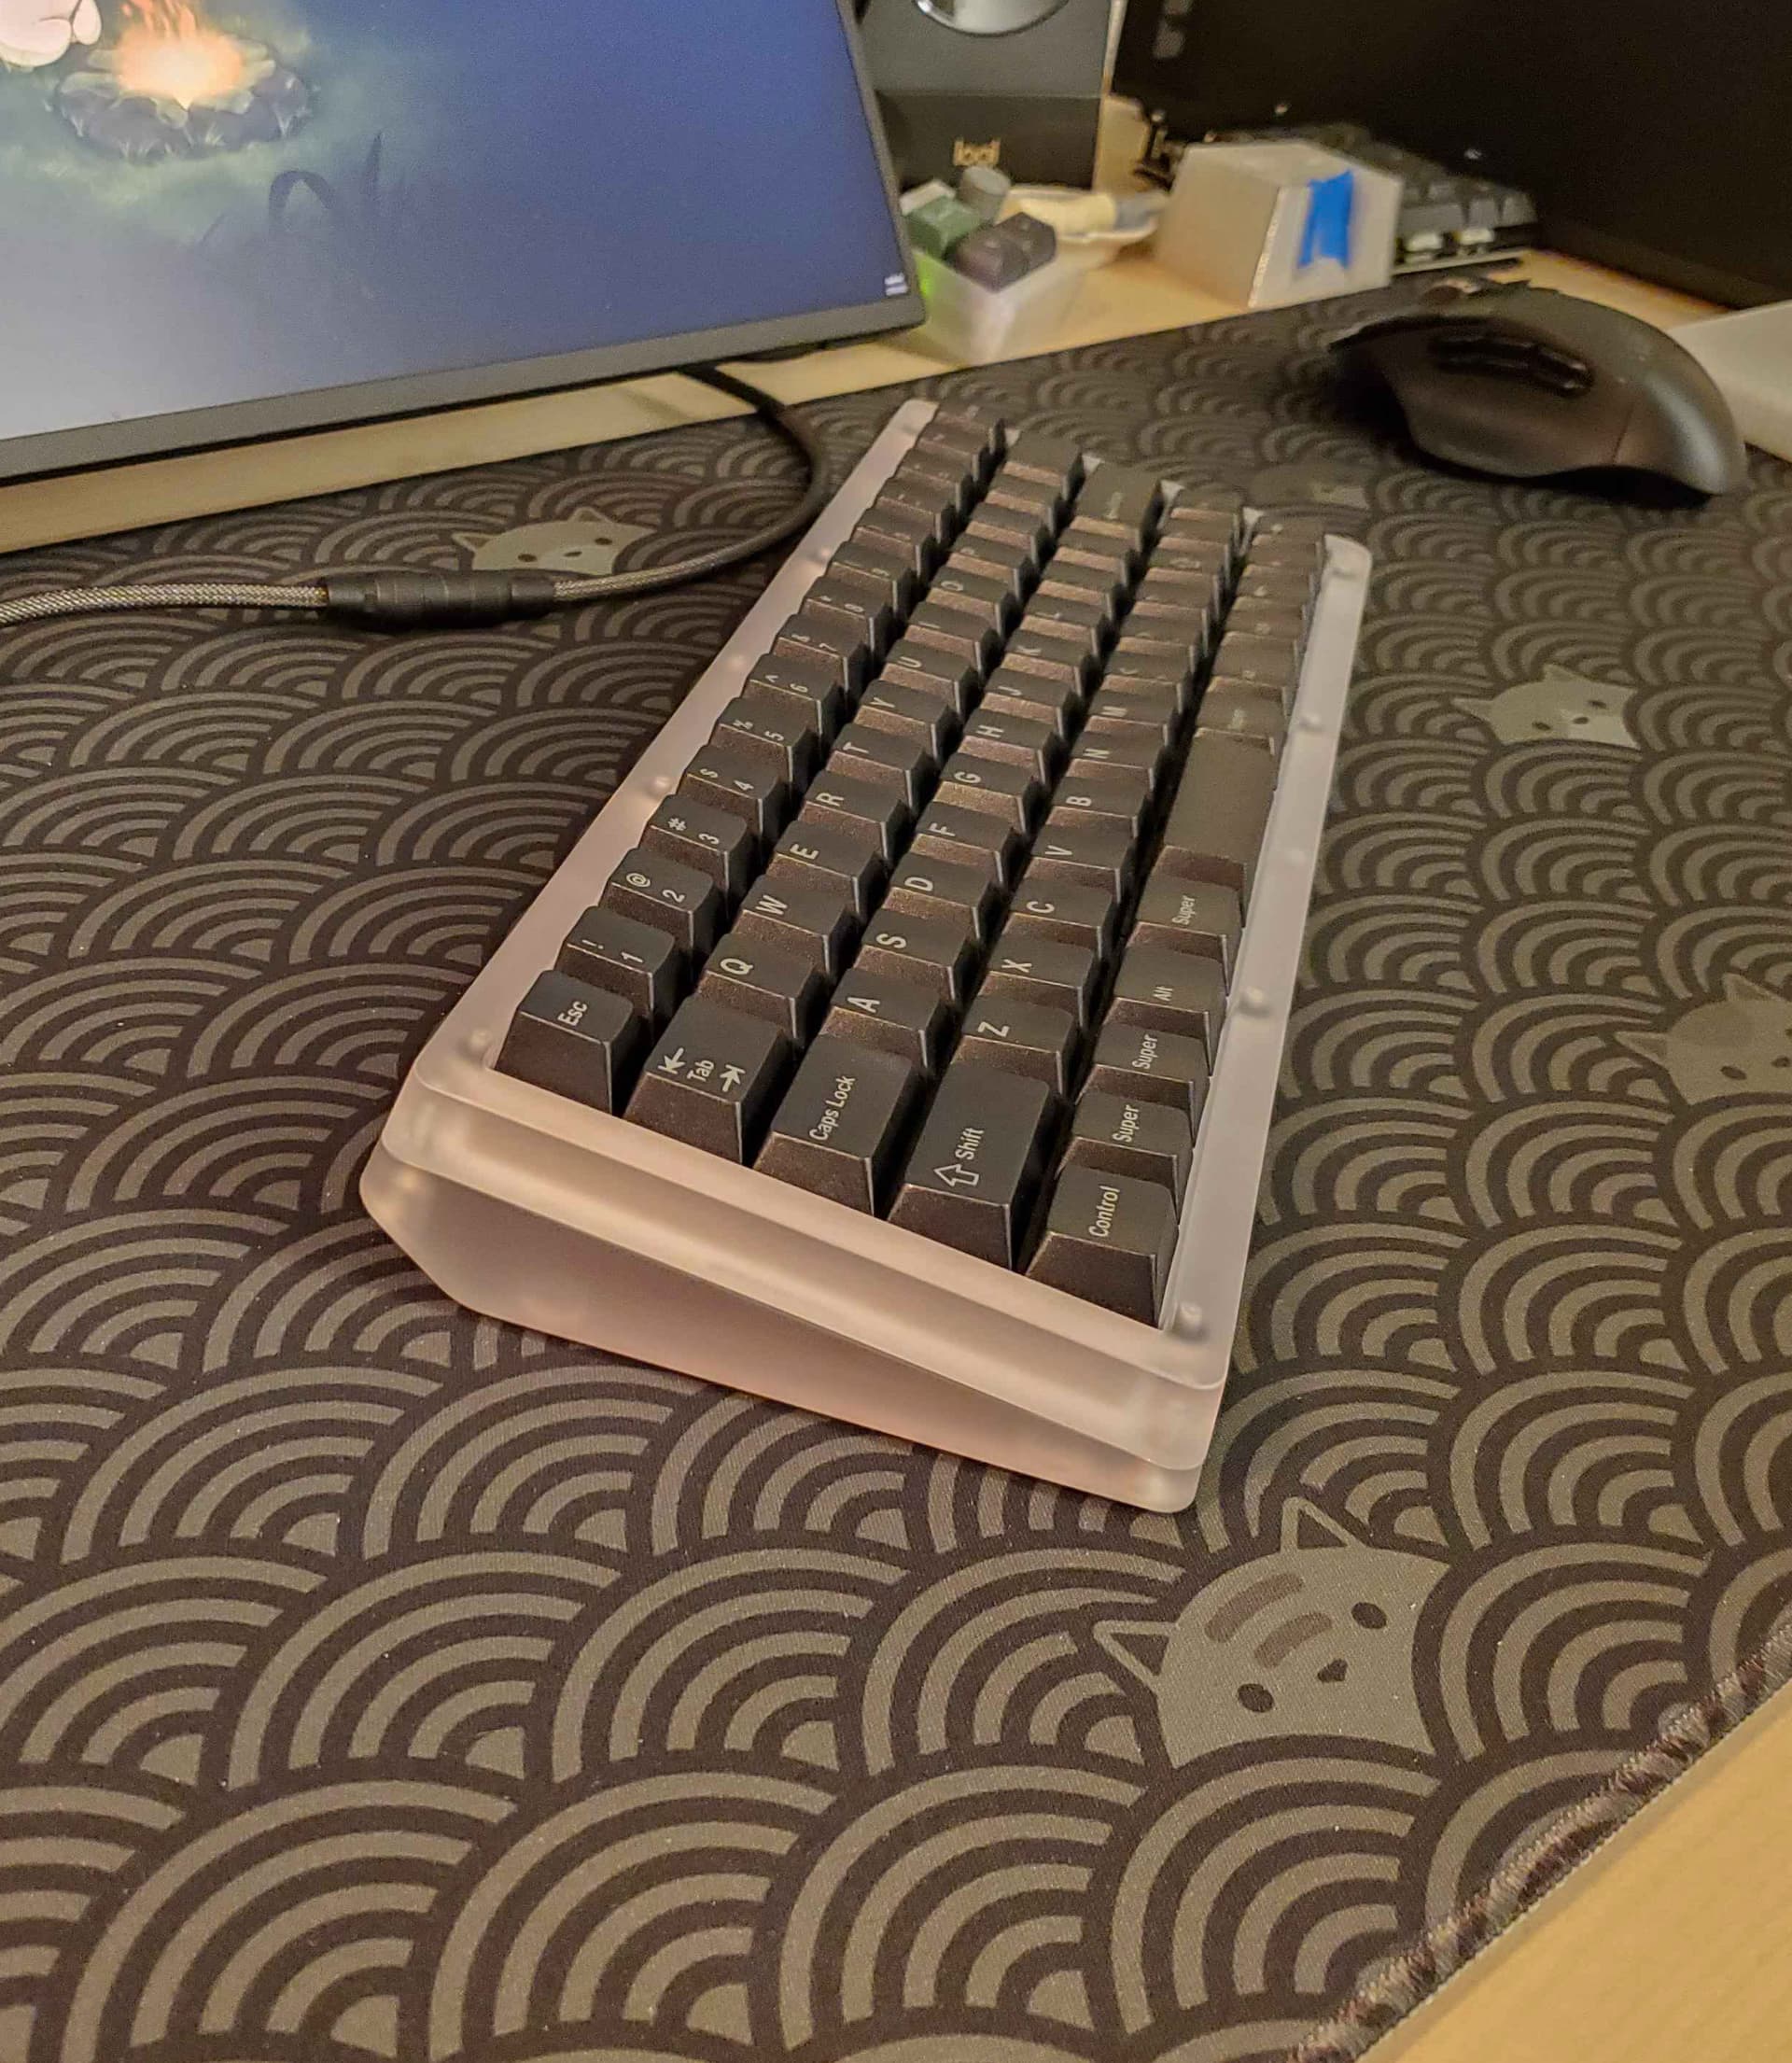
Now that the 7000P is done though, I am moving on to planning. I am going to combine a few “want-to’s” on this project. Use of Alps, obviously, and due to the lack of any arrow keycaps I’m doing more of a 60%+Numpad layout. To go with that, I’m going to map a “fake NumLock” toggle layer using the NumLock key so I can have a proper inverted T when it’s off, using 1, 2, 3, and 5, and tap-hold arrows using the Tsangan mods when it’s on. I’ll hide the “real” NumLock somewhere.
I’m going to run a couple of small scale laser cuts and see if my usual plate material will hold onto the Alps switches well enough to use (though I doubt anything I could fab at home would withstand a keycap removal… Alps was not a perfect design, LOL). Joe Scotto did a hand-wire with Alps where he seemed to rely on friction fit, so it’s worth trying. Stabs will probably need to be hot glued in.
Finally, I’m going to make a simple wooden frame to screw to a bottom plate and surround the switch-plate and serve as a case. I think making it a bit oversize and cutting a chamfer on the table saw should look kind of nice. I don’t have much hardwood lumber right now, but I have a piece of walnut that should be big enough, and one of maple too. I don’t plan to ever change the keycaps, so I just need to figure out which will look better with a classic Pebble and Pearl color scheme.
2 Likes
I have not pursued a replacement yet. Using my trusty volt meter and mostly non-existent soldering skills (pre-k level LOL), I found the issue created while trying to repair it initially and fixed it. The socket is glued to the pcb, jumpered in the correct row and column. IT AIN’T PRETTY, and I will not embarrass myself by posting a pic, but it does work.
Attention peeps: If you or someone you know teaches soldering, please reach out to me.
(Mostly joking)
1 Like
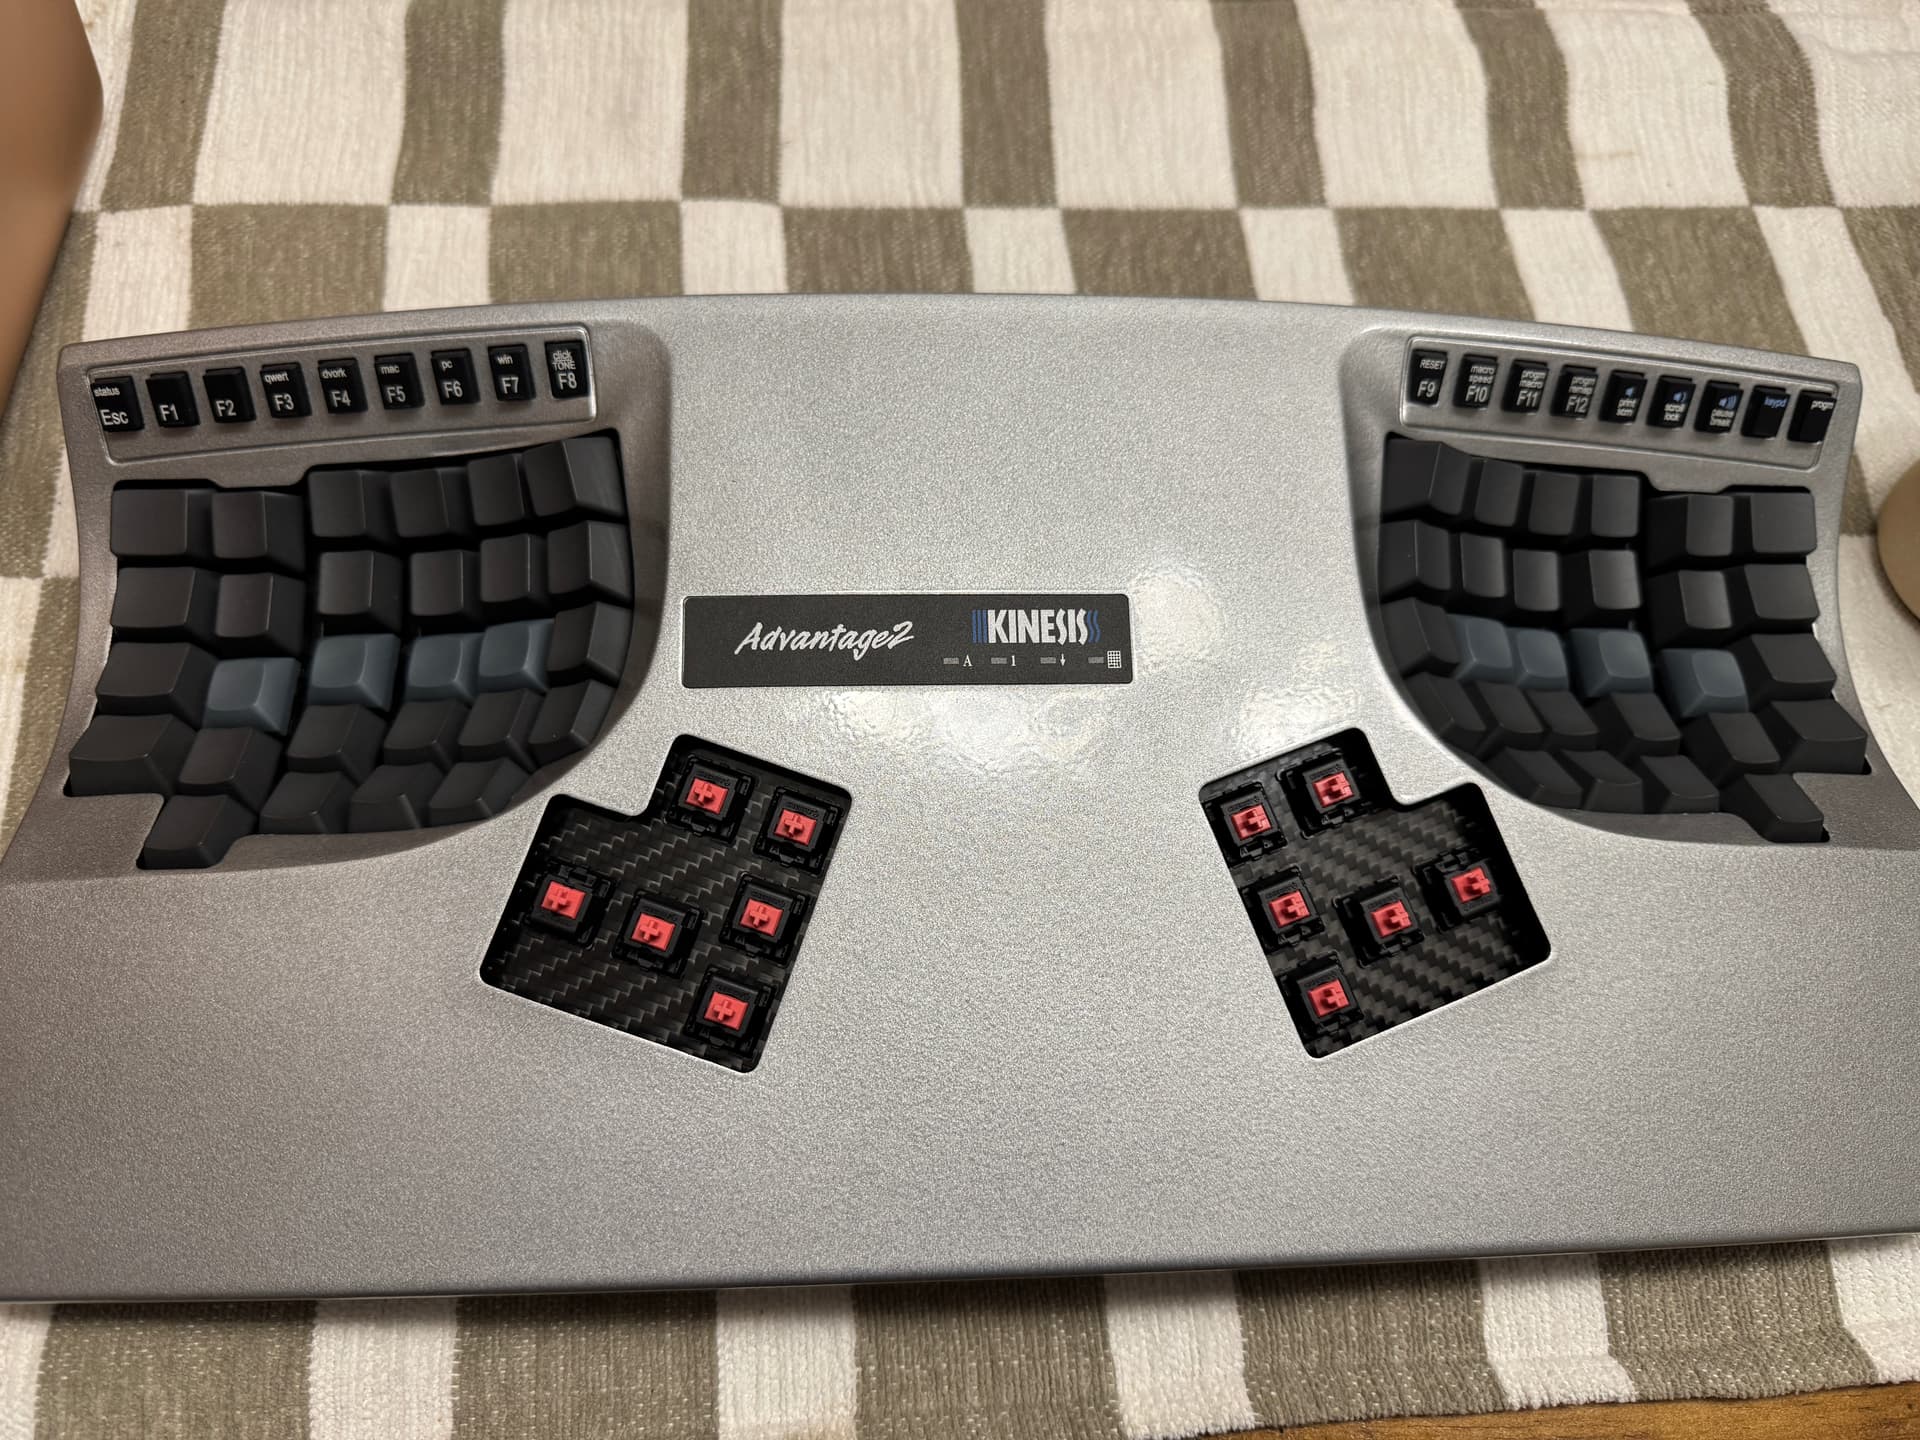
The second round of KA2 thumb cluster replacement PCBs I designed arrived.
The first round I messed up because I put the Molex connectors facing the wrong direction and I didn’t realize they only work in one orientation with the flat cable connectors. Soooooo, I had to flip it in the design and redo the traces.
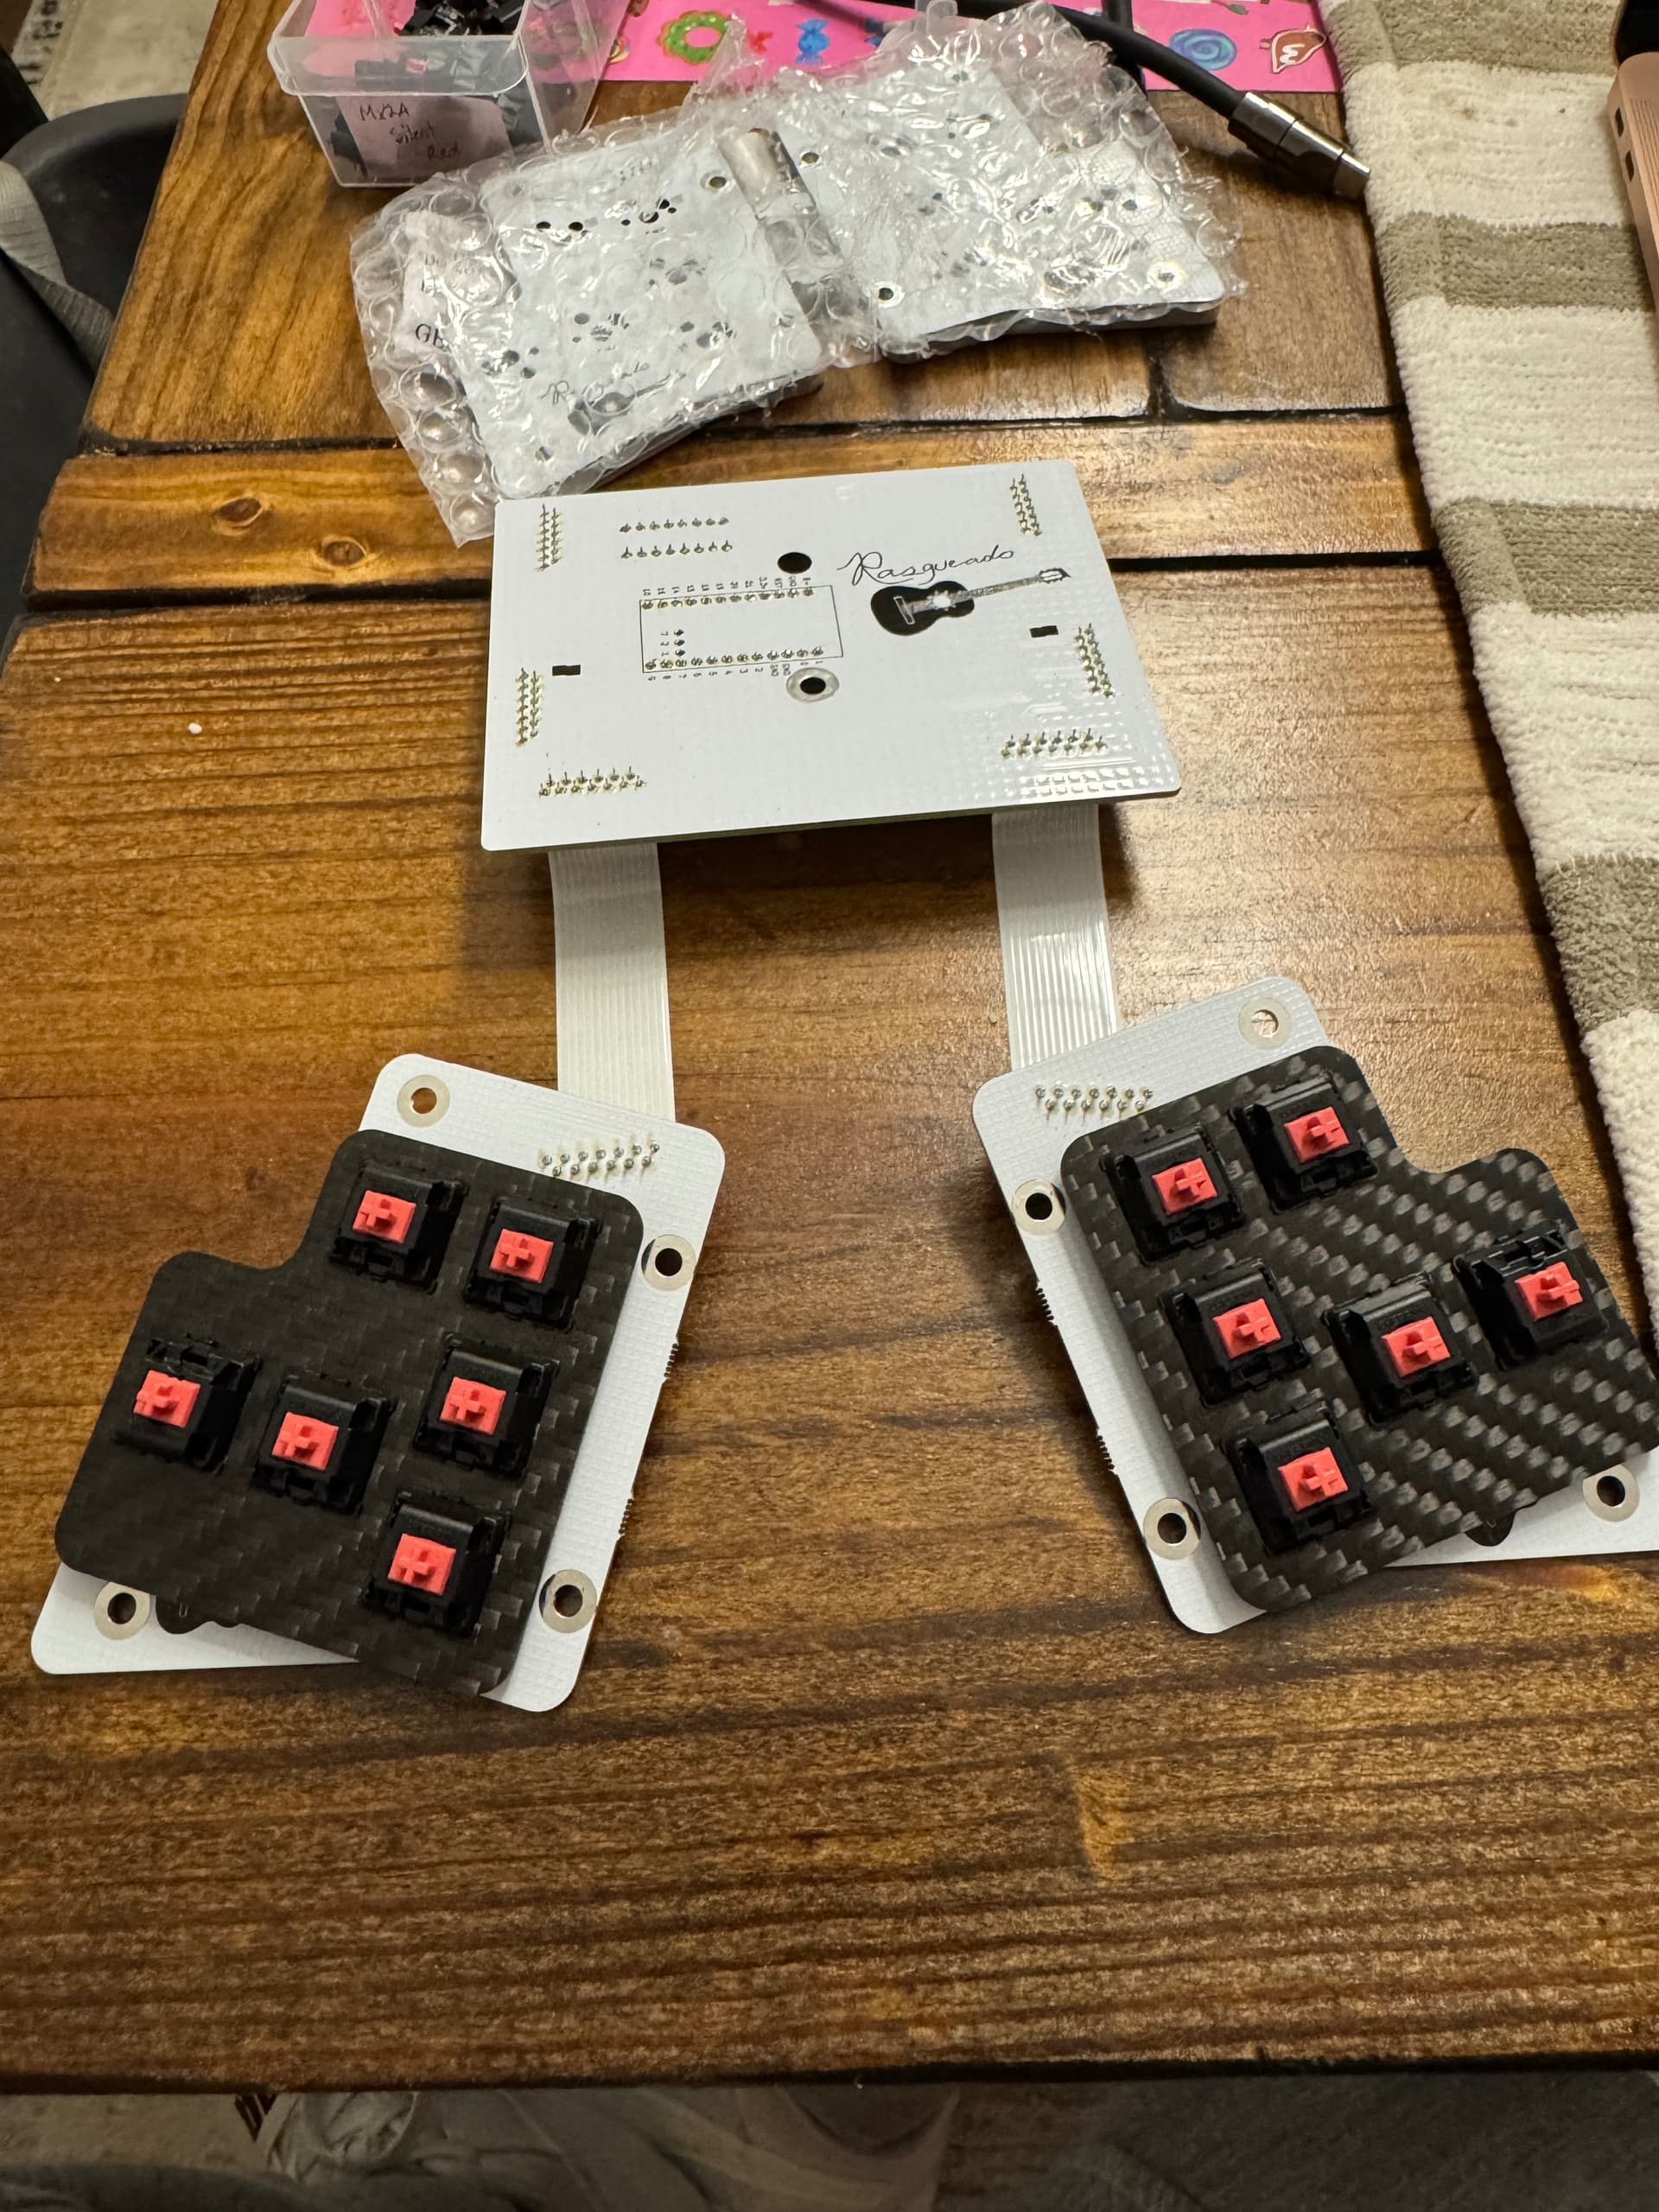
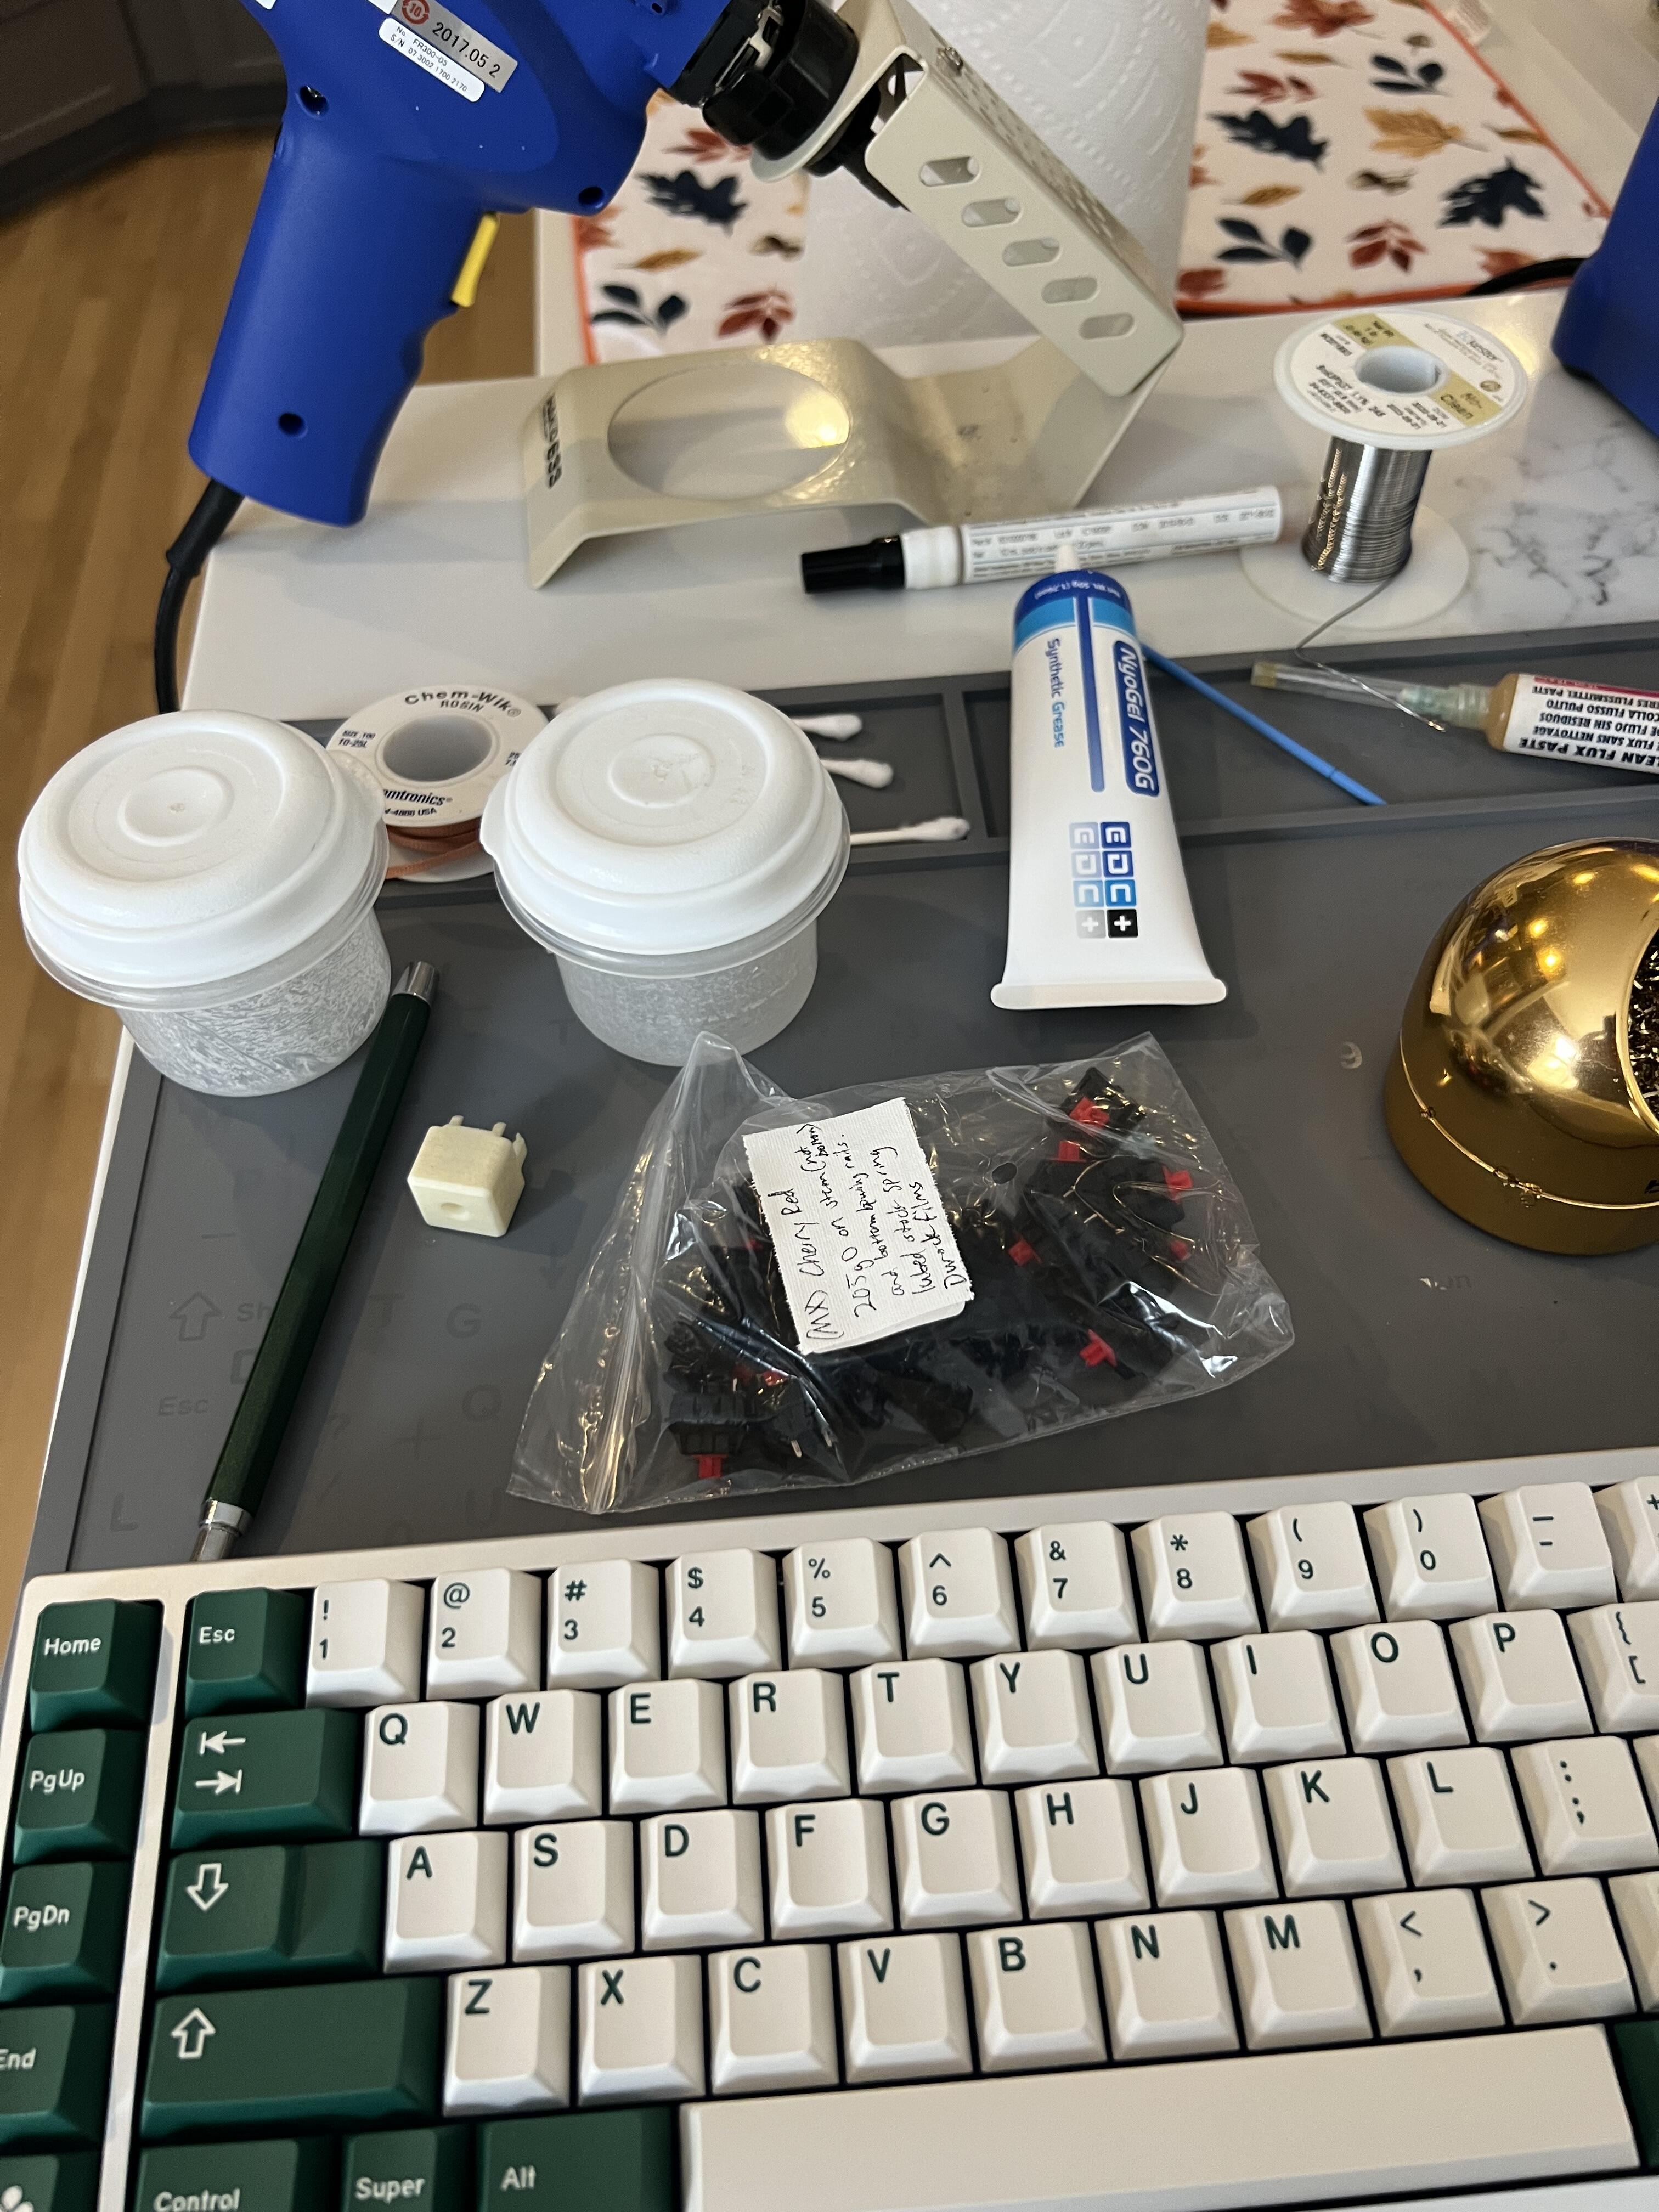
Fortunately, this round worked great, so I have hot swappable PCBs, carbon fiber plates that I designed, and some brand new MX2A silent reds in my thumb clusters.
The more time I spend on my low profile Ambient Choc switch boards, the more I’m finding my MX switch preference change from stock New Nixies to stock MX2A silent reds. Didn’t expect that to happen.
I think that this board has reached its final form unless I can find a way to design replacement keywell PCBs and carbon fiber plates for those as well ![]() .
.
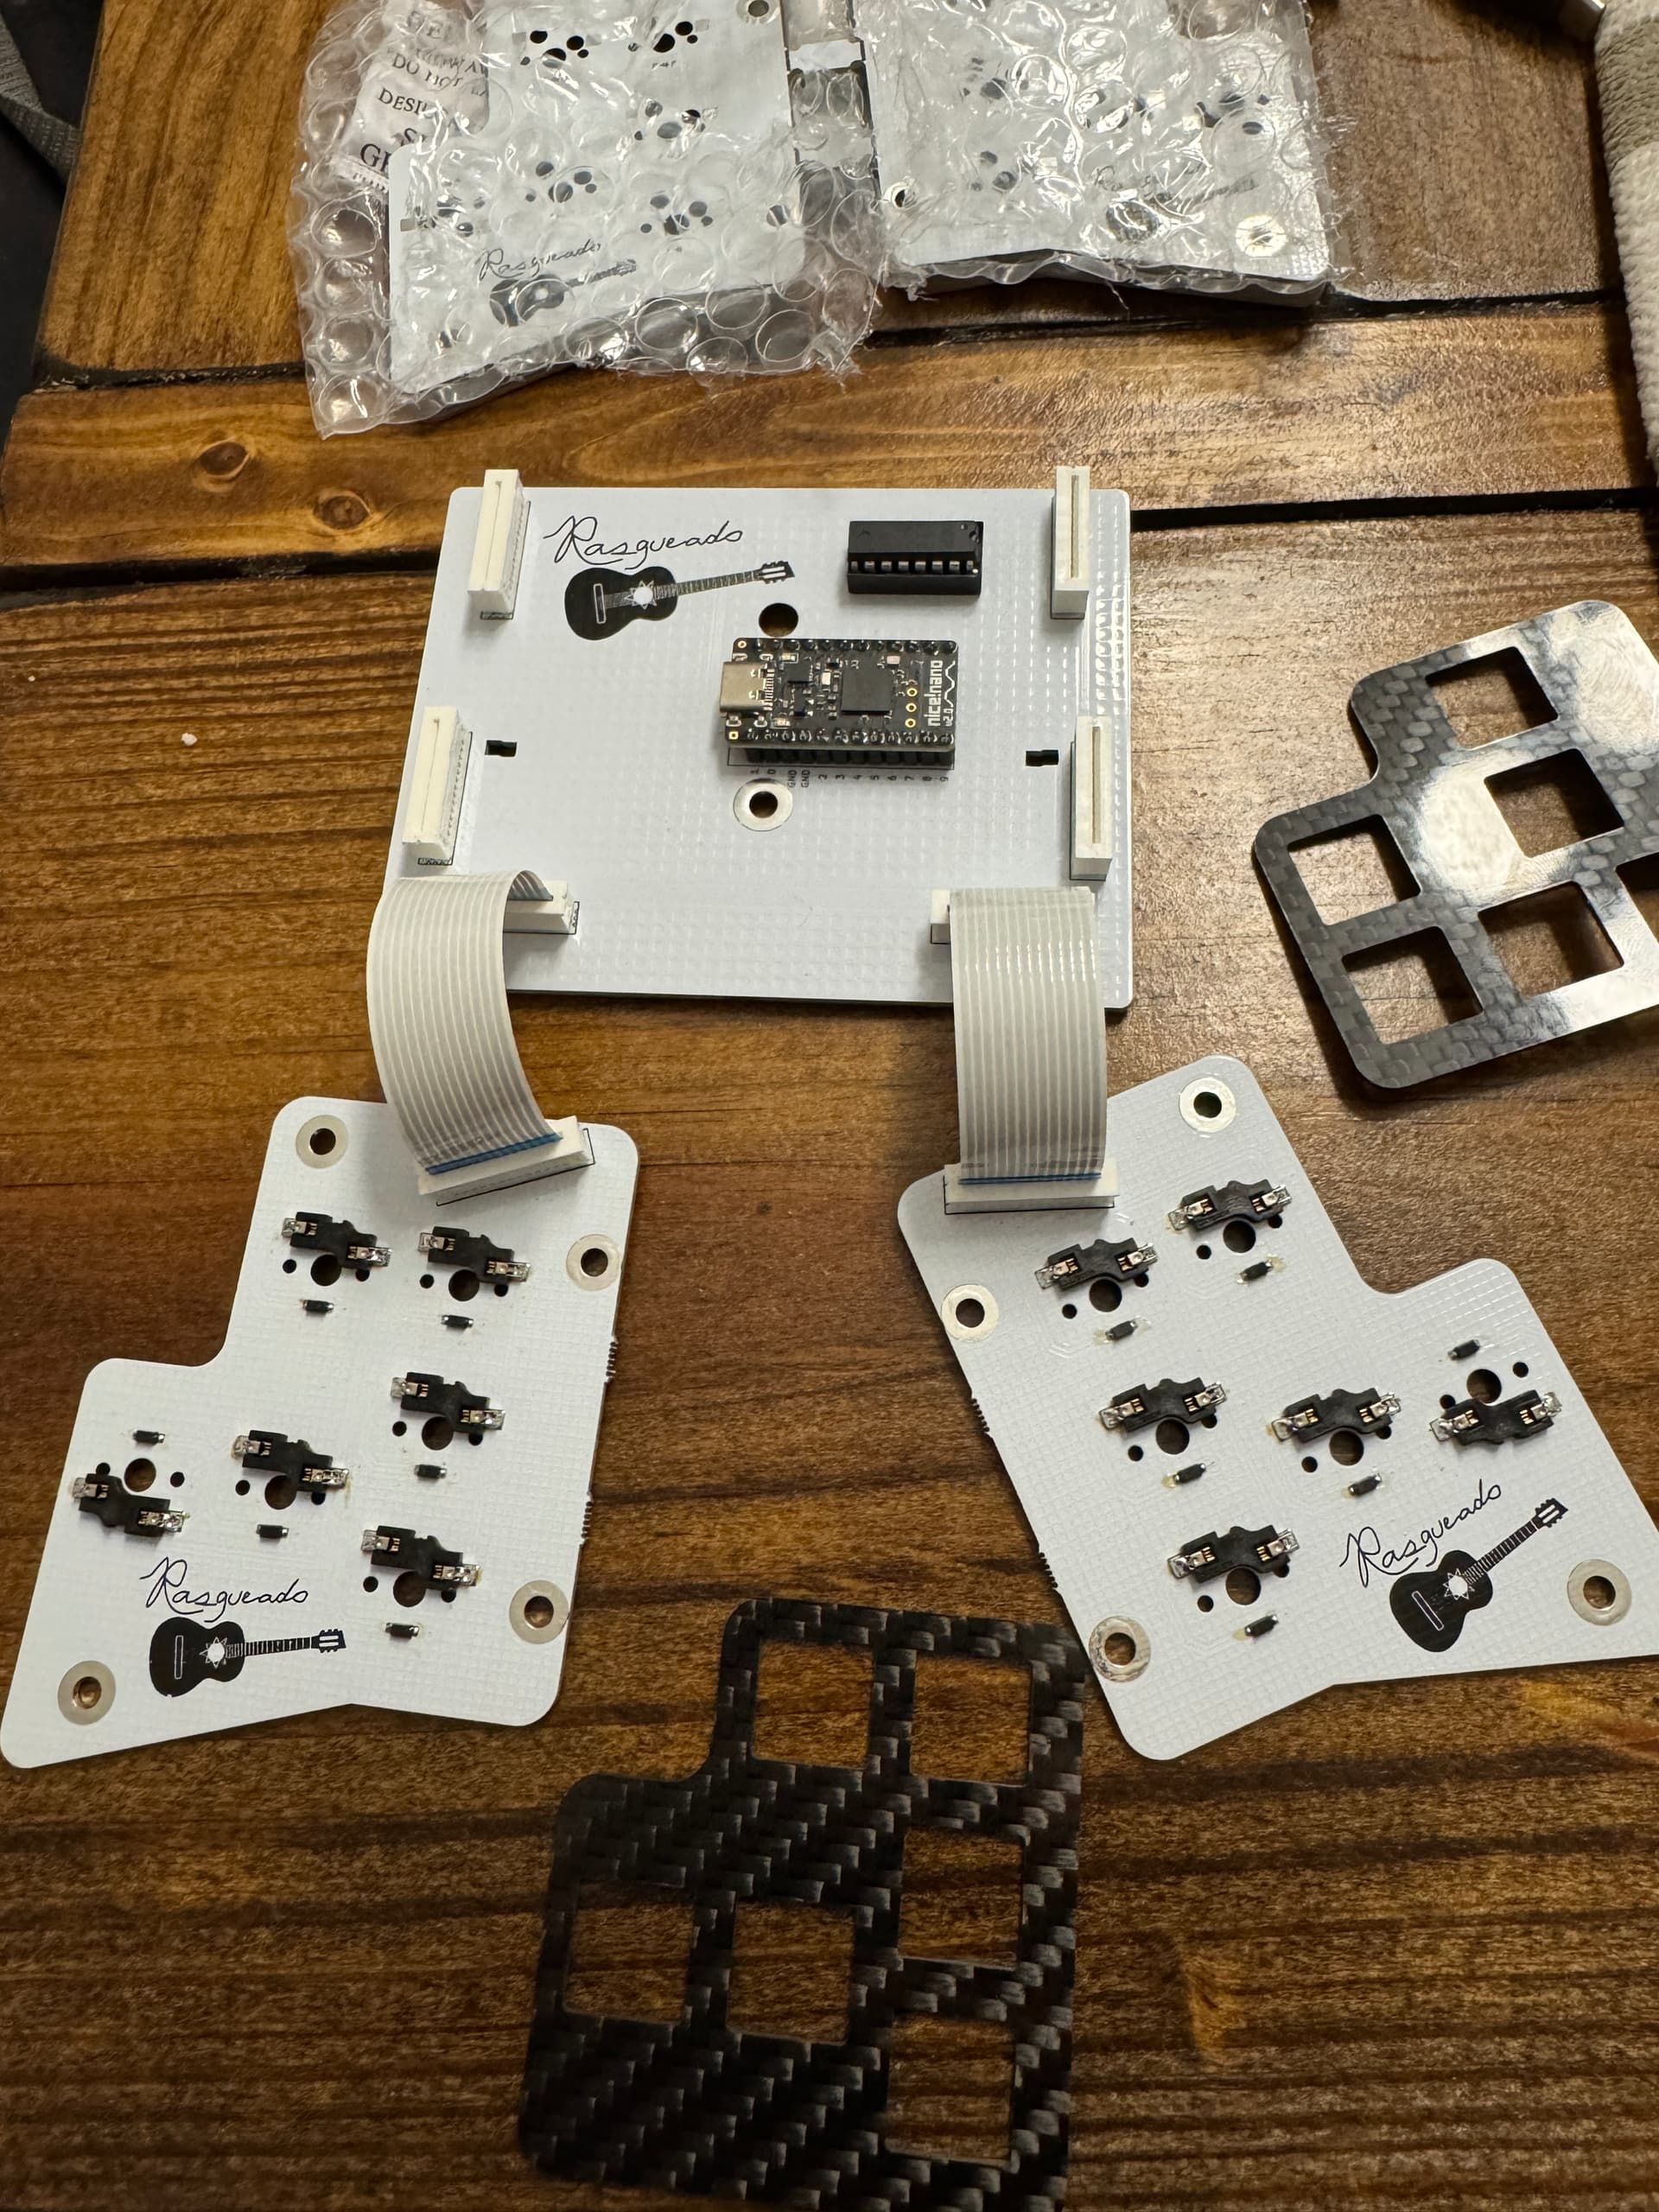
The fact that I have one switch on each board in a different orientation may look weird at first glance, but it’s to prevent interference with the keywell PCB. You’ll see this in action a few pictures down.
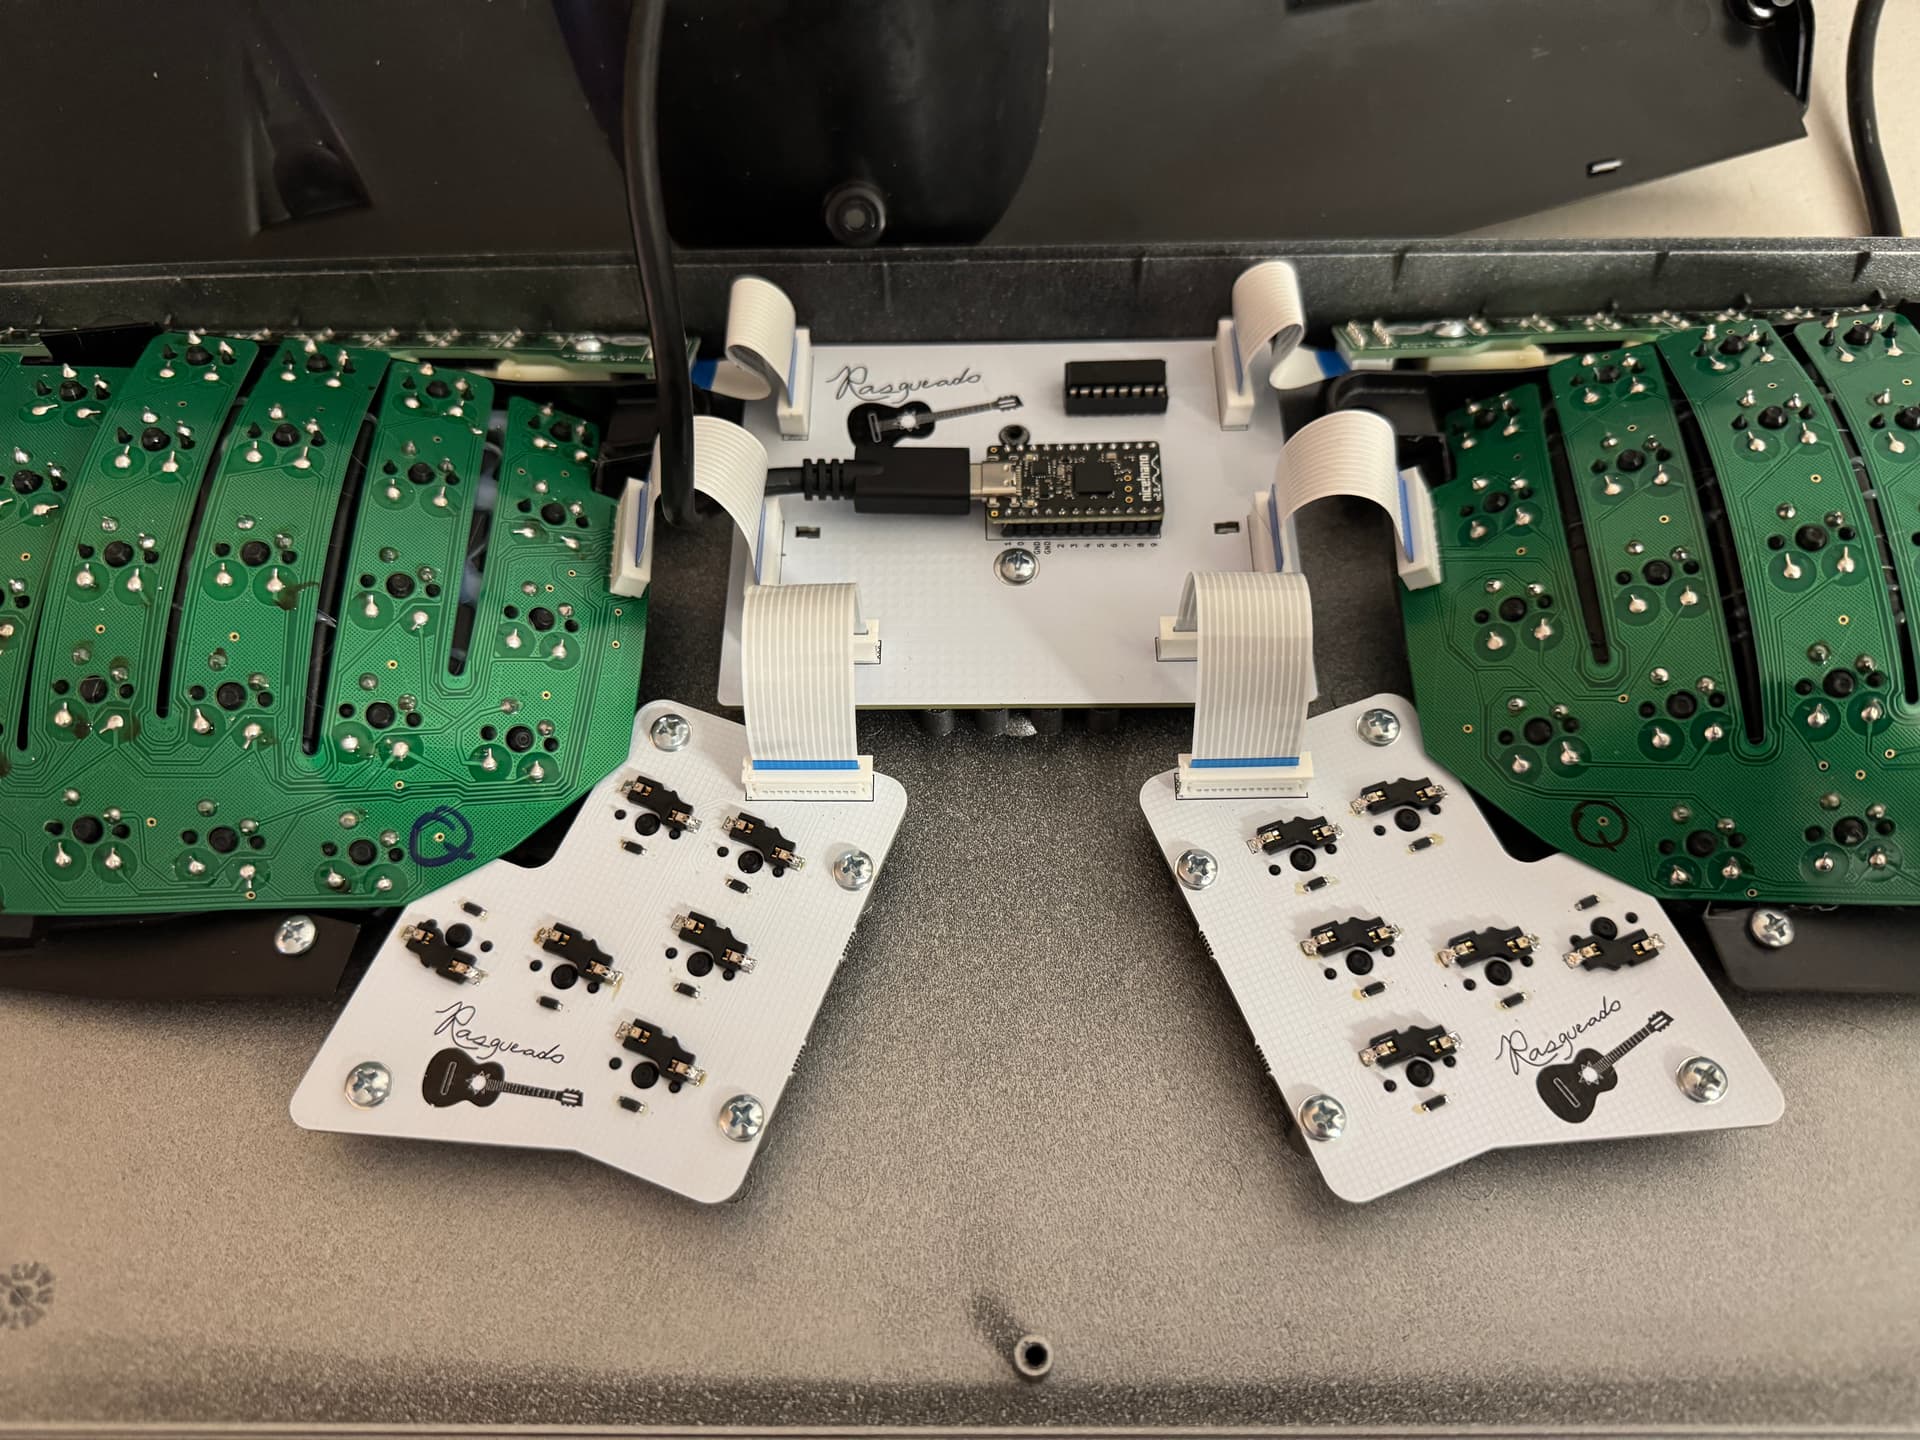
Notice the hot swap sockets closest to the “Q” markings on the keywell PCBs. If I hadn’t flipped the orientation, I think that it would have collided with the other PCB.
I did throw GMK Mictlan back on this board after the photoshoot above because I can see this taking over as my daily driver and Mictlan now shares the crown as my favorite GMK set (tied with OG Skidata).
This project has been super cool because I designed the PCBs, designed the plates (and found a manufacturer for them that I really like - CNC Madness), and wrote the ZMK firmware for it.
I think that this project is pretty much done even though I will continue to create these PCBs for all of my KA2s. But… I am having a recurring intrusive thought in the back of my mind saying “Wouldn’t it be fun to design the main replacement board around a SEEED Xiao with two shift registers?!” I will see how long I can resist the temptation to do that.
Also… I think I’m finding that I really enjoy soldering surface mount diodes. No, I’m not joking. Yes, I know it’s weird.
12 Likes
I’ve clearly not been paying attention, I recall some earlier posts and being fascinated by the PCB Kinesis used for the main keys. Now I’m only realizing that what you’re doing, and please correct me if I’m wrong, is completely gutting the Kinesis OEM control and making it 100% your own and I think that’s amazing.
7 Likes
You are 100% correct! I wish I was the first to come up with such a clever idea, but I built on ideas I saw from both GitHub - kinx-project/kint: kinT keyboard controller (Kinesis controller replacement) and GitHub - dcpedit/pillzmod: Replacement PCBs for the Kinesis Advantage/Contour keyboards. Both of those projects built on earlier work as well from people who figured out the KA2 matrix and had their own projects.
I had used the Kinesis KinT for years in my KA2s and I never thought to make replacement thumb cluster PCBs until I saw the work done in the Pillzmod project. Making my own thumb PCBs allowed me to remedy one of my biggest gripes with KA2s, which is that they never had switch plates for the thumb clusters. Now, I can choose whichever material I want for thumb plates as long as I can find a manufacturer to produce it!
3 Likes
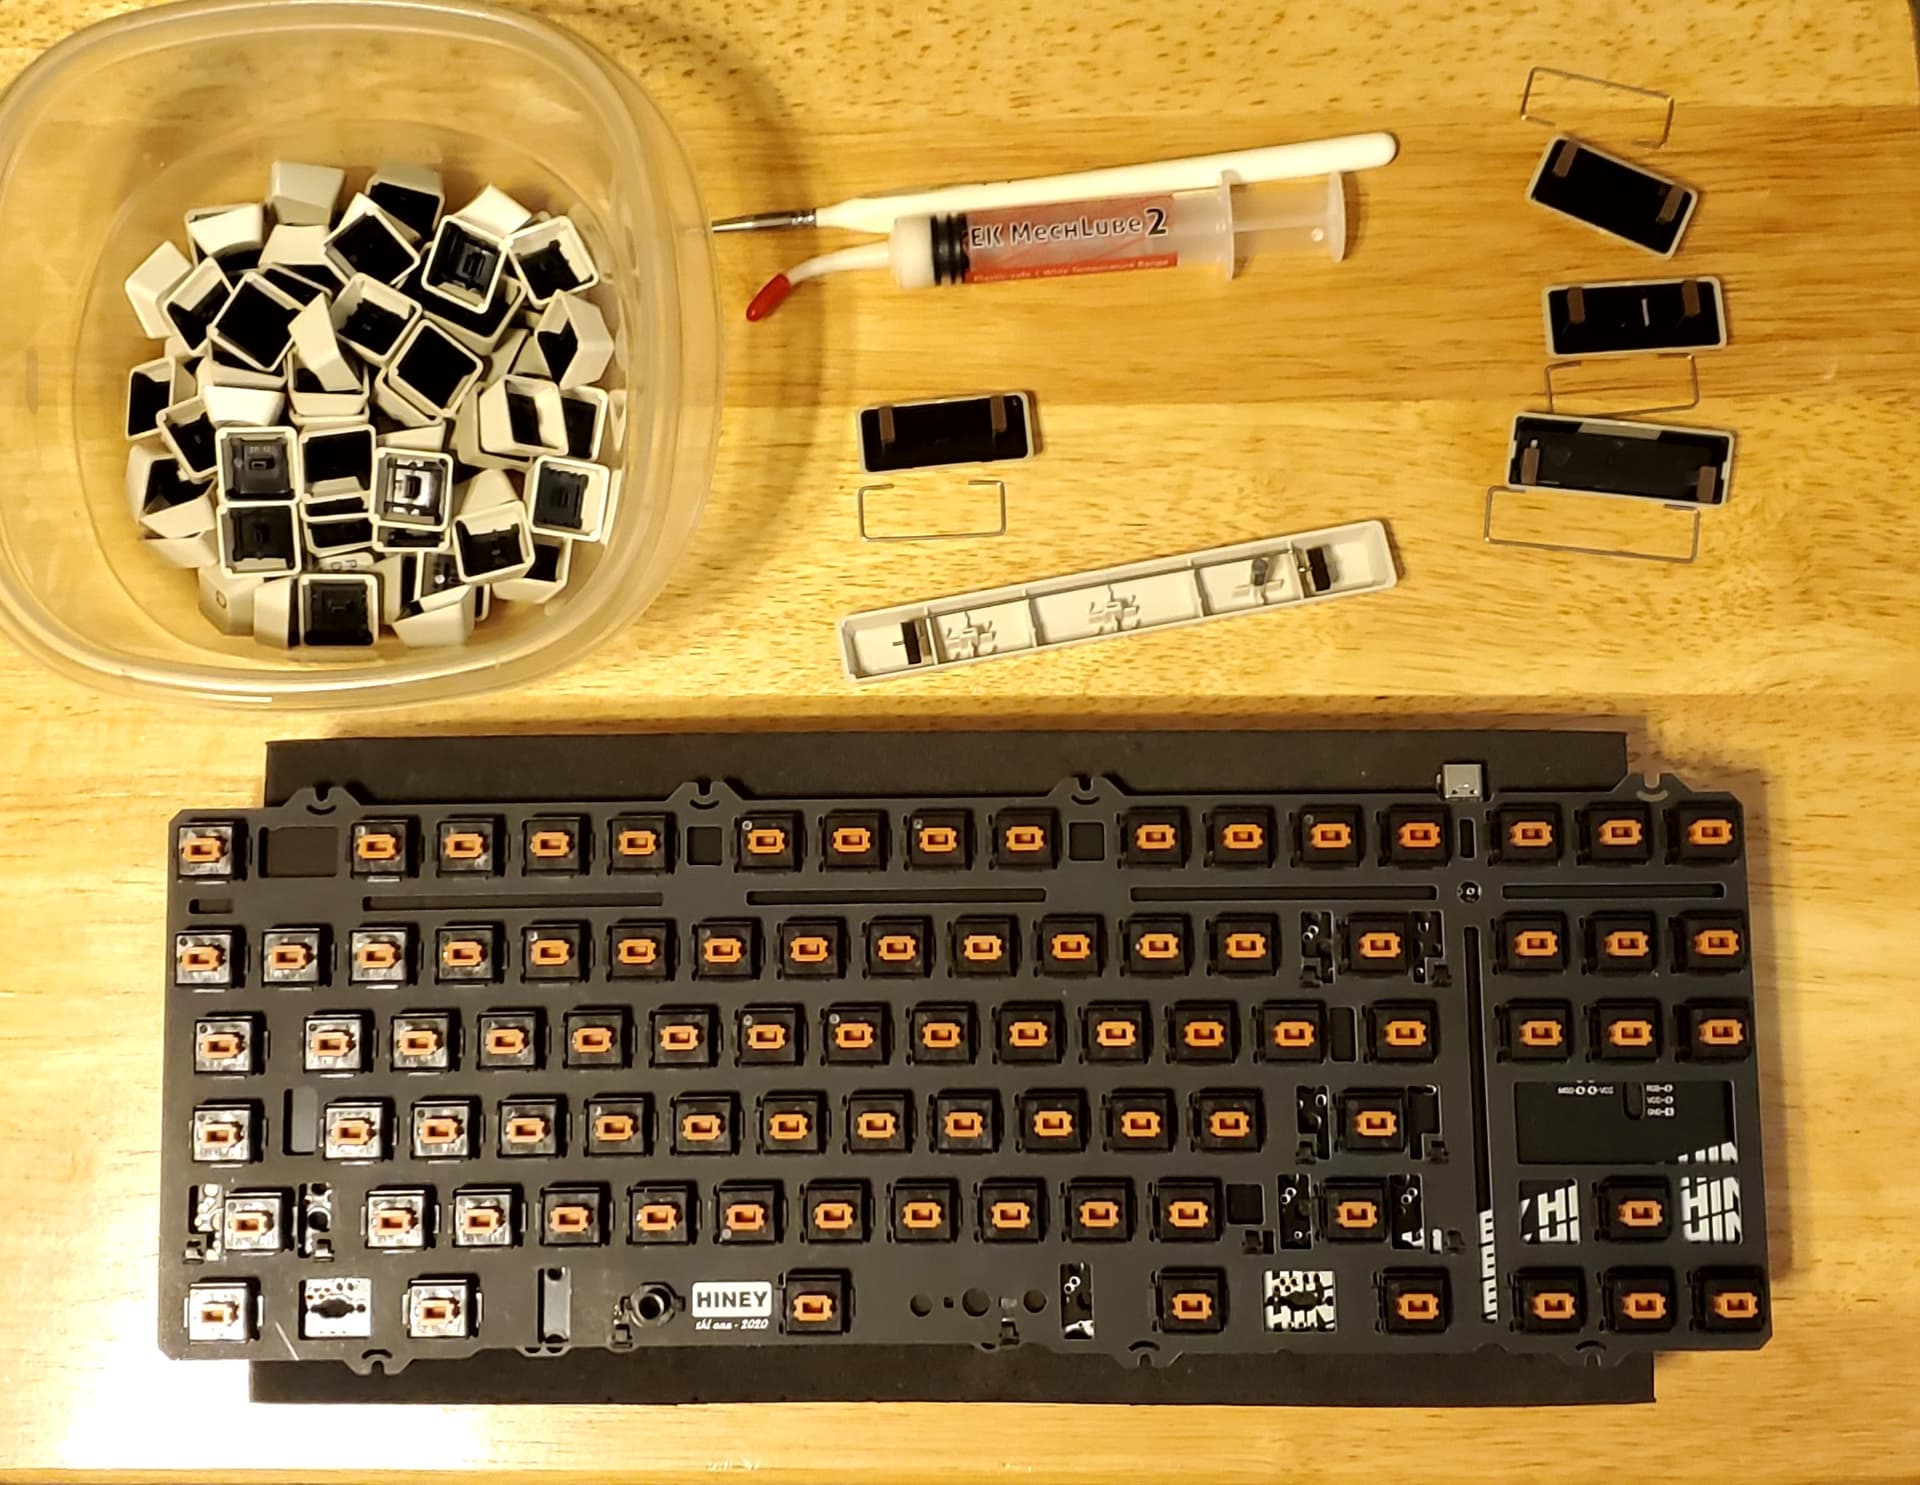
Spent the last 3 days reworking my Aalto keyboard. I originally built it with Canglan v2 switches on aluminum. I decided it was just too harsh and clacky. So a while back I ordered another PCB and PC plate.
I mill-maxed the new PCB and tried at least a dozen switches in with the PC plate. I didn’t like any of it. I finally found that some lubed and filmed cherry switches were close to what I wanted.
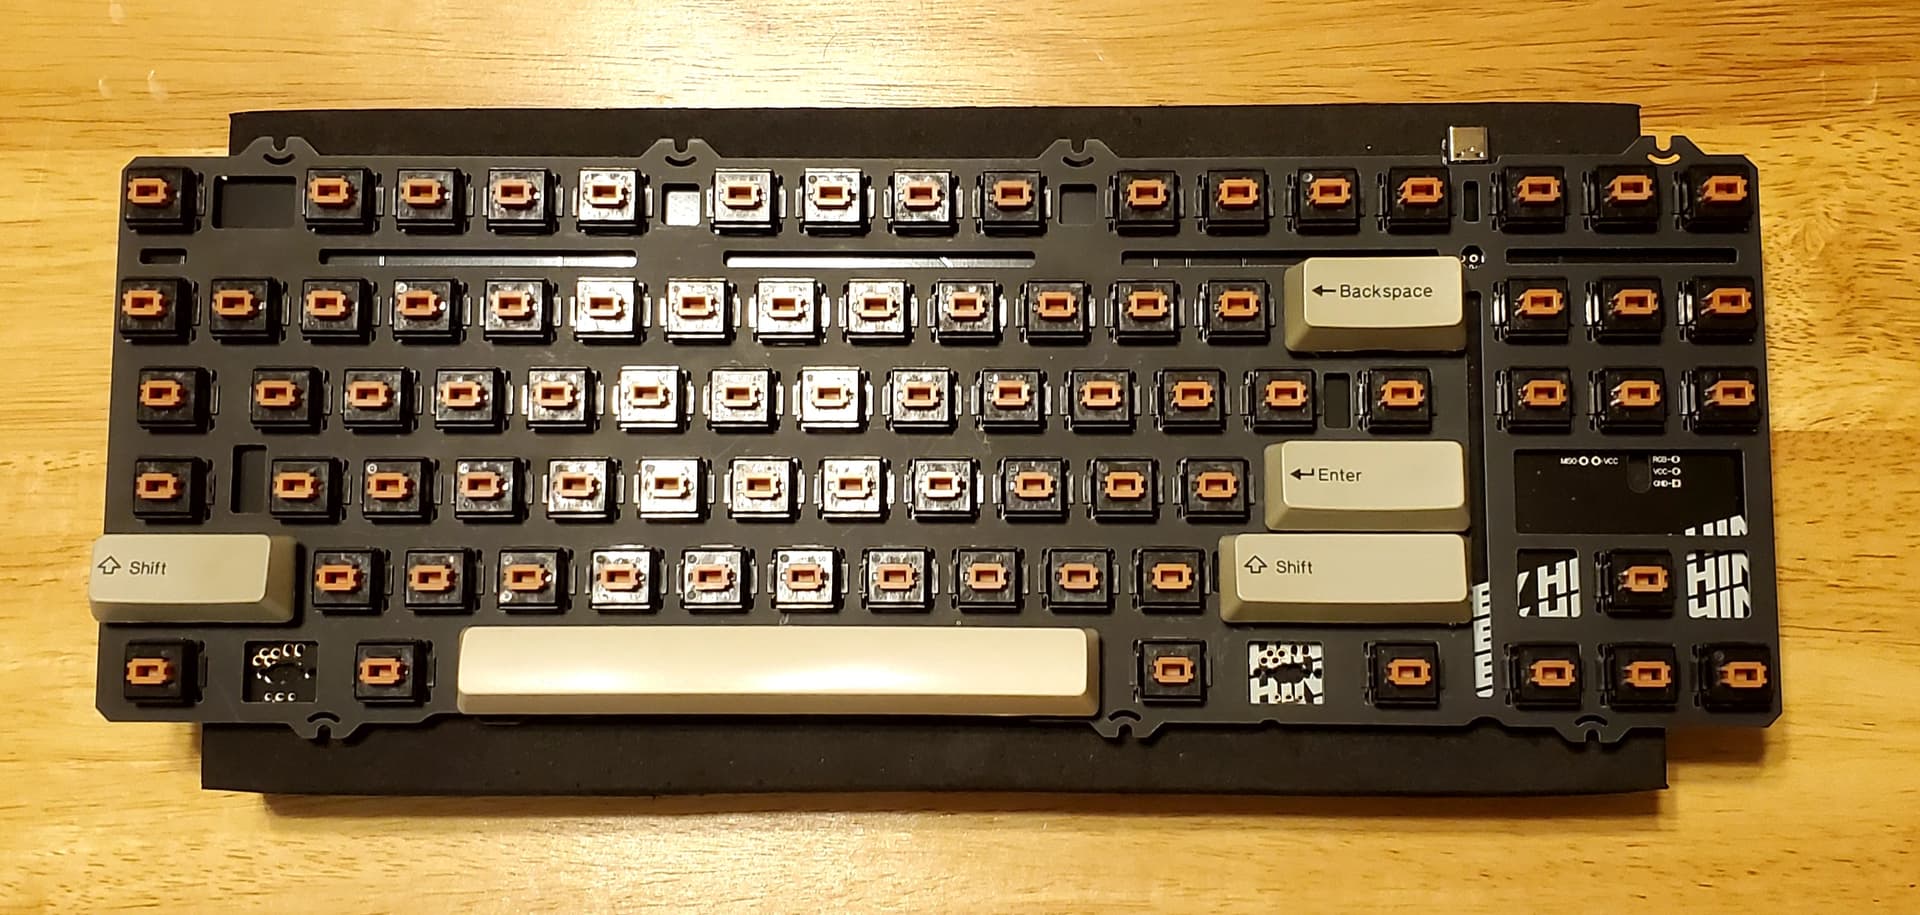
I spent 2 days hand lubing and filming. Got it all built up. But the PC plate was not going to work. The space bar in particular sounded dead and awful. So I desoldered the aluminum plate and used that. Now it’s much better.
But I realize that it’s of the utmost importance to me to make sure to lube the stem pole and bottom housing tube for these switches. Otherwise you will get occasional high pitched ticking when typing. You can pinpoint it by tapping on the bottom front edge of a key. Good to know because I’m about to lube and solder in some more for another build.
I prefer to tub lube for better consistency and time savings. Because tub lubing gets all surfaces of the stem, I hadn’t noticed how important it was to lube that spot. However, I don’t like the muted sound of cherry switches when they have lube on the bottom on the stem. So I usually have to lube them by hand.
For this next batch I’m going to tub lube them and then wipe away the bottom edges. We’ll see how that goes
5 Likes
I feel like we should dedicate a thread to switches that need a post lubing to prevent this phenomenon. I never noticed this on any switches until I bought a couple of different HMX switches. I don’t own any long pole switches otherwise so I’m not sure if that’s the real issue. Regardless, that ticking drives me nuts and is much worse than leaf noise to me.
3 Likes
It’s an annoying yet real phenomenon that the more you tame the sound of a switch, the more prone it is to producing irritating noises. You don’t notice all the small noises like spring ping, leaf tick, and stem rattle when they all occur in concert with the key press. But if you remove one or two, it’s easy to hear one blatant issue rearing its ugly head. I wish I could ignore it, but that’s just not how I operate. ![]()
6 Likes
You did inspire me to take a casual glance on eBay for some borked Advantage 2’s. Now that I know this is possible, I’m curious to take a swing at it myself.
2 Likes
Awesome, love that! I’ll post links to my repos once I take them off of being private in case you wanted to glance at them for any ideas!
1 Like
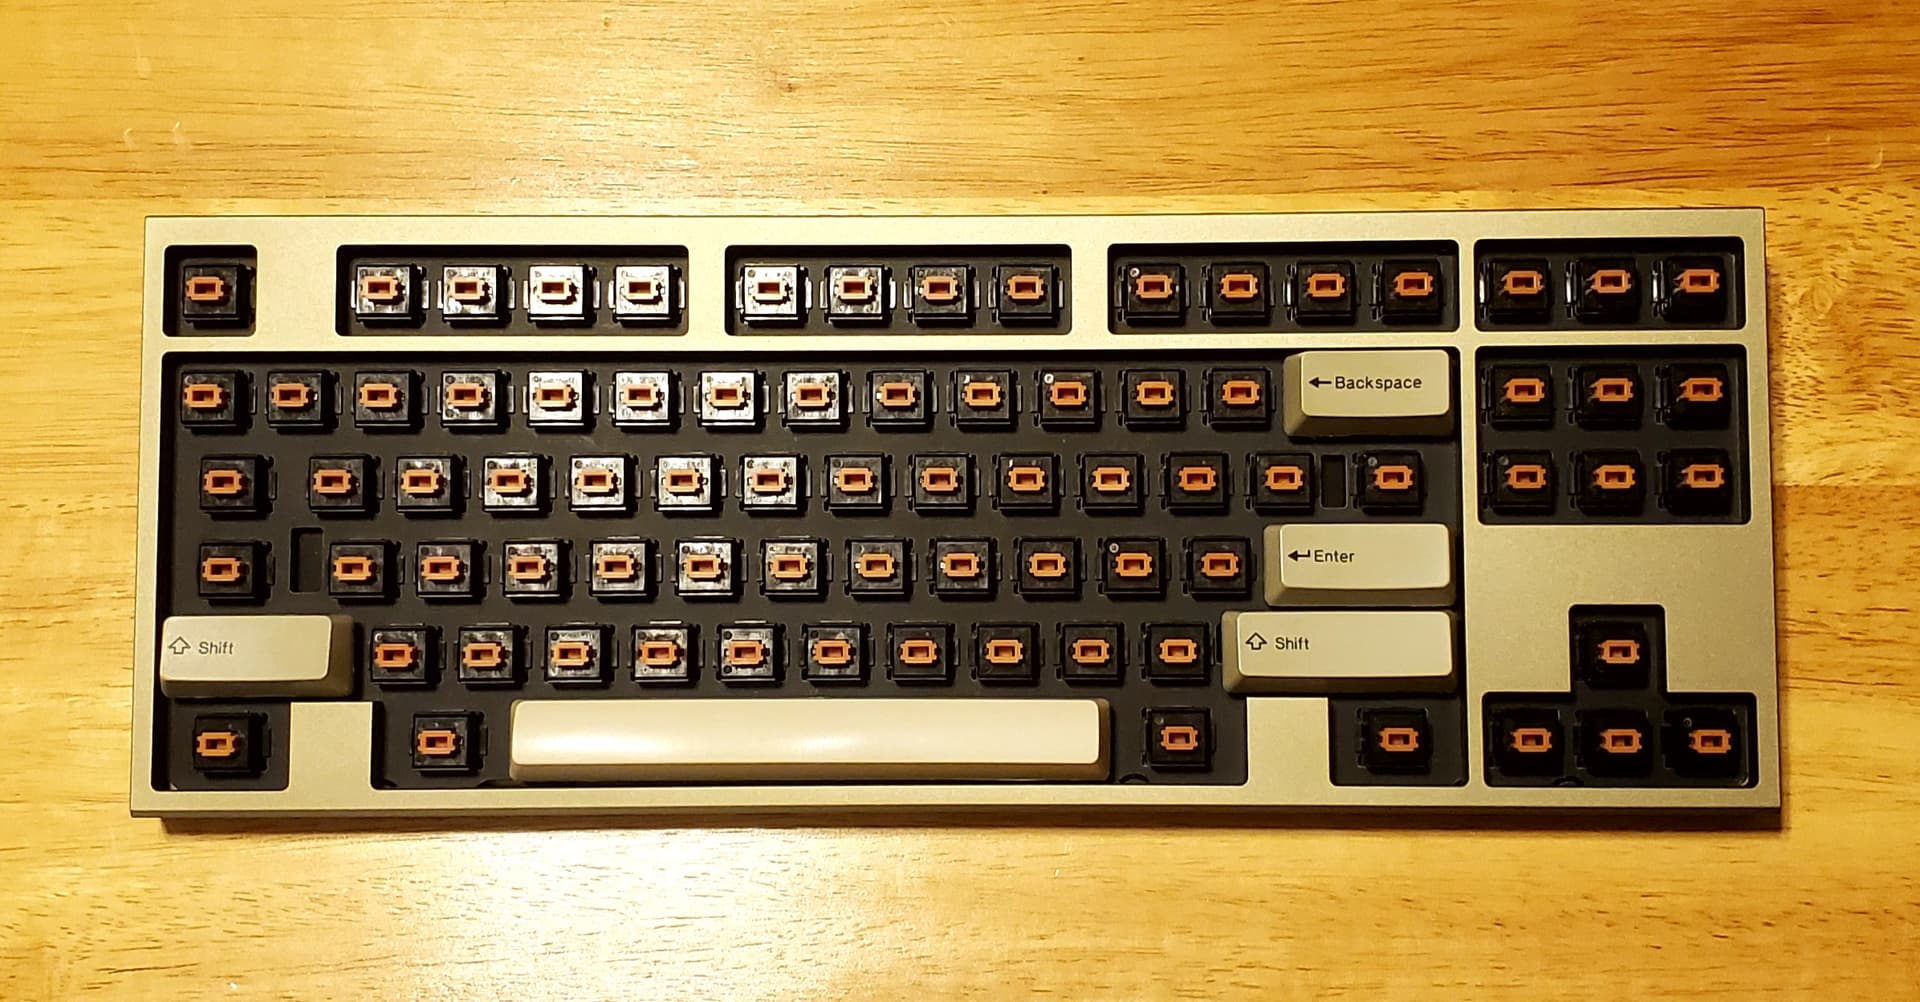

Finally bit the bullet & built the ALPS setup for my TKL One! Decided to against going with the last batch of SKCM Browns I have since I’ve been way more into linear switches lately. So I took the last of those really good condition SKCM Oranges I have & linearized them, also swapped the stock springs out for lubed 40g sprit ALPS springs. Went with thick doubleshot ABS ALPS caps from a Leading Edge. Using it right now to type this out, really happy with the way it turned out! Will post a soundtest of it later on when I get a chance.
13 Likes
Those keycaps look sweet. Is the extra ALPS mount in the spacebar for stabilization?
1 Like
No, for some weird reason some ALPS KBs actually had the spacer switch that far offset from center. That’s why there is a stabilization bar (the gray thing) on the opposite side. On a board like mine that uses the center switch spot can do without the stabilization bar, but it does help to keep the spacebar from having N/S movement. That’s why I use them even with a centered switch as the ALPS style stabilizers themselves don’t prevent N/S movement at all.
2 Likes
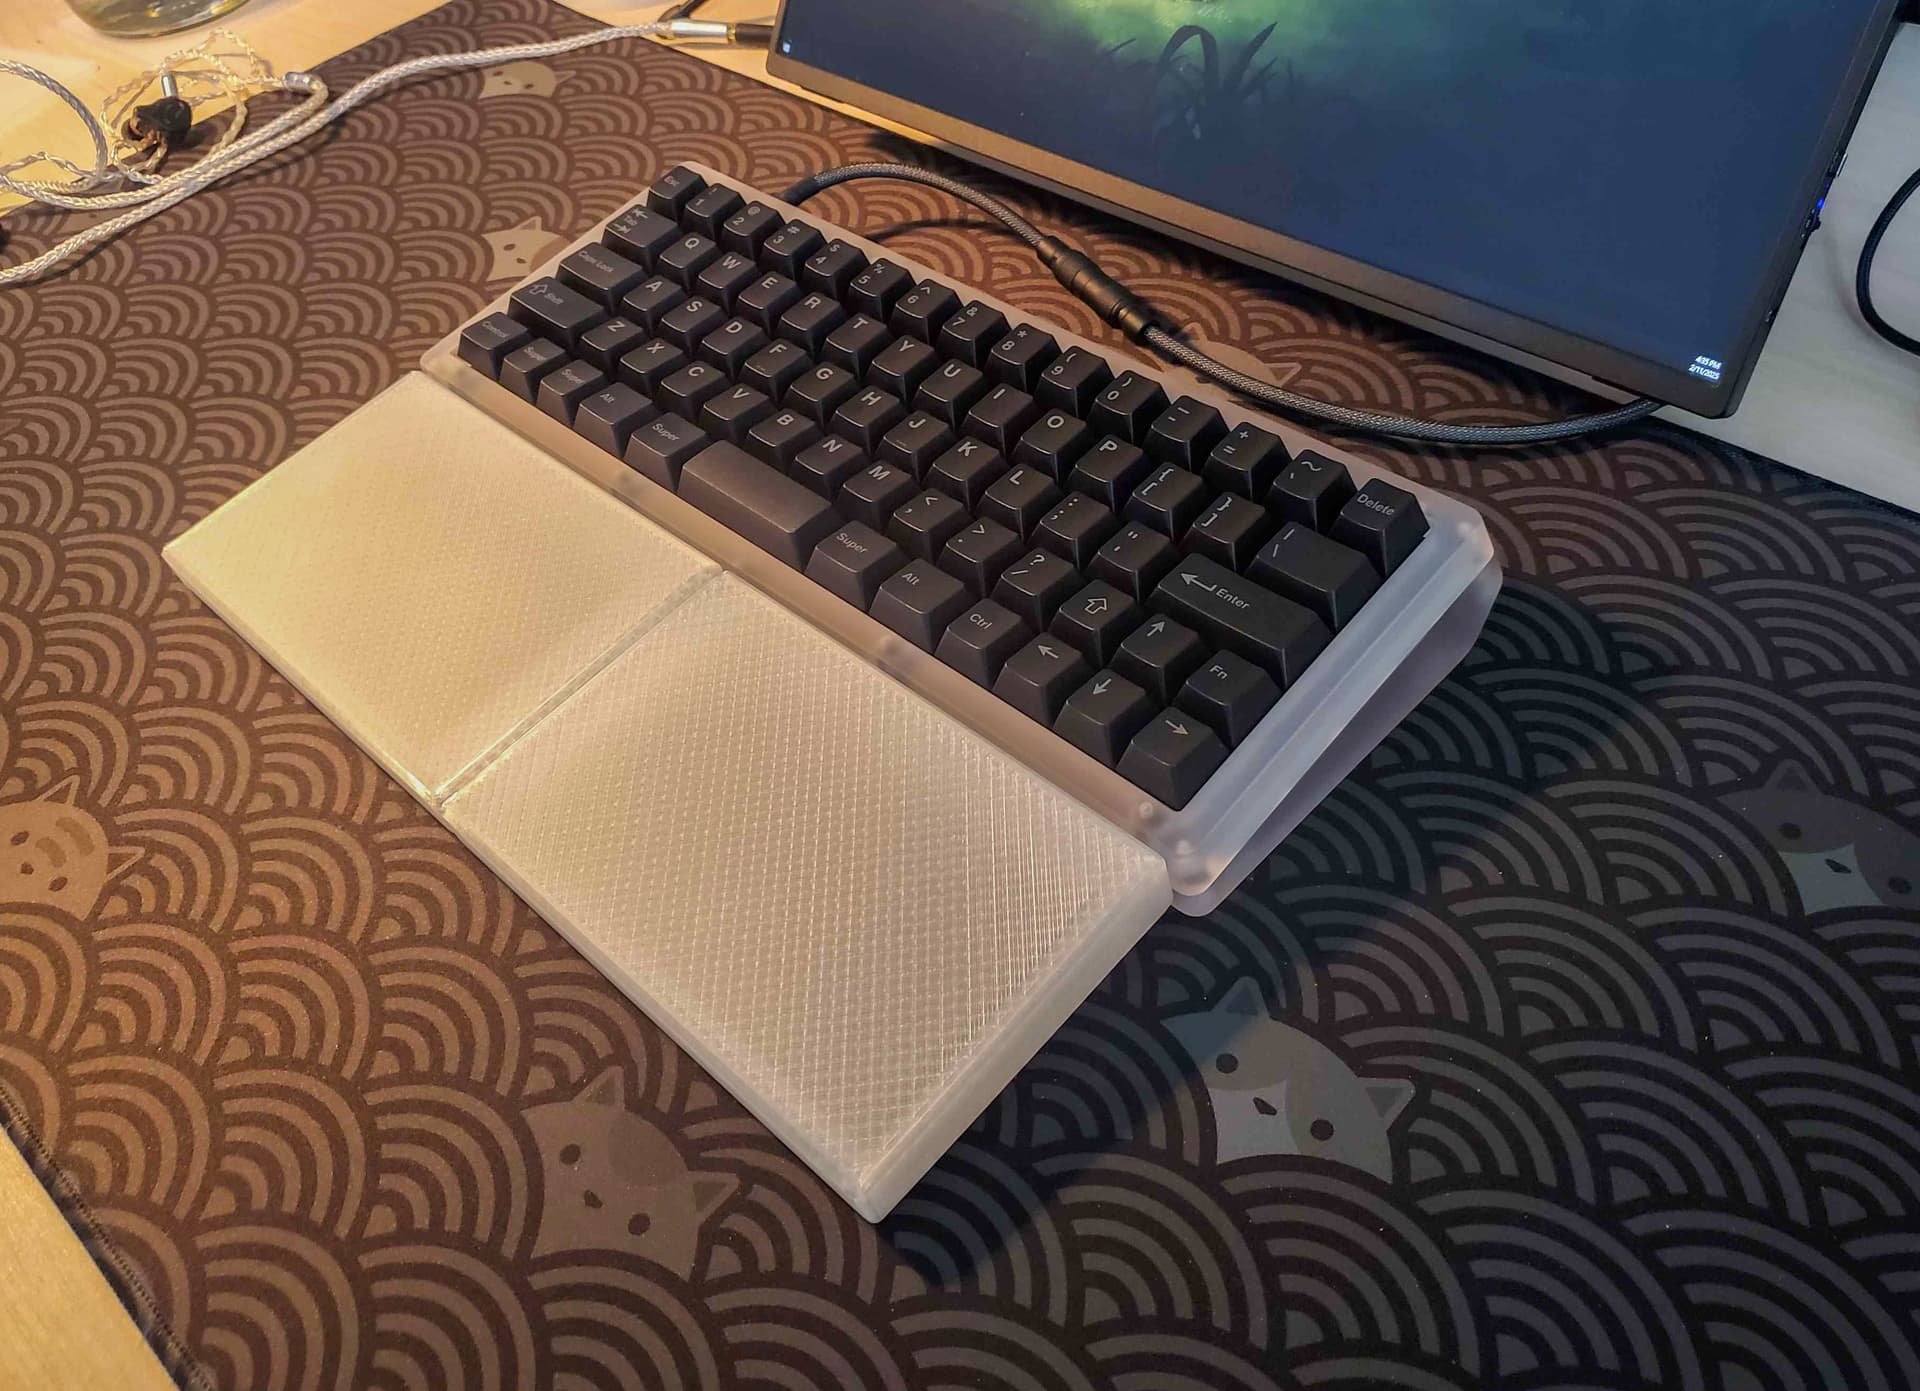
Added magnets to my 3d printed wrist rest design because the interlocking pieces get worn out pretty quickly and don’t stay in at all. Magnets snap the pieces in quite nicely. The dovetail key holds the halves together, and the feet add 4mm of height for taller boards. Without the feet, it’s perfect height for Tofu, Korn, QK60, Frog Mini, etc. Boards like the Sirius60, Viktus Sinne, Fjell need the feet.


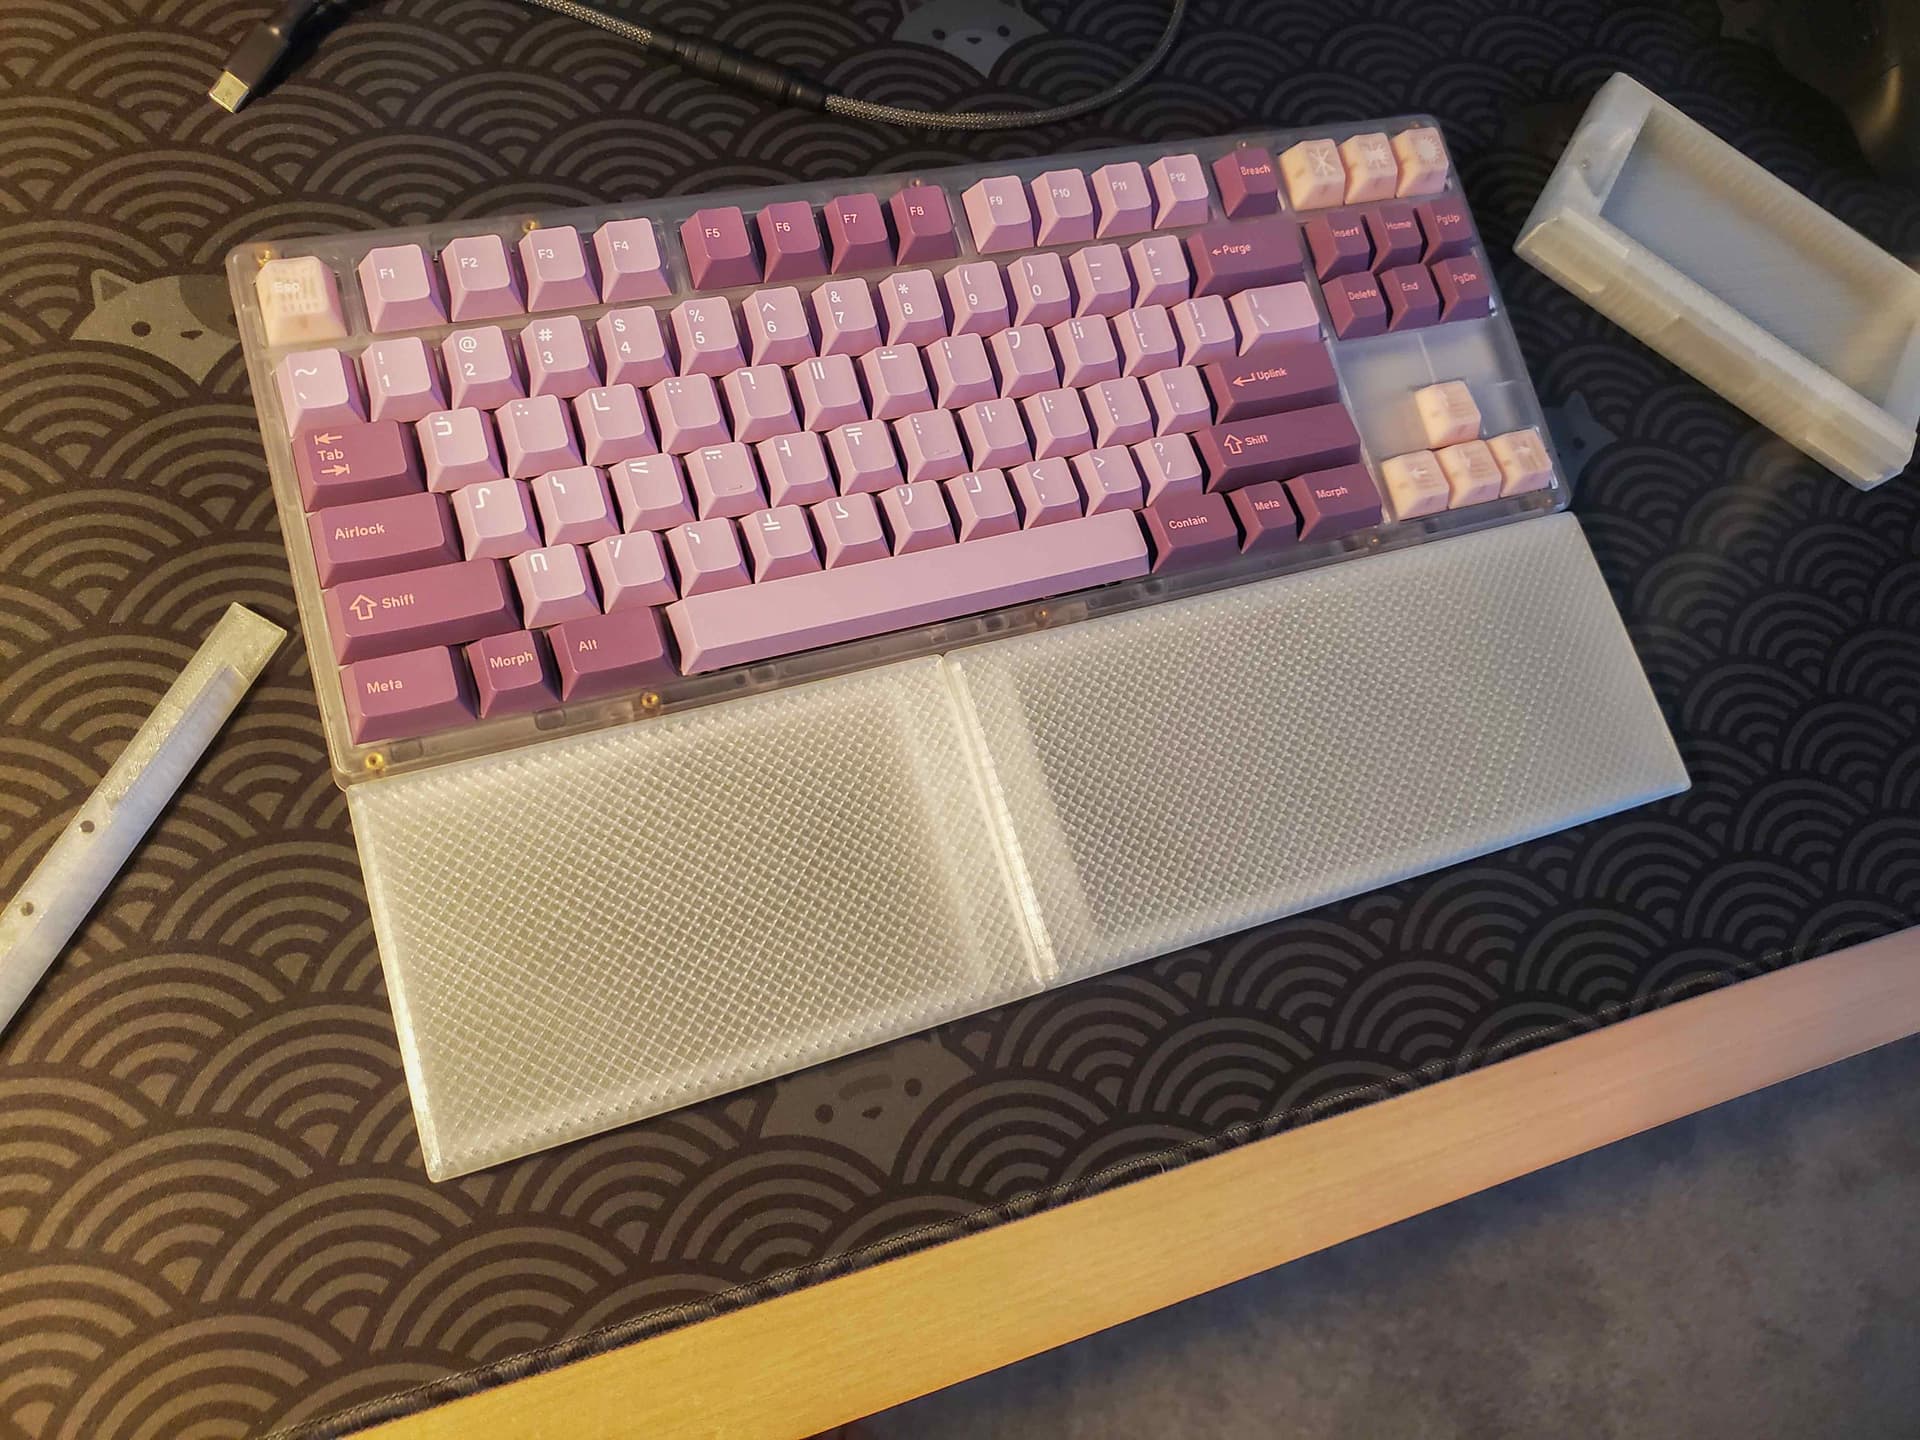
Longer right half for TKLs.
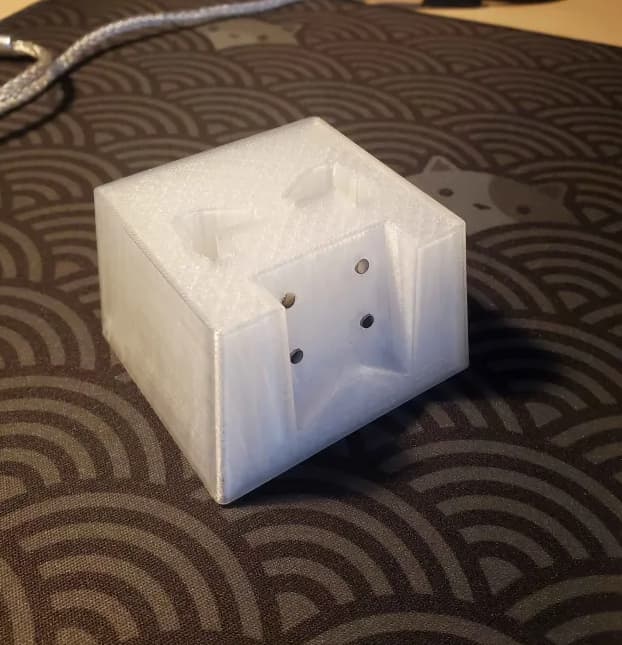
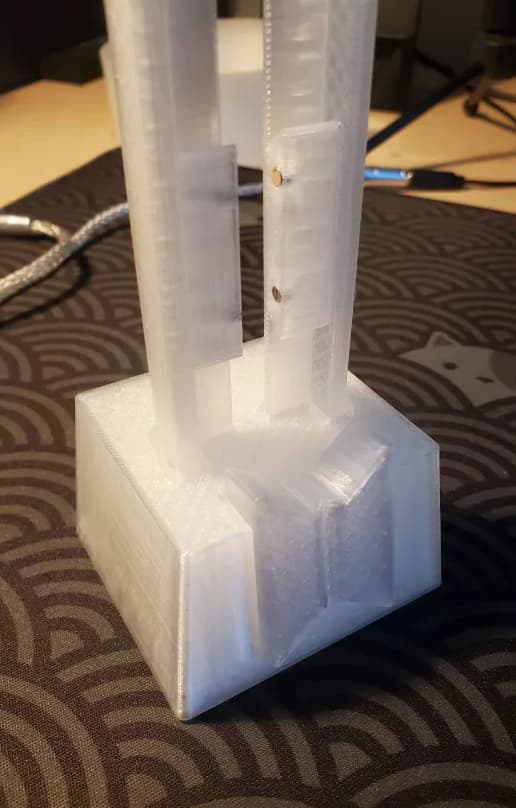
Redesigned the stand as well to hold the feet and dovetail key.
Sorry for the potato pics as usual, bad lighting, hard to see the transparent filament.
I also built a Sirius60 in polycarb. I’m in love with how the curves look in PC.
PCB and PLA plate
Printed the plate in black PLA in 2 pieces that overlap. Sanded and superglued the simple lap joint.
As usual with my custom PCB, mill maxed with 7305s and TX AP Rev4 stabs.
10 Likes
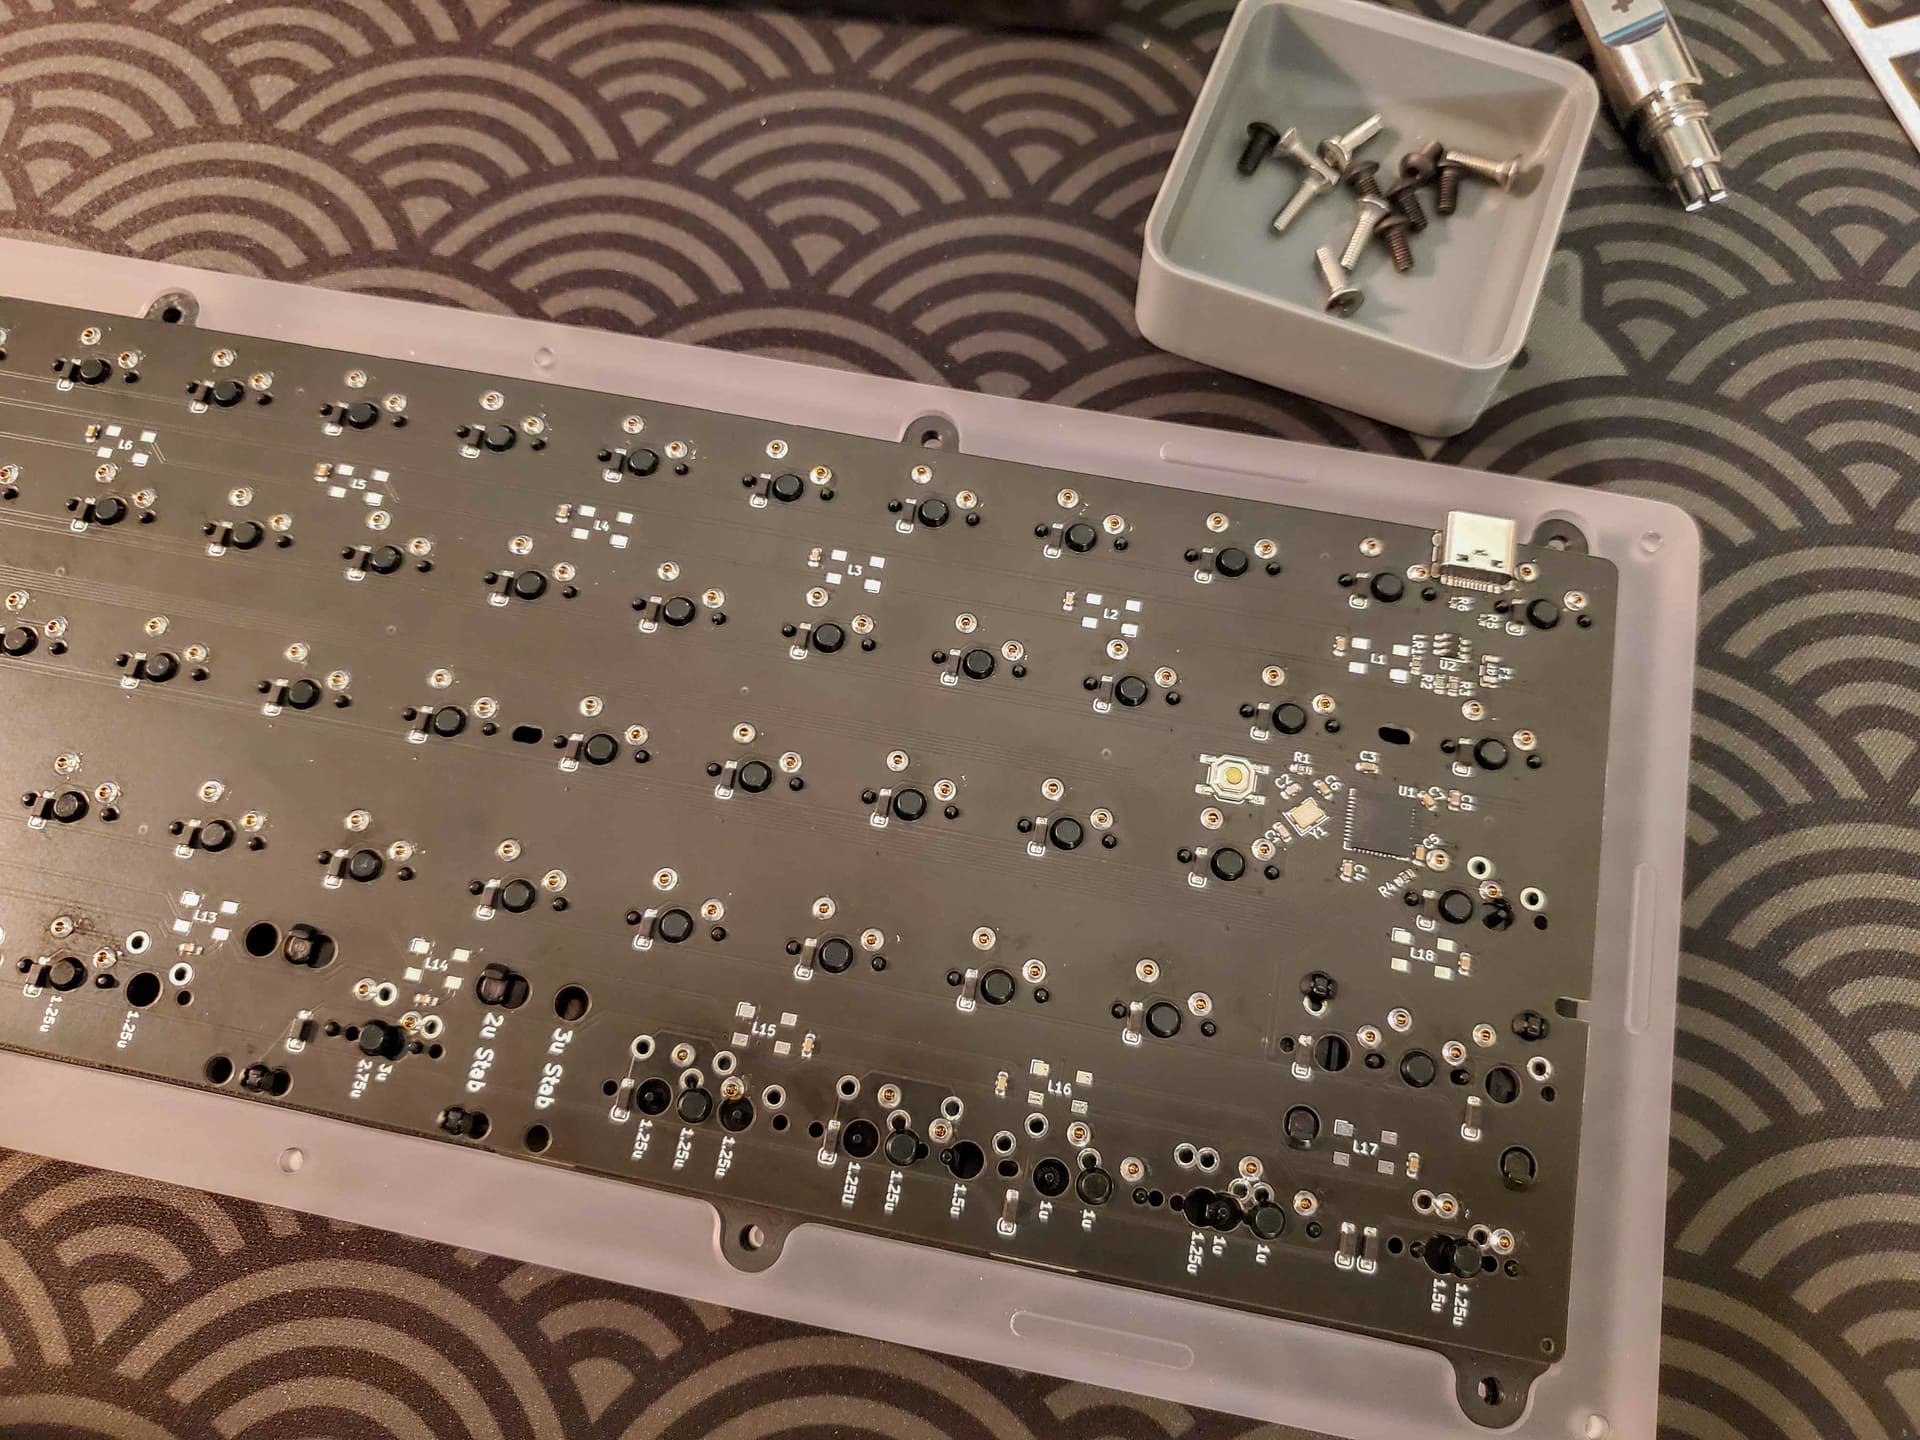
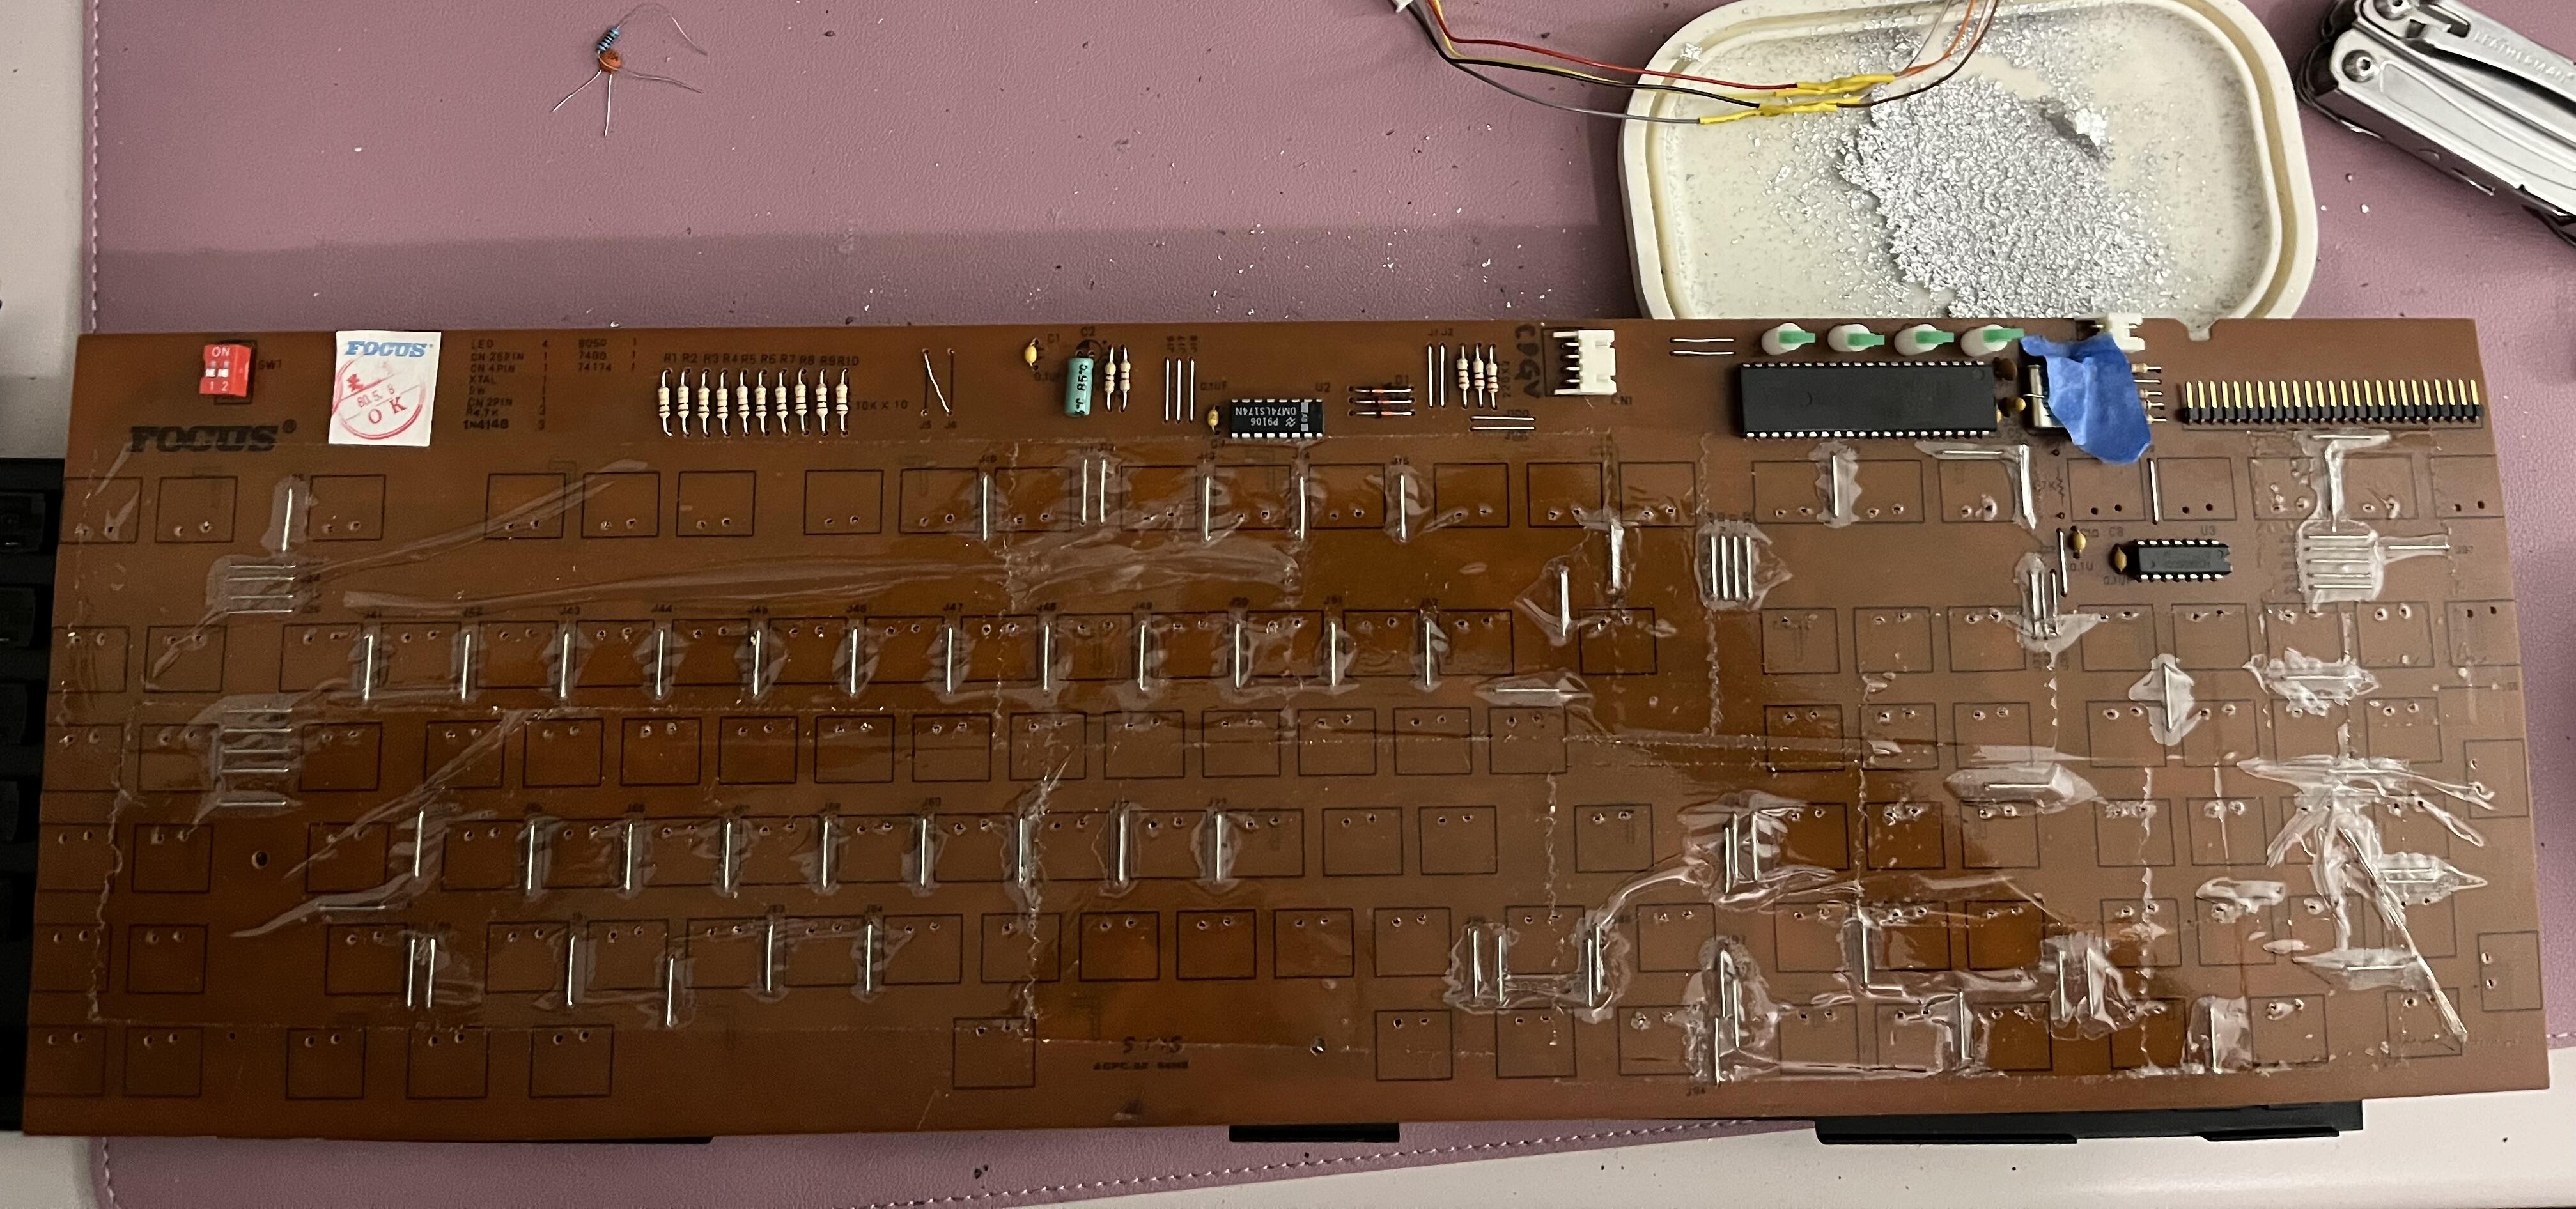
So I finally broke down and desoldered the Focus FK-5001 board. Focus, being Focus, seems to have insulated the dozens of jumpers their single-sided PCB (anybody know when dual-sided PCBs became common?) with a clear tape. I’m going to give them the benefit of the doubt and assume it’s some sort of electrical tape, but man that was NOT my first impression.
It’s completely possible that I desoldered something problematic, but I tend to think the decaying tape (several gaps and cracks are visible) was allowing a couple of the jumpers to connect to the steel plate and/or to each other. I tried the PCB with no switches and the ghosting I’d been seeing was gone. That would also track with the board working okay for a little while at first until it had the stress of actually being used.
Unfortunately, me being me, I lifted several pads surrounding the vias of switches. It’s all through-hole and physically contained, so it should still work. That leaves me with my original conundrum: re-tape over the jumpers with some Kapton and painstakingly straighten the pins to get the PCB back on, or make a matrix and turn this thing into a handwire. I’m not clever enough to figure out the Calculator, so I’ll have to choose between the iconic feature of the board on the one hand, or getting full programmability out of every key on the other.
6 Likes
Quite the crossroads you seem to be in.
2 Likes
Literally the most serious moral quandary anyone has ever faced!!!
BTW, right now I’m leaning towards hand-wired but keeping the PCB around somewhere. The switches are really nice and at first I thought the 5001 had macro programming like the 9000.
Some paper with the number 8008135 written on it in crayon should suffice as a replacement for the calculator LCD. ![]()
6 Likes