The Aquanaut - A new keyboard design from the Sea Collection

I could worke on theAquanaut Type H PCB firmware and assembly today.

The PCB works flawlessly and has a working QMK VIA firmware that I wrote today :slight_smile:
I also assembled switches (Glarses Cherry Purple) with the matching FR4 plate.
Everything have been assembled without issues.

I need to work on the Type C version of the PCB now (the electro capacitive version).

5 Likes

:tada:

1 Like

And with keycaps !

I forgot the numpad 0 stabs :sob: with have to disassemble everything to fix this stupid mistake :frowning:

3 Likes

Oh no! :disappointed_relieved:

I had a similar incident with a recent build that I never talked about. I built my M0lly from TKC and forgot to test the stabilizers until after it was built. The backspace stabilizer is totally borked. Basically doesn’t function. I said fuck it and remapped it. One day I’ll get around to desoldering it.

3 Likes

My luck is that this is a hotswap PCB, so no big issue disassembling it :wink:

4 Likes

Could work on the project again this WE.

First on the Type H PCB assembly.
I had forgot the numpad 0 stabilizer so had to dissassemble the whole thing to install it …
This is now done and the PCB + switches + keycaps assembly are now waiting for a case to be installed in !

Second on the Type C PCB.
I told before that I heavily designed the PCB around what @Cipulot did on it’s numerous EC PCBs, all open source.
I did not want to reinvent the wheel and found that it’s solution was very good.
I did analyze it’s code on QMK and VIA repository and found it to be of very high quality.

Took me very little time to have the firmware compiling succesfully.
It was time to see if the PCB I designed was working so I plugged it on my USB hub:

Had a few hiccups here and there but surprisingly it very quickly worked flawlessly and I could validate that all the keys were working as intended by pressing the EC pads with my bare fingers :slight_smile:

The experiment of porting my board with his code proved that @Cipulot made an amazing job to make his work easily accessible to everyone: only 2 hours from discovering his code to a fully working firmware, this was surprisingly short !!!

Now that I have both my Type S and Type C PCBs fully functional I can order the cases that will accept them !!!

3 Likes

This was Type C Aquanaut PCB assembly this weekend!

Here is the view with housing rails and stabilizers lubed, dome and springs placed:

And the result when PCB is installed and screwed to the plate:

Working on EC boards is quite involved and something new to me.
Before doing the assembly I watched many @Cipulot videos on how he does it, and also a few from Unreal Keyboard guy that gives usefull tips and tricks.

3 Likes

Well, it LOOKS great. Would love to know how your board ends up feeling compared to a RealForce or HHKB. I’m also still kind of interested in the AliExpress PCBs and kits.

2 Likes

I can’t wait too!

At first I didn’t want a silenced board but finally went with the thinnest rings Deskey had (0.2mm thick).
Typing on the switches looks to eliminate the clack sound at the upstoke while still having a bit of sound, this is what I was looking for.
The deskey 49g purple domes are very interesting, a tiny more tactile than 45g OEM but still not over the top tactility that could be fatiguing.

Still have to order the cases …

3 Likes

Now that both Type H and Type C PCBs are known to work I could send the cases for CNC manufacturing.

Those last days have been dedicated to this task and I am happy to say that the CNC order have been sent and validated by my usual provider Xometry EU !

Two cases have been ordered with the same finish.
As for the finish the accent has been made to raw material finishing for most of the parts.
The top part is using a new material alloy and a new finish (for me), I have yet to receive the part to see it’s final color (the finishing selected can produce various colors in the end) this will be a surprize :wink:

I can’t wait to have the parts in hand !!!

3 Likes

I bet you’re excited to see it in person!

Curious, what’s the ballpark figure for having them CNC one case?

3 Likes

Each board cost me two grand each, that is quite an amount …

To be fair my previous designs were less expensive, this one is the biggest board ever designed and also the amount of material is quite substential.

I tried several times to find a good manufacturer in China with no success.
The first one was a known manufacturer often used for one offs like I do, the pictures of their work showed terrible machining quality and they were not that much less expensive than Xometry.
It tried JLC3DP for the Aquanaut, the price was looking extremely low but unfortunately some features were too complex for them to machine :frowning: I will probably come back to them in the future if I make a new keyboard design, and hope that they will be able to machine it this time.

The price is one of the reason I don’t do keyboard design often, just imagine the number of great custom keyboards I could buy with this amount …

3 Likes

Hmm… considering many keyboards end up costing $500-$700 now, that’s honestly not too bad. Especially with the added value of being something you designed yourself.

What kind of checks are there to ensure the cases will work out? Do you risk paying a large amount for something that may have to be scrapped?

2 Likes

Definitely the price is not terrible for prototypes.

And as you said this is something that I designed myself and tailored exactly to my needs.
The thing is, I can’t compete with great designers like Geon or Bowl that make a lot of designs for their living; my designs are less refined as a result but in the end this is what makes them special to me.

I do mechanical collision tests on Fusion 360 to unsure the parts do not overlap each other.
I also so do assembly test fit on Fusion 360 with case parts, plate, PCB and keycaps to ensure that the design is valid.

Yes there is a risk unfortunately, even if I do all the tests possible to prevent it.
The manufacturer can also do a mistake that can make it totally unusable (never happed to me yet), I guess I can be refunded if this happens.

Up until now I could always use the parts I designed.
Manufacturer can do small interpretation errors that still can be manageable.
It is manufacturer fault for sure, but also designer fault to not have well defined dimensions; one example is to put crazy curves everywere on a part, this definitely complicate the work of the engineer in charge of programming the CNC machine.
One such example is the bottom part of the Manta75; while the aluminium versions were fine the copper version had a small dimensioning error that made it stick out 0.5mm of the top part (this has not been a huge deal as I polished the part and rounded the borders).

This is one of the reasons why I did a boxier design for the Aquanaut :wink:

2 Likes

Even at the more low-end scale, sophistication, and cost point where I’m doing my designs, all of this feels so very true. Accounting for material and tooling limitations while still trying to come up with a design that has some visual interest is a real challenge, and one I occasionally abdicate, lol.

In particular, none of the fabrication methods available for small scale manufacturing, to say nothing of home manufacturing, are super well suited to the dramatic curves and complex profiles that are iconic in our hobby. I have nothing but the utmost respect for anybody who pulls it off, or even gets close, and a little “persuasion” to make a slightly imperfect prototype come together is just par for the course. :joy:

Now all that said, the satisfaction of typing on something that you designed yourself from the ground up, however modest, is very real. One of the things that drew me to making my own boards is the fact that you can end up with an end product that works every bit as well as a commercial offering.

Rico, your designs look great to me. Well done, sir.

1 Like

Thanks for your kind words !

This is so true :wink:

1 Like

I recieved my cases this week, time for the reveal !

I wanted most of my parts to look raw, as such both the alu 6061 bottom and the brass weight camed as machined. Also this allowed me to decrease the price a little bit as a result.

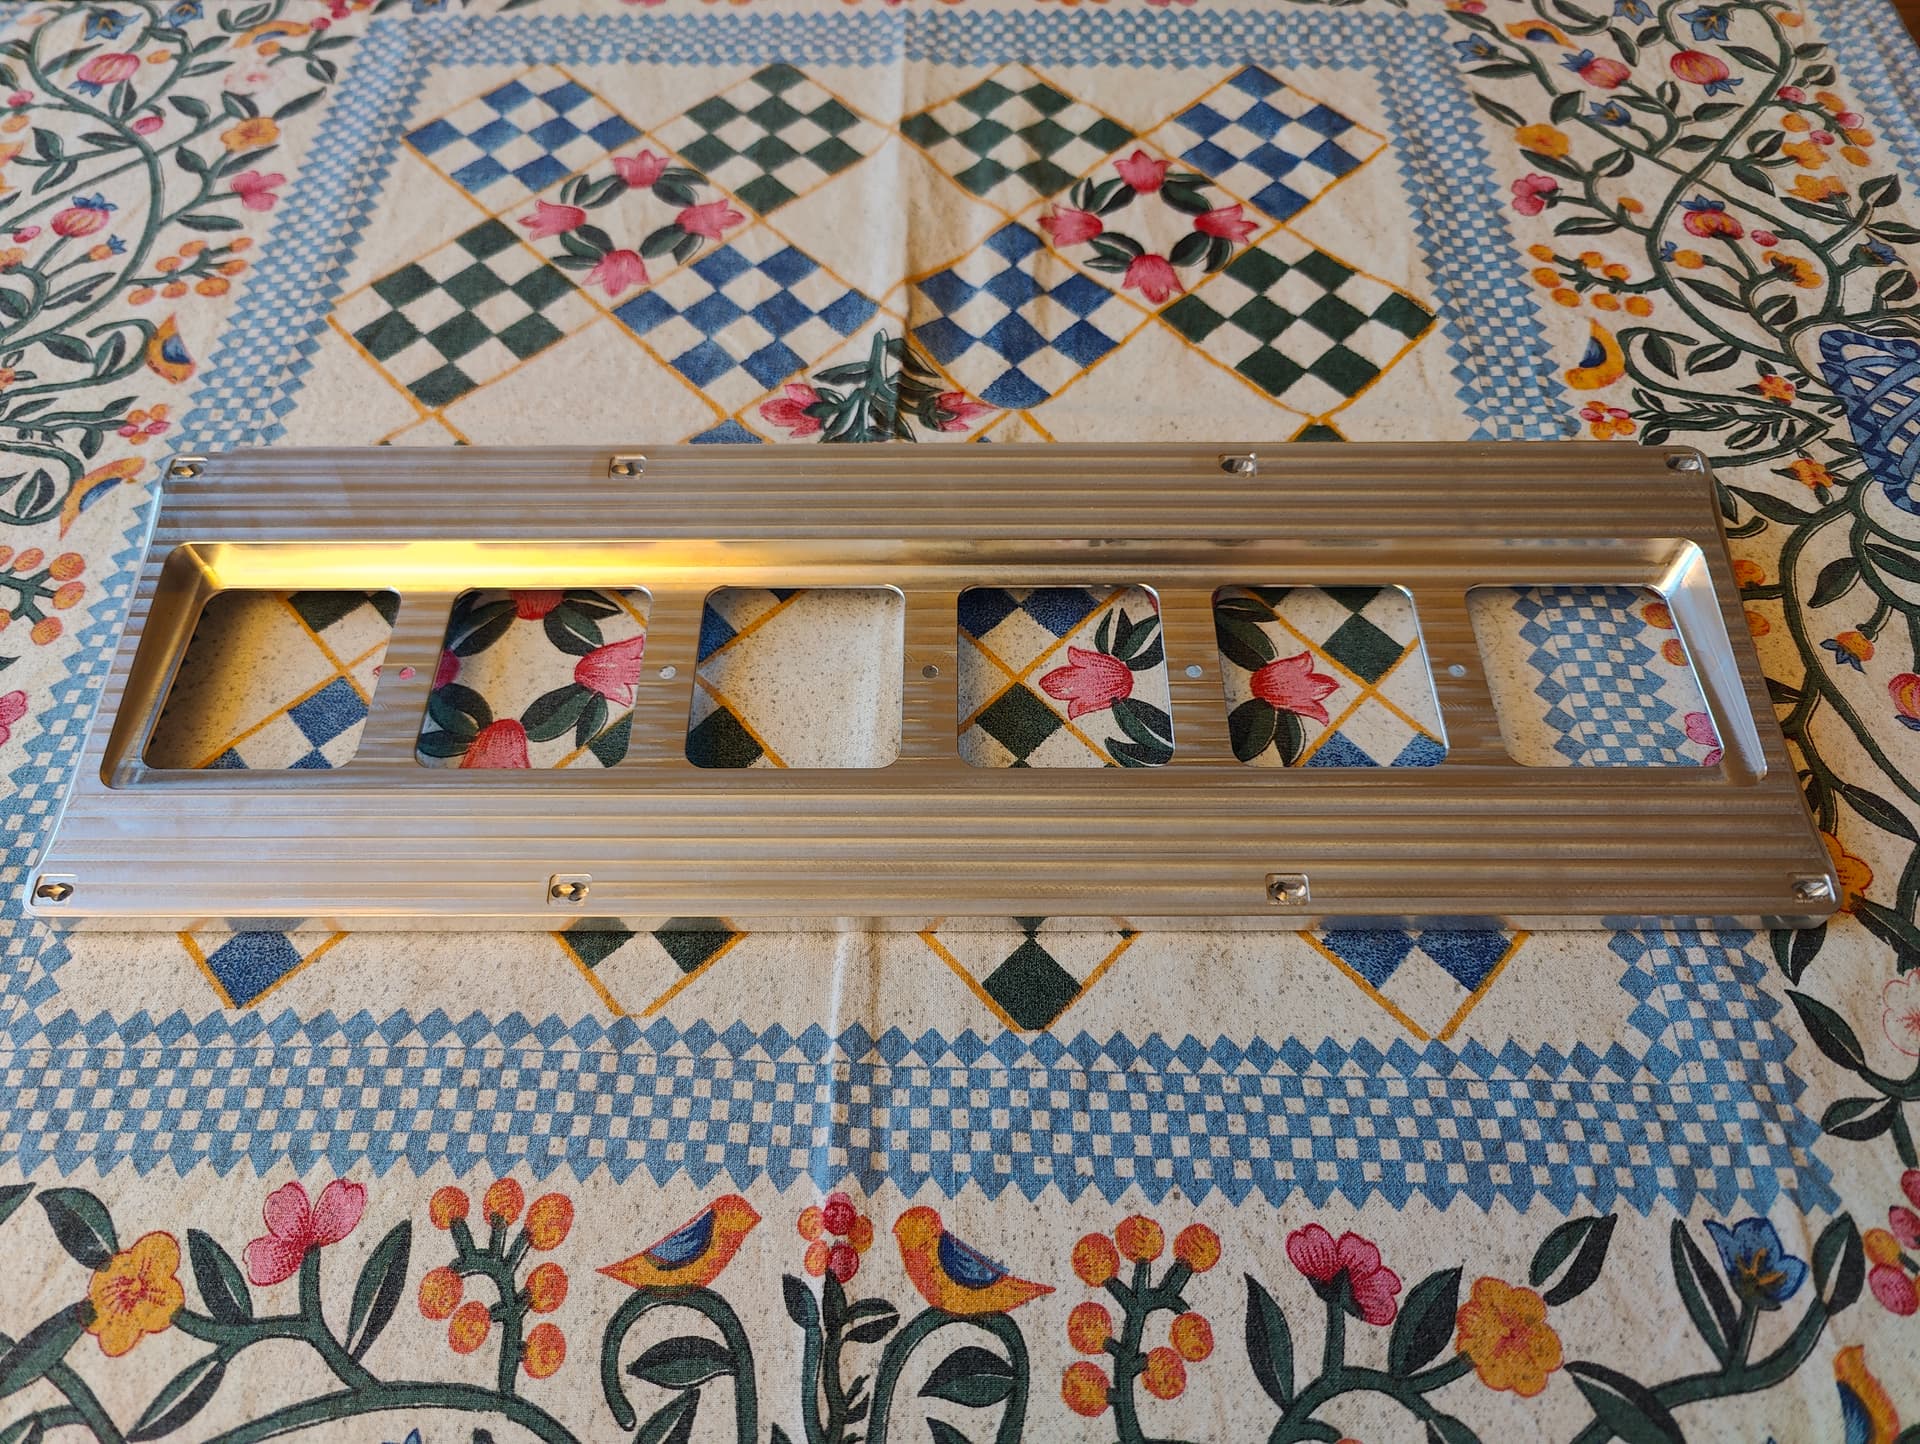
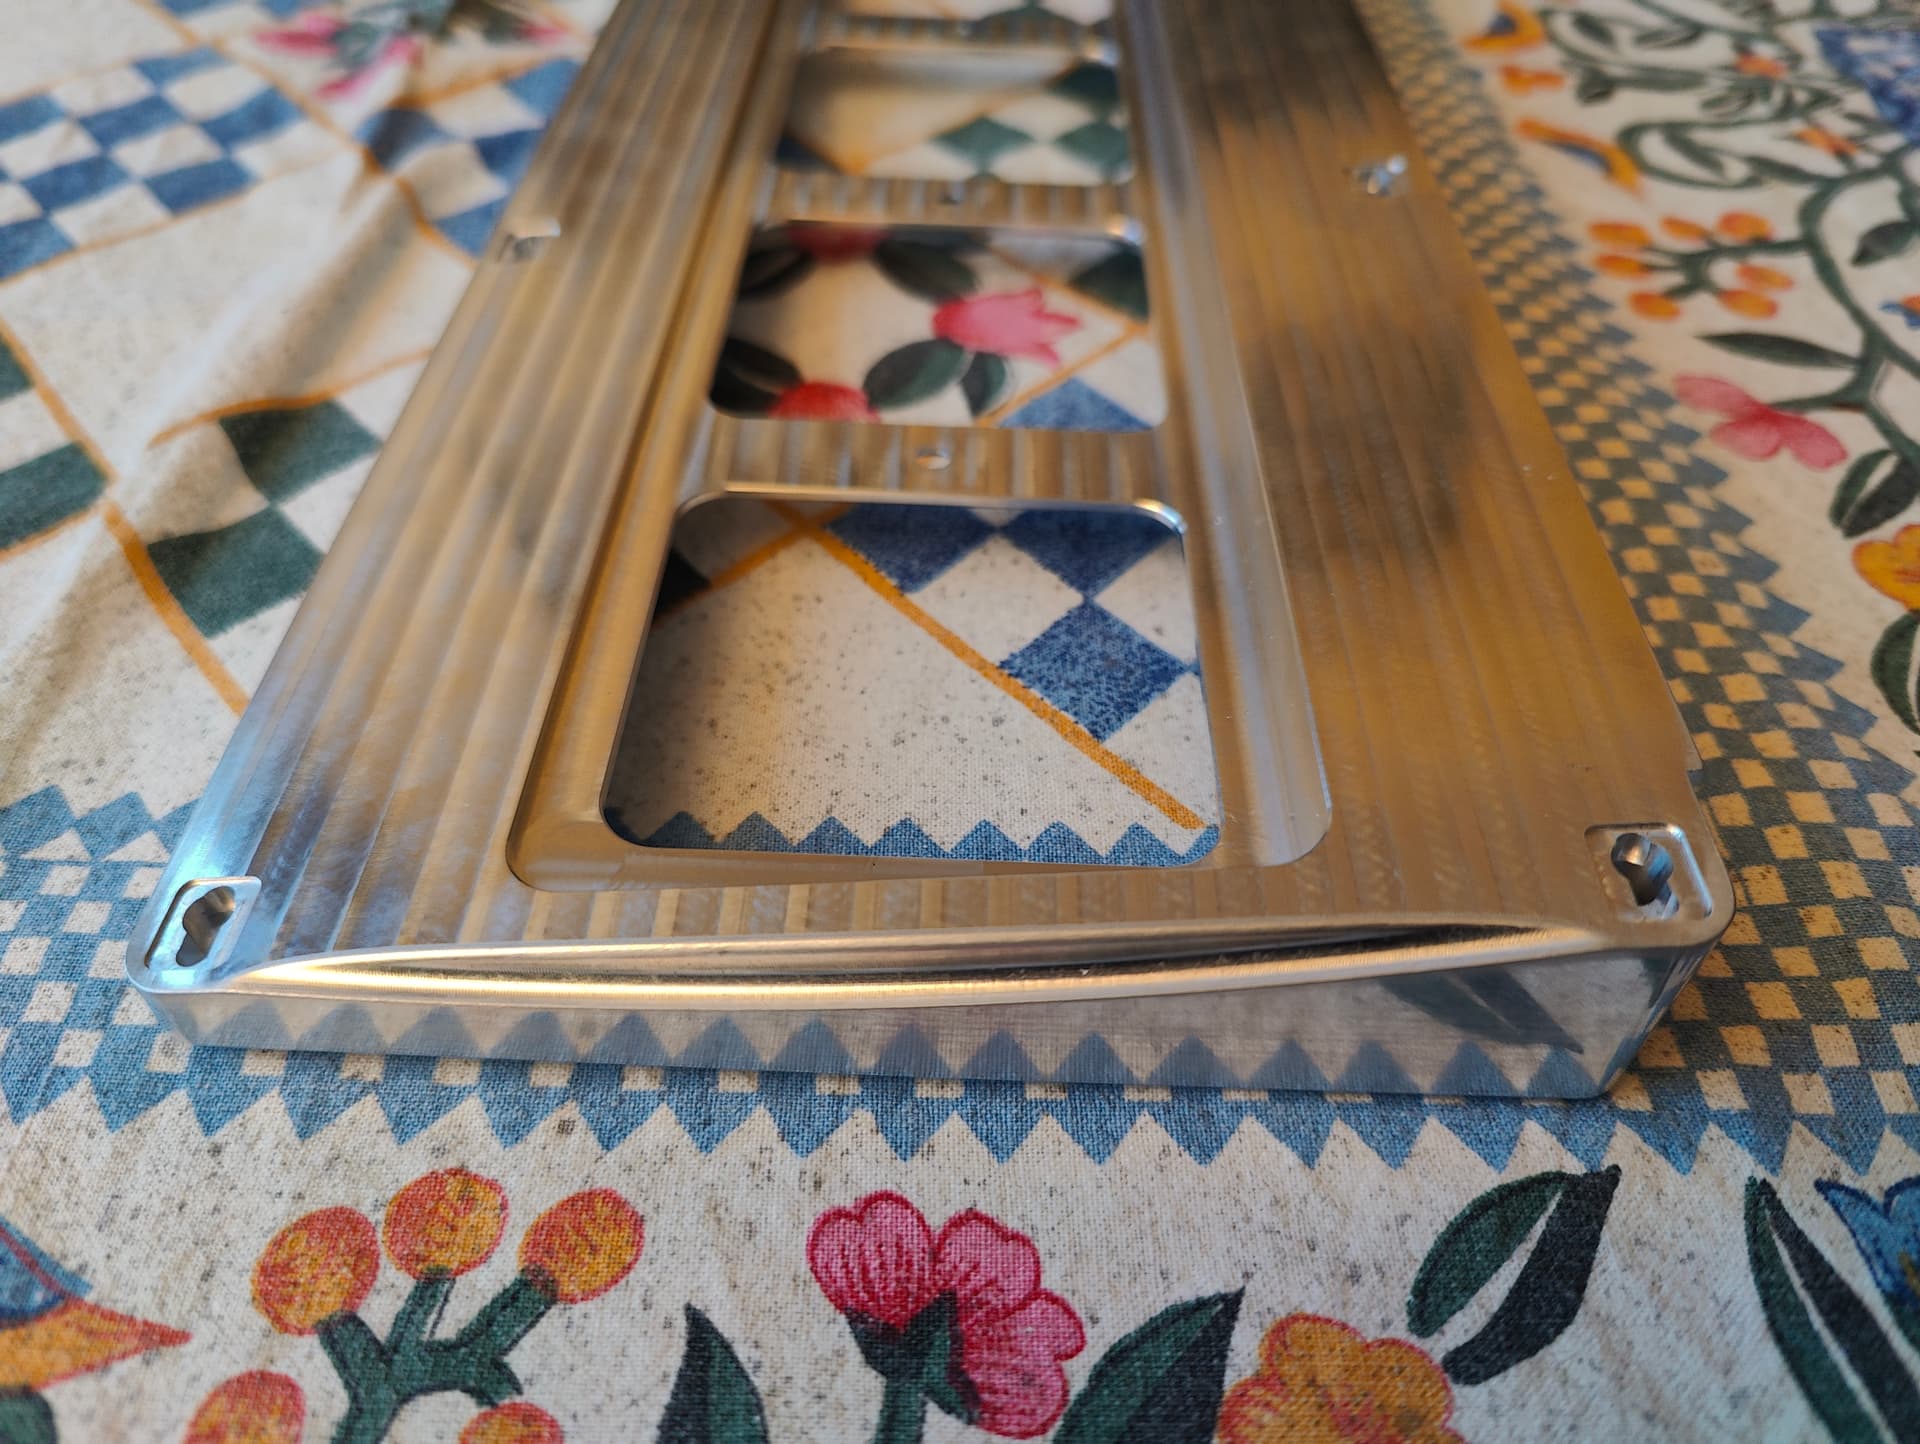
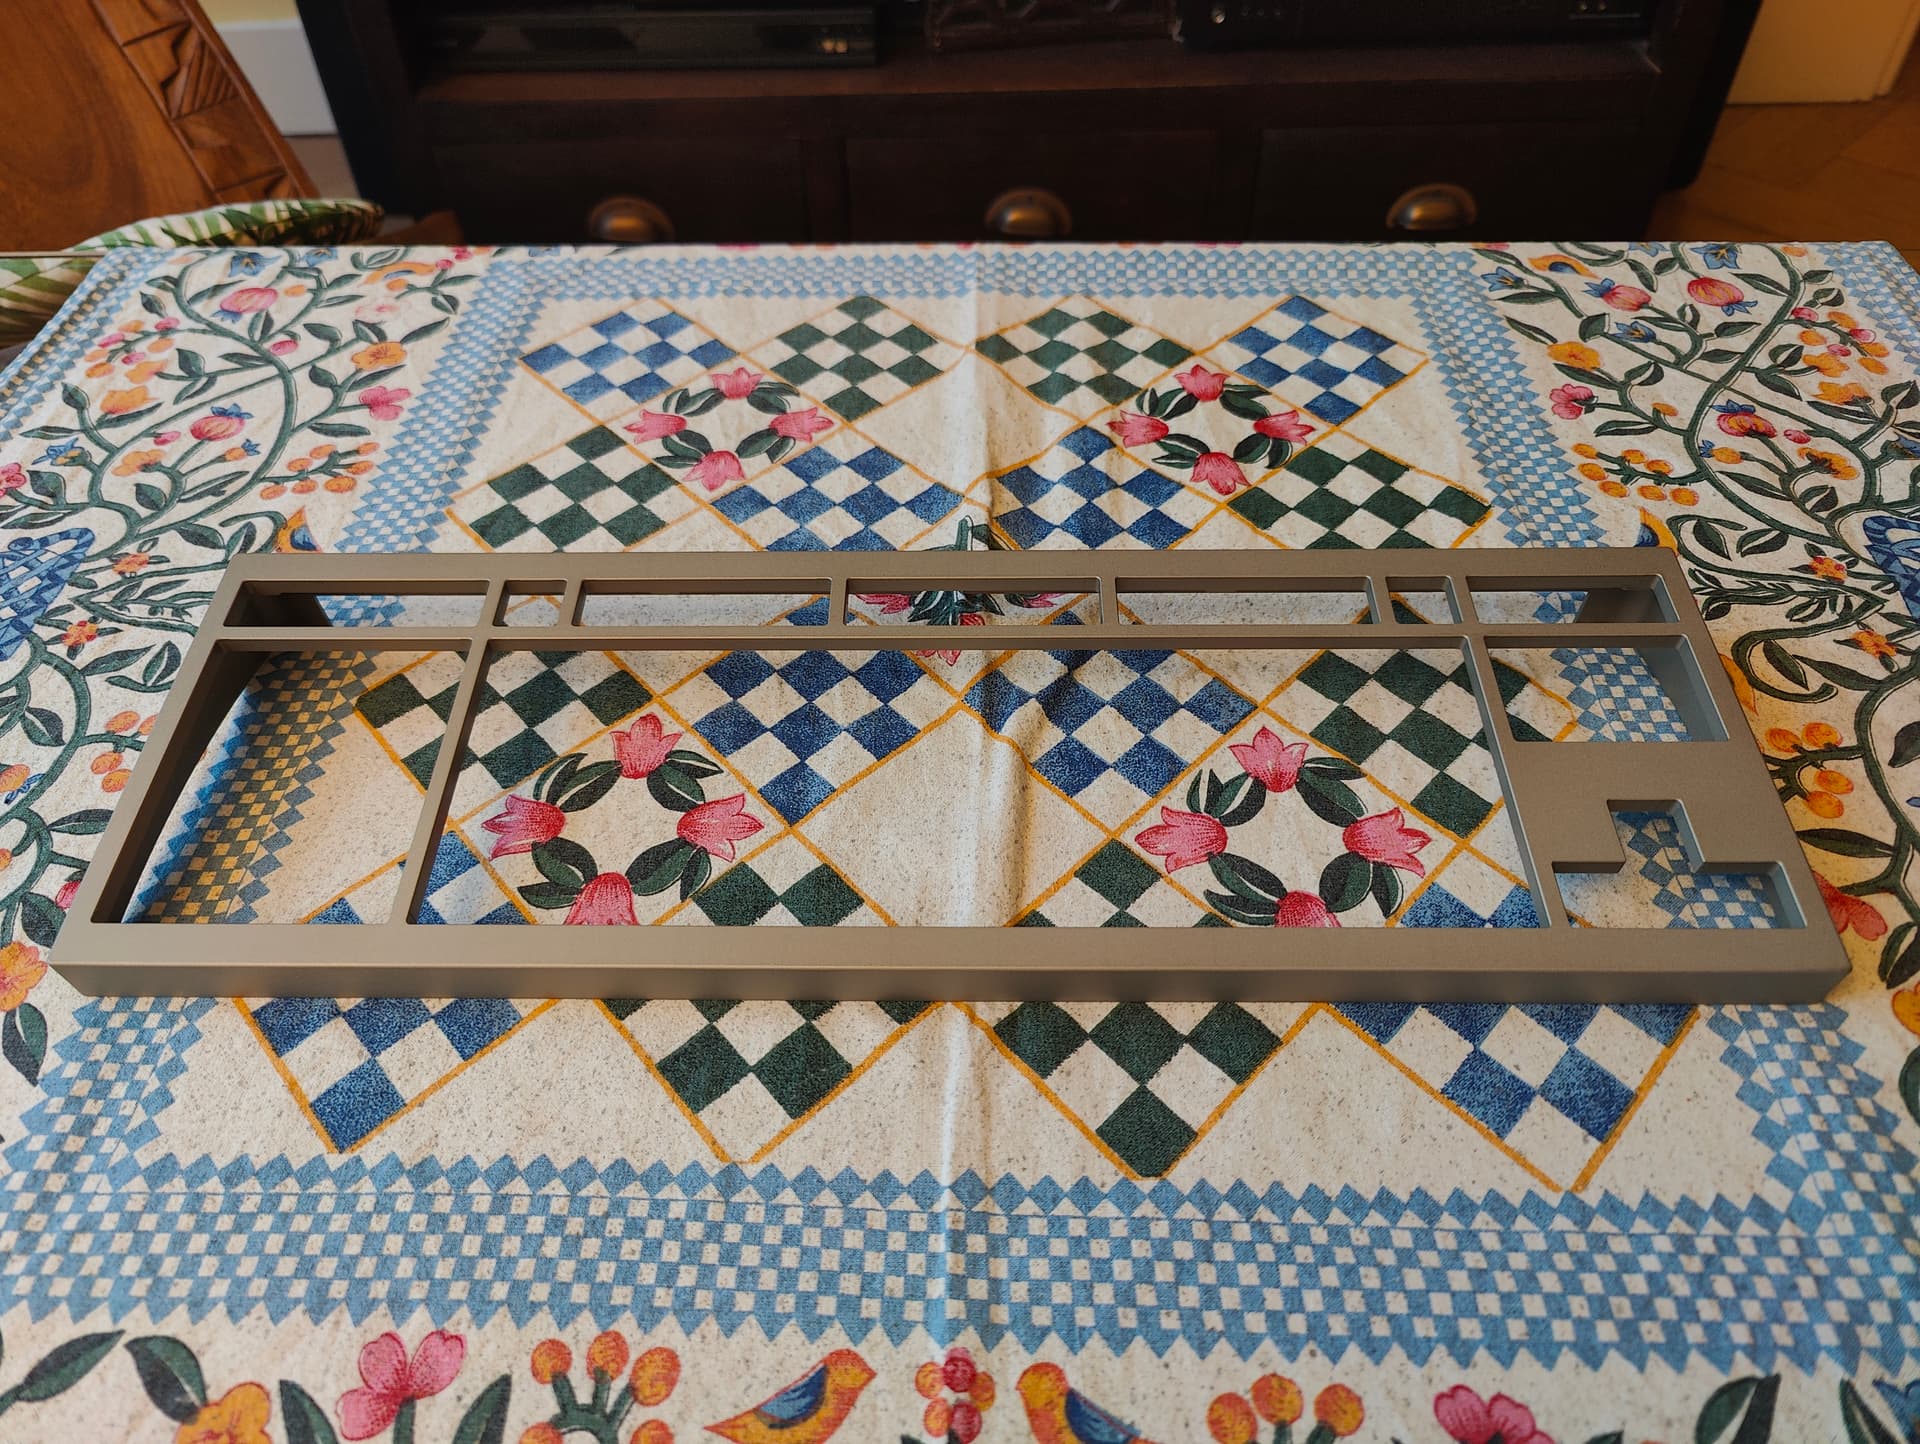
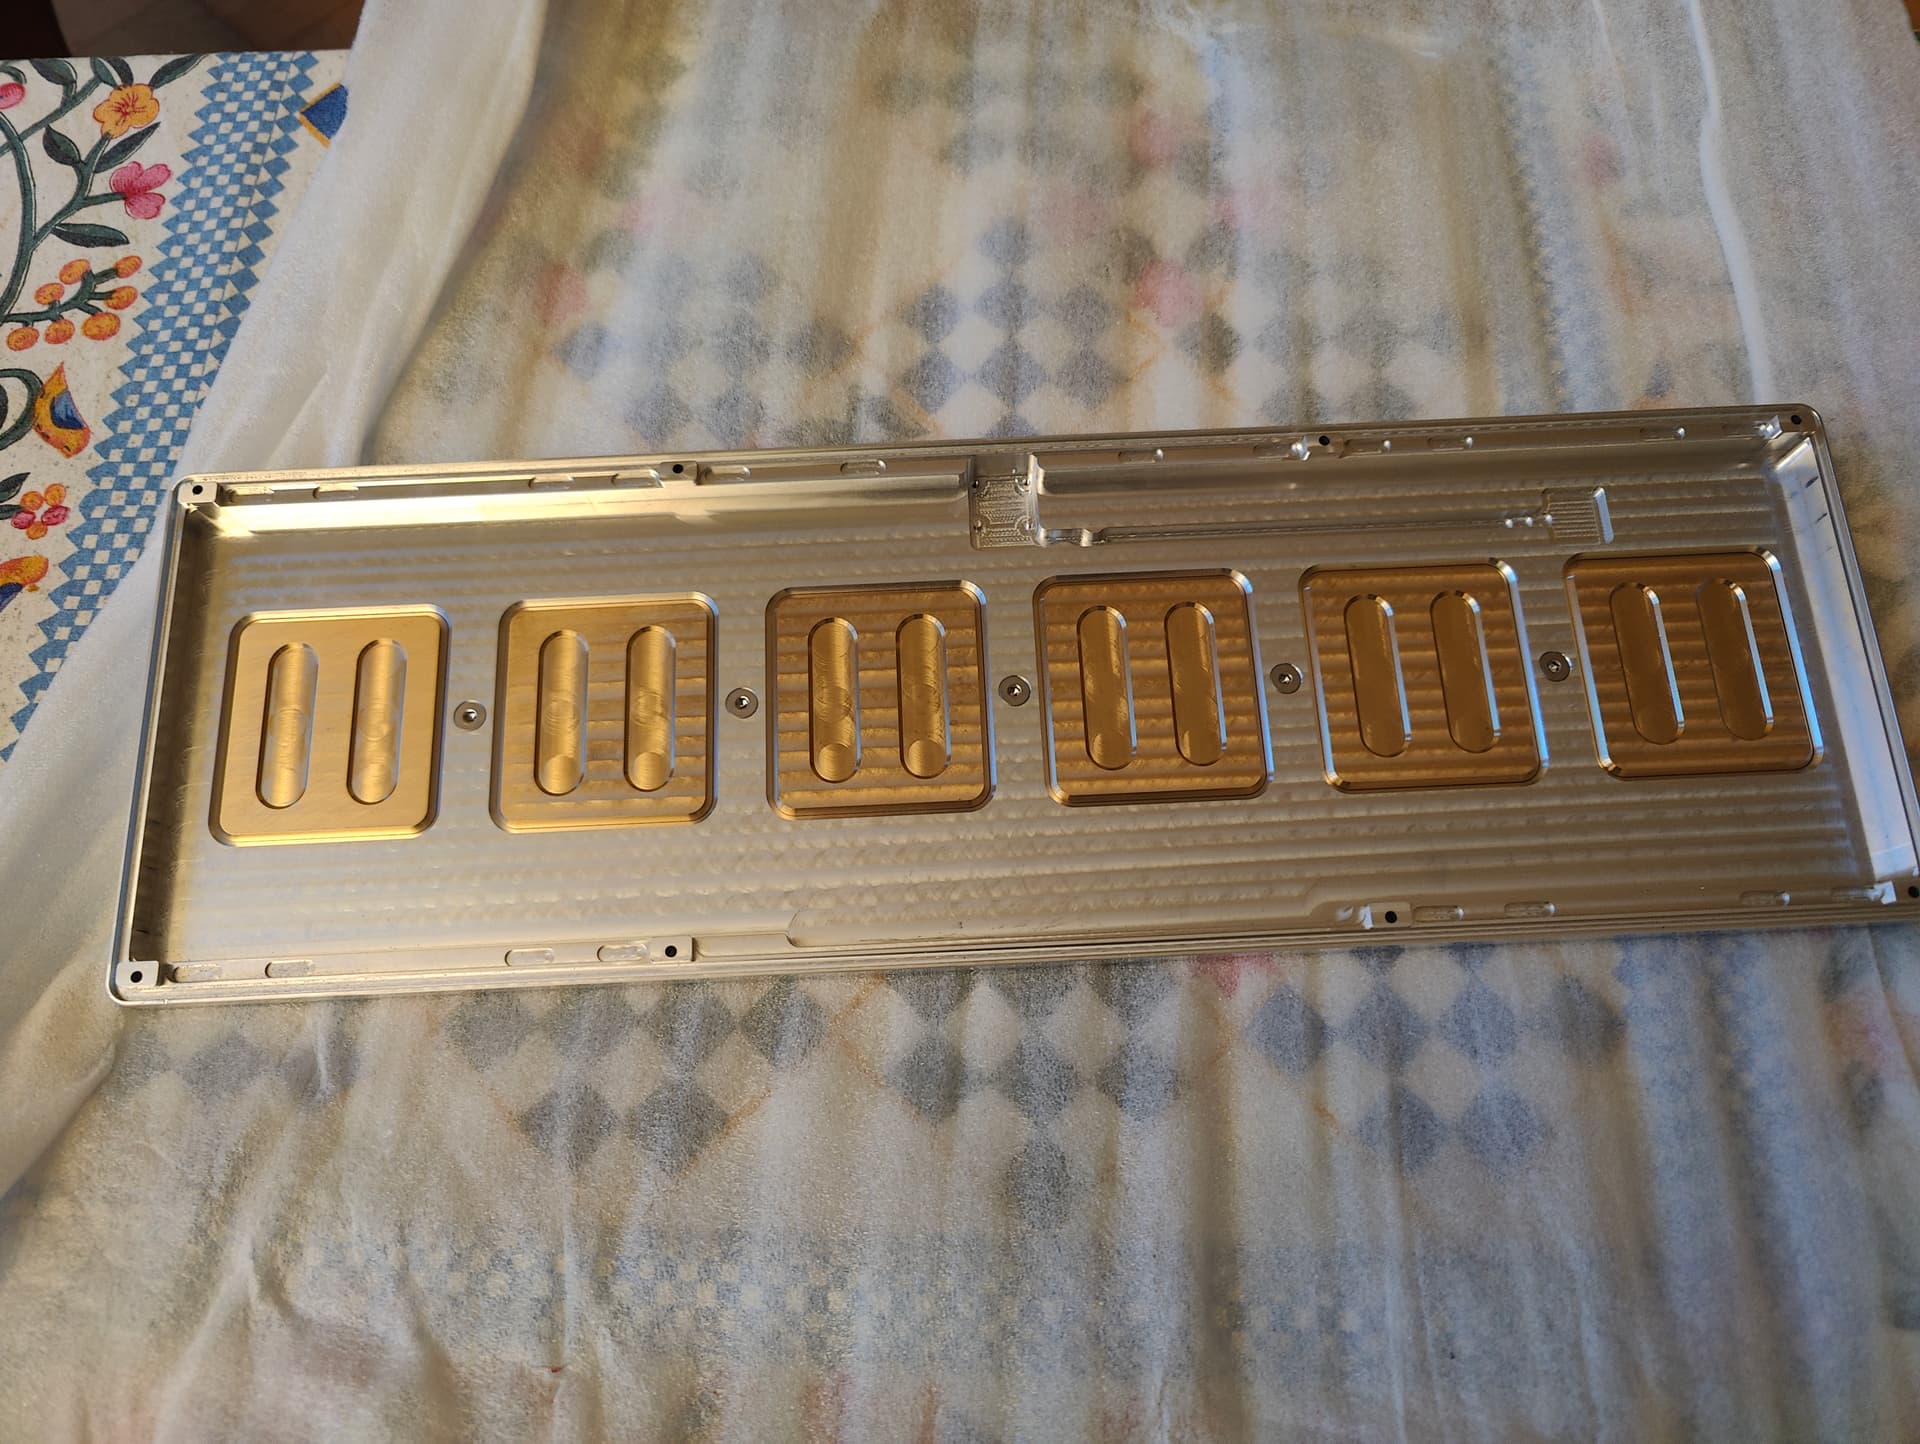
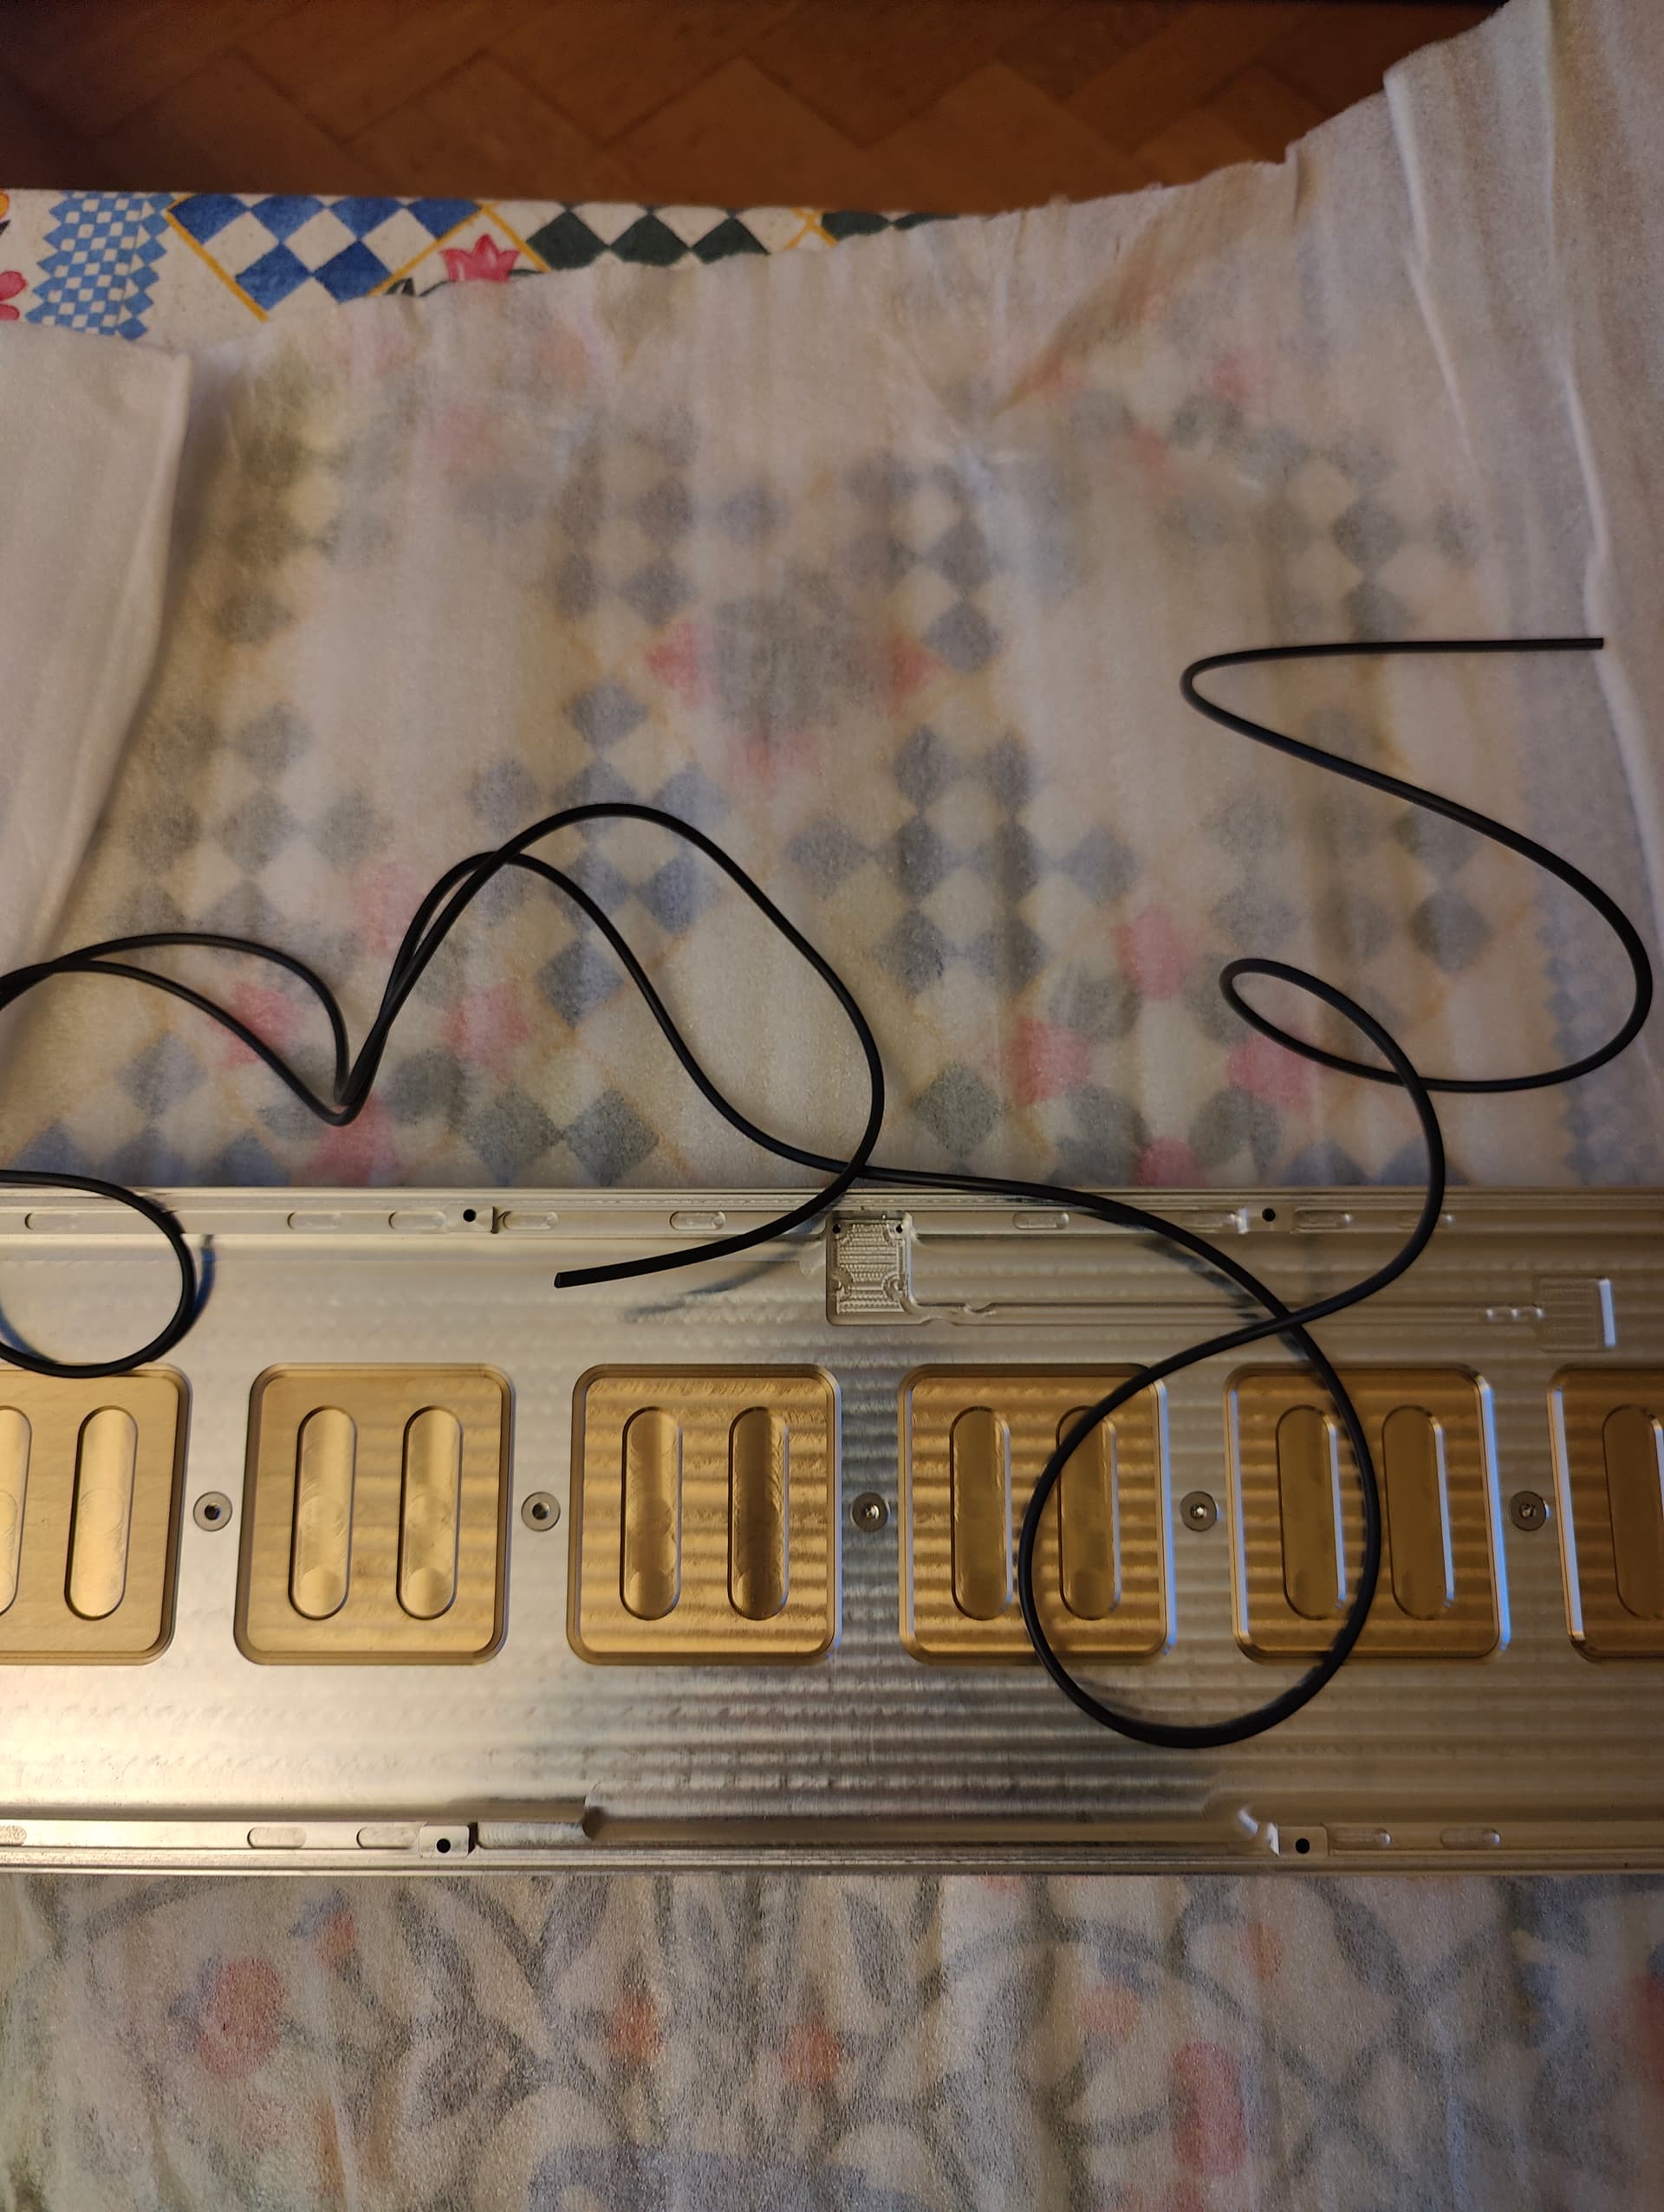
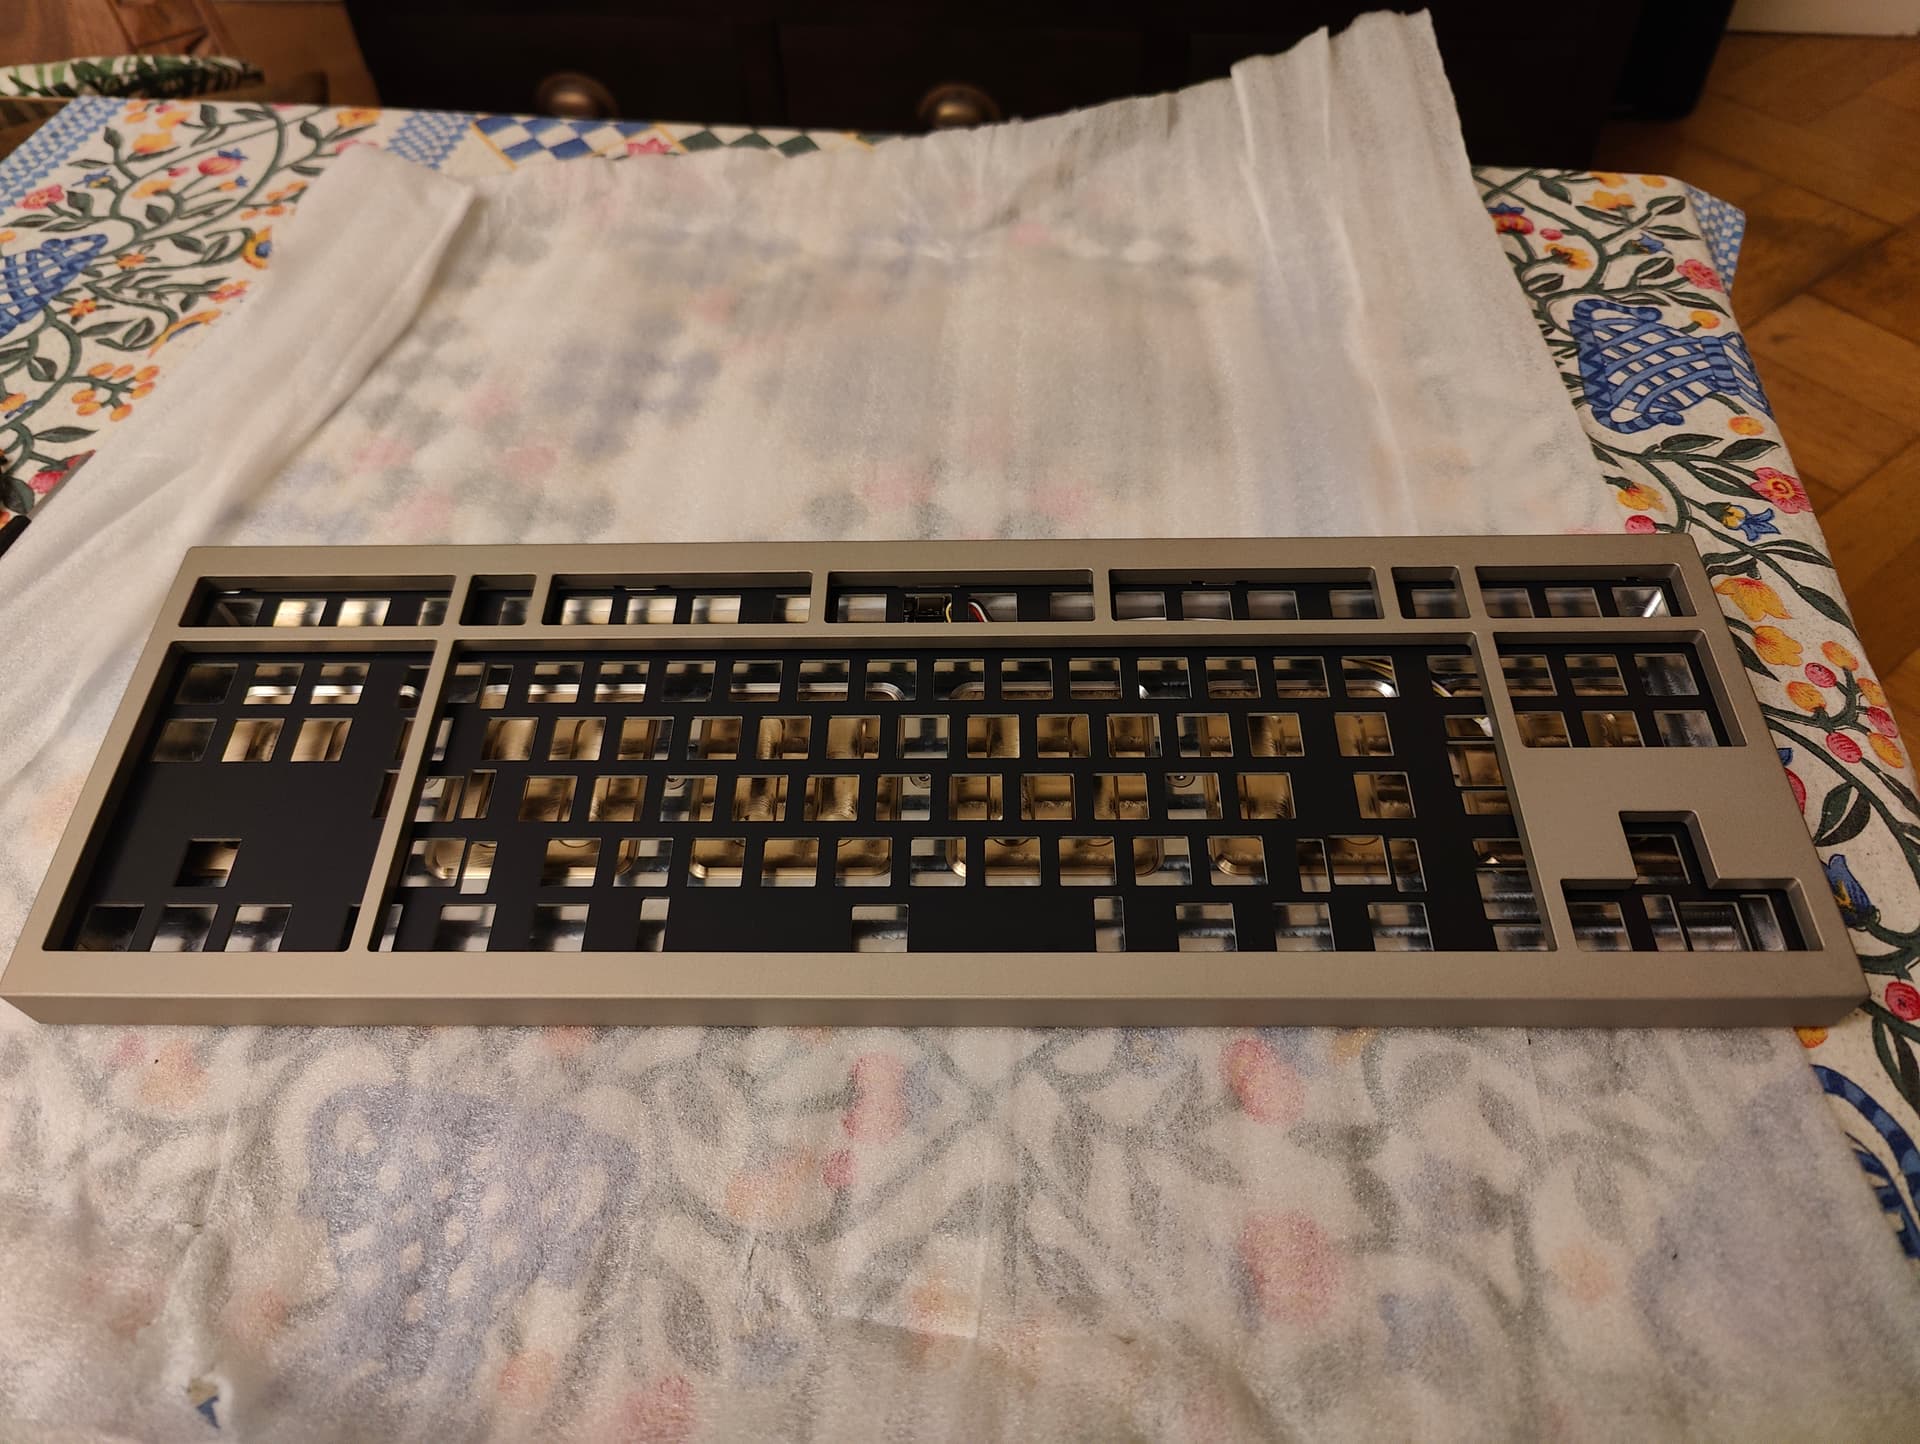
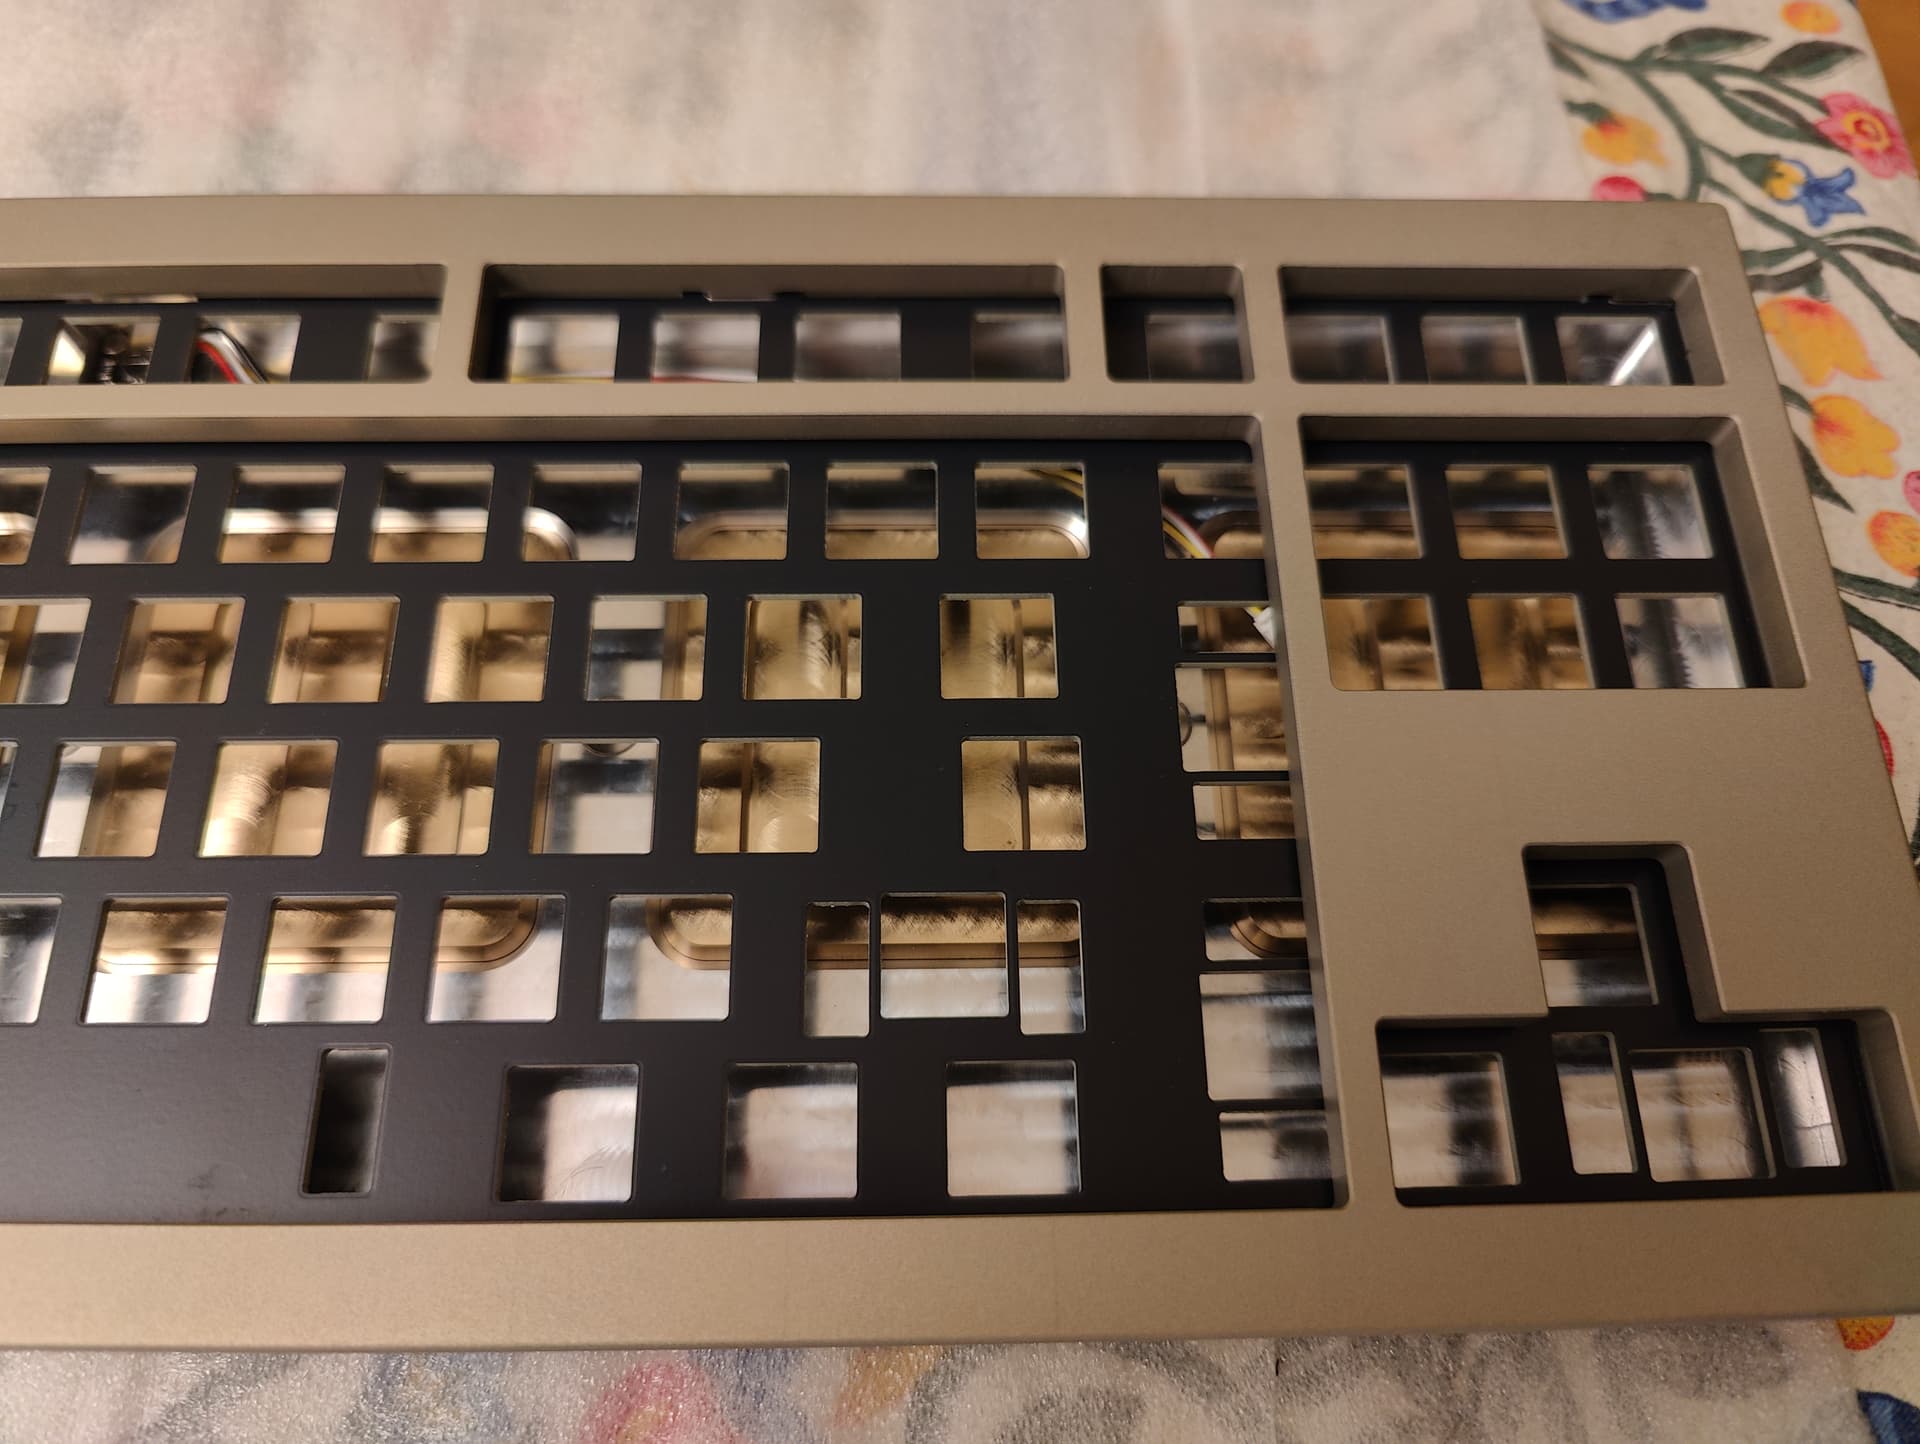
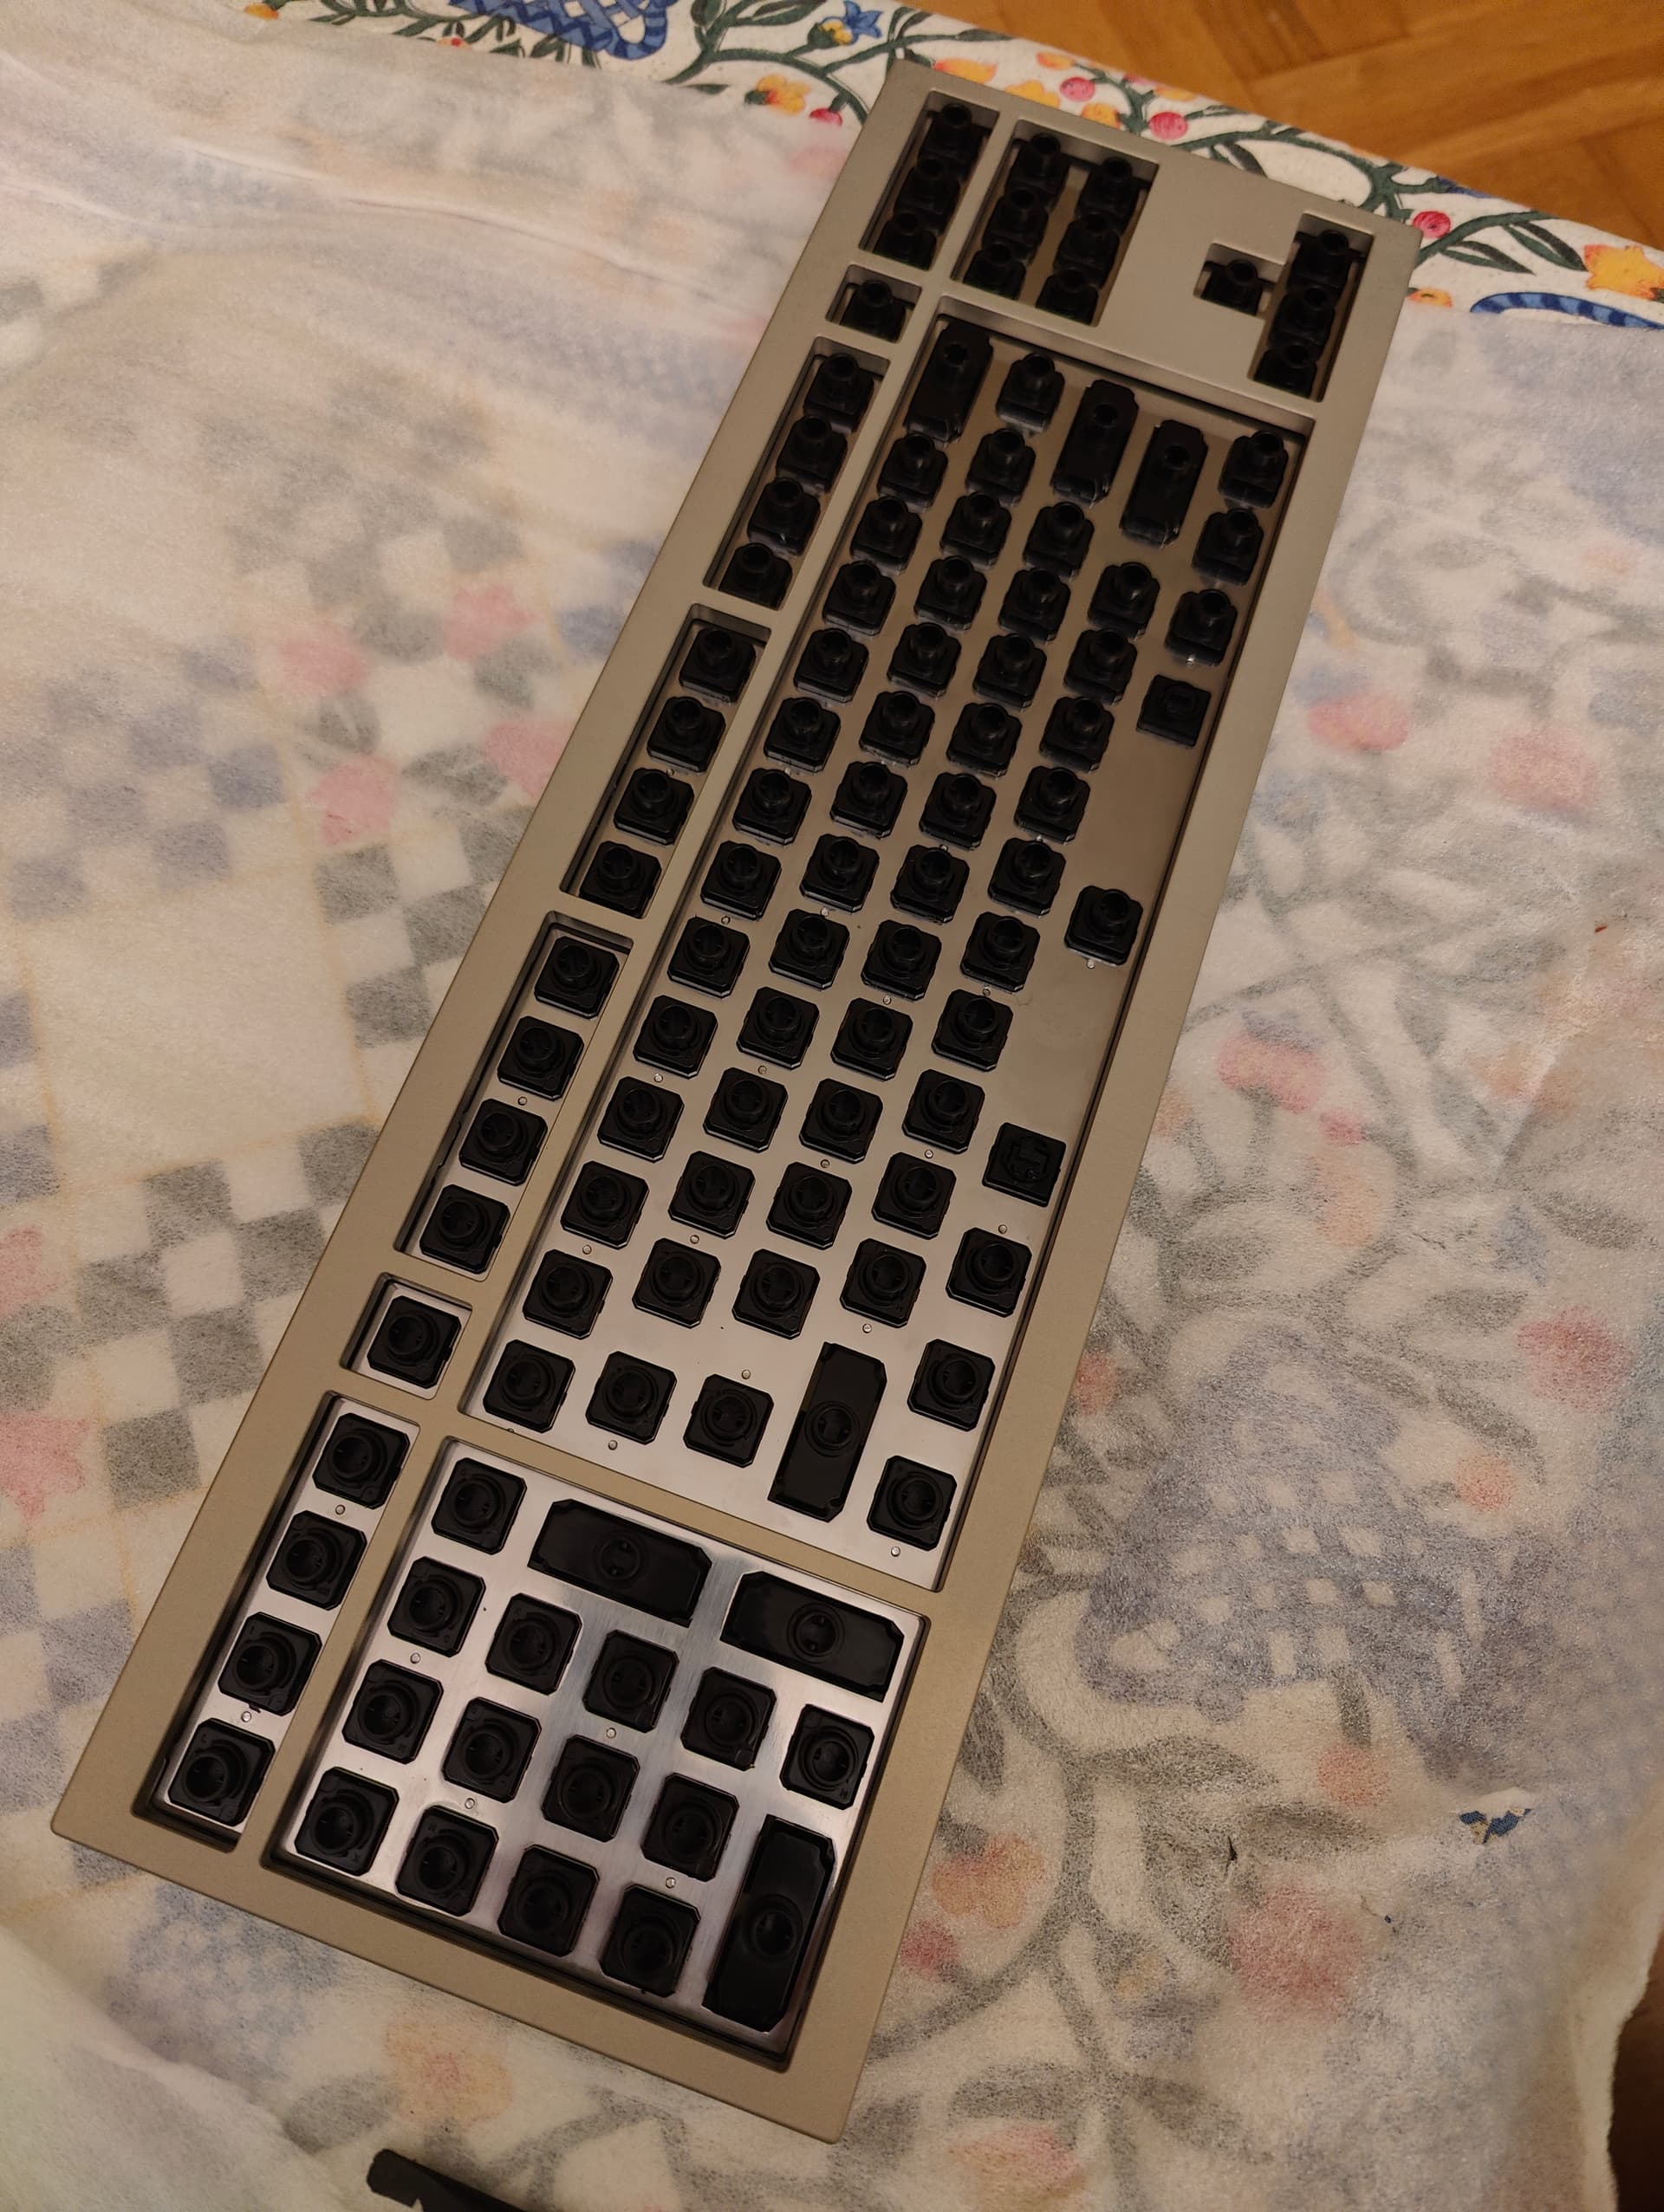
First the bottom part:

I am very satisfied with the machining quality.
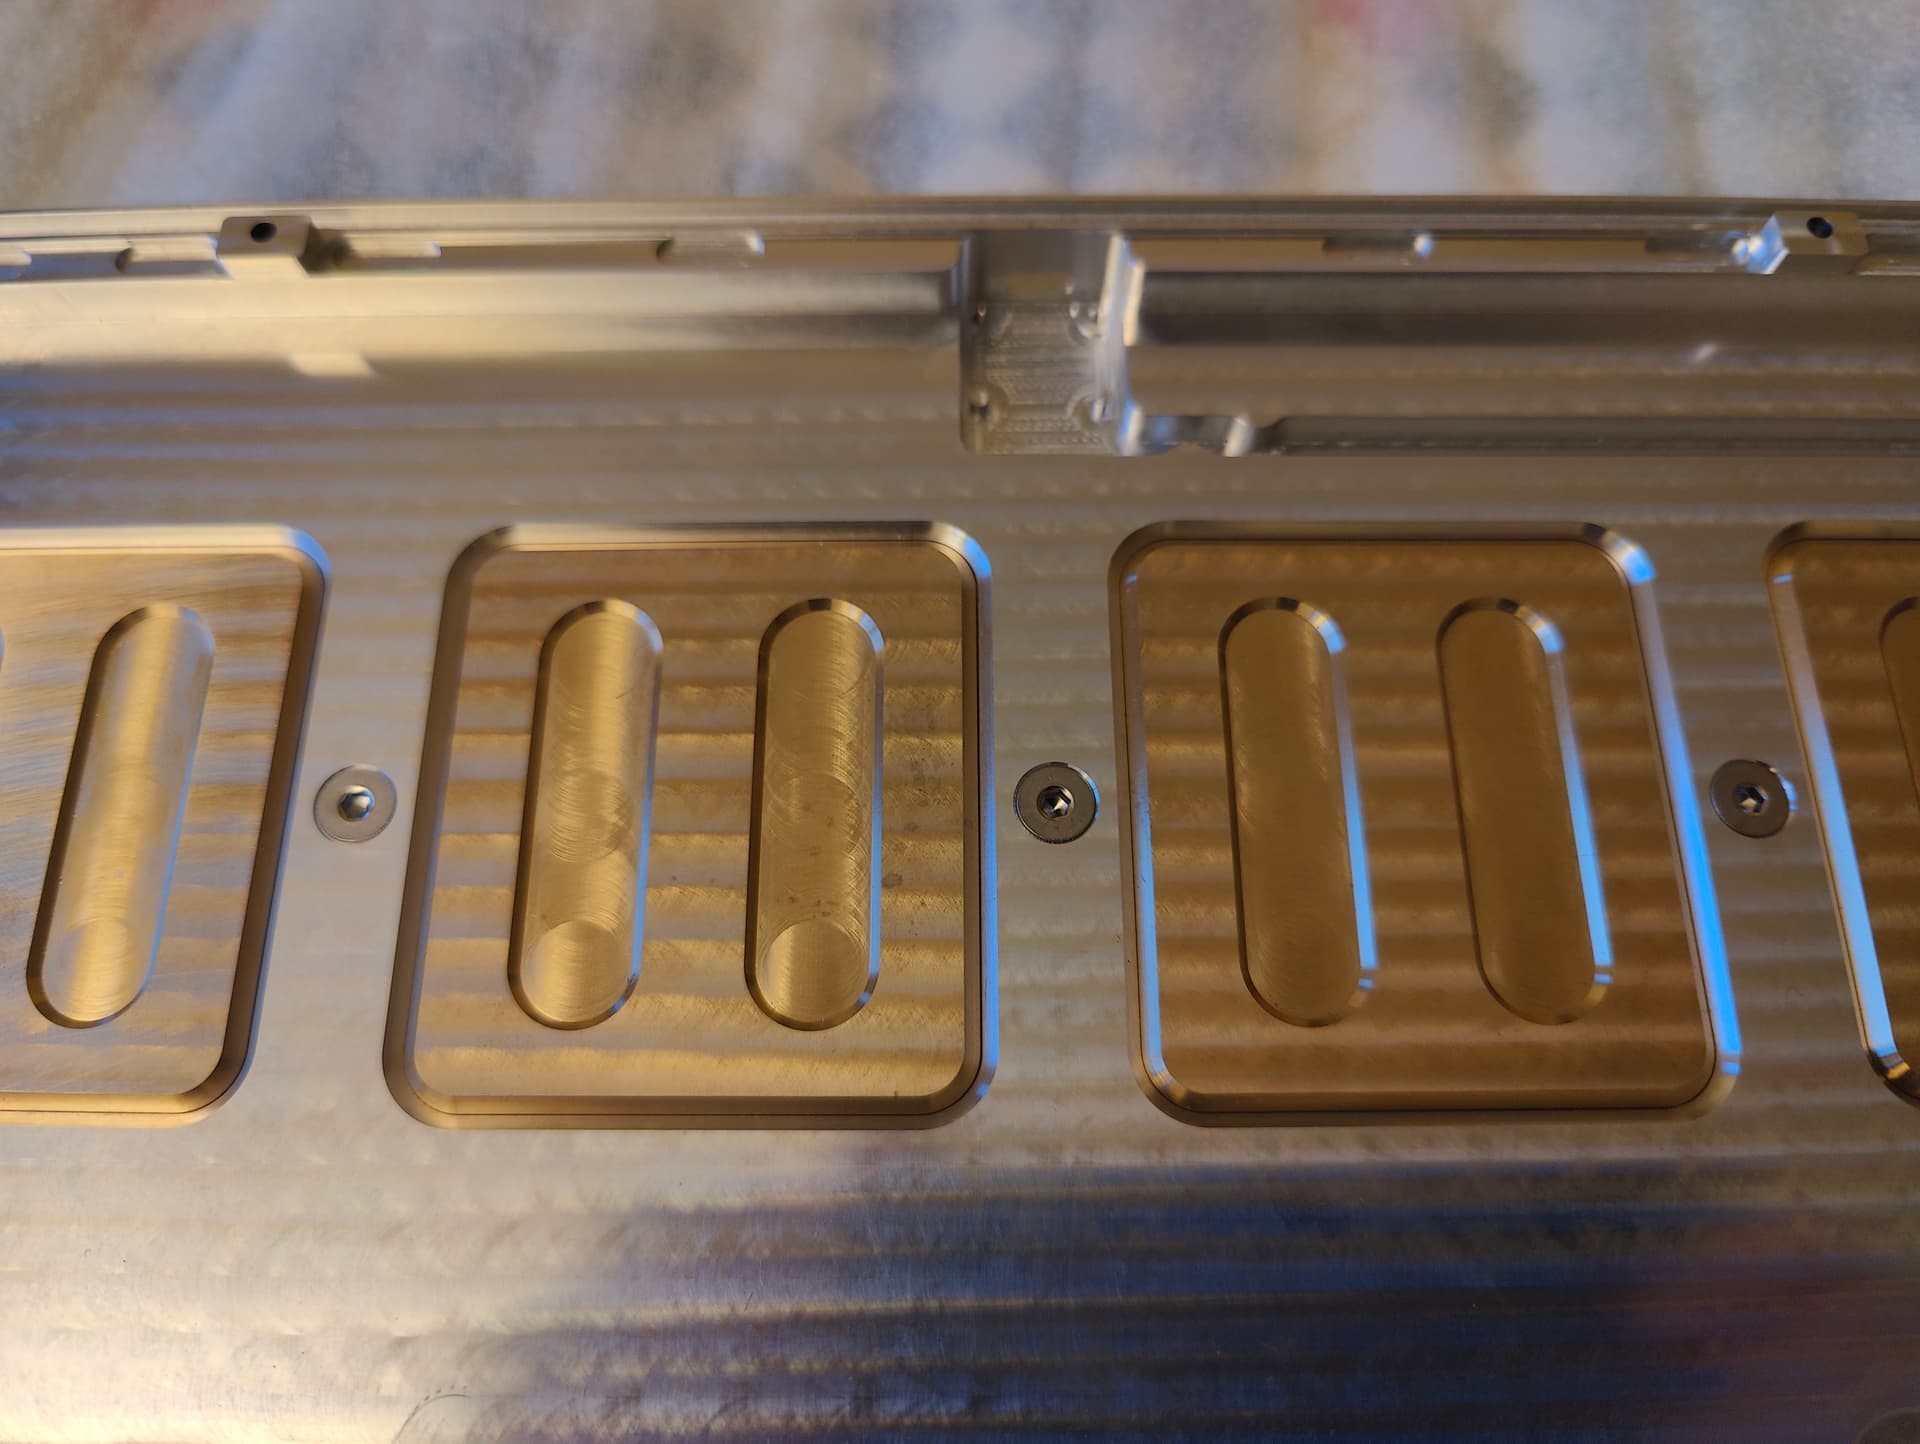
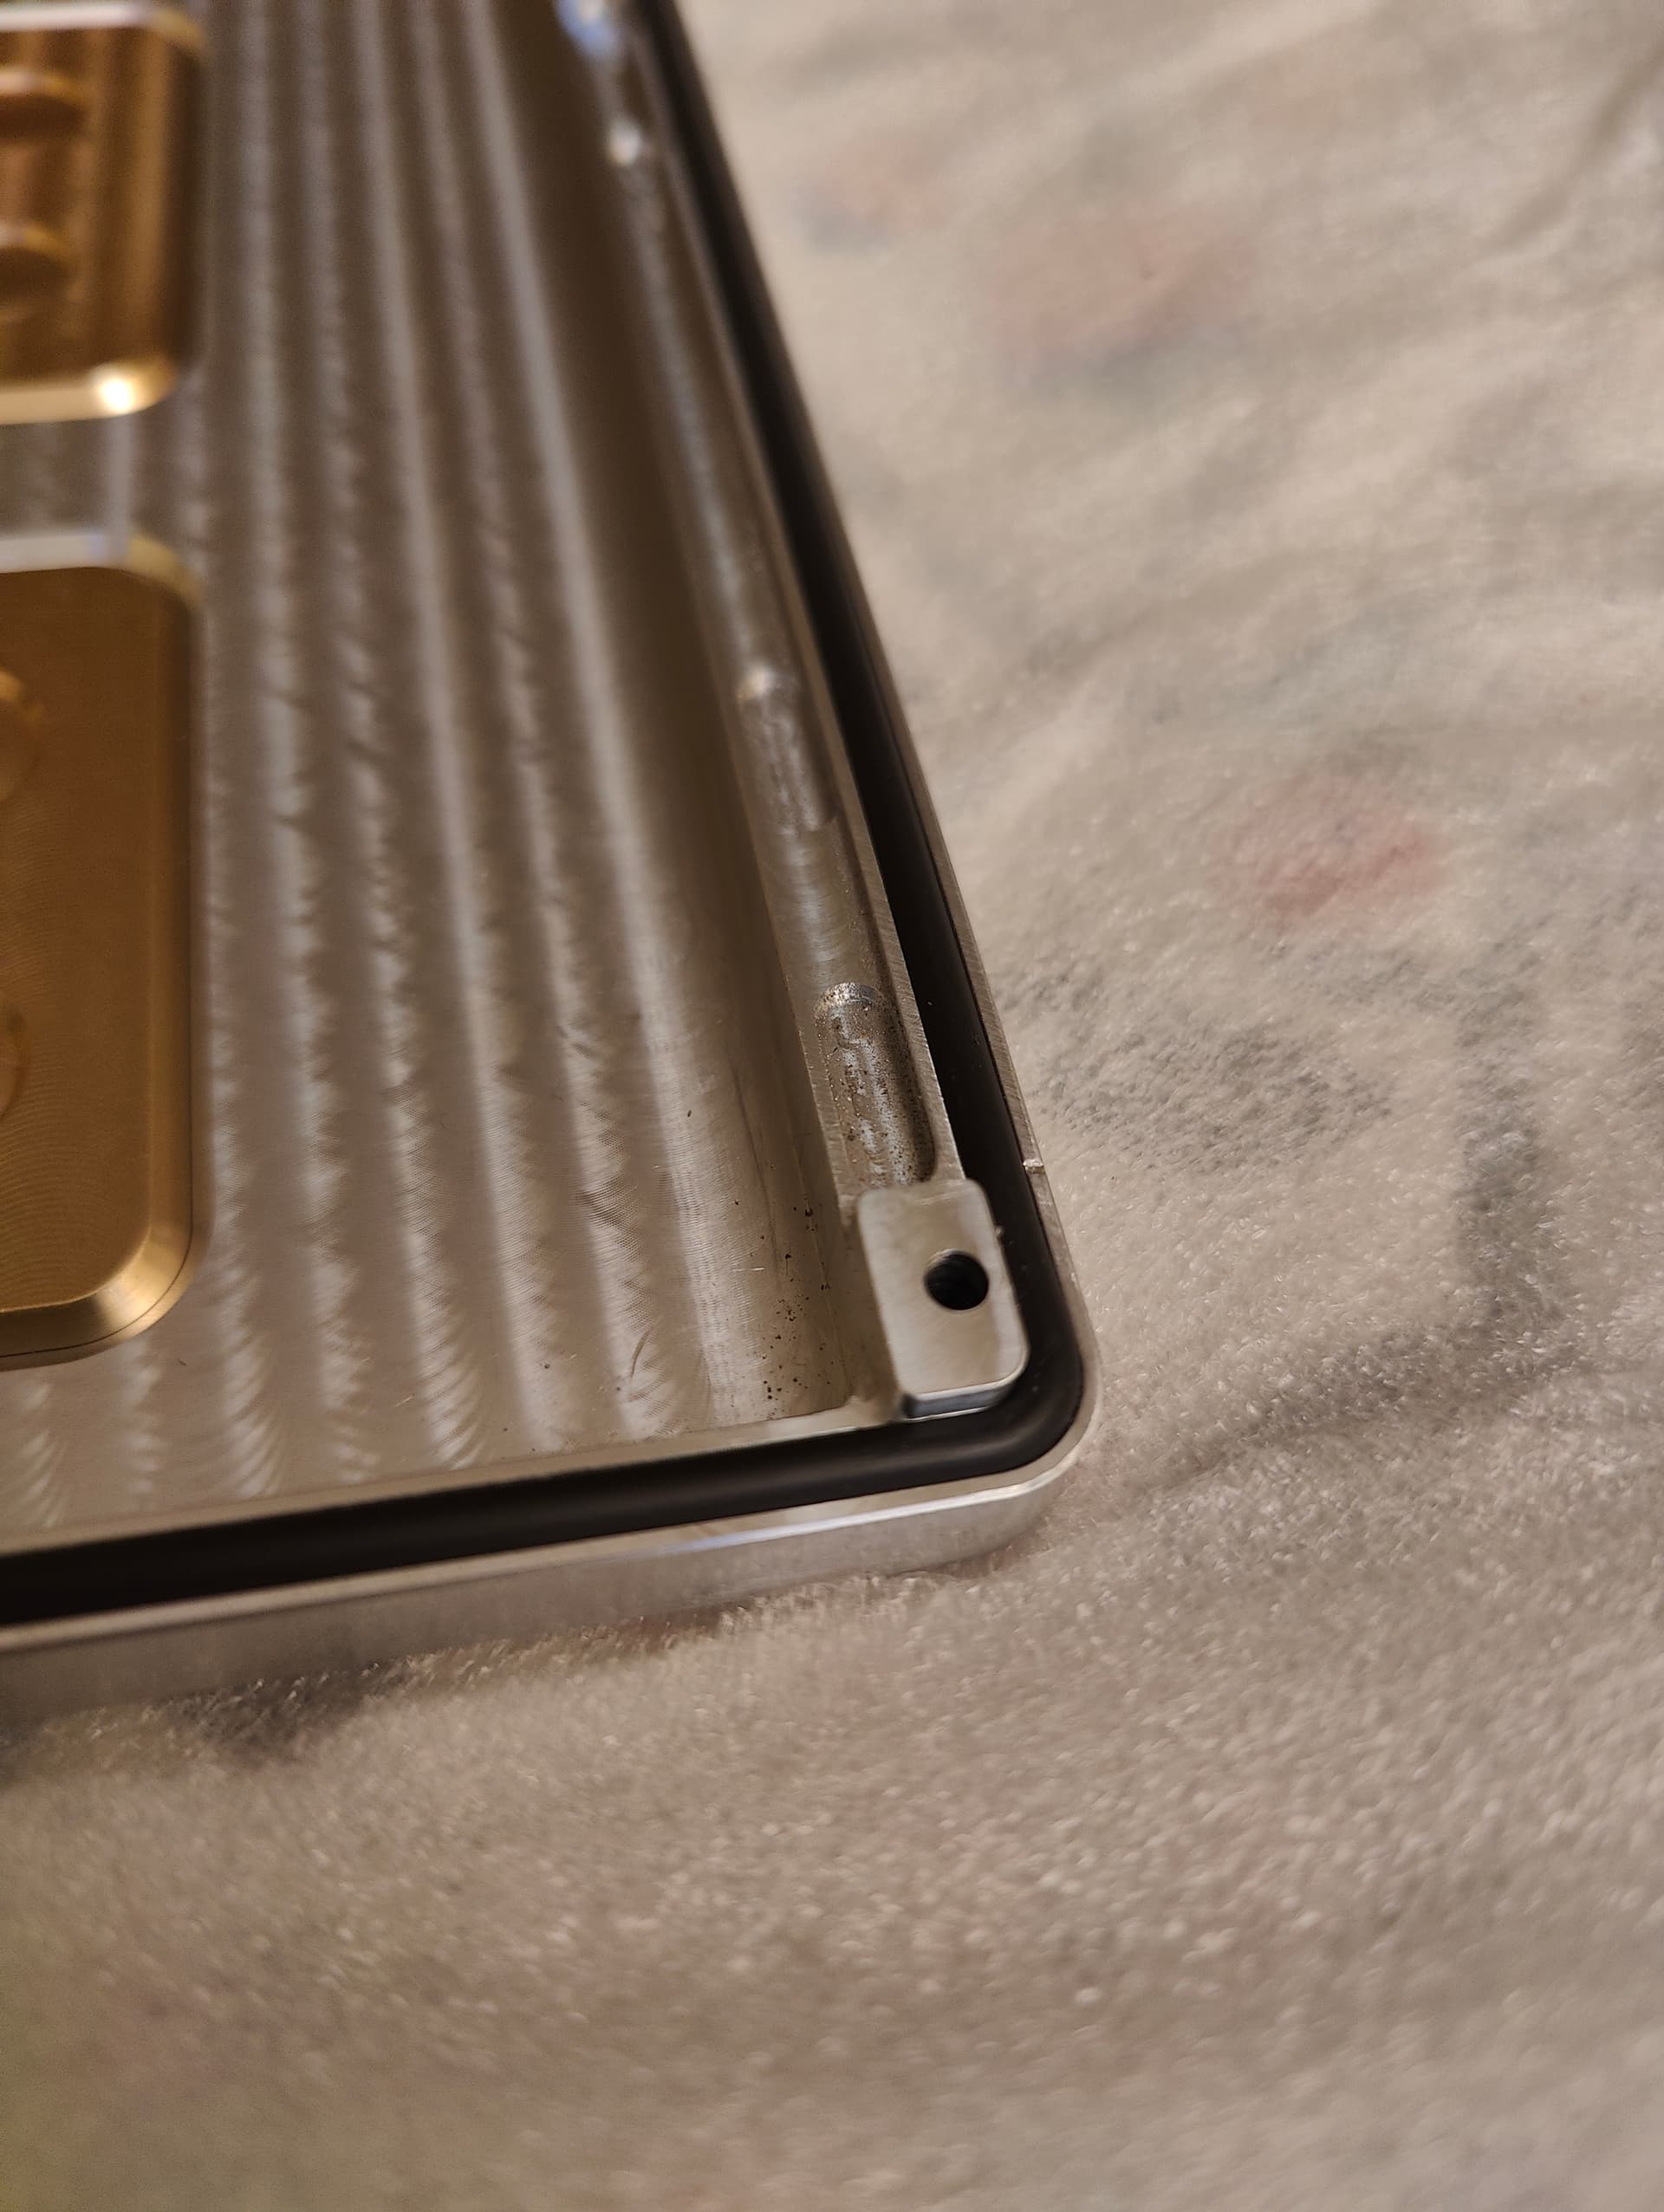
You can see they did a good job by looking at the bottom left picture: This has been done in two different setups and with different tools, you can definitely see the machining marks but on your finger you feel nothing. This mark would completely disappear with a beadblast process.
The koala curve is nicely machined as well.
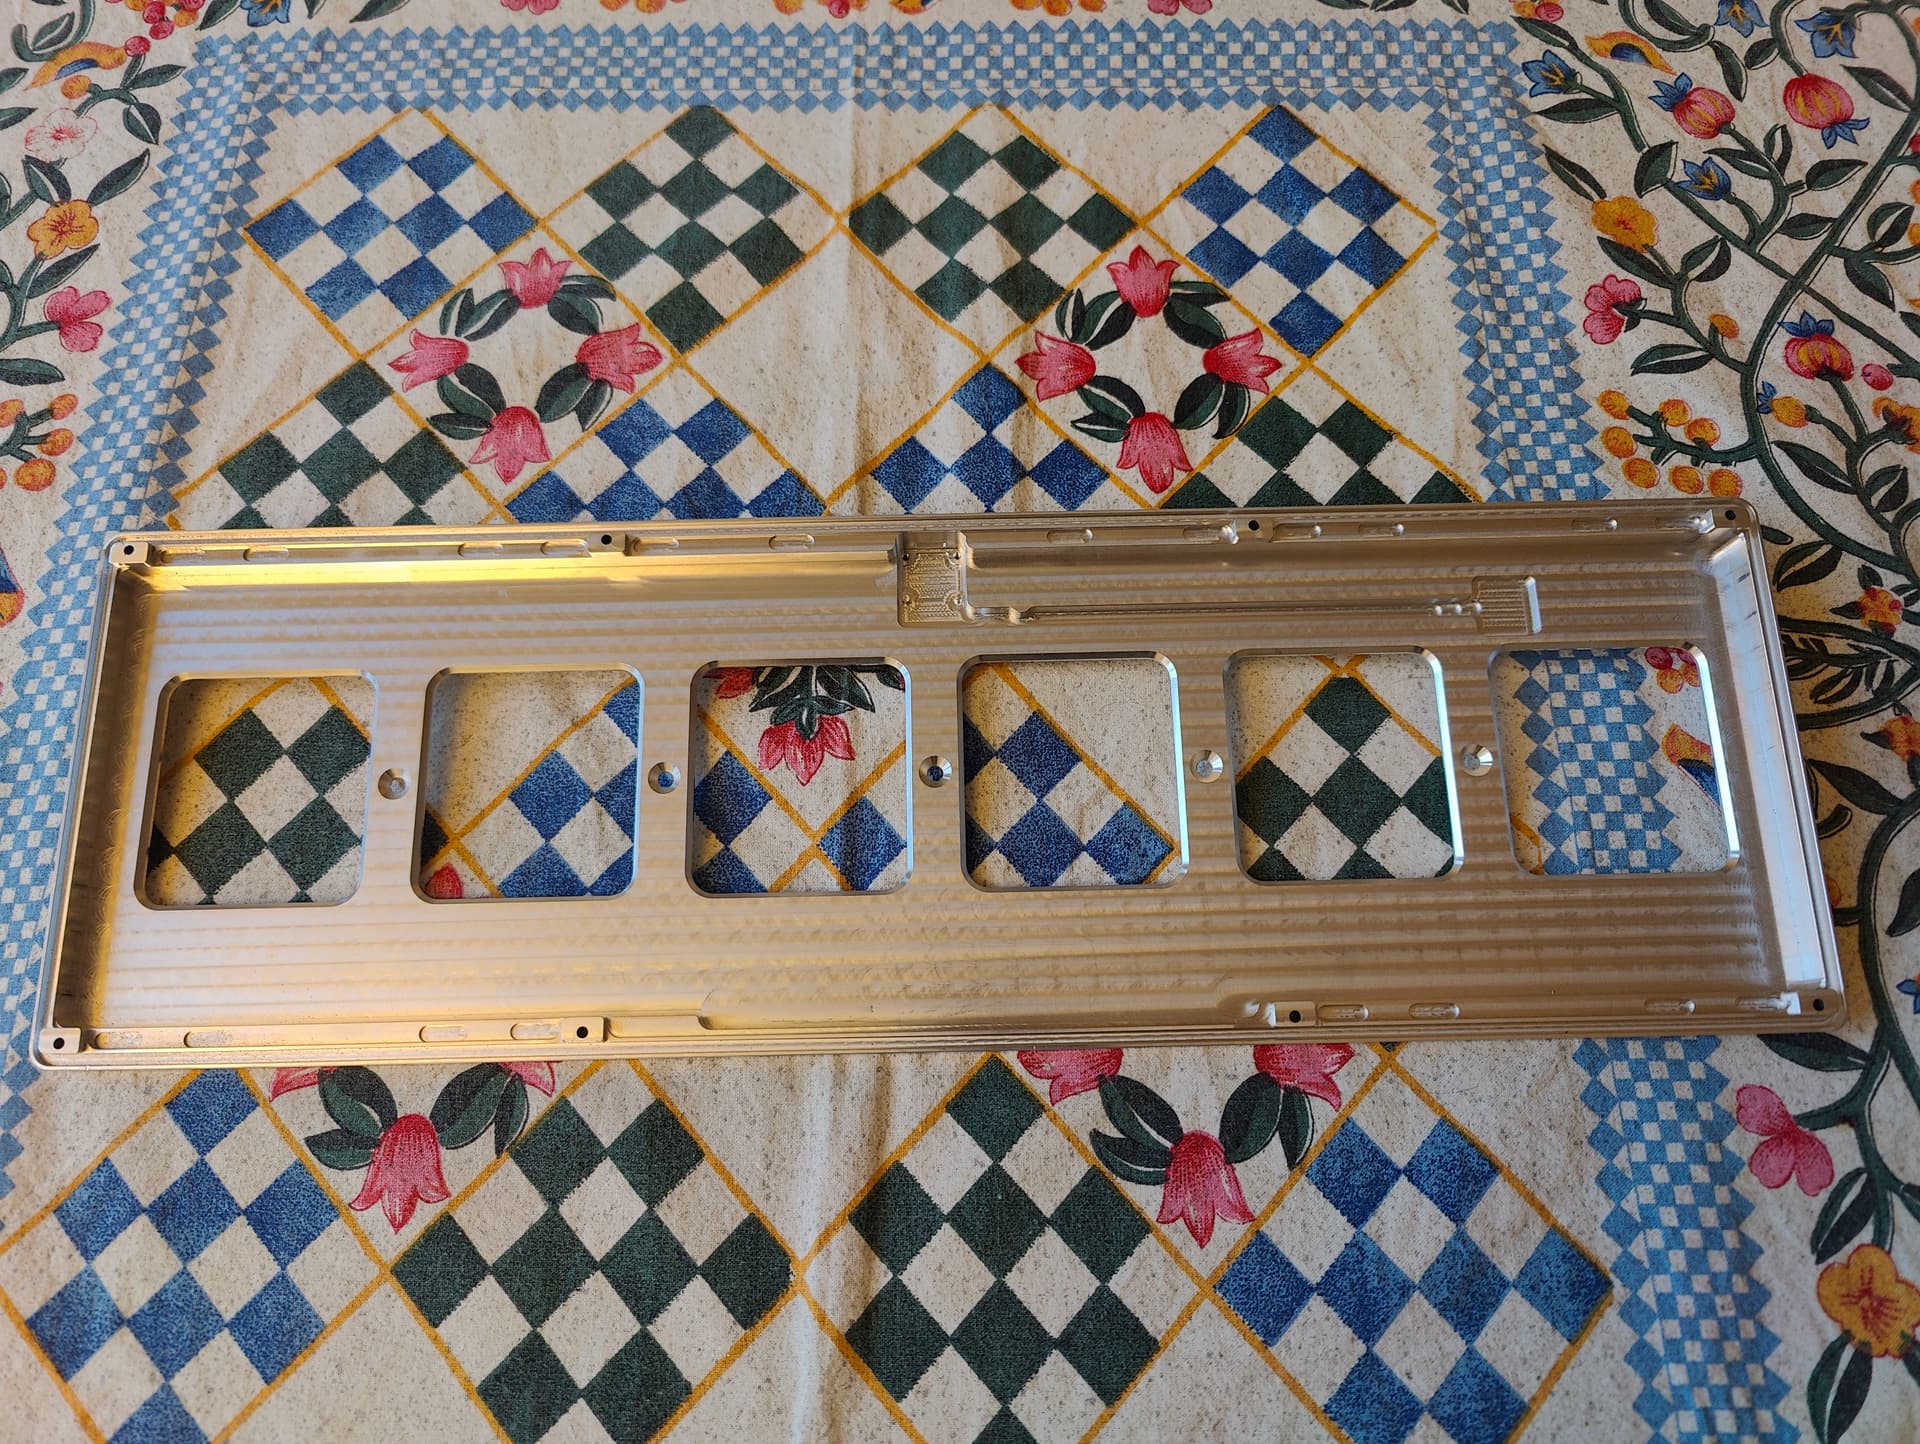
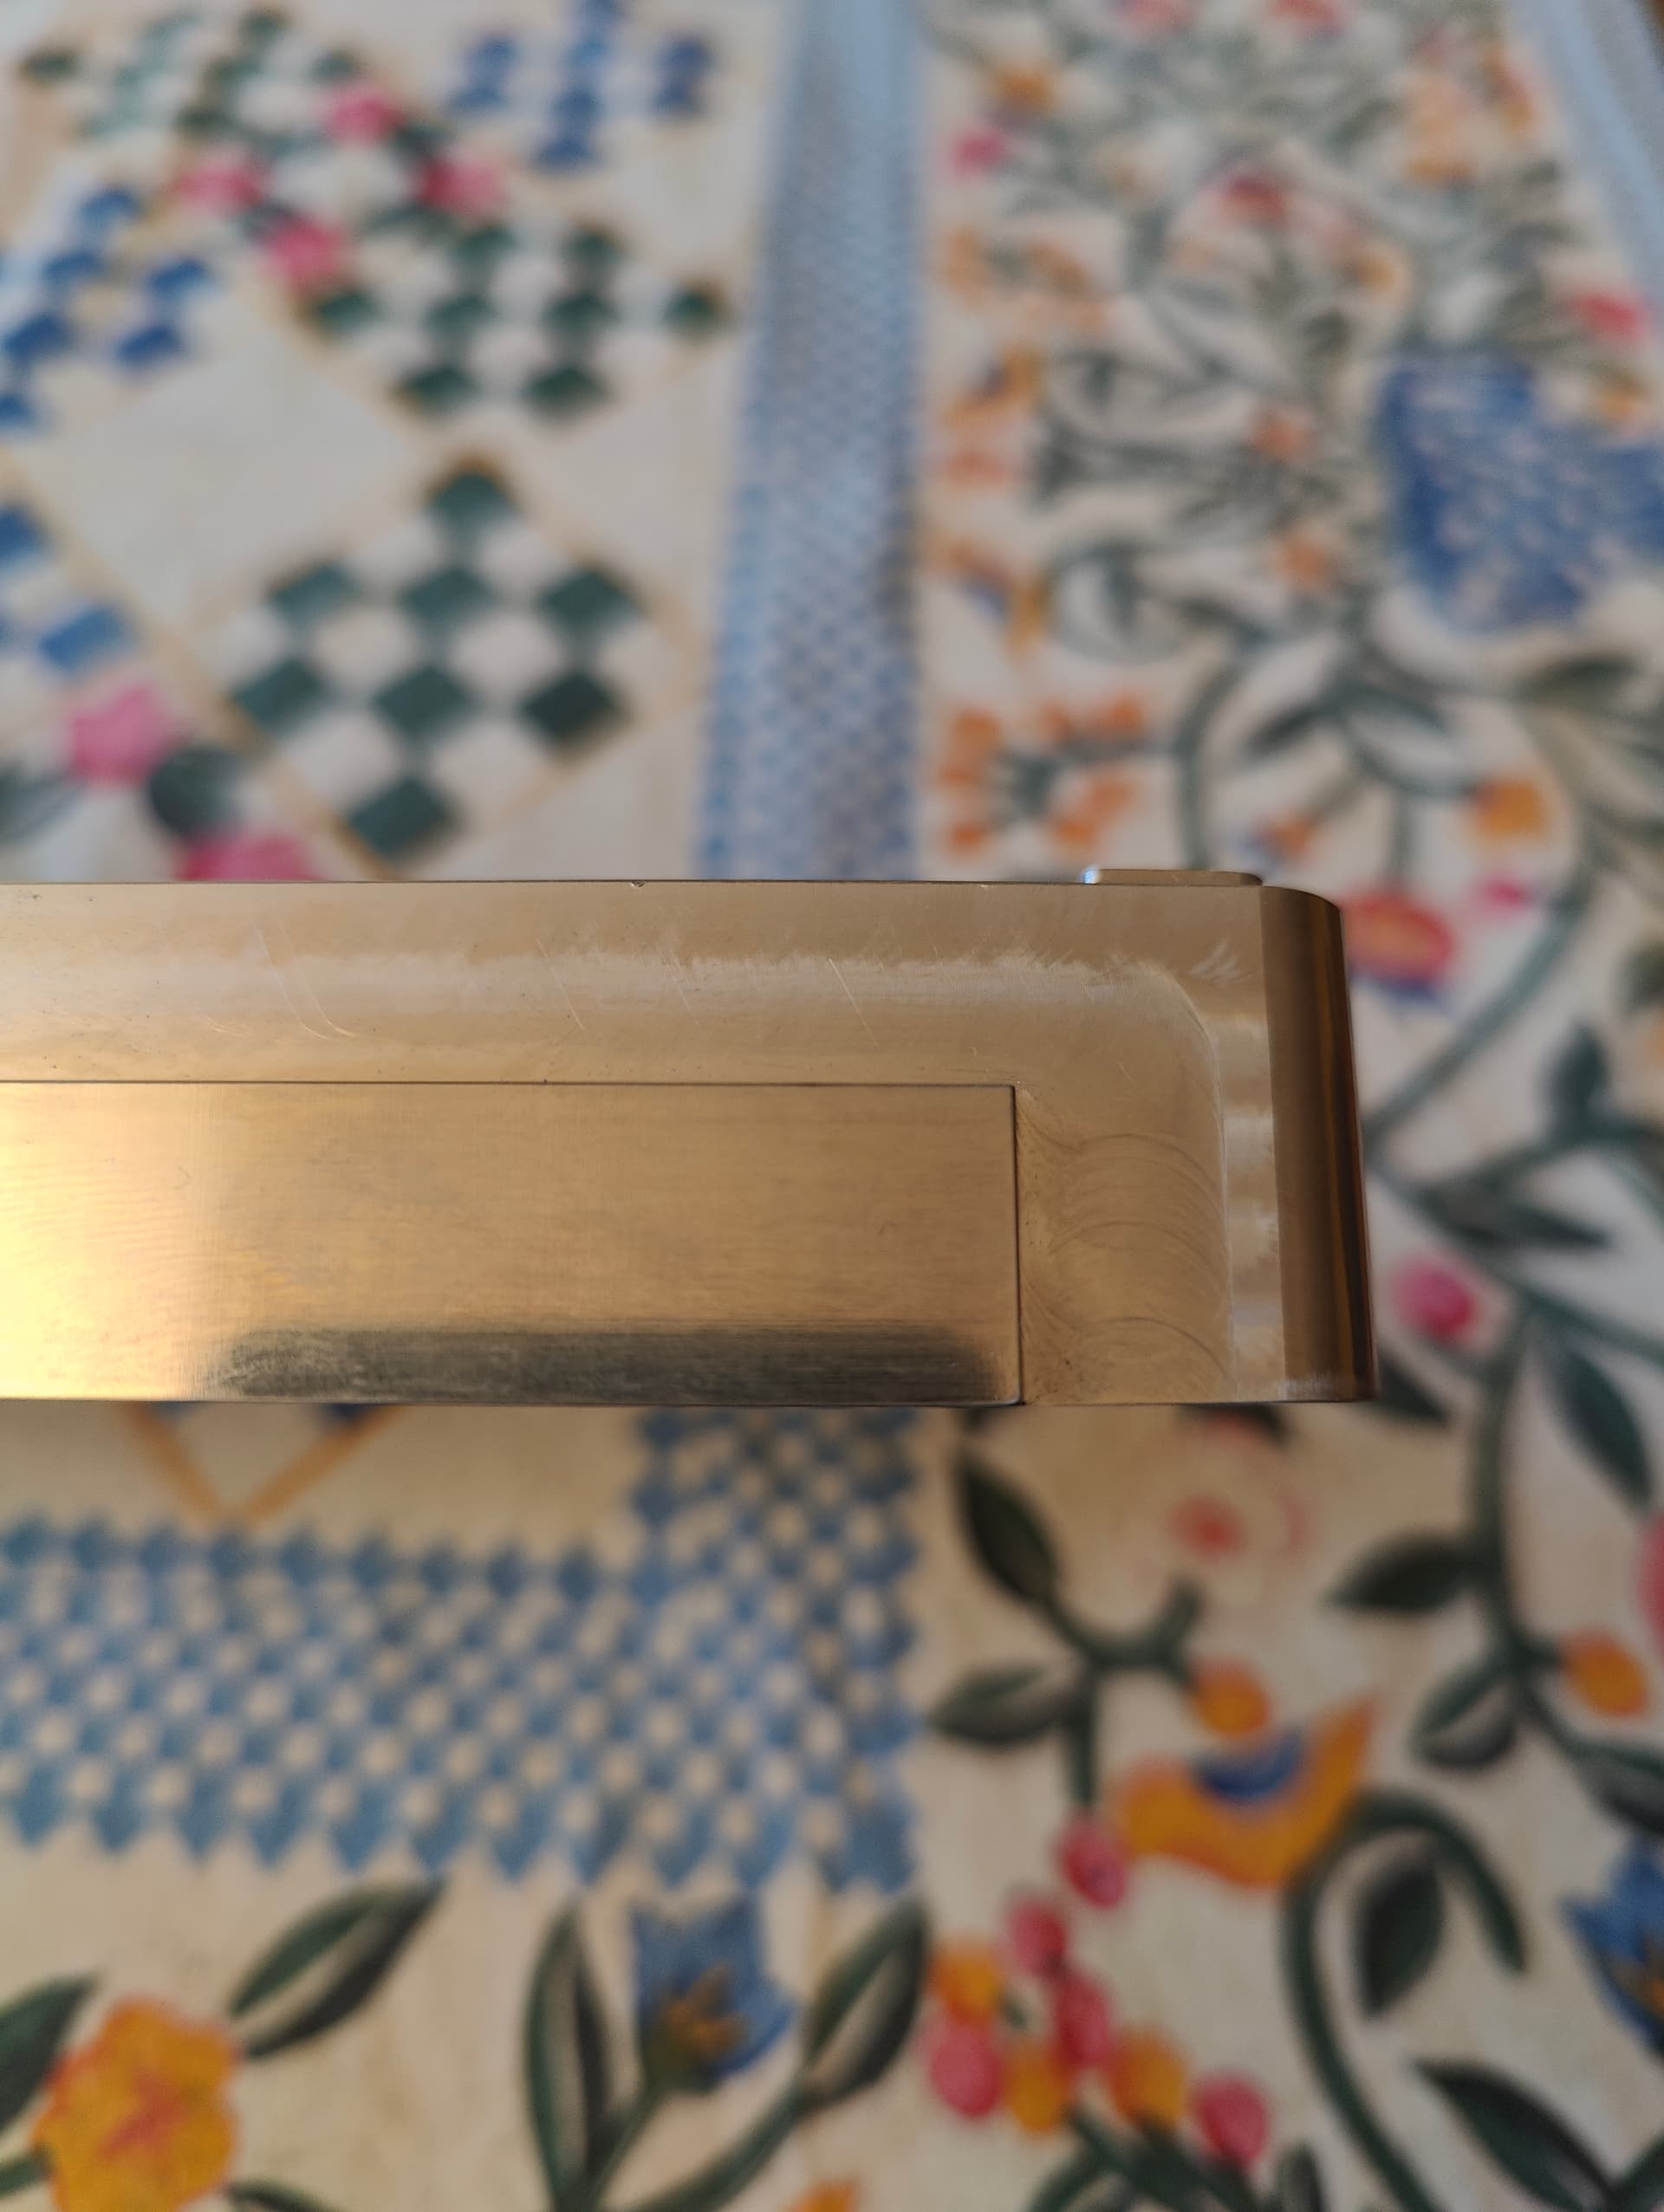
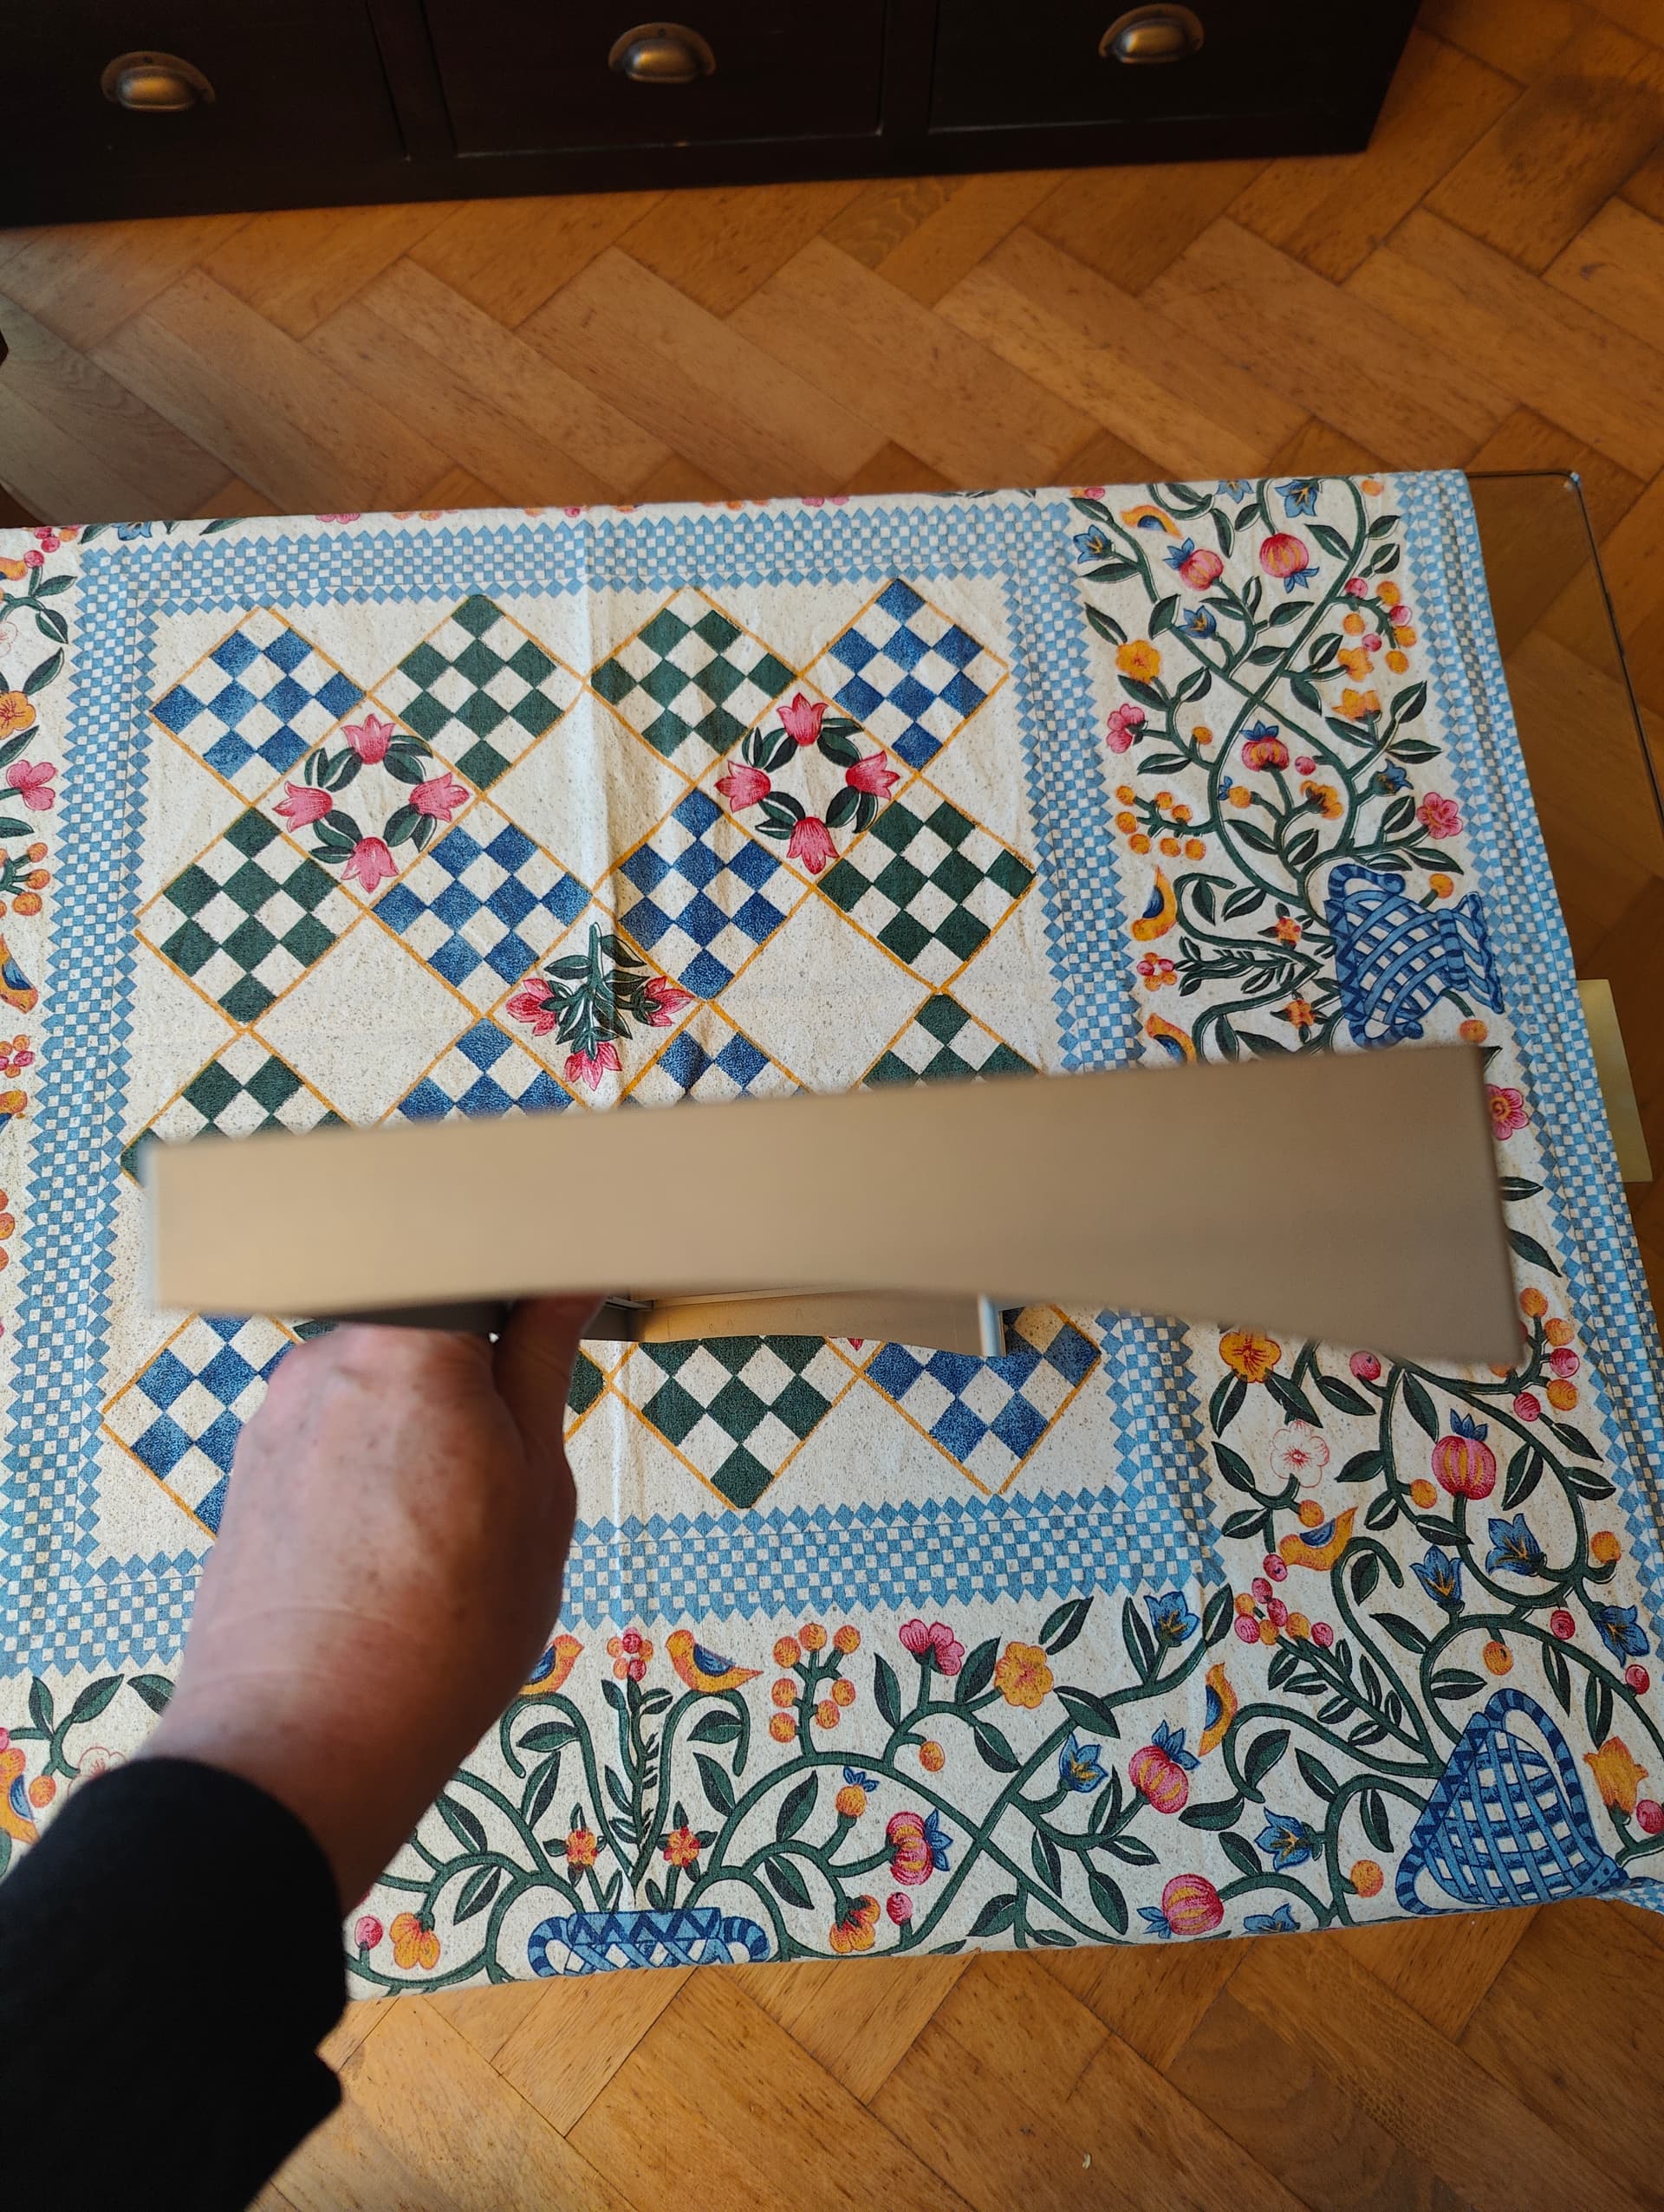
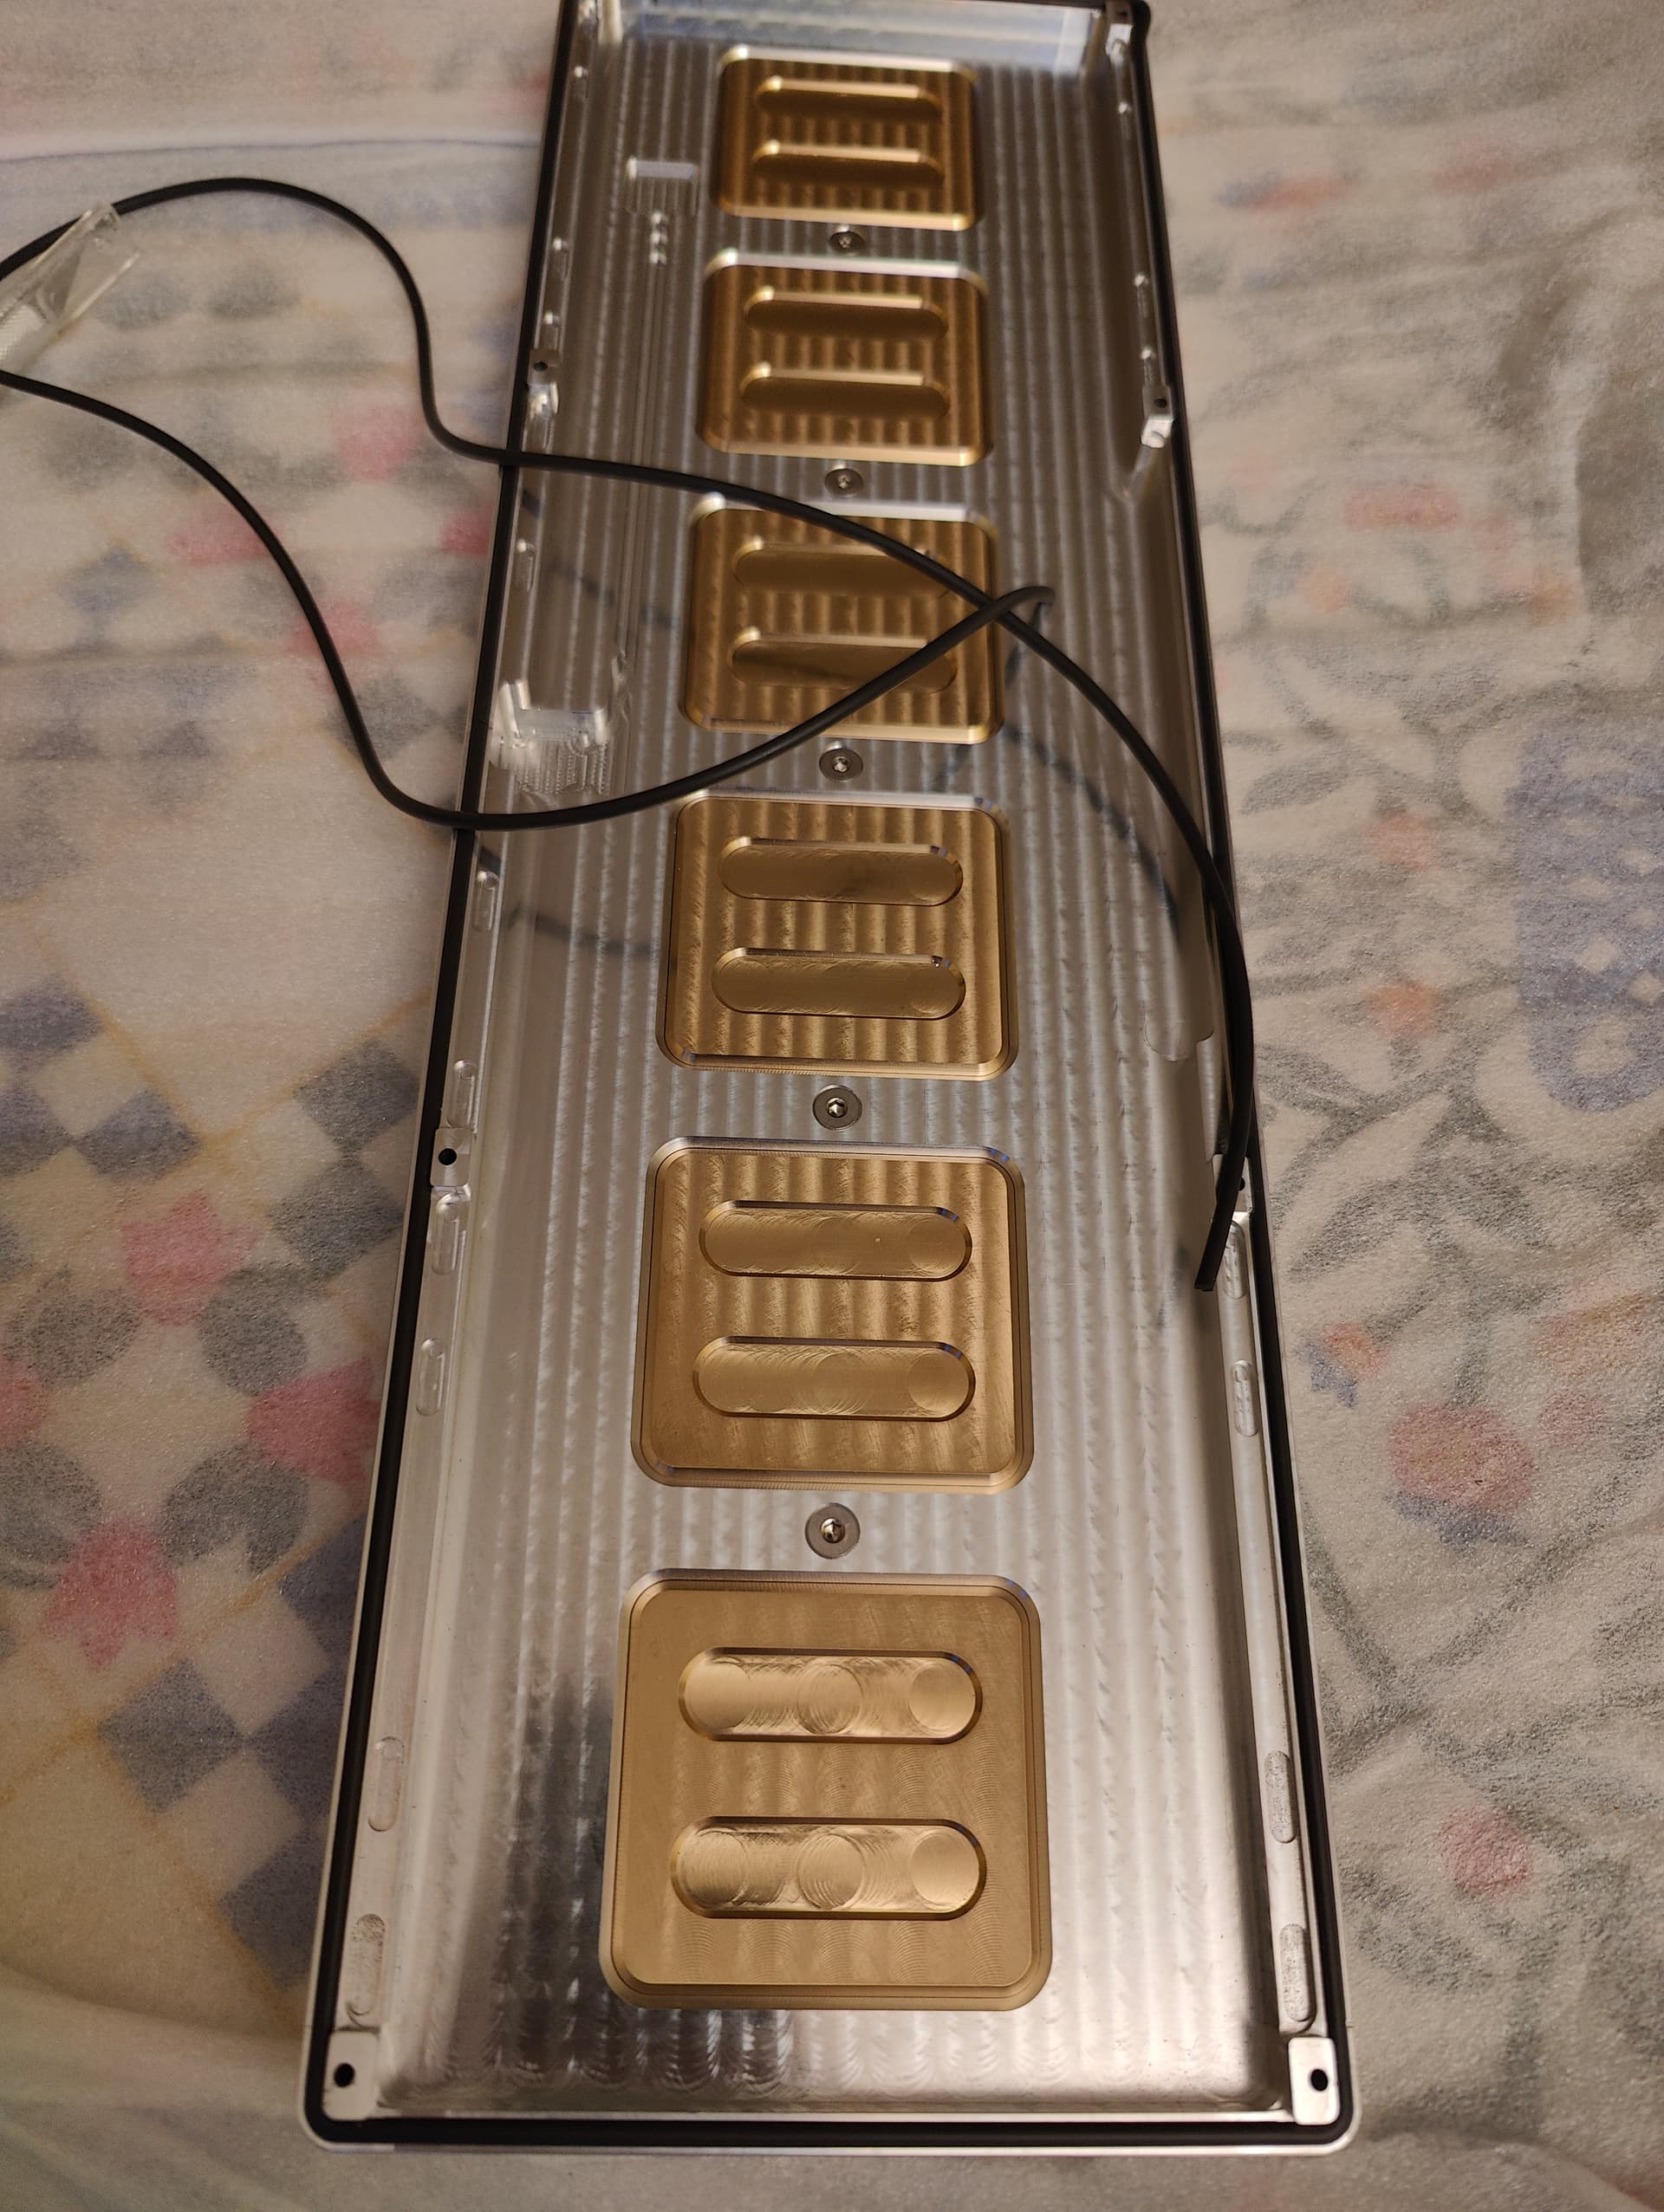
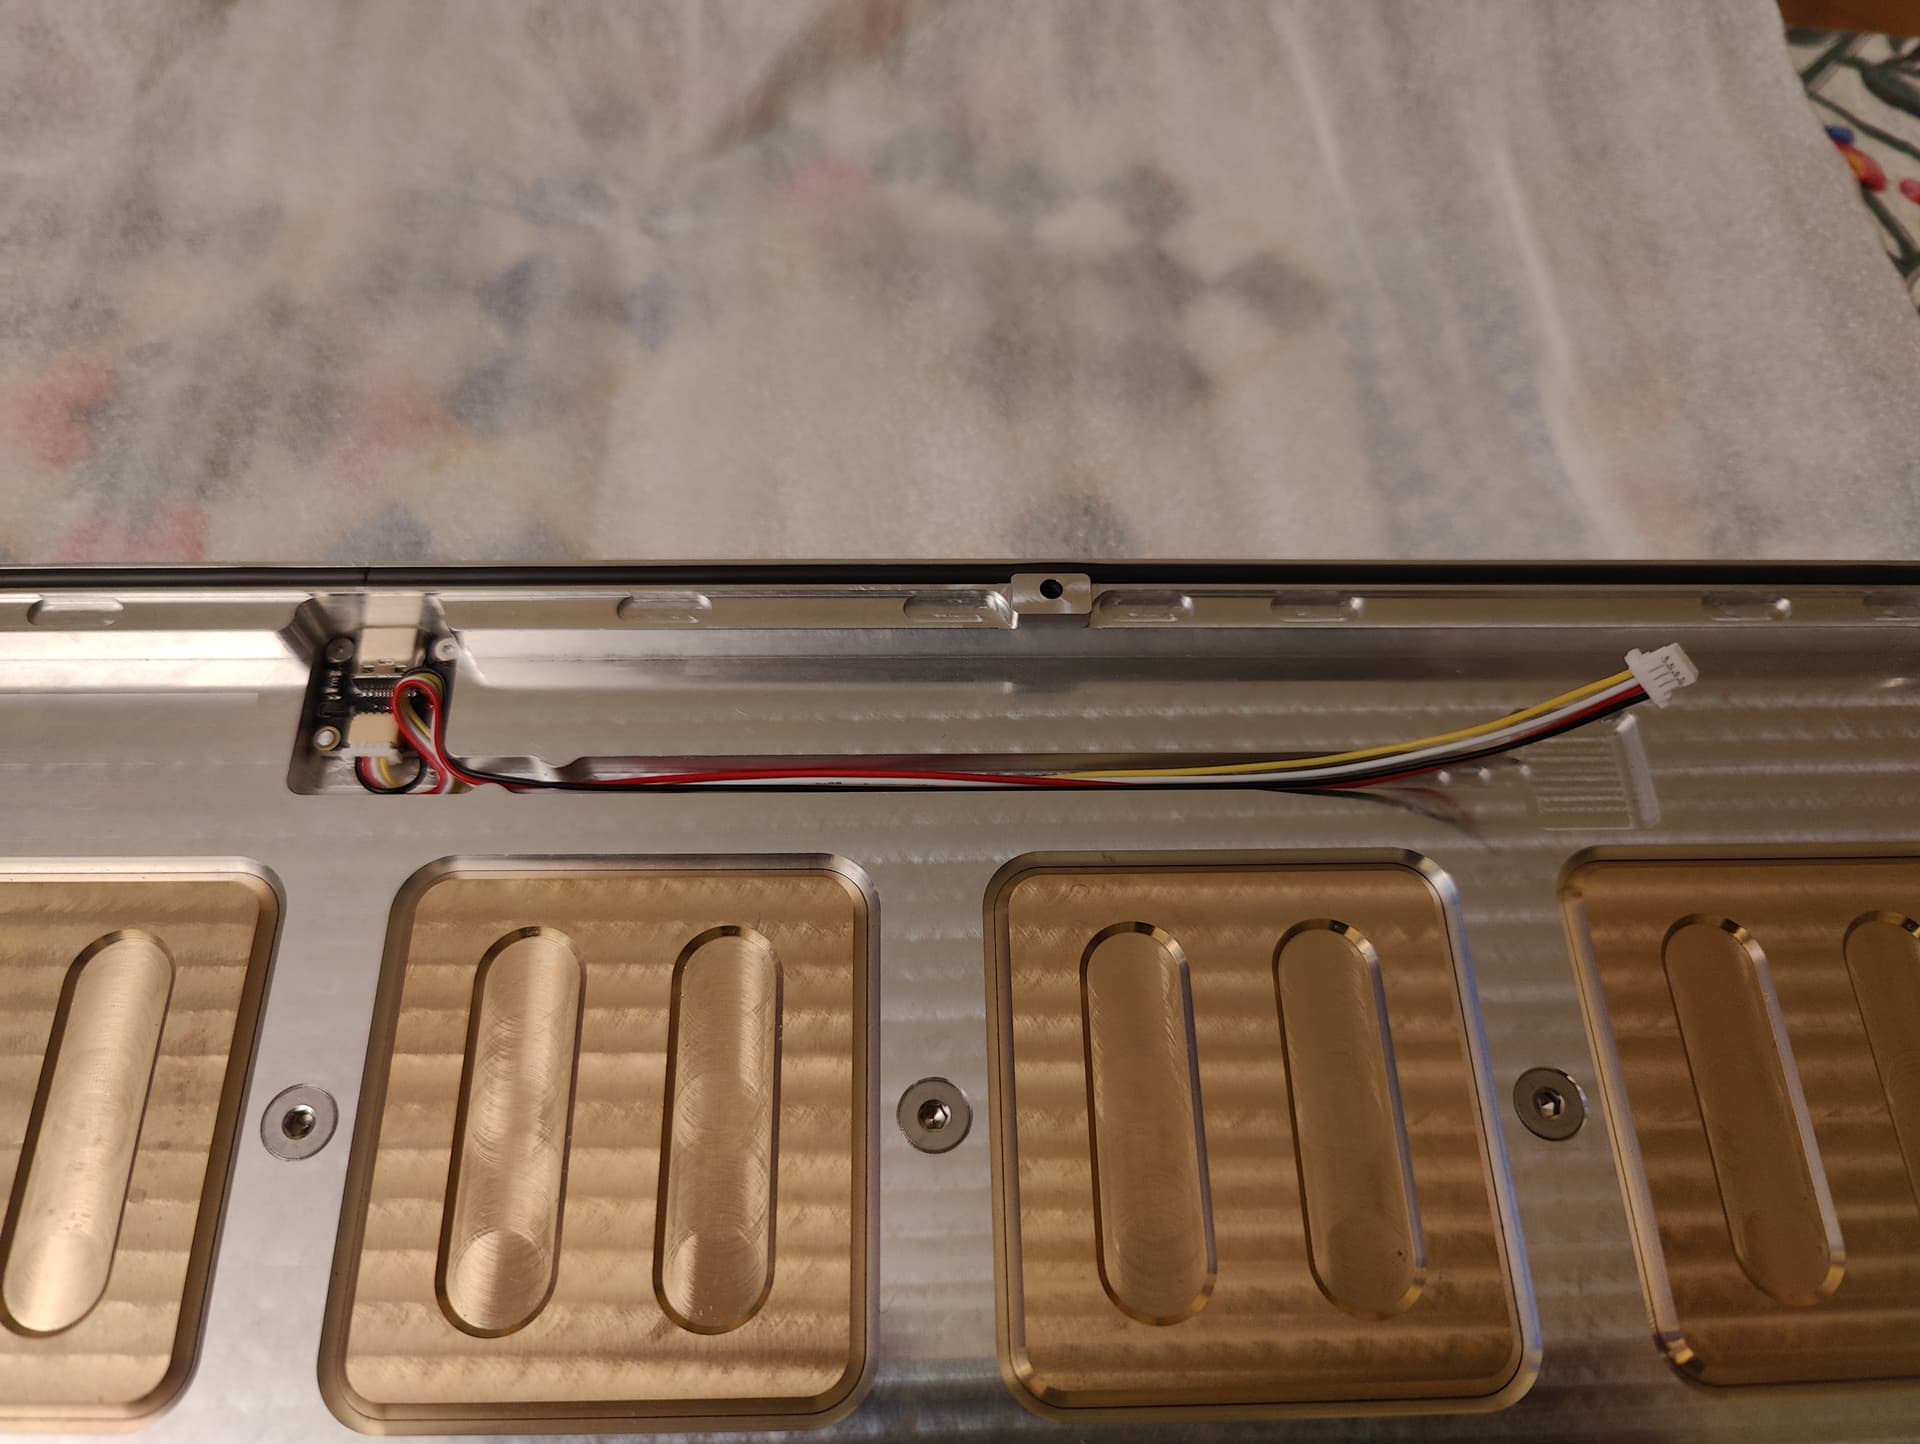
The weight:

It came covered with an ugly petroleum base oil that was smelling like hell. Once wipe out with a towel it looks much better.
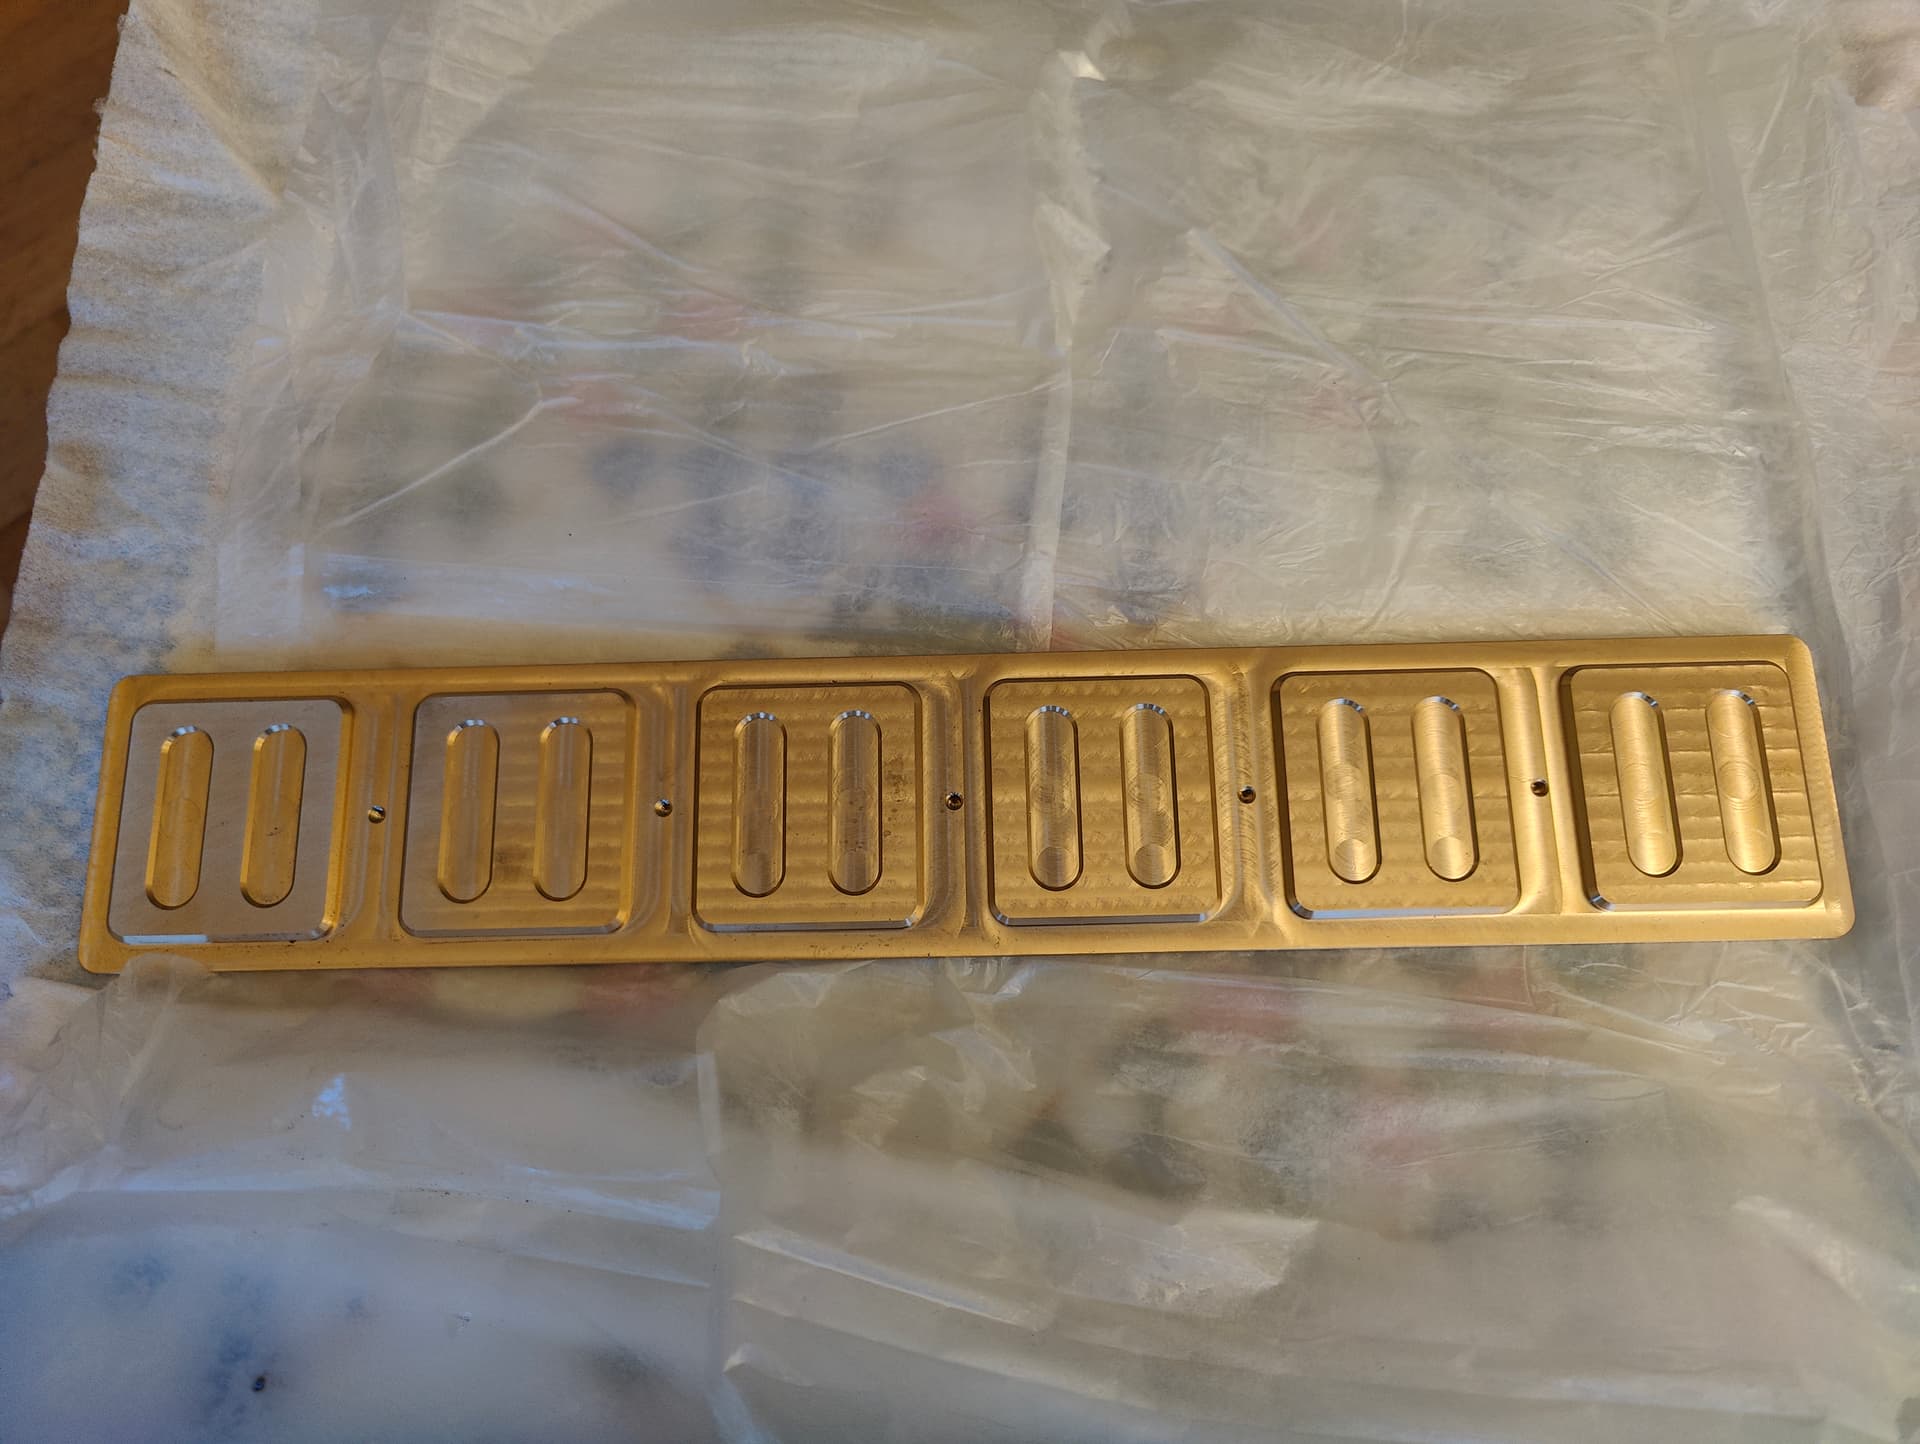
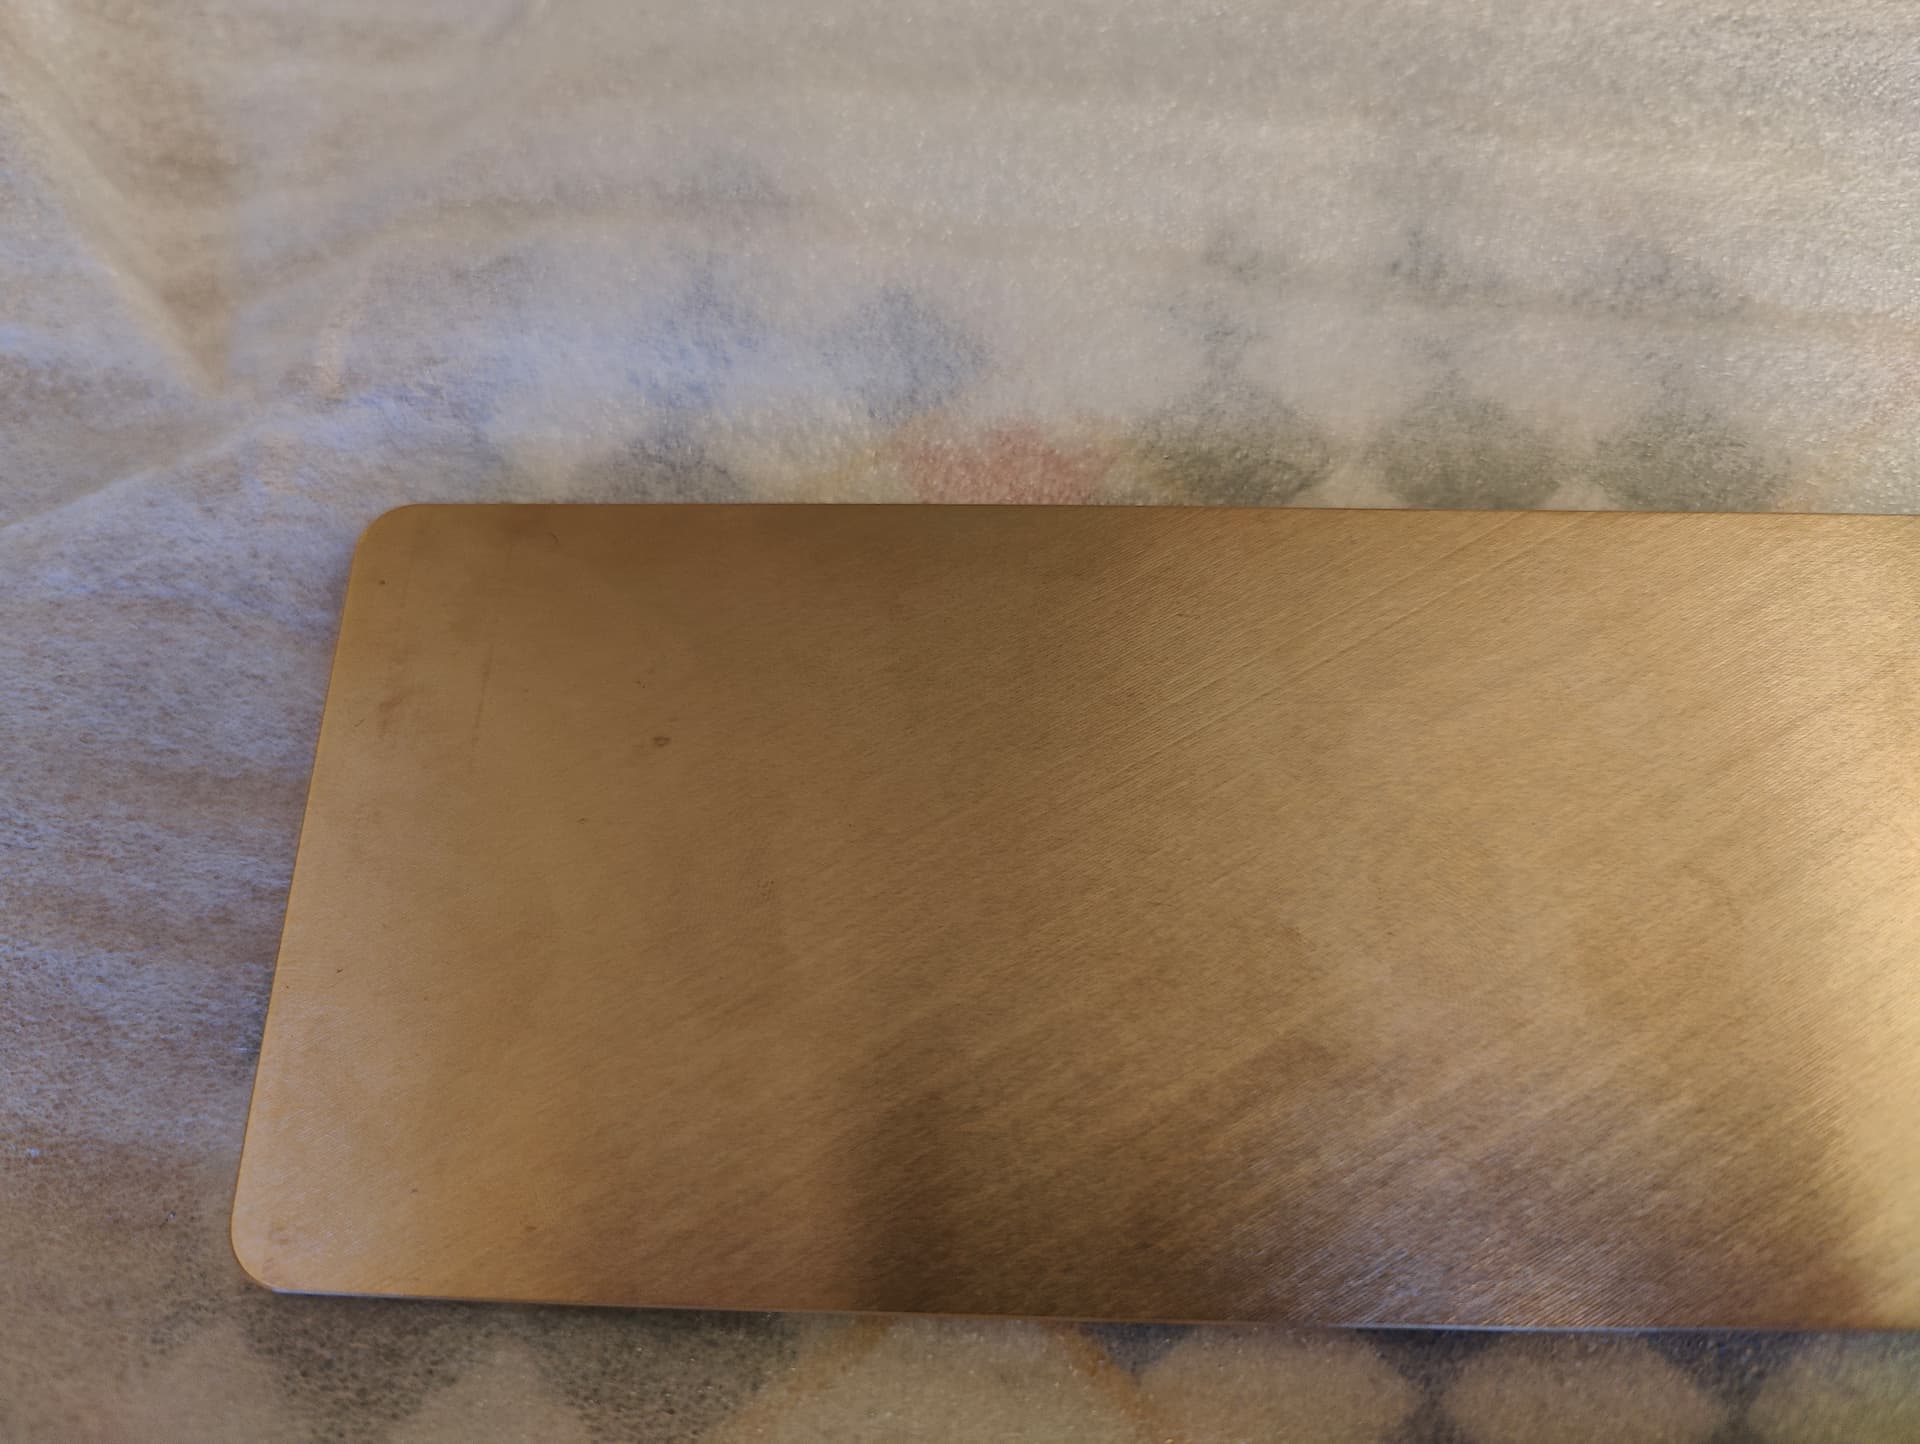
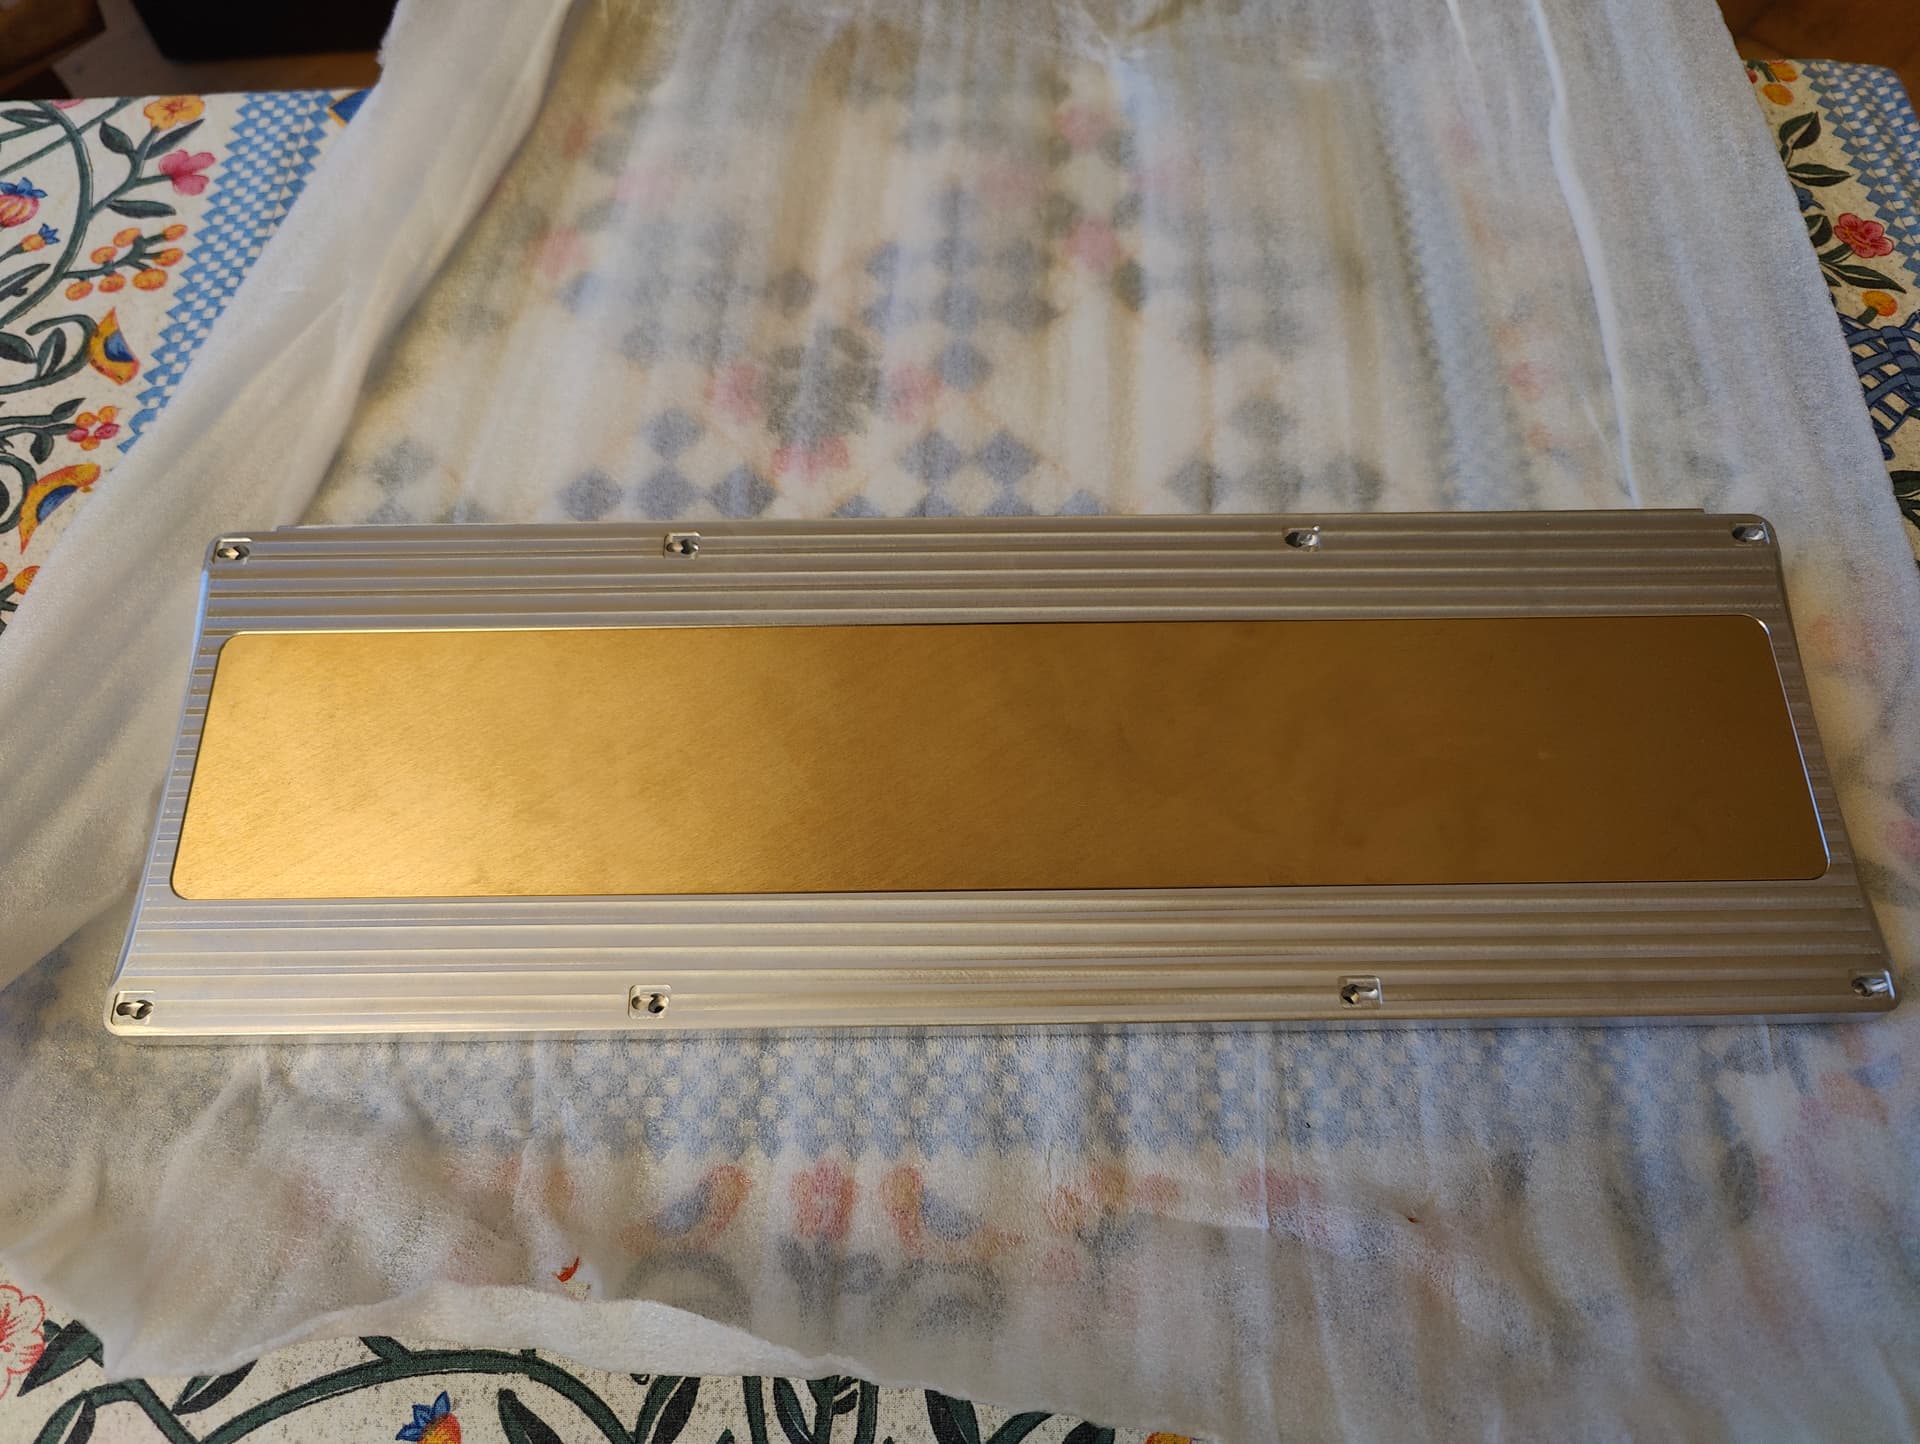
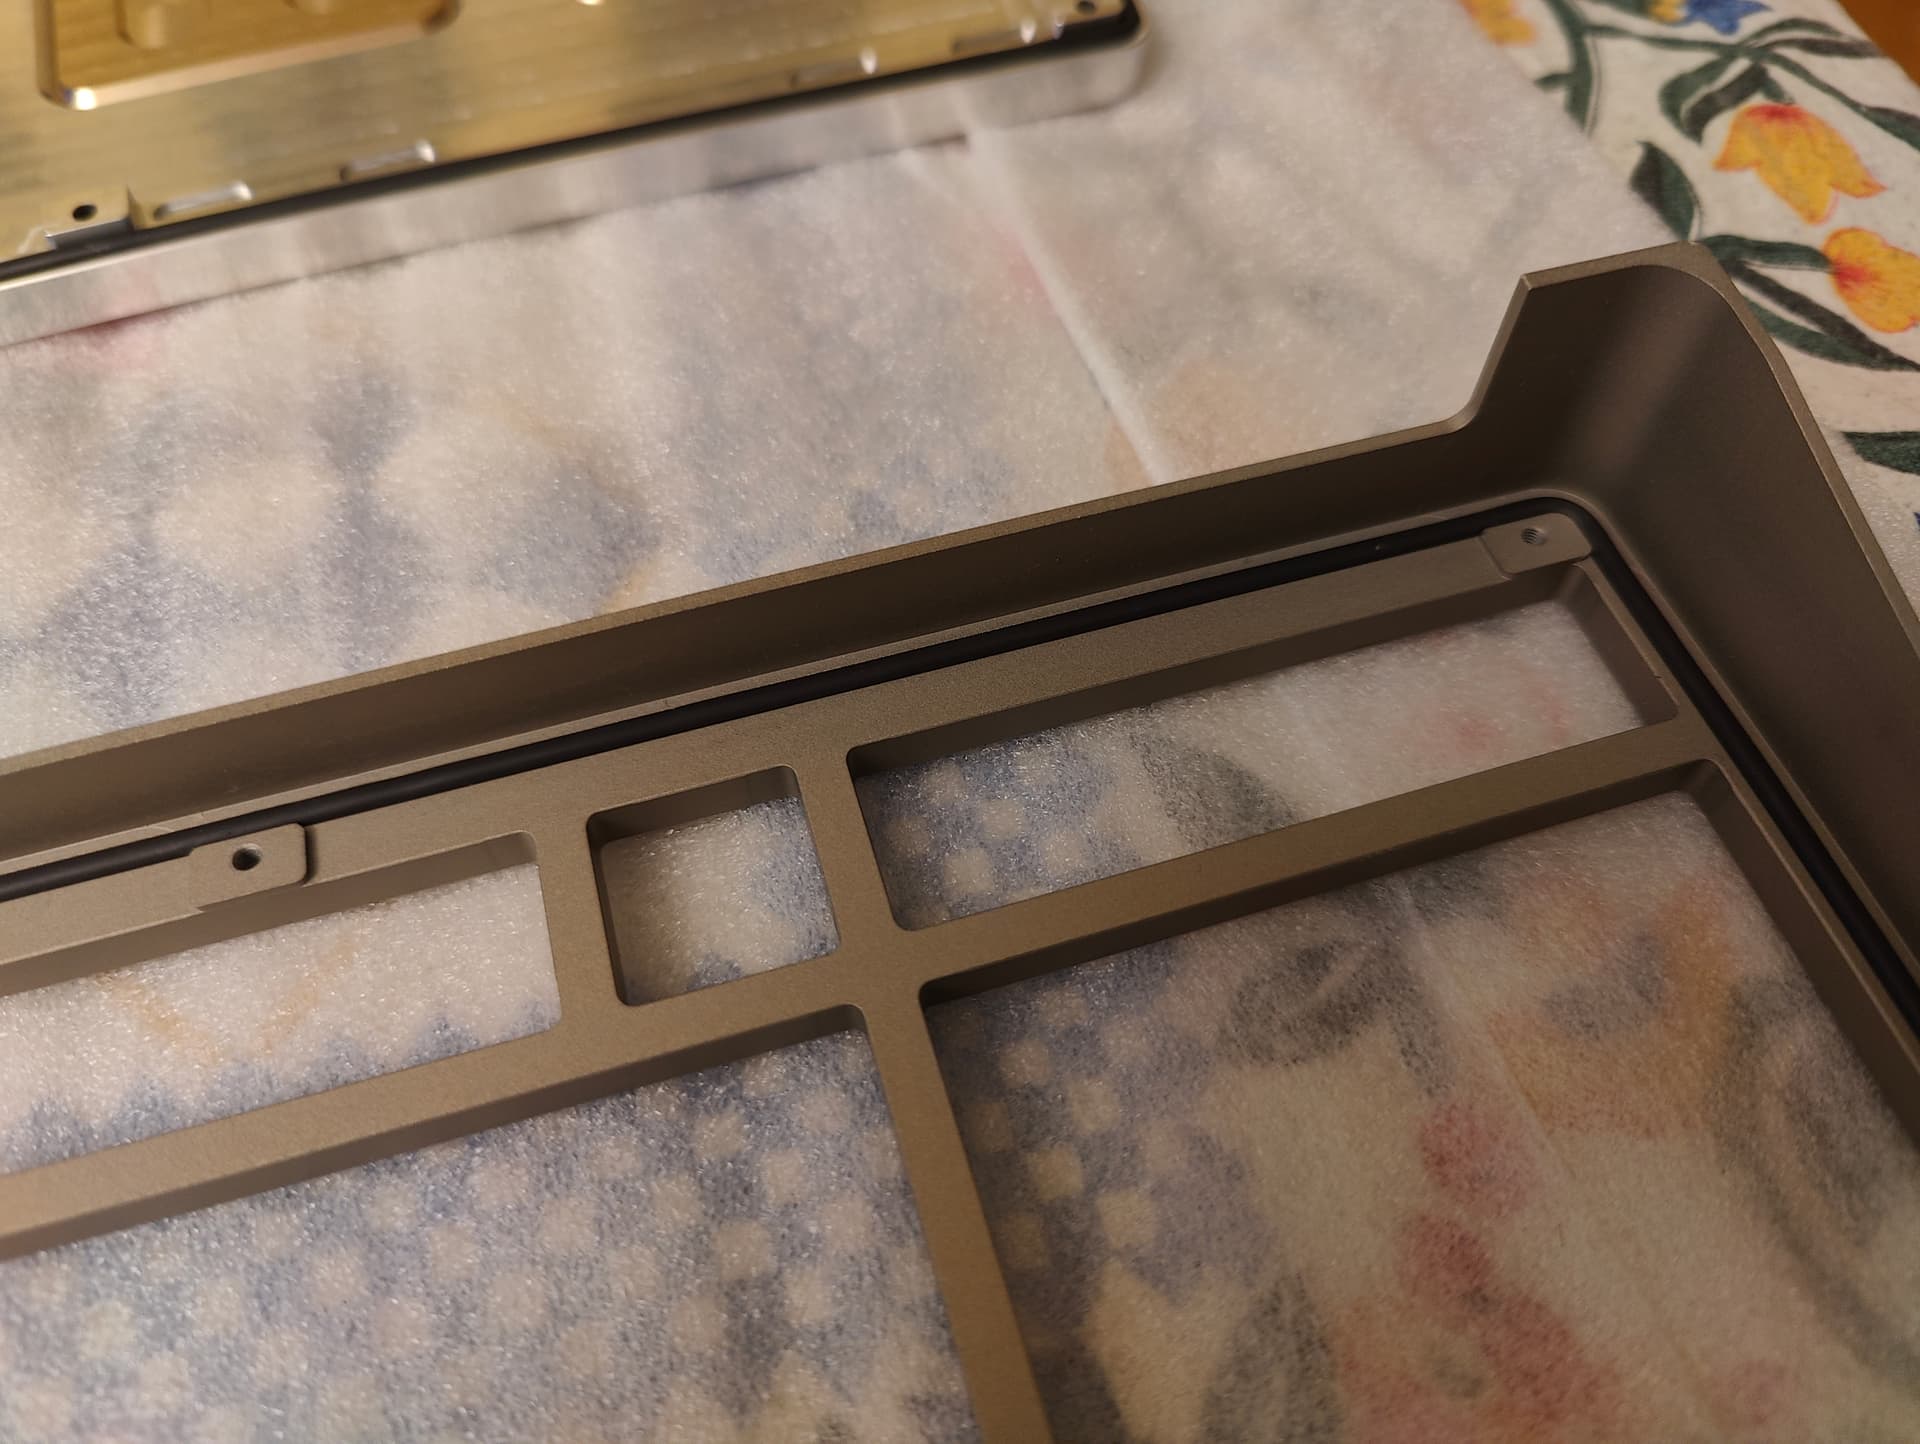
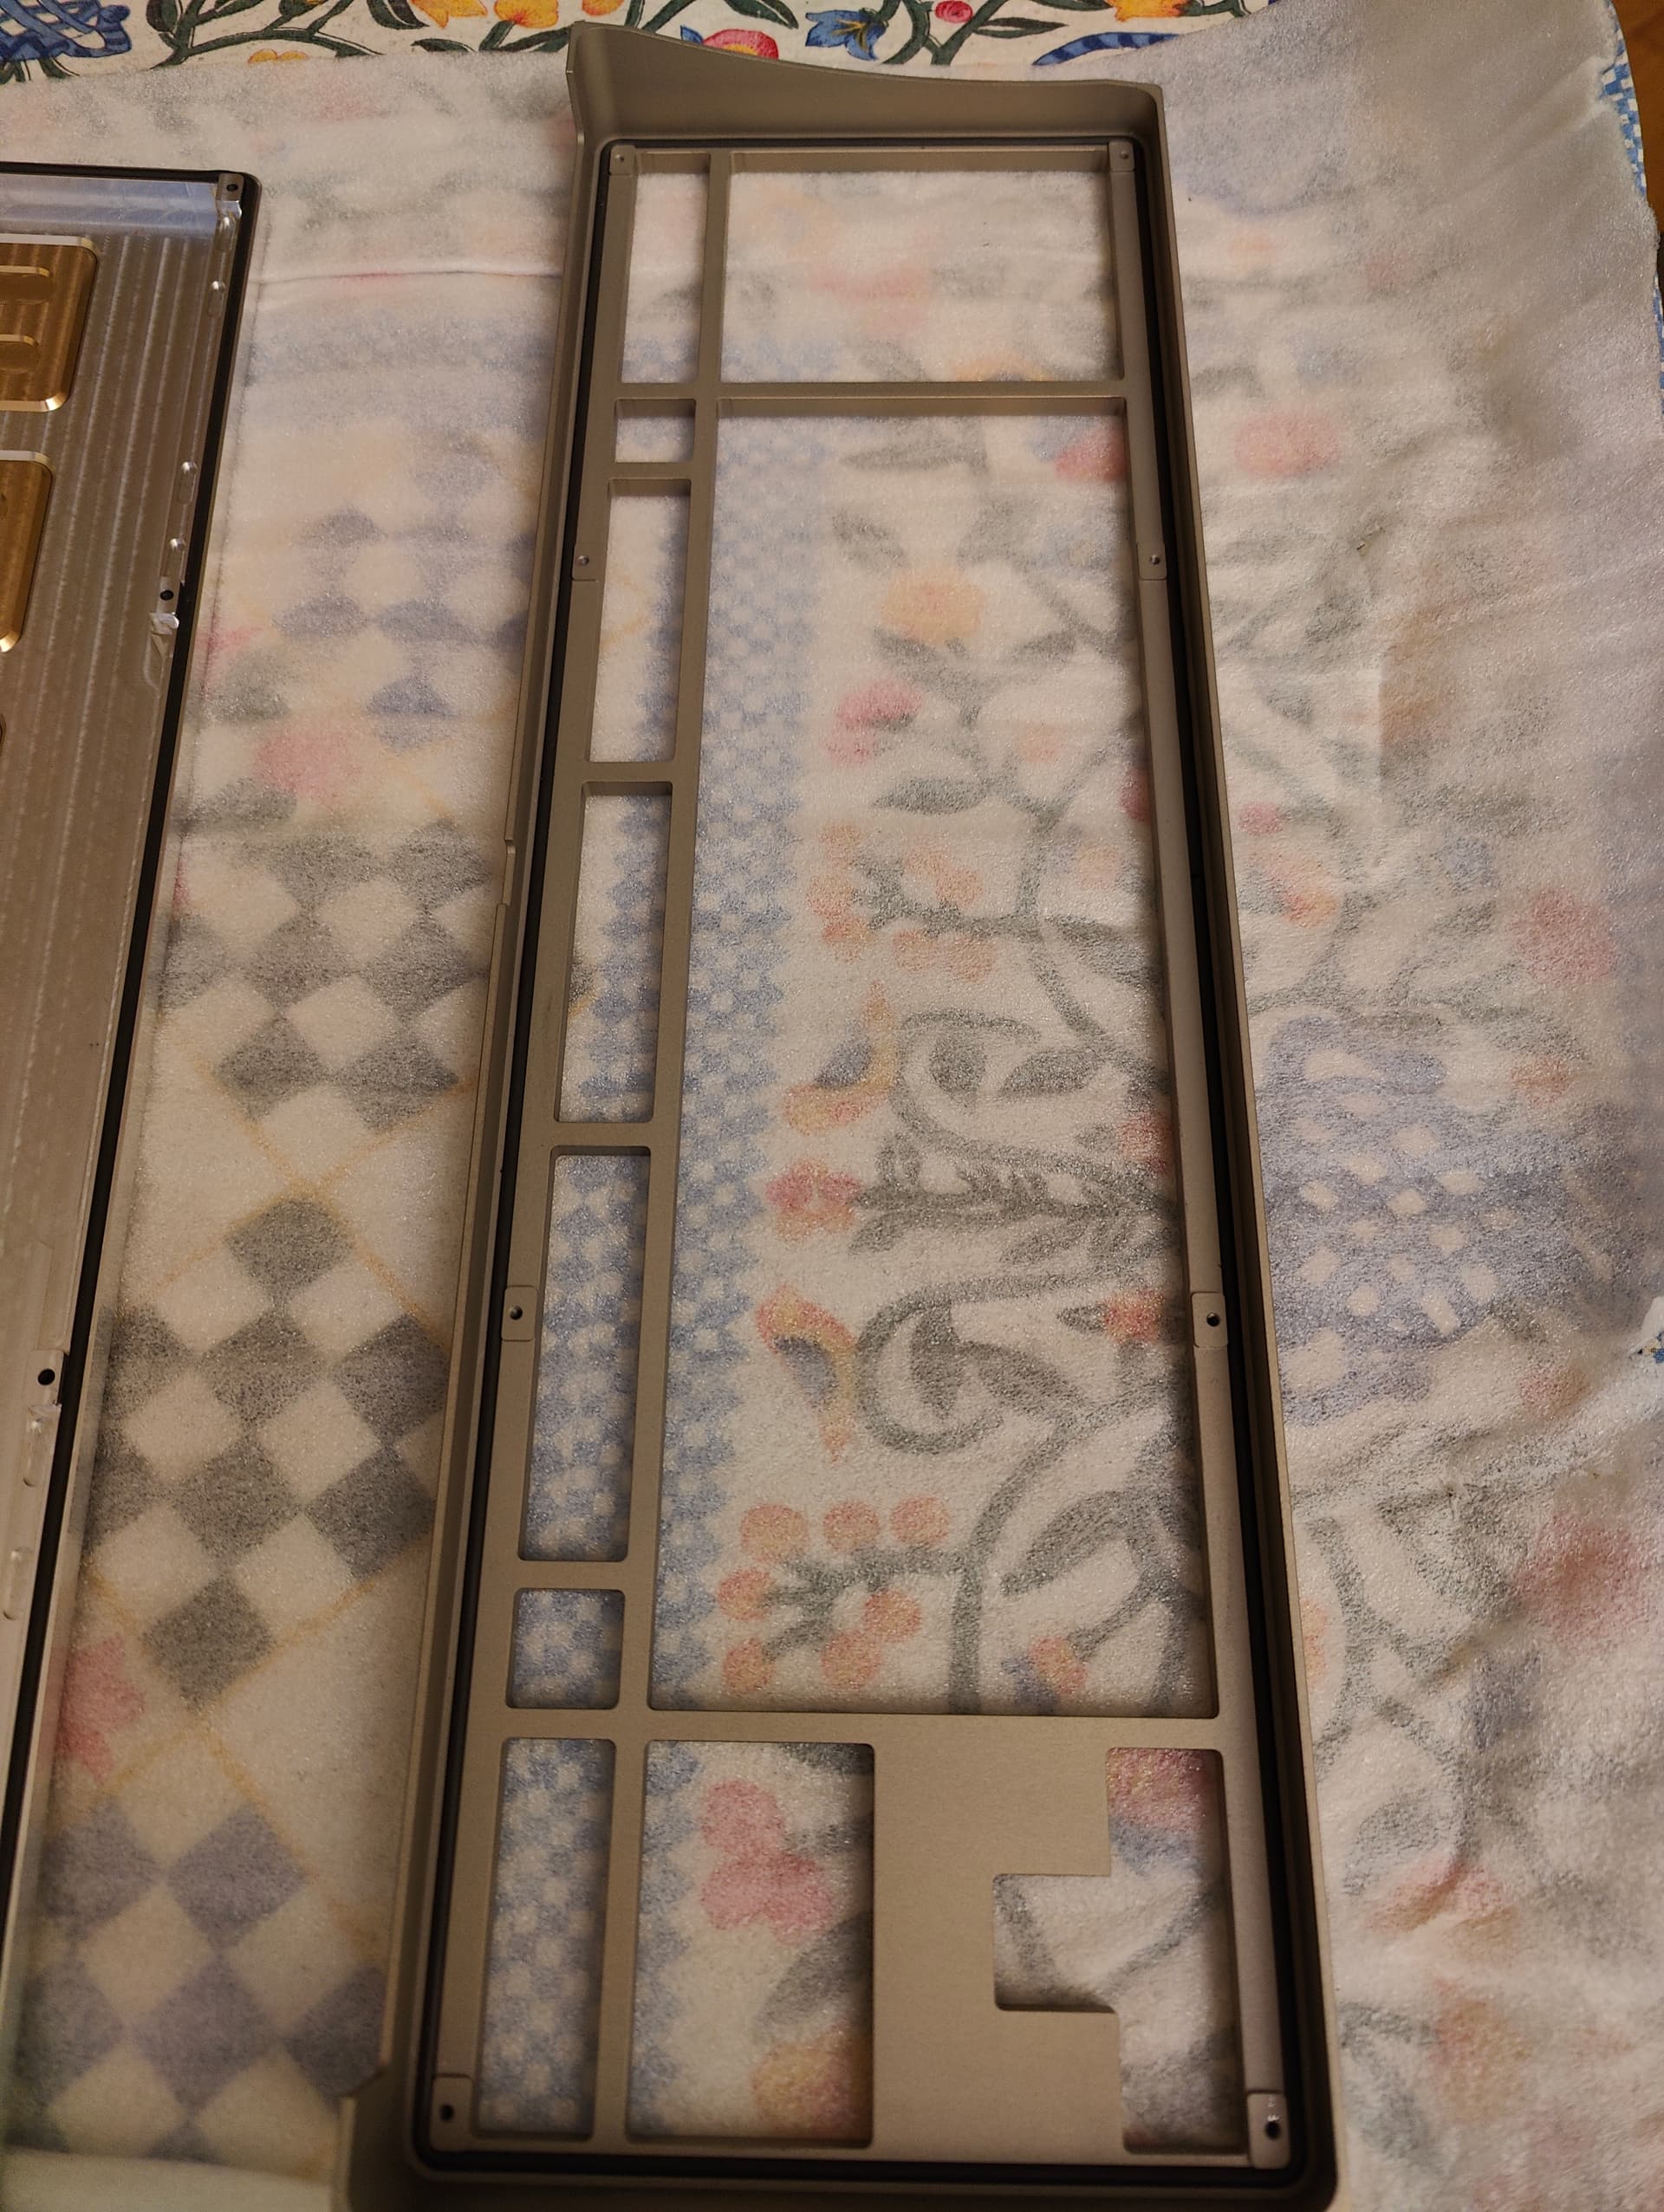
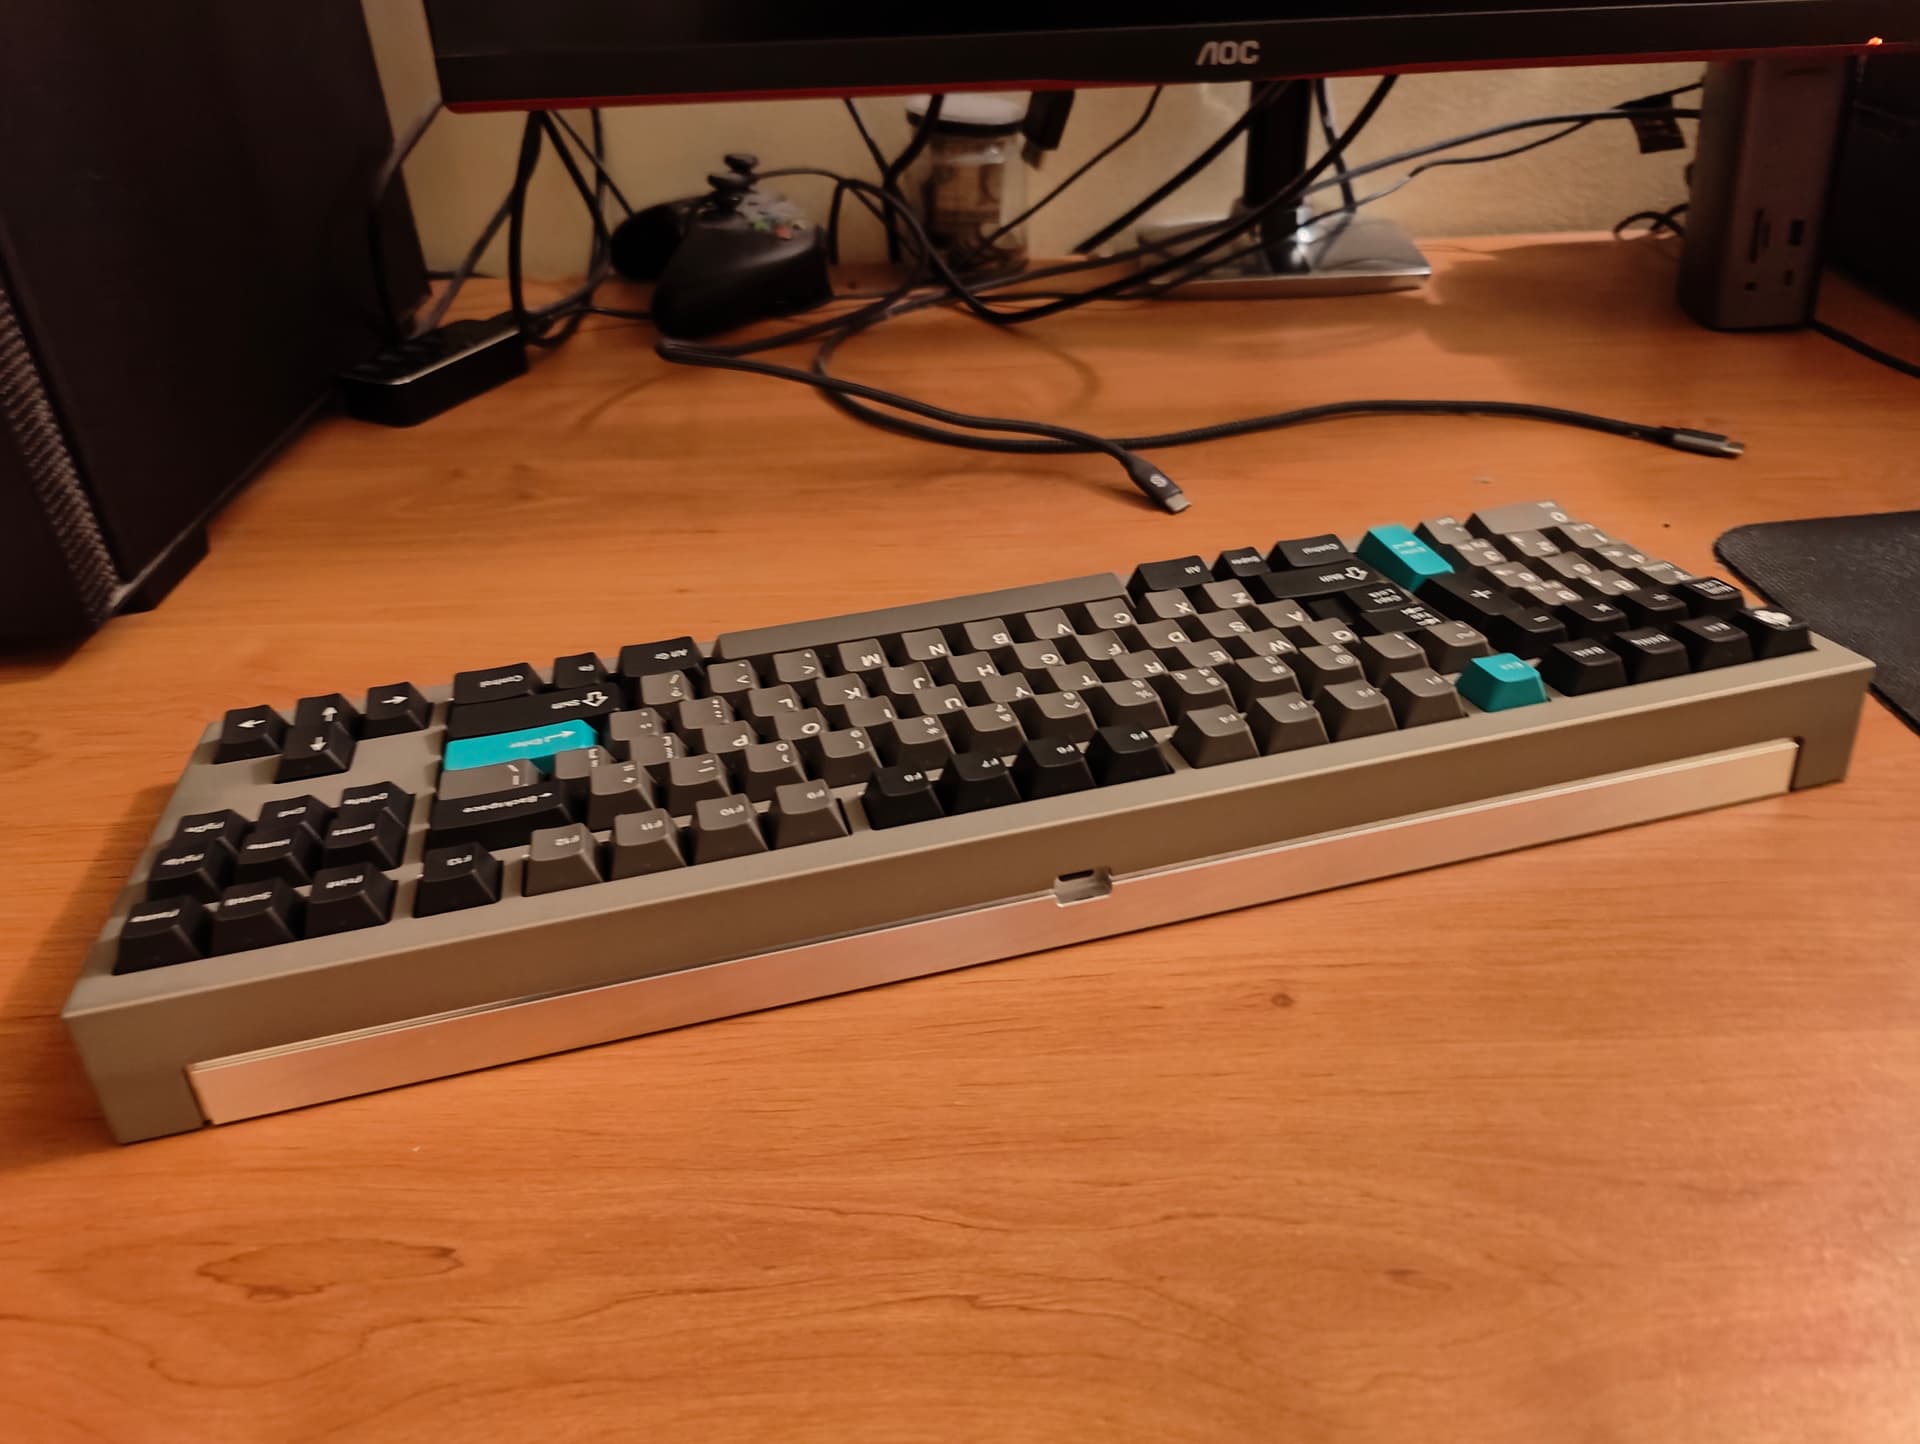
The top:

The only part that had a post machining treatment.
I wanted to try hard coat anodize and studied a lot the colors that can take various aluminium aloys.
I decided to use 7075 as it takes a natural gold/brown color with hard coat.

I love the color, but the finish is not perfect, particularly on the side were the color is not totally uniform. You can barely see it in a normal light but with a good exposure it becomes obvious.

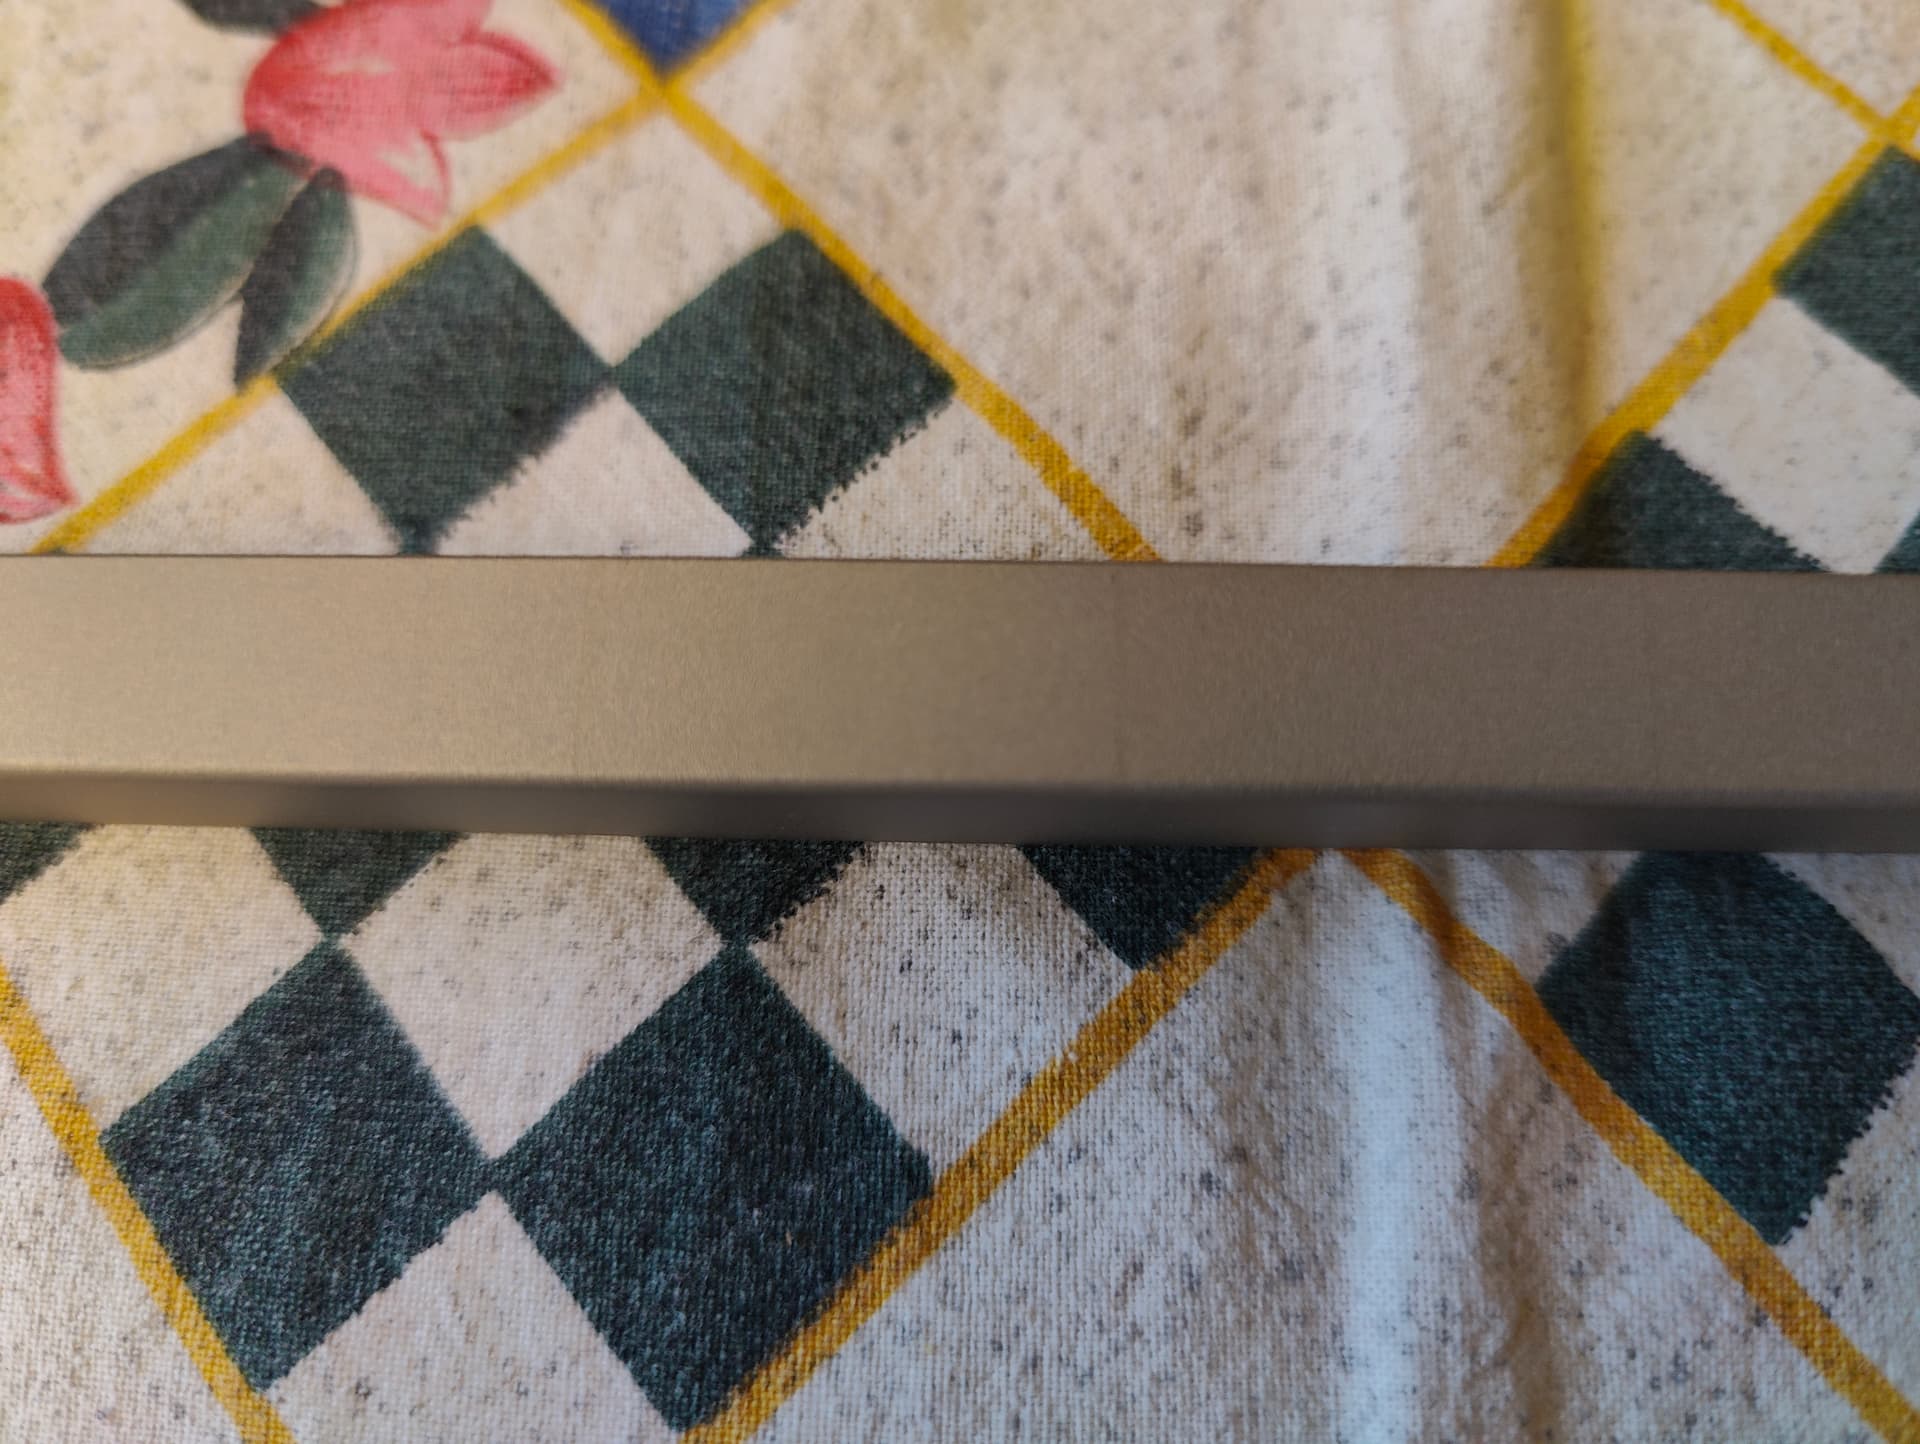
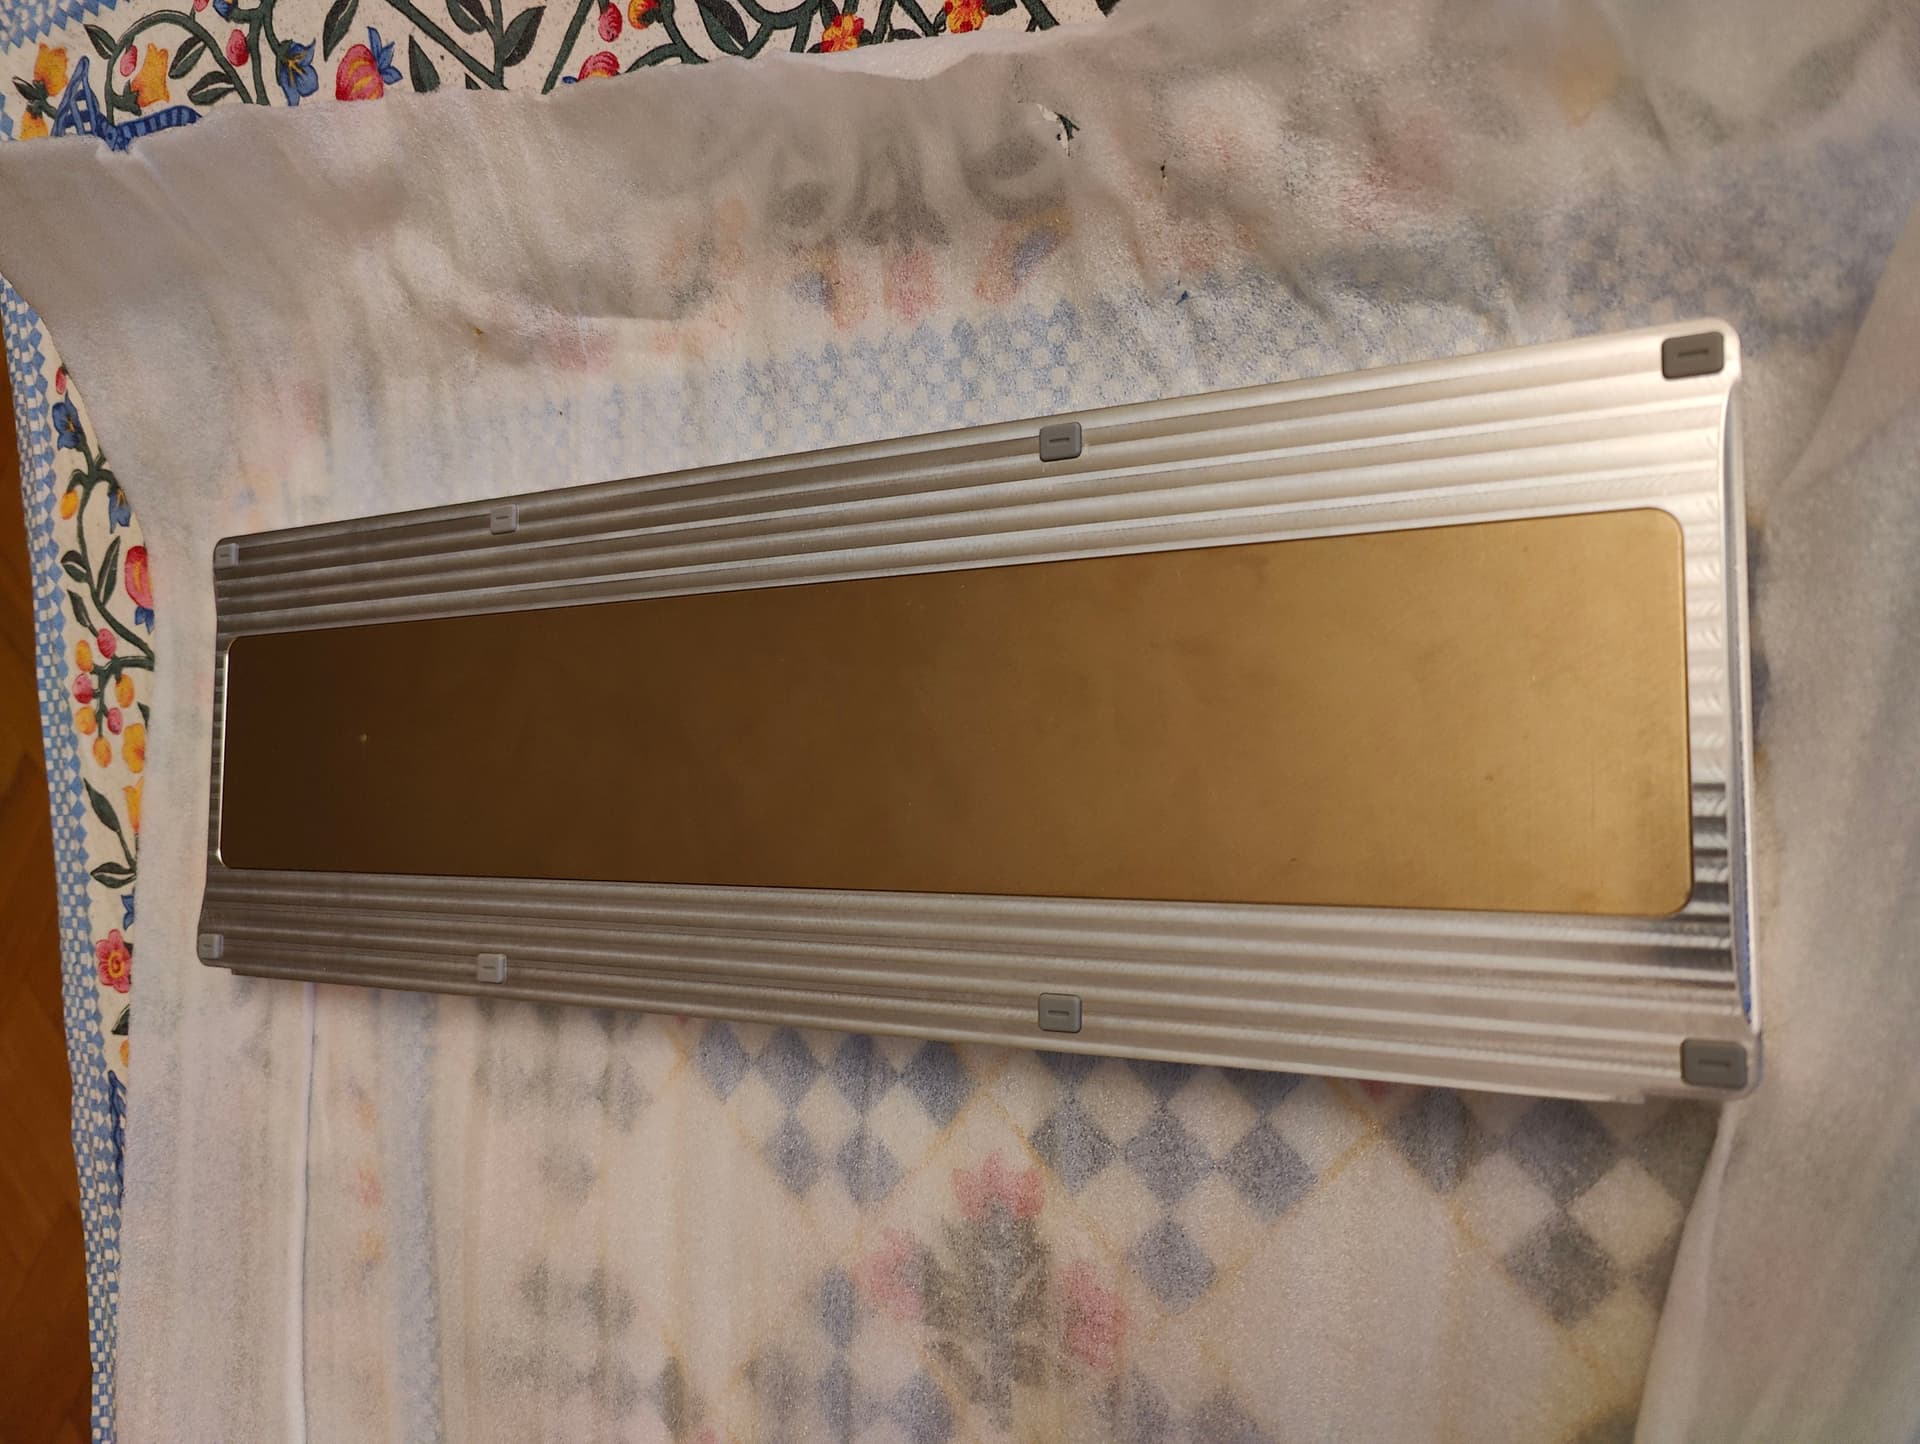
You may not have noticed in the first picture as it is very subtle but the top face has a pattern of vertical lines at regular intervals. You really have to look closely and with a direct lighting to see this but yet …

Those are not machining marks, the top was maintained at those exact places for the anodizing process to be effective.
Hard anodize consist of putting a lot of current on the piece, as a result the piece has to be in a firm current contact at many places for the process to be effective.
This is why the top face color is very uniform and the sides have a few gradients here and there.
This is not really the manufacturer fault, more a lack of knowledge on my part.

So if you want really good cosmetics while anodizing stay away from hard anodize and stick to type II, specially on very large parts like this one.

But the color is sooo nice otherwise !
Also it is extremely durable: I tried to scratch it with my xacto knife and it resulted in dulling my blade while the piece stayed intact, this is impressive !

To conclude I am overall quite satisfied with the parts, with the exception of the hard anodisation overall quality (but man, the color :heart:).

Next post will show how everything assemble together and my finished build !!!

6 Likes

Part of the color inconsistency could be from uneven blasting before the anodizing. Since blasting before type 3 hard coat is pretty standard, and thus that could show through post anodizing.

2 Likes

Let’s talk about the assembly process :wink:

Five M4 screws are used to fix the weight with the bottom case.

A quick test fit of the F1-8X silicon feets.
They install with the right amount of resistance: they don’t come off by themselves but still easy to hand remove, good :slight_smile:

I like the raw unfinished style of the botton of the board.

Now on to the ‘seal mount’ installation on the bottom, that is to instaling the Viton oring.
It can be inserted without too much force by hand.

Followed by the ‘seal mount’ installation on the top.
This one needed a bit of extra force to insert due to the extra thickness of the anodization (around 50 microns less than on the bottom part), I used a plastic spatula for the insertion as my fingers started to be sore :stuck_out_tongue:

This extra tightness is wanted in the design and has a purpose: to dampen all vibrations of the top piece (Viton is a very dense and soft material, I think GEON also picked it for this reason).
The result ?
With the keyboard fully assembled the top part makes no reverb sound how hard you try tap it with your fingers or a metallic tool.


Installed the USB dautherboard.

And did a test fit with screws of the plate (wrongly oriented in the pictures :D)
There is just the right amount of resistance to maintain the plate in place, cool.

Curious to see what it will look like with the EC PCB plus plate assembly ?
The complete build will be for much later, I am waiting for @Andreas URSA keycaps for this.
Will probably do an MX build in the mean time.

My first fully built setup, Dolch fits well with the anodization color.


I typed the last two posts with this board.
It sound good, has no resonance and has a nice subtle bounce to it.
I put poron XD strips at the middle of the leaves (there are machined cutouts on the bottom part for this) to make the bounce more contained but it also works perfectly without it, just significantly bouncier (this amount of bounce may appeal to some people).

5 Likes

Is possible indeed, I am not an expert on this to be honest.
The top part is very uniform though, this is strange.

2 Likes