Hello All,
In this post I will be going over the REALFORCE RC1 and my findings. This is an informative post that will show the build and components of the new REALFORCE RC1 keyboard.
TLDR: It’s a big weird (in a good way) HHKB!
DISCLAIMER
I AM NOT RESPONSIBLE FOR ANY DAMAGES THAT MAY BE CAUSED FROM DISASSEMBLY. THIS IS NOT A GUIDE BUT IS AN INFORMATIVE DOCUMENT. READER ASSUMES ALL RESPONSIBILITY FOR ANY DAMAGES. THIS WILL VOID YOUR WARRANTY
With the disclaimer out of the way, let’s tear this thing down. ![]()
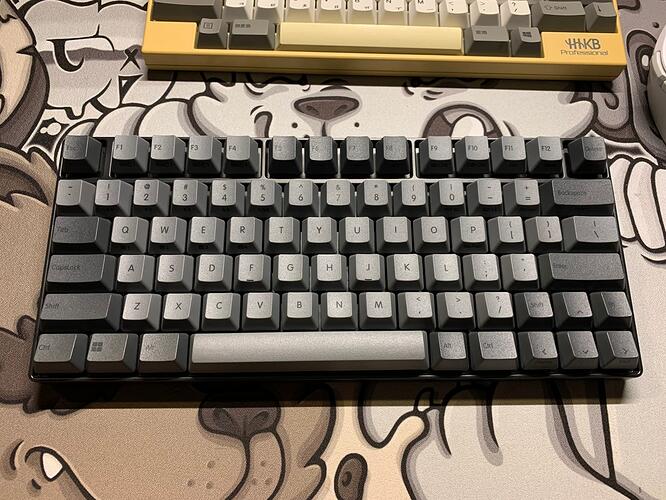
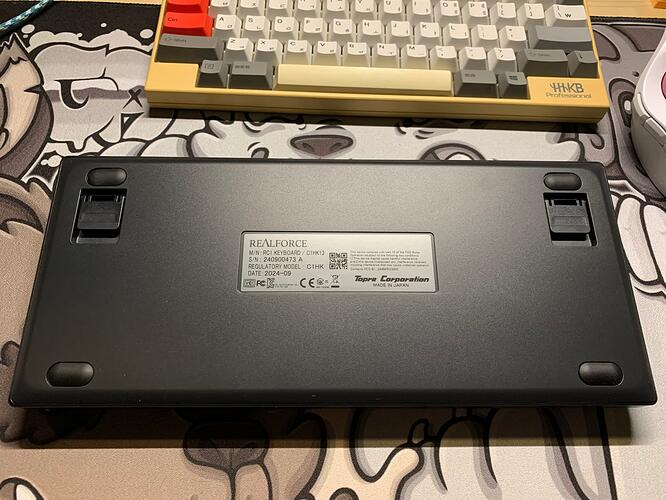
We’ll start with some pics of the board in general to show the new layout and design.
Top view of the board
Bottom view of the board
No caps
Ok, to the tear down!
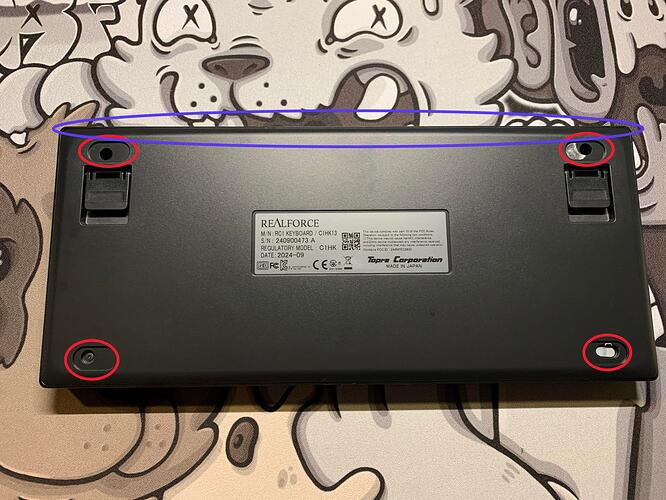
First, you will want to remove each of the feet, then remove the screws circled in red (top 2 are big, bottom 2 are smaller). Next, to open the case, you will need to slide a spudger into the top of the case circled in blue. WARNING There is a cable attached that is pictured in the next image, do not pull the bottom of the board away quickly without detaching!!!
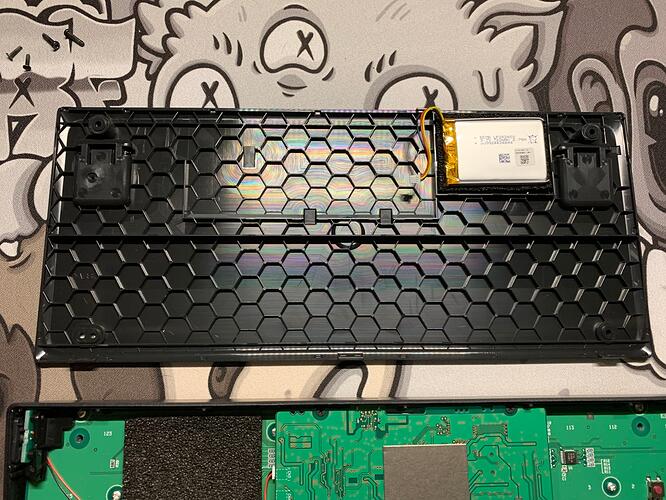
That cable is to the battery which is pictured here. It is a 720 mAh battery and is housed in some sort of impact resistant foam that is cool to the touch (cooling pad too?). As you will notice there is a nice hex pattern on the case for structural integrity.
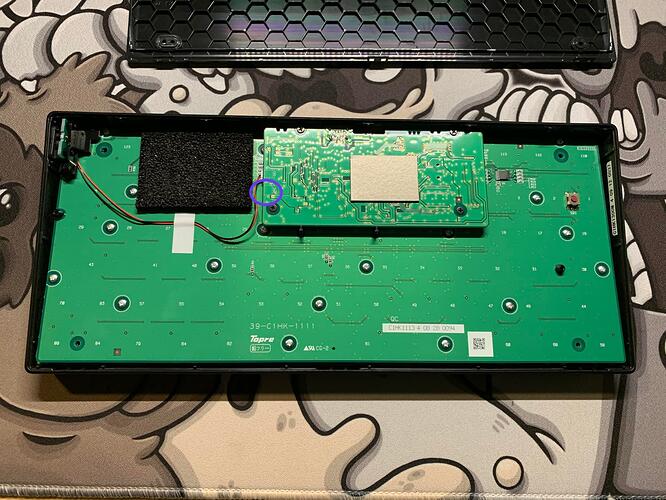
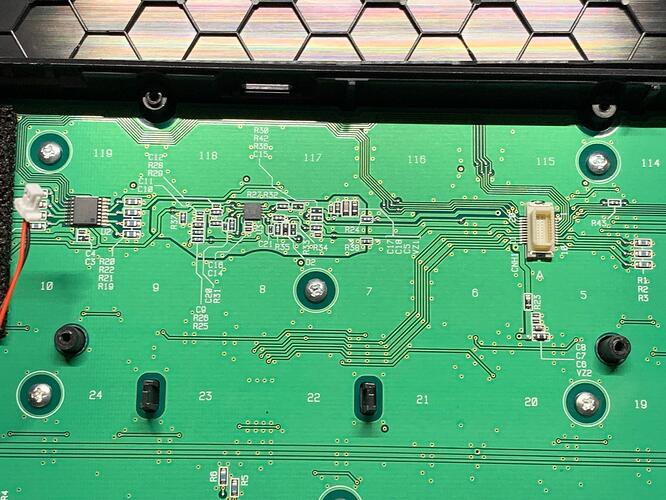
Here is the PCB. The area in blue is where you detach the battery from the board. As you can also see there is some sort of switch present on the right side… Not sure what this is yet, I assume a reset switch. Overall, nothing crazy going on here. Things to note, you can see the side “power switch” that is also connected to the daughterboard which is how you power on the board when using Bluetooth, and 4 unpopulated screw holes with no circling, these are for the outer screws we removed before. Notice also there is some foam attached to the PCB to encase the battery when assembled.
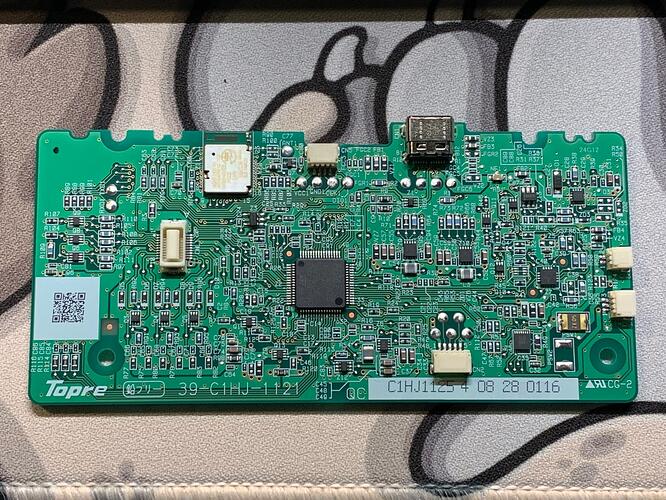
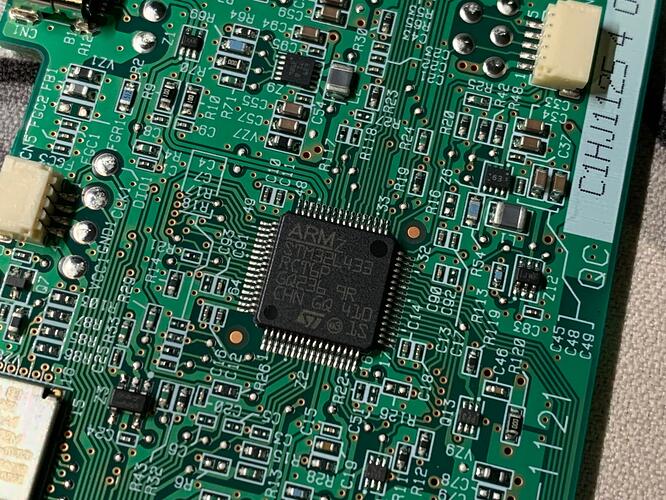
And here is the bottom of the daughterboard. It is removed after you take off the 4 screws in each corner. It is being powered by an ARM chip. It also connects like the 23u daughterboard with a plug and socket.
And the underside of where the daughterboard sits if you are curious.
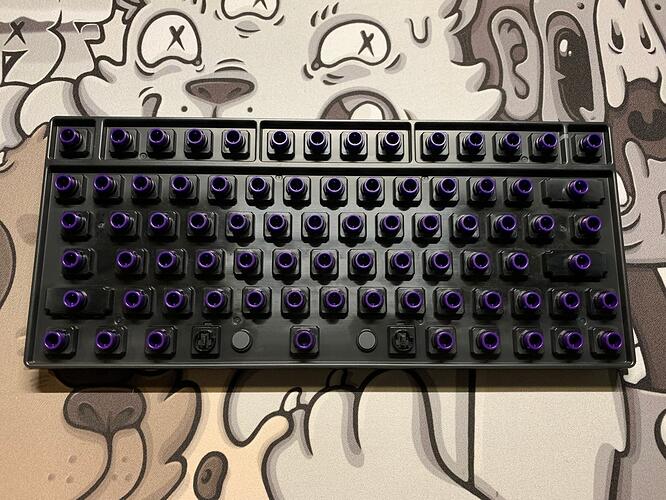
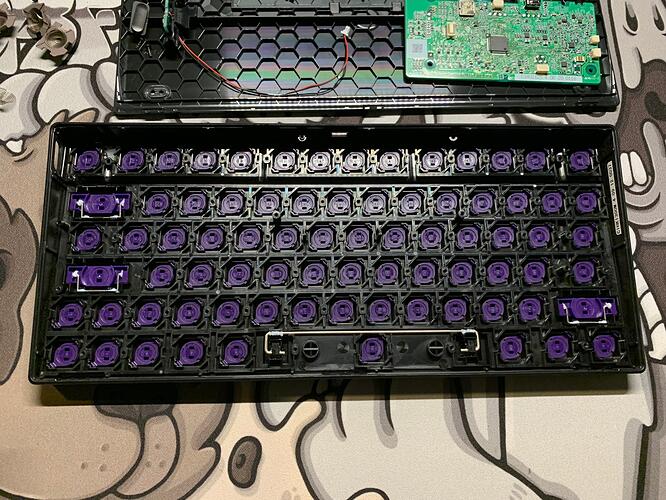
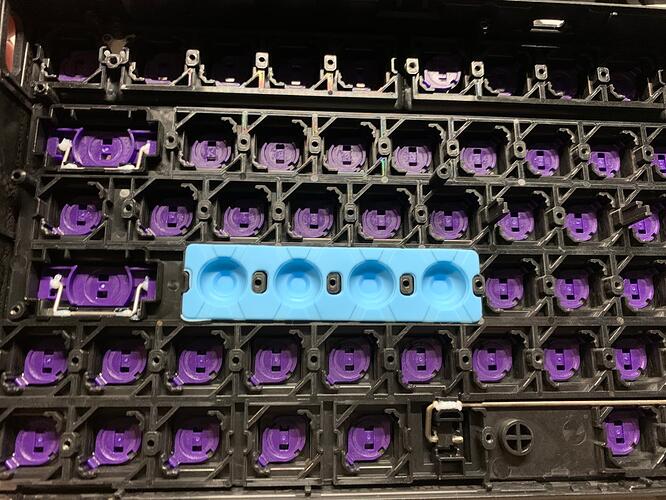
Here is the underside of the top case (YUMMY PURPLE!!!). As you will notice, it is lubed from the factory in a very tasteful way. TBH this is the best sounding 100% stock board I have ever used from REALFORCE. The next picture we will check out something… Interesting…
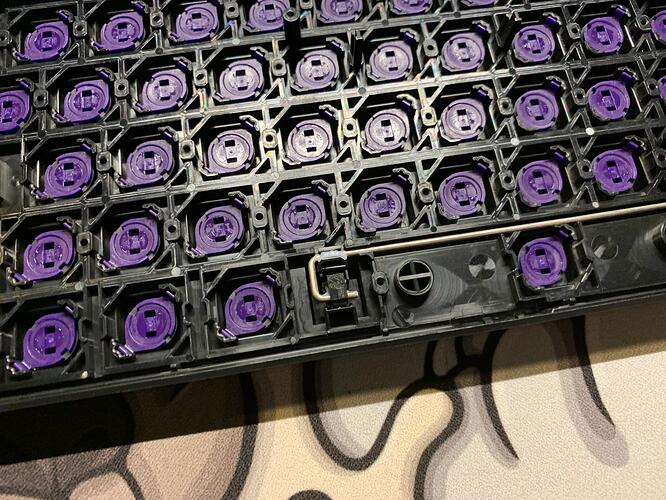
So… what do you see here? What looks… off… or different? That’s right! The spacebar housings are integrated! Definitely a different choice, but to be completely honest, I dont mind. This gives them a more secure attachment and better sound. No harvesting these bad bois later down the line.
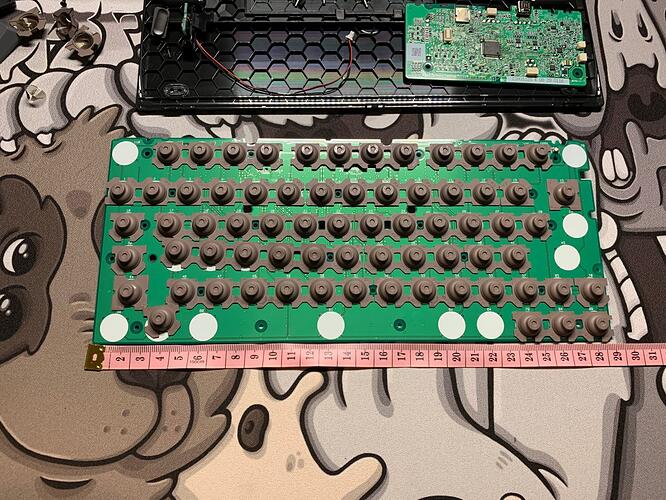
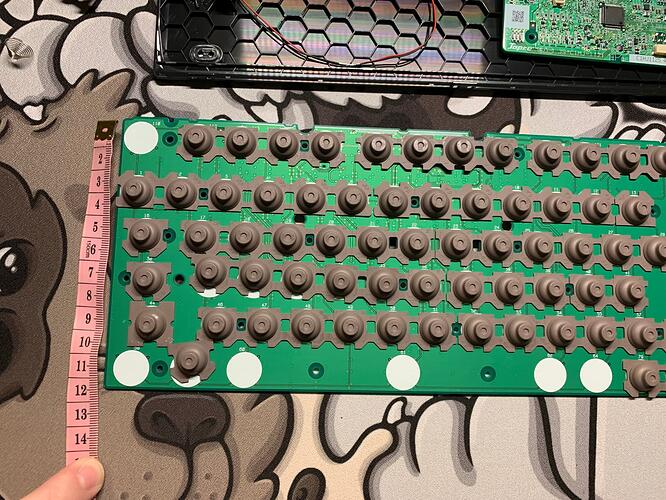
Alright, now the PCB. It is 29cm long, and 12cm tall.
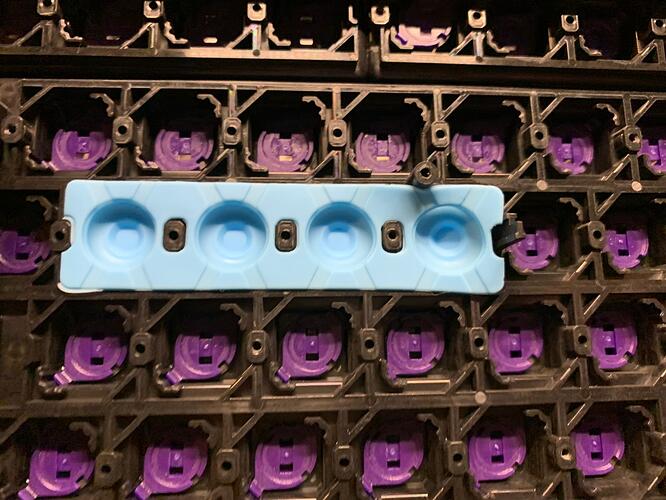
You’ll notice an odd shaped dome, but these are very similar to the ones in the GX1. Regular domes can fit in most of the board, but you will need to modify domes that are around the posts as seen in these pictures:
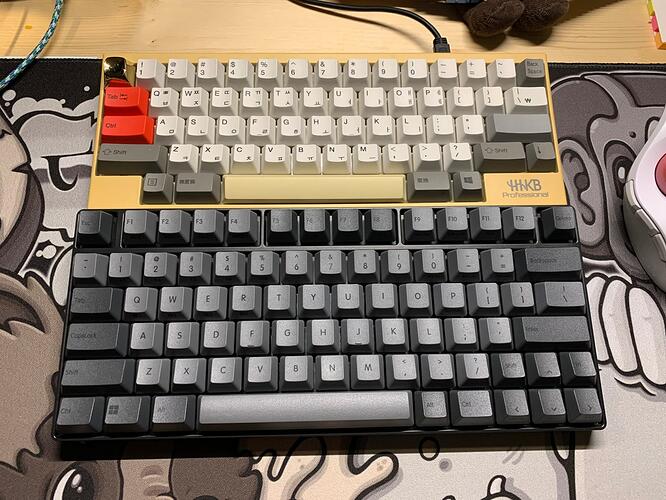
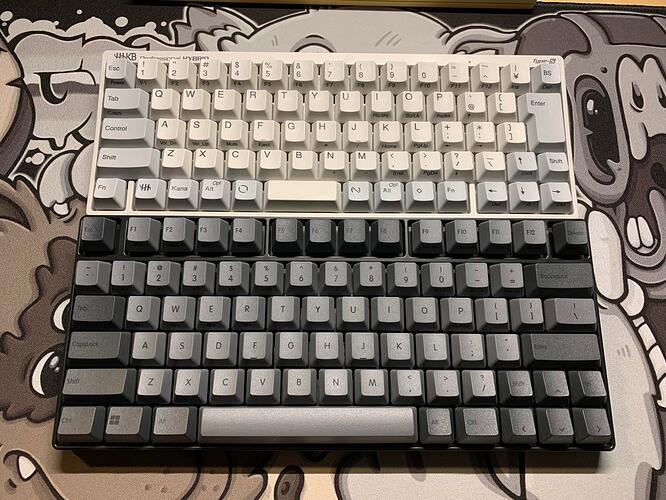
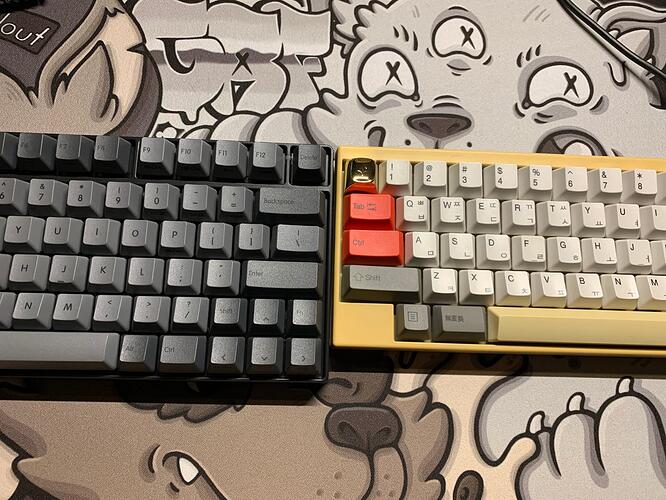
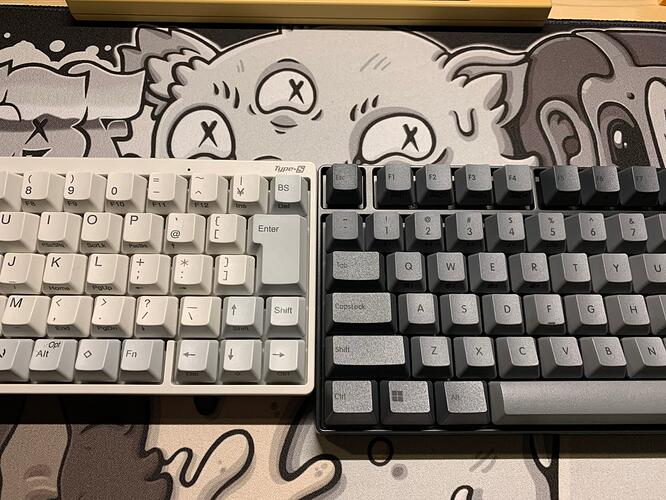
Next, are some comparisons to other HHKB boards to give you some perspective on size.
RC1 bottom, HHKB Pro 1 top
RC1 bottom, JIS HHKB Hybrid top
RC1 left, HHKB Pro 1 right
HHKB Hybrid left, RC1 right
In conclusion, this is a very nice and lightweight offering from RF that I’d say is their take on the HHKB. Very portable, sturdy, great sounding, and supports wired and Bluetooth connection. Perfect for taking to the office or school when you don’t want to lug around a metal keyboard or a TKL RF. If you are one that needs more than what an HHKB layout gives and want it in a nice form factor this is your board. Also note that the key sizing on the RC1 is odd, L-Shift is 2u (like JIS HHKB), and other mods are 1.5u like R2. All that to say, you’ll need multiple sets of older RF/HHKB keysets to fill this board if you want to use classic caps on it. But the keycaps it comes with are very nice so in my opinion no need to swap them out. Overall, I give this board an 8/10.
Thanks for reading!
