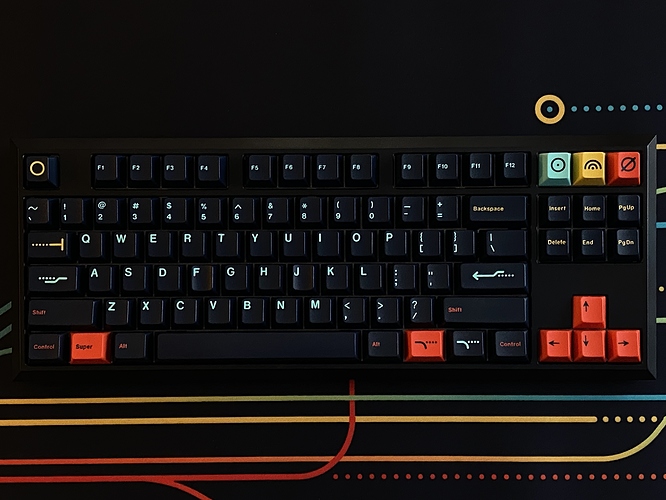
Ok & I know you use your boards for actual work, not just estimates/emails like I do. Agree there must be something helpful with that layout.
Debatable lol, I do a lot of both of those too. I do CAD but it’s mostly board schematics and I mostly just use a handful of key combos on my left hand and keep my right on the mouse, I do a little code here and there, but it’s not like I write a lot of code or something where I type all day.
I’d be curious what our buddy @jshufelt does there, I get the impression he types a lot.
Ok, puppy finally went to sleep for a bit so I made some Zykos real quick. Not lubed or anything like that, Just V2 Zealio bottom housings, YOK Red Panda top housings, Zealio 67g springs, & Halo clear stems. Even with a quick & dirty test like that I gotta say they rock! Zeal smoothness, HP tactility/bottom out sound, & a super thocky top out! Think I’m gonna go with Zykos in my Clueboard rebuild now, thanks for letting us know about these bud!
A LOT of typing. I’m primarily a CS guy - tons of coding. In the earlier part of my career, also a lot of research papers and funding proposals, which meant I was effectively doubling down on typing. I still code these days, albeit not at the same pace, but I’ve managed to fill the void with little typing projects like this one…
Yup, that’s the same quick and dirty test I did. Pretty convincing, right?
I’ll be very curious to hear how the clueboard rebuild goes with these. Zykos are finicky to install, for sure, but arguably worth the effort.
Oh yeah, honestly surprised me a lot how nice they feel & sound. I’m gonna wait till I have the time to a build log before I start the rebuild, so I’ll definitely let you know how it all goes!
Same here. Typed like a mad monkey when sharpness of youth and adrenaline rush was a thing but slowed down now, spending more time thinking, writing, and talking.
Having a selection of keyboards to type with helps me change the mood as I work. Soft Telios adds more human touch. Solid Cream and Holy Panda adds more resolve, helping me to communicate more directly. Retooled black brings practicality more into focus. Chirpy clicky lightens the mood…
Most of it is just mental but that’s where joy lives.
Truth.
My goodness this is some major dedication! I can’t imagine building a 3-way frankenswitch especially having to pull the legs through the PCB. Beautiful build as always!
Thanks! The masochistic side of me wants to build them again and add a spring swap and a third lube into the mix - fortunately, I’m all about “no pain, no pain.”
Hey, at least you code and write! I just like keyboards for aesthetics lol
Build #30: Oxalys80
This build started with a keyset: GMK Metropolis. Dark themed keyset? Check. Assertive accent colors? Check. Abstract glyphs for novelties? Check. Thematic consistency? With symbols and deskmats that immediately evoke a subway map, check. For my preferences, one of the best keysets I’ve seen (and one that is highly likely to appear in multiple future build logs, but I’m getting ahead of myself).
When I think “metropolis”, I’m thinking dense urban skyline. Skyscrapers, steel, precise geometry. I wanted a board with clean angular lines to echo the theme, and one with enough coverage to properly show off GMK Metropolis. As luck would have it, Nixytheria’s Oxalys80 group buy ran at roughly the same time as the Metropolis IC, and it seemed to me that there was a lot of potential in pairing Metropolis with this angular, hefty TKL. Let’s dive in.
First up: stabilizers.
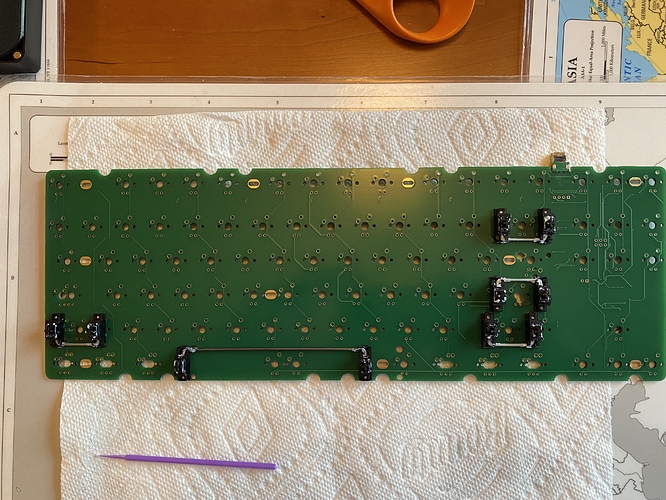
I’ve been waffling back and forth on stab lube. After an initial fling with Christo 111, I had gone back to good old SuperLube for a while, but for this build, I decided I wanted the more responsive feel of 111. And, if I’m being completely honest, the less demanding application for 111 is appealing - while it’s possible to overlube with dielectric grease, you can really load the stabs with 111 without worrying about it. Take a look for yourself, and if you’ve never used 111 - despite the impression you might have from seeing the globs of lube in this photo, the stabs are completely responsive. Get sloppy with 111.
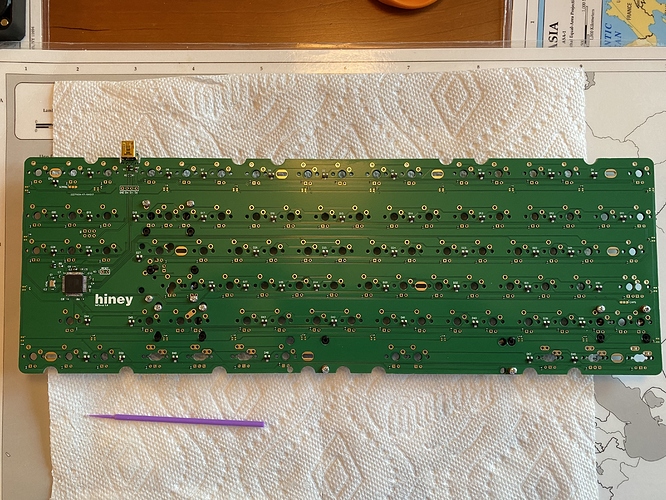
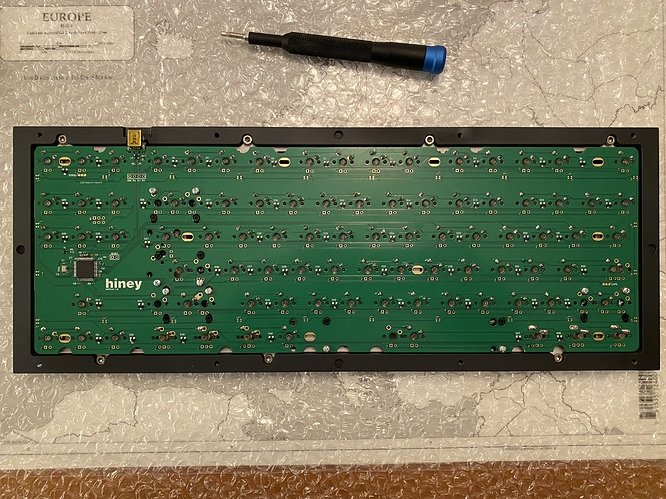
This is also a good opportunity to get a good look at the Oxalys80 PCB, designed by Hineybush. It’s a variant of Hiney’s popular h87a TKL PCB, and uses the same QMK config as the h87. For those who may not have been following the Oxalys GB, there was a minor miscommunication during machining that led to a misalignment between the case’s USB port and the PCB’s USB connector. One of the many dangers of a small first-run GB. Fortunately, Hiney was able to make adjustments to the PCB to correct for this. One little build detail worth noting at this stage - h87 PCBs support both north-facing and south-facing right shift stabilizers, so we needed to decide which way we wanted that stabilizer to be oriented. We’ll come back to that shortly.
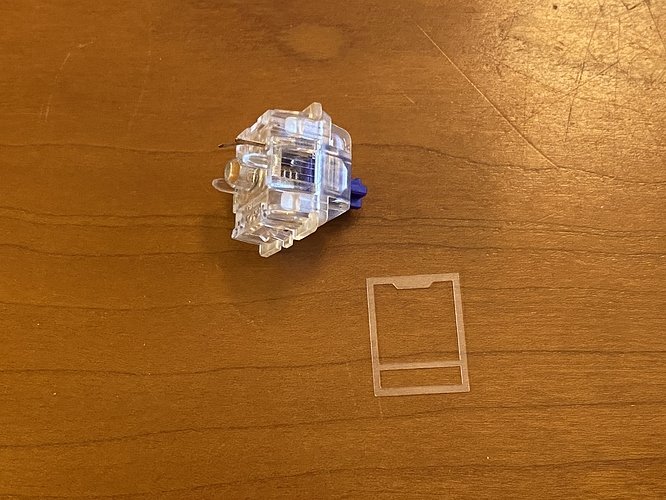
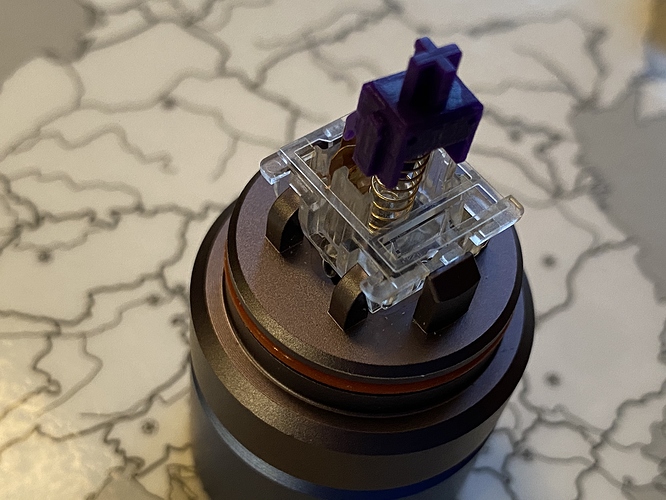
I chose V2 Zealios for the build. After lubing, I found that four of the switches were a little wobbly - specifically, the top housing moved slightly with each keypress. I’ve never used switch films before, but no time like the present, right? For scale, here’s a picture of a switch and a switch film, which is just a very thin piece of plastic that fits between the top and bottom housing to reduce housing movement when the switch is assembled.
Since both the switch housing and the film are clear, it’s a little hard to see it if you don’t know what you’re looking for. Now that you’ve seen the film, hopefully you can spot it resting on the bottom housing in the next photo, prior to switch reassembly. I filmed the four wobbly switches and used those for the four arrow keys, and it worked just fine - the rattling noise created by the wobble was eliminated. I should mention that I found the film installation to be a little finicky; it was important to cleanly snap the top and bottom housings together to be sure that the film wasn’t moved a little out of place.
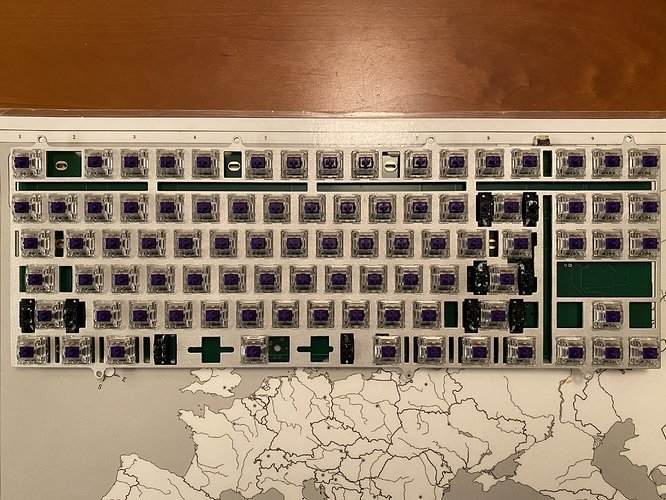
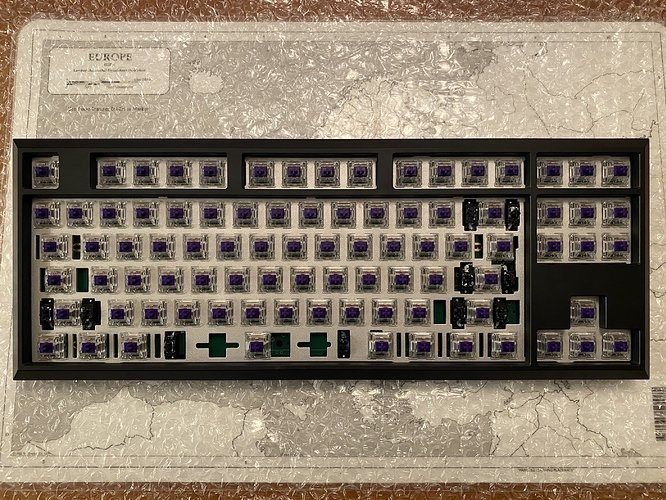
With all switches mounted and soldered into place, we can get a good look at the plate. First, note the relief cuts in the plate. Since those cuts are placed exactly where I might typically do a Sorbothane strut mod, I won’t be using any Sorbo between the PCB and plate on this build. Second, remember the right shift stabilizer orientation decision we need to make? This plate has asymmetric cutouts for the stabilizer housings, so in this case, it’s clear we want a south-facing right shift stabilizer to prevent the stab wires from hitting the plate.
The Oxalys80 is a top-mount TKL, so we just screw the plate to the case top. Note that there are 7 screws, not the 6 or 8 you might have been expecting. I note that the “missing” screw along the bottom edge is roughly where the spacebar switch sits, so I wonder if this screw placement was done for reasons of sound or feel? Just speculation.
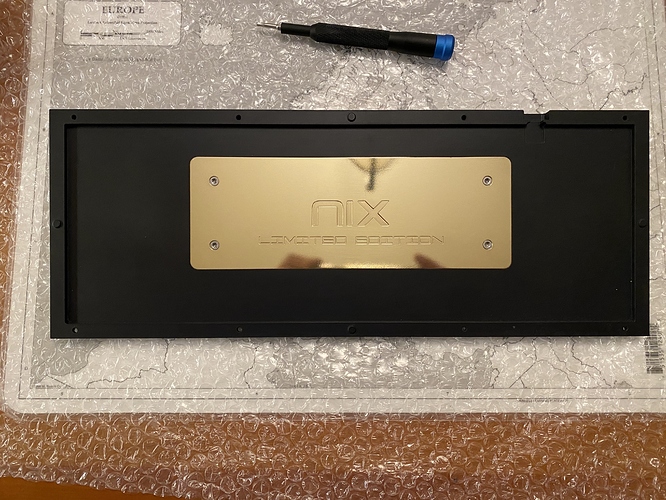
When I joined the GB, I knew Hiney was going to be providing the PCB (excellent), but I didn’t know Salvun would be doing the machining (also excellent). Here’s a look at the brass weight, which fits very cleanly in the bottom housing. Also, notice that while this is an angled board, the shelf here is flat, and there is not a lot of space between the PCB and the case. As you can imagine, this means that the base is satisfyingly heavy.
Another little twist during the GB, that ended up working in my favor - instead of a navy blue anodization I had originally chosen, problems with ano afforded the opportunity to switch to a very dark “midnight blue” cerakote for the case, which I felt would work better with Metropolis. While this photo makes it look black, in real life it’s a very dark blue-black.
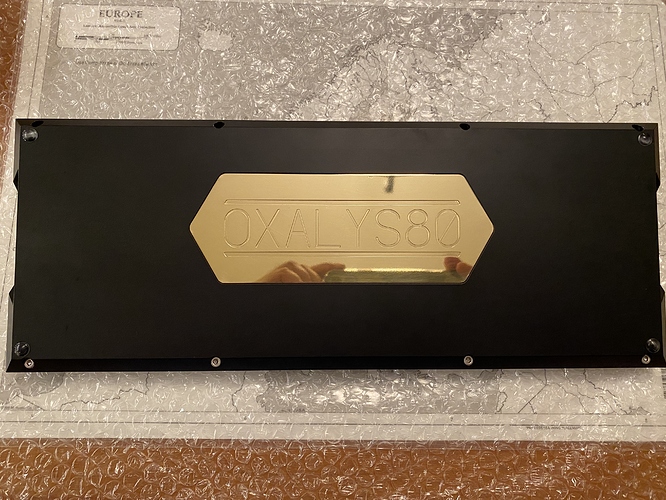
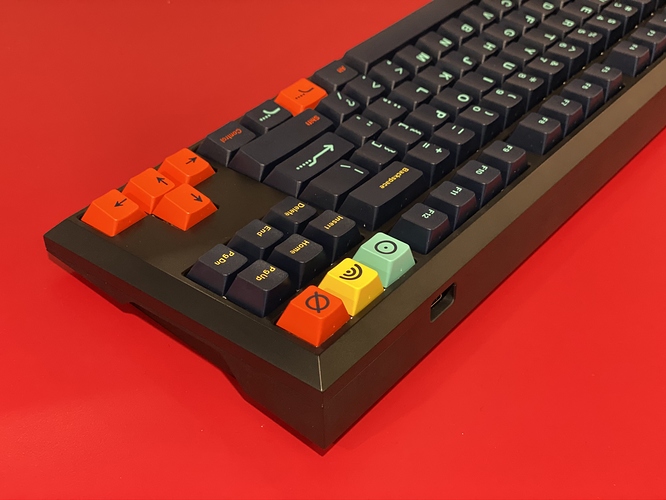
And, the base. We’ll get a better look at the side cutouts and case profile a bit later, but if I had to characterize this board’s shape, I’d say it’s the lower-angled love child of a union between a Fjell and a Duck.
The top and bottom of the case attach with eight screws, and with that, we’re ready for keycaps. All in all, a straightforward, quick build.
So how does the board perform? To answer that, we have to talk about weight. As with just about every other point of preference in this hobby, board weight can be polarizing. Some will argue the heavier the board, the better; more substantial feel, little movement on the desk,“premium” heft, and so on. Others will argue that there is too much focus on weight, that a good experience can be had without all the extra mass. I think there is truth on both sides of that argument, but it really does come down to personal preference.
For my tastes, the weight matters, and it matters for one reason: sound. So far, I’ve found that heavier boards suffer less from metallic echoes and pings during board use, and the Oxalys is no exception to the rule. While it might benefit ever so slightly from a sheet of Sorbothane, that’s by no means necessary, and the weight, coupled with a narrow pocket of space between the PCB and case, yields a very nice sound. If you weren’t listening closely, you might be fooled into thinking that foam or Sorbothane is already present - it’s that kind of sound signature. Crisp, clear, with good attenuation of metallic overtones. Definitely one of the top boards I’ve built from a sound perspective.
Lessons learned
- The verdict is in: I prefer heavy boards. To me, they consistently sound better.
- I need to pay more attention to spacing between the PCB and case bottom. I’m starting to form the impression that tighter spacing is better in terms of acoustics, although I think it’s a second-order effect relative to case weight. But it’s hard to know for sure, since we can’t just change that spacing to evaluate its impact on sound…
- I’ve said it before, but 111 is a nice stab lube, and forgiving to apply. If I have any complaints, it would be that sometimes it doesn’t mute the stabs quite as much as I might like. It would be interesting to try some thicker Christo variants to see if there’s some golden mean between scuba lube and SuperLube.
- I’m overdue for a full build with films - based on its effect on four switches for this build, I suspect I have more sonic improvements to achieve in my future builds.
- My switch lubing style continues to evolve. I think I’m convinced that I don’t need to lube the housing if I lube all contact points on the stem, but I really do need to lube all contact points - and for tactiles, that includes the top “grooved ledge” on the “leg side” of the switch, even when I’m not lubing the legs, and it possibly also includes a tiny dab of lube on the end of the pole.
- Very small group buys aren’t for everyone, but if you have the patience (almost a year’s worth, in this case) and can cope with the ups and downs and adjustments along the way, it can be very satisfying when the final result is finally in your hands. Nix, Hiney, and Salvun did a great job here getting all of this to come together, and Nix was good about providing updates during the entire process.
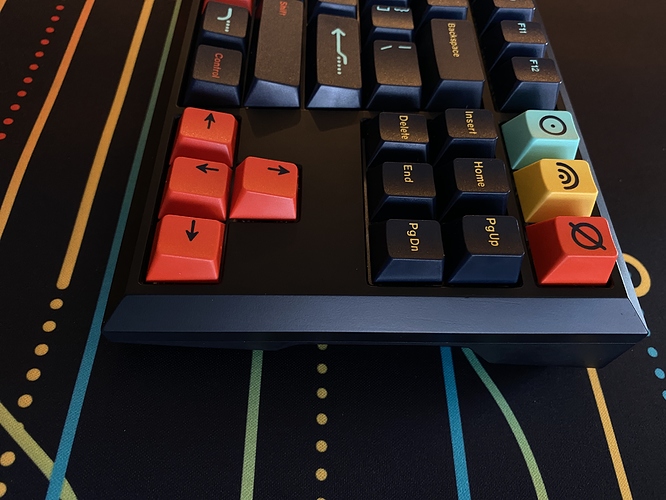
This board was difficult to photograph - GMK Metropolis can look almost light navy blue under direct sunlight, and the midnight-blue cerakote can look black, or blue, or even orange, depending on the light source and angle. Hopefully the following photos give a sense of the visual appeal of this build, but if not, then trust that in real life, all the potential is realized. This board was worth the wait.
Specifications
case: Oxalys80
- 6063 aluminum
- Cerakote finish ("Midnight Blue", H-238Q)
case dampening: N/A
PCB: Hineybush h87a-ox (1.6)
plate: 1.5mm sandblasted aluminum
plate/PCB dampening: N/A
stabilizers: GMK PCB screw-in
- 1x6.25u, 4x2u
stabilizer mods:
- clipped and lubed with Christo MCG-111
- cloth washers on screws
switches: 87x 67g V2 Zealios
switch mods:
- springs tub-lubed with Krytox GPL-104
- stems hand-lubed with Tribosys 3204
- no housing lube
keycaps: GMK Metropolis (base, signs)
HxWxD (without caps or feet): 1.56" x 14.5" x 5.5"
HxWxD (without caps): 1.63" x 14.5" x 5.5"
HxWxD: 1.94" x 14.5" x 5.5"
assembled weight: 3.74 kg (8.25 lb)Wow. Another masterpiece buildlog post. With so much details and passing comments, it almost makes me feel like I built it myself. Thanks! 
I definitely agree with a heavy board being very nice for acoustics. I also just installed switch films on some Gateron silent inks and I’m surprised how much better they are. The switch by itself is quite tight and so I thought it wouldn’t make any difference but I saw something recently that made me think about it. The sound is a lot bassier even if the switch housing is already tight.
Oooh, good to know! I wouldn’t have thought it would make much difference on inks either. Making a note of that for future reference!
I think it may be the extra pressure. This theory makes me wonder if soldered switches feel and sound better than [Kailh] socketed switches and whether pressing switches harder on the PCB while soldering makes noticeable difference in feel and sound.
This is one of those things where you could easily be correct - but I hope not, because one of my favorite parts of any build is soldering, and having to apply more pressure to every switch while soldering sounds like a real joykiller.
Still, science…
A beauty, for sure !!!
Thank you again for this very nice build!
Although I have much less experience than you on building keyboards, I also think that anything that we put between PCB and case works mostly because of empty volume reduction.
Well, in a few months I may have an answer with my next keyboard, as it will have only 3mm between PCB and bottom case.
3.7Kg … what a beast!
I’d offer the Norbatouch build as a counterexample. In that build, when I put a few pieces of gaffer-tape wrapped Sorbothane between the PCB and case, all of the pinging and hollowness was effectively eliminated, in possibly the most dramatic before/after sound difference I’ve heard to date - yet roughly 2/3rds of that PCB/case volume remained open. I suspect that if the dampening material sufficiently attenuates vibration, then volume doesn’t matter, because the air isn’t being moved.
With that said, I’m very curious to hear your findings with a 3mm gap!
