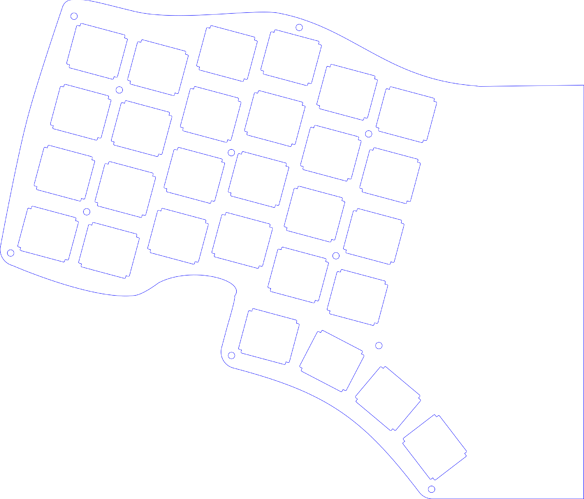
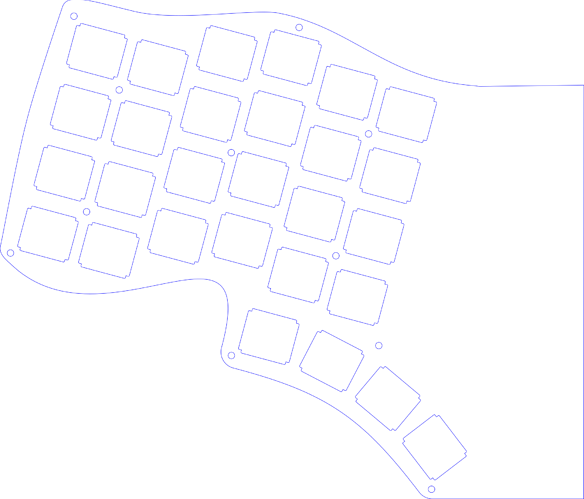
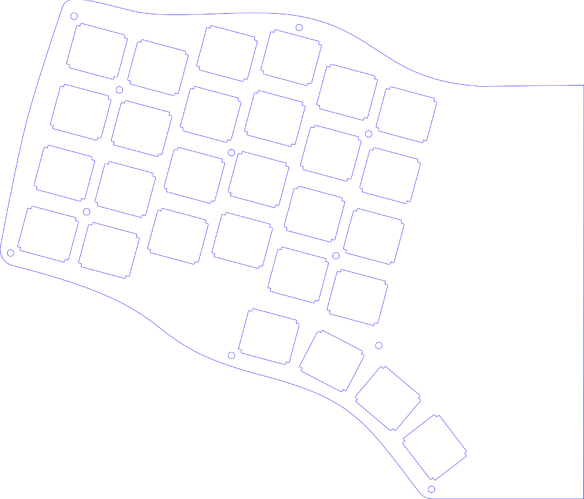
Not sure what you mean here. Could you perhaps make a sketch?
Yes, planned to do that anyway
Some sketches. Not perfect yet, and only one half because I accidentally deleted the other one.
Yeah, it’s much easier to edit it without the mirroring, so I usually remove the mirror first as well. It’s easy enough to add after.
The sketches show what you mean, but I don’t really know how to go from there. I tried curves like that when first starting out, but couldn’t really make anything I found attractive, so that’s why I went with the more straight/cornered style.
I might give the split case another go, and see if I can’t make something I’m happy with.
The qmk config and a default keymap for the pteron is available on my fork of qmk, and should be merged into the main qmk repo as soon as the pull request is accepted. The default keymap is largely just a copy of the default preonic keymap, with the bottom row adapted to the preonic layout.
Pteron has now been merged into QMK and is available here if anyone wants to have a look.
On a related note: It turns out that 5 rows by 12 columns is about the largest keyboard that’s possible to build using a Pro Micro, without getting into some shenanigans with the matrix. I’ve used all available pins, the only free are 3 ground pins, RAW, RESET and VCC.
#define MATRIX_ROW_PINS { D7, E6, B4, B5, B6 }
#define MATRIX_COL_PINS { F4, F6, F5, F7, B1, B3, C6, D4, D0, D1, D2, D3 }
So I got lucky when picking the number if keys I wanted on the board!
You can get larger, actually
If you make the matrix a square, or … rather 8x9 (or 9x8), you get get a lot more keys. The problem is, the traces get a lot more complicated.
Yeah, that’s what I was alluding to when I said “shenanigans”. It seems doable if using a pcb (although I wouldn’t want to be the one to figure out the layout definition), but on a handwired I think I would loose my mind trying to figure out the wiring.
lol, totally understand.
And a number of boards do this. If you look at the Planck Rev6, it does this. And most of the splits do this, as well.
But yes, it is definitely more complicated. A lot more.
Just saw this - unlike other boards, this has room for a bluetooth module and battery in the middle. Could you make something like that with low profile Kaihl chocs? If so, maybe we should be talking/PMing.
I think Chocs use the same cutout as MX, so you should be able to use the same plates for the switches.
An easy way to add Bluetooth support would be to replace the Pro Micro with something like a BlueMicro. There seems to be a fork of QMK that supports the BlueMicro/NRF52832.
I’m pretty busy these days with starting a new job, moving house, and a family addition early next year, so I don’t think I can be of much help personally. But feel free to get one made elsewhere (if there are any issues with the license just PM me and I can arrange something, although I think the license should be pretty permissive).
This is super late but I just came across this and it’s great. I’ve been wanting a more arched thumb cluster like this.
This is a dumb question, but how is the controller actually attached to the plate in the photos? I feel much more comfortable about the wiring and the firmware than the physical making things stay together
Thanks for the interest! The Pro Micro just sits there. It’s pretty firmly held in place by all the wires going to it. I’m using single strand wires (from a cat6 cable), so they are pretty stiff.
I haven’t had any issues with that so far, but I guess you could secure it to the top plate with a blob of epoxy once you have verified that the wiring is good.
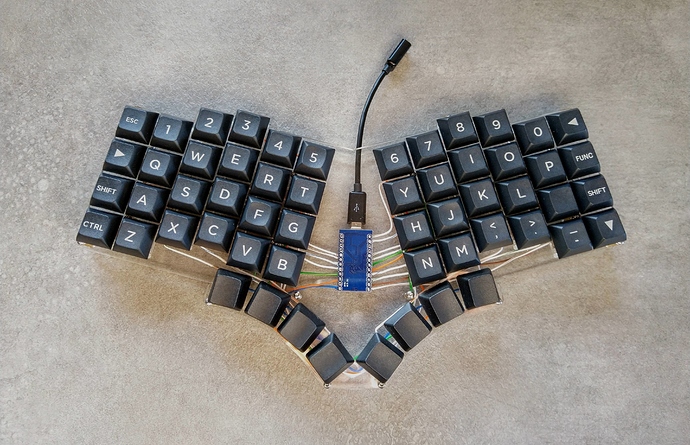
EDIT: Just realized I’ve never posted the any images of my finished Pteron build
It’s build using some pretty strange TTC Silent Red switches, whch are fixed in place using regular CA glue.
Just for science-y curiosities, how do glued down switches feel? Can’t imagine they’re as nice as sitting naturally. Though I might be misunderstanding the build.
I’ve only glued the switch itself to the top plate if that’s what you’re wondering, not anything to do with the switch mechanism. The switches feel pretty similar in this board and the other boards I’ve tried them in.
Have you considered maybe adding some larger rubber bump ons towards the center of both sides to have more of a tenting style typing? Many who have split keyboards swear by tenting 
Sounds interesting, although I don’t think the assembled board really flexes that much that I could get any noticeable tenting going. But if I split the top plate down the middle I think it would be possible to introduce a bend to the bottom plate (perhaps by heating it and bending over a straight edge?) to introduce some tenting.


